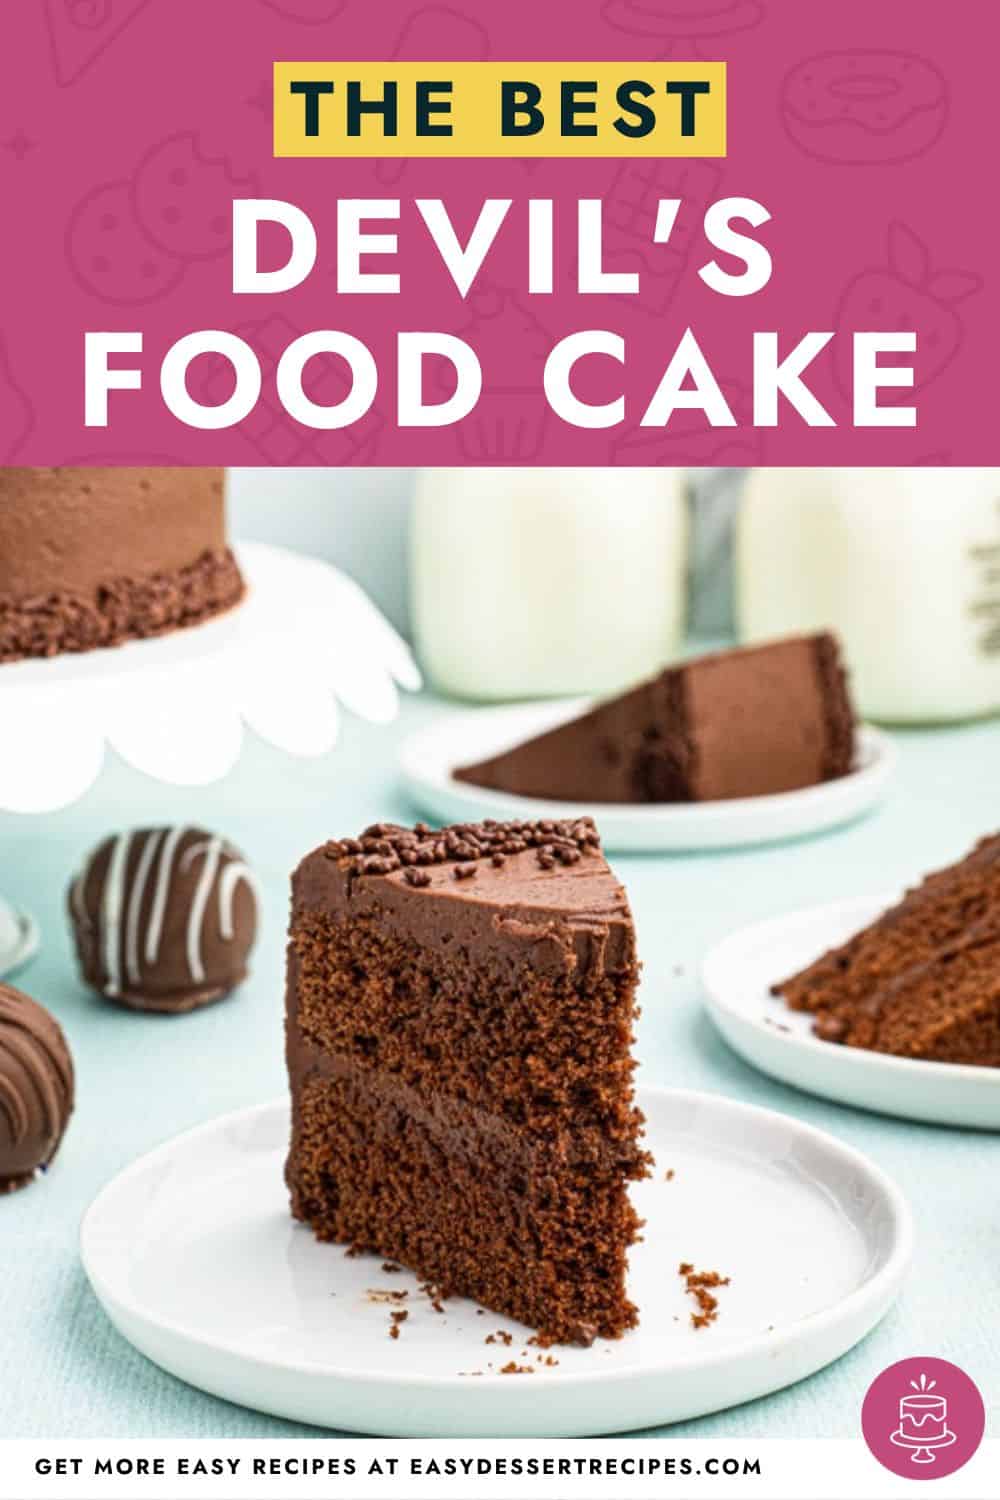
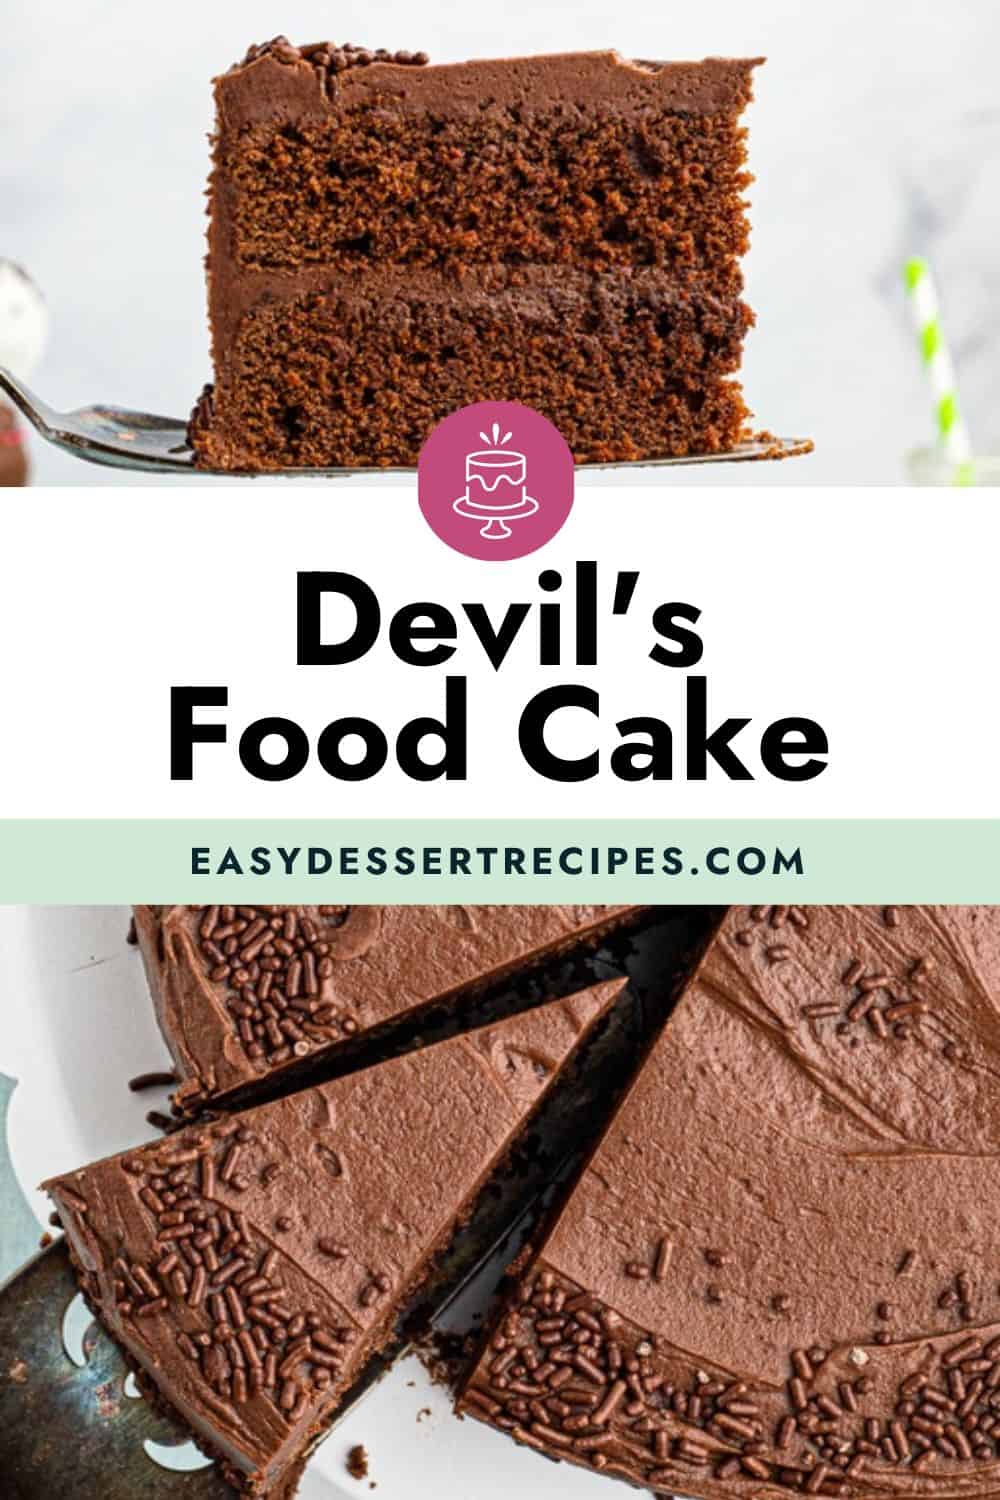
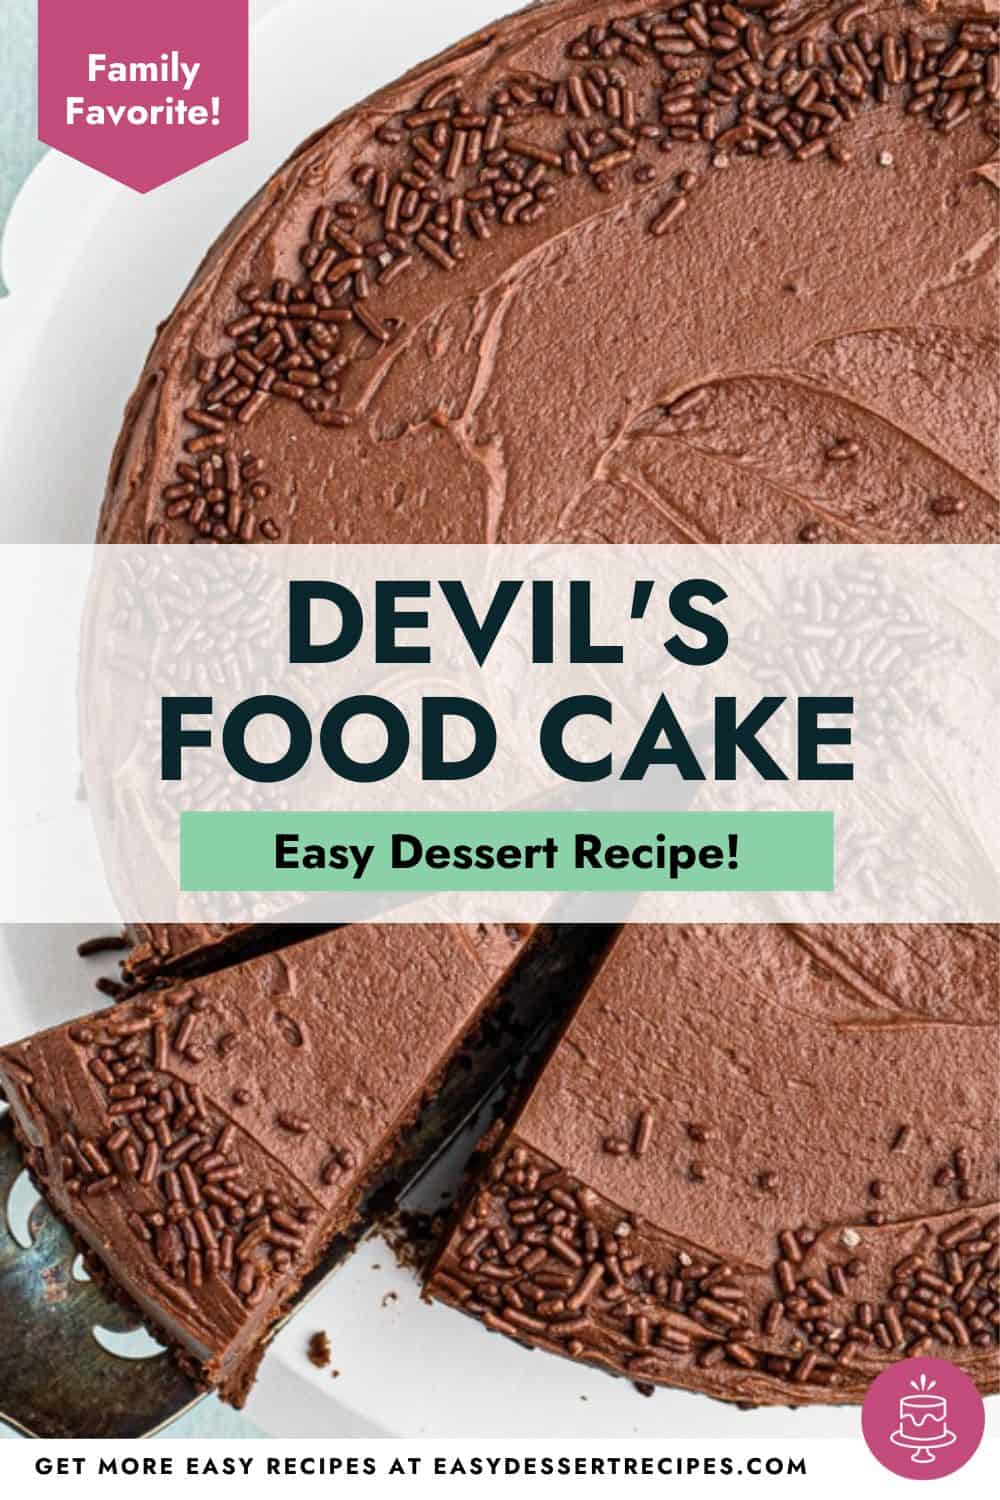
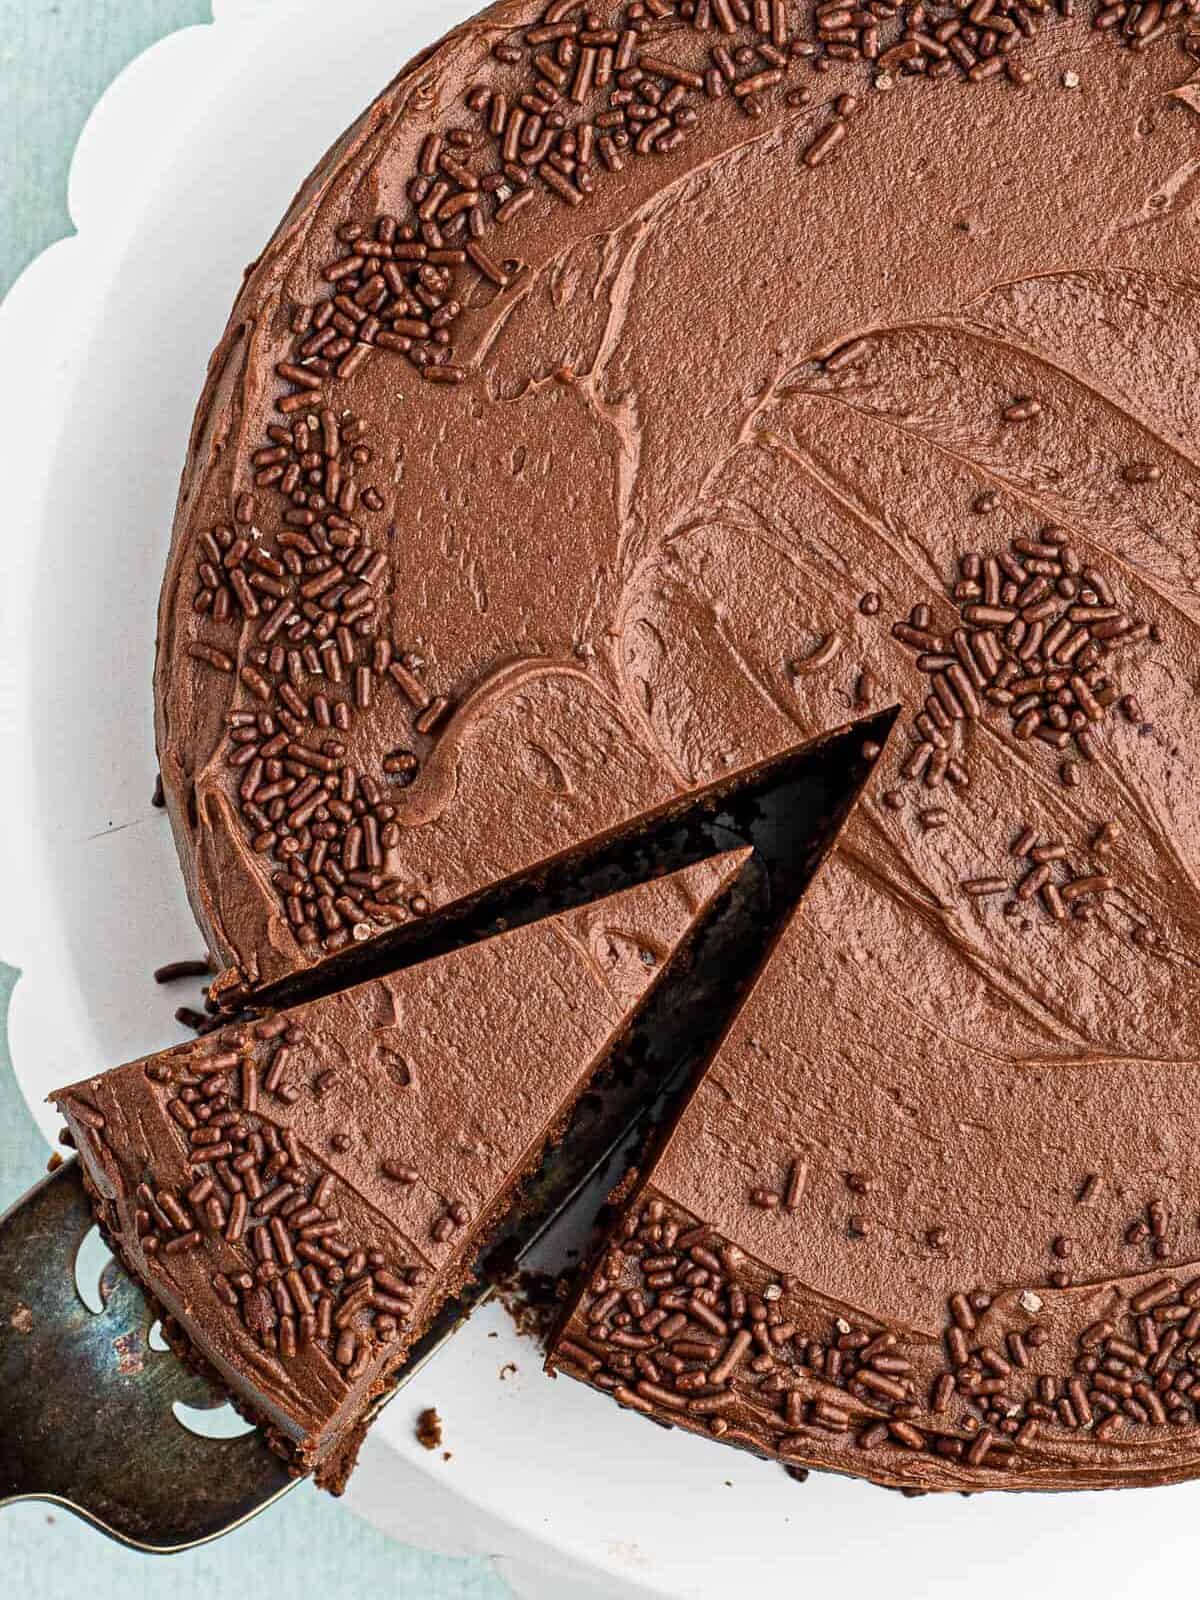
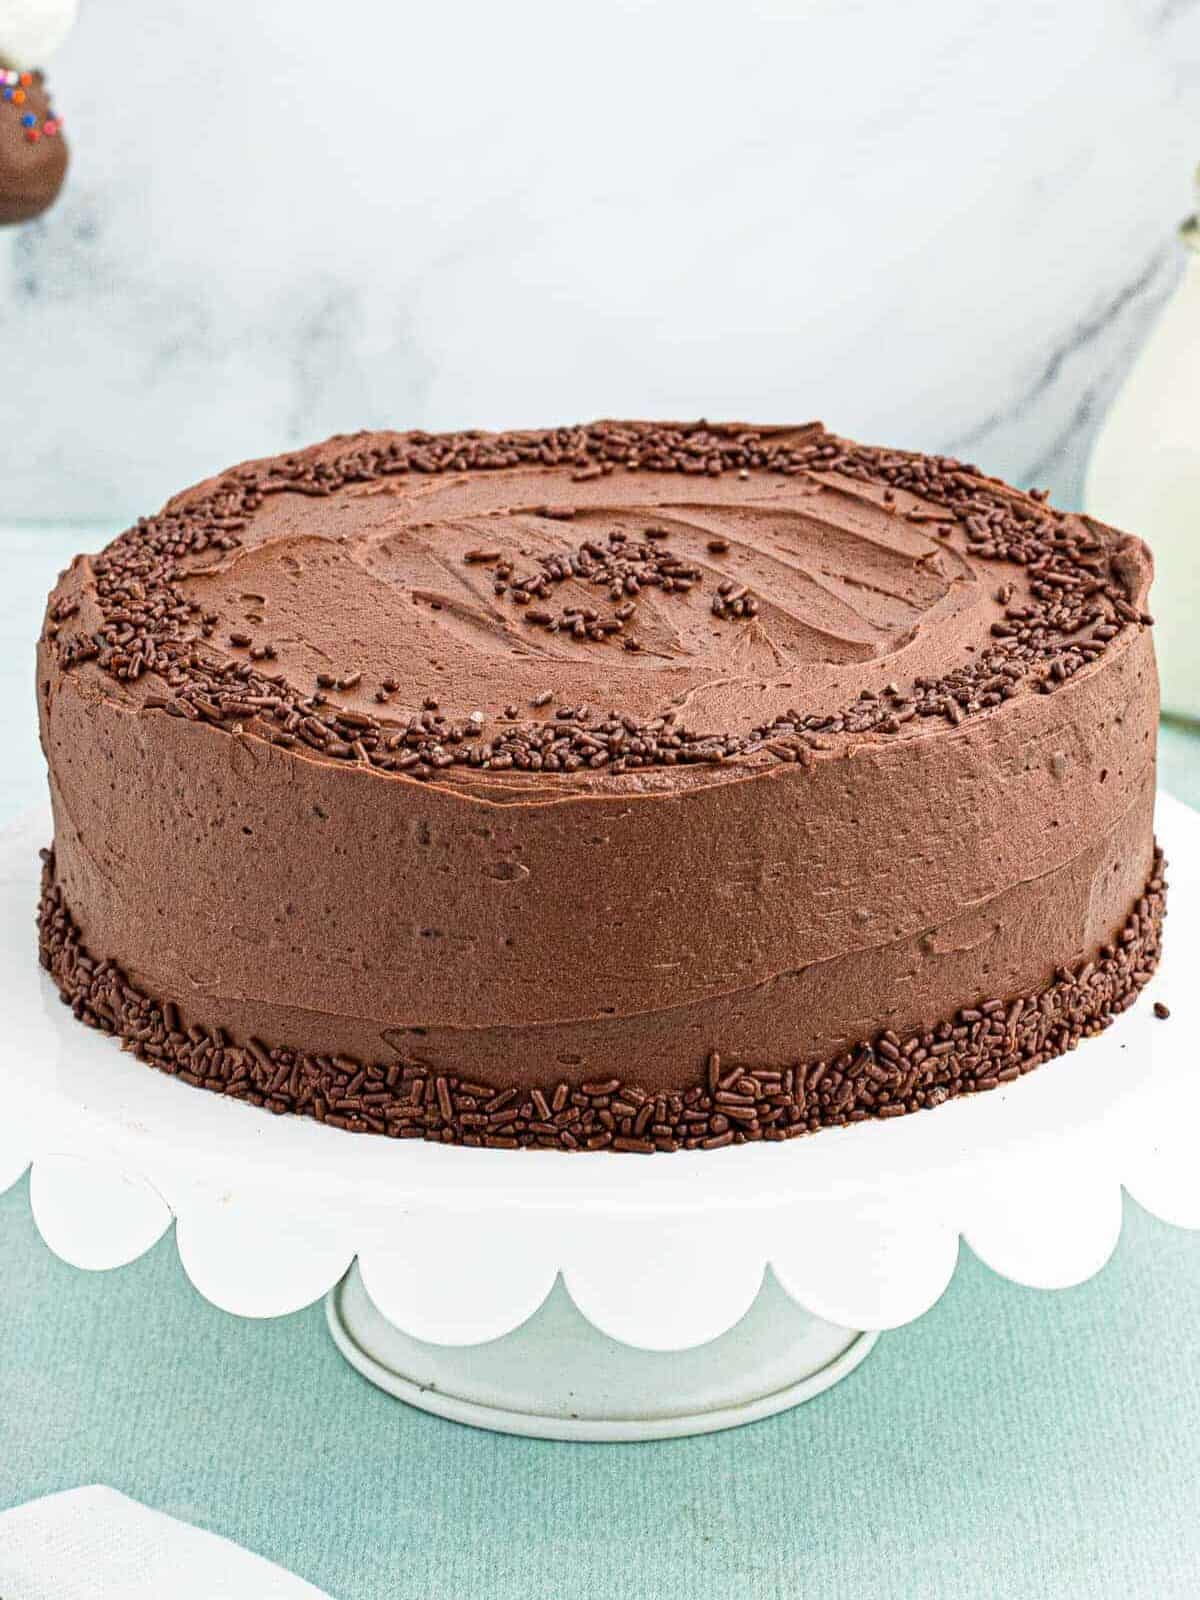
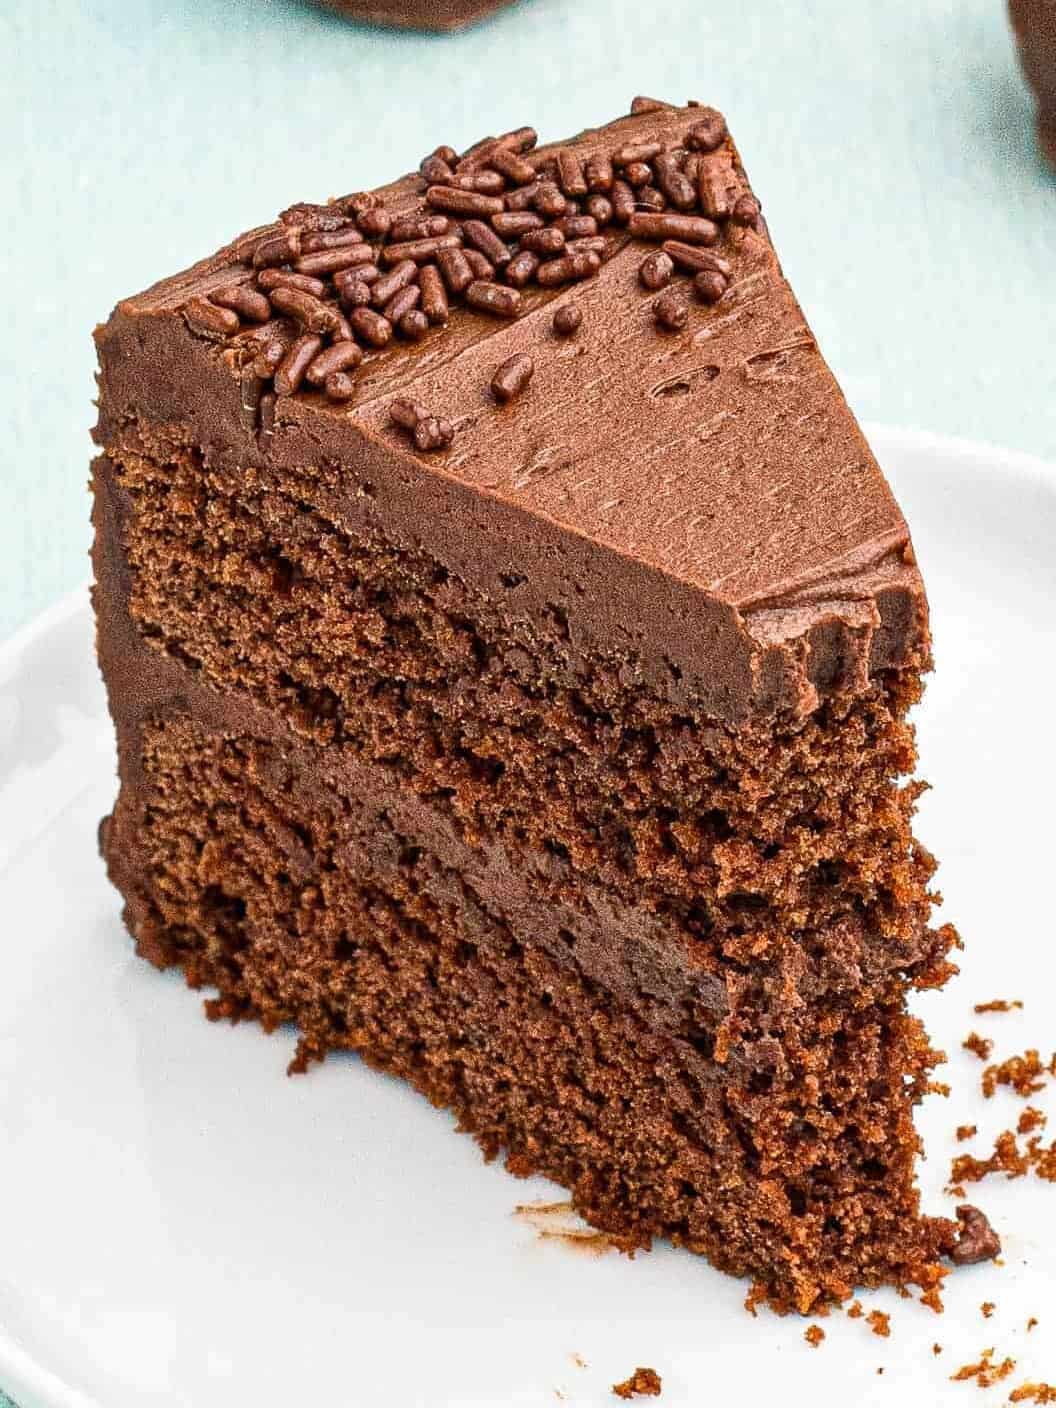
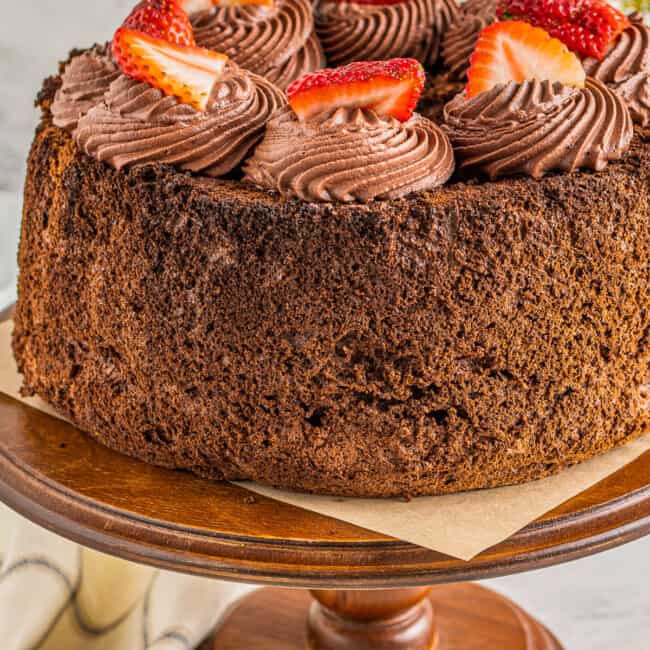
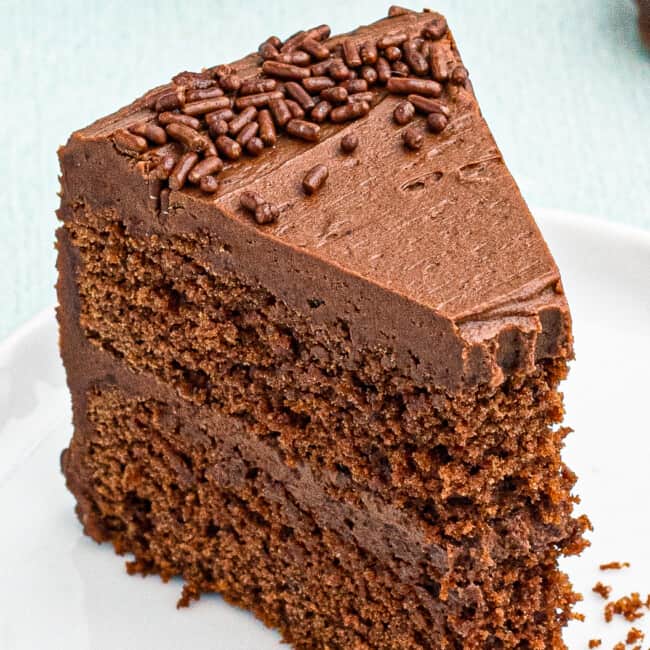
Deliciously rich and decadent, this Devil’s Food Cake is a chocolate lover’s dream! This double-layered frosted cake is perfect to serve on any occasion.
What’s in this Devil’s Food Cake Recipe?
This is one recipe for all you chocolate lovers…it really doesn’t get much better than this!
- Cocoa Powder: Unsweetened cocoa powder lends a rich chocolate flavor to this cake.
- Hot Water: Helps bloom the cocoa powder, releasing more of its rich flavor.
- Milk: Adds moisture to the cake and thins the frosting to the right consistency.
- All-Purpose Flour: Gives the cake structure.
- Baking Soda: Gives the cake lift.
- Salt: Enhances the chocolate flavor.
- Unsalted Butter: Adds fat, moisture, and flavor to the cake and forms the base of the frosting.
- Sugar: Granulated sugar sweetens the cake, while powdered sugar sweetens the frosting without making it grainy.
- Vanilla Extract: Enhances the chocolate flavor.
- Eggs: Give structure to the cake.
Pro Tip: You can use any cocoa powder, but I recommend natural cocoa powder for the best flavor.
Gluten Free Devil’s Food Cake
To make this recipe gluten-free, swap the all-purpose flour for an equal amount of gluten-free 1:1 baking flour. That’s it!

Email This Recipe
Enter your email and we’ll send the recipe directly to you!
This rich chocolate cake first appeared in the 1900s. Originally, lots of red food dye was added to the cake and it had a bright reddish-brown color (like red velvet cake).
Devil’s food cake gets its name from how sinfully rich and decadent it is!
Devil’s food cake is intensely rich, dark, and chocolatey. It is perhaps the chocolatiest cake you’ll ever taste!
Mainly, it’s the addition of more baking soda, which interacts with other ingredients to create a denser texture, a richer flavor, and a slightly darker color.
While you can use any unsweetened cocoa powder you prefer, I like to use natural cocoa powder here because the baking soda helps to neutralize the acidity of natural cocoa powder, letting its rich flavor shine.
You can freeze the cakes, unfrosted, for up to 3 months. Let the cakes cool completely before covering them well in plastic wrap. Thaw the cakes at room temperature for a few hours before frosting.
I’ve included a recipe for chocolate buttercream to top off this rich cake. You can’t go wrong with more chocolate! Plus the creamy frosting compliments the fluffy cake so well.
How to Store
Store leftover Devil’s food cake in an airtight container or cake dome at room temperature for up to 3 days or in the refrigerator for up to 5 days. Enjoy at room temperature for the best taste.
How to Freeze
Freeze Devil’s food cake whole or cut into individual slices tightly wrapped in 2 layers of plastic wrap and 1 layer of aluminum foil for up to 3 months. Let thaw at room temperature for a few hours before enjoying.
Serving Suggestions
Serve chocolate Devil’s food cake with the provided frosting recipe, or try chocolate cream cheese frosting or chocolate whipped cream frosting. It’d be beautiful decorated with chocolate covered Oreos, chocolate meringue cookies, or chocolate macarons.
Serve slices with vanilla bean or cheesecake ice cream and a drizzle of caramel sauce or hot fudge!

Devil’s Food Cake Recipe

Email This Recipe
Enter your email and we’ll send the recipe directly to you!
Ingredients
For the Cake
- ½ cup unsweetened cocoa powder 42 grams
- ⅓ cup boiling or very hot water 76 grams
- ⅔ cup milk 151 grams, room temperature
- 2 cups all purpose flour 240 grams
- ½ teaspoon baking soda 3 grams
- ¼ teaspoon kosher salt
- 1 cup unsalted butter 226 grams, room temperature (2 sticks)
- 1½ cups granulated sugar 300 grams
- 1 teaspoon pure vanilla extract 4 grams
- 3 large eggs 150 grams, room temperature
For the Frosting
- 1 cup unsalted butter 226 grams, room temperature (2 sticks)
- ¾ cup unsweetened cocoa powder 63 grams
- 4 cups powdered sugar 450 grams, sifted
- 3 tablespoons milk 43 grams
- 2 teaspoons pure vanilla extract 8 grams
Equipment
- Kitchen Scale (optional)
- 2 8-inch Round Cake Pan
- Stand Mixer
Instructions
For the Cake
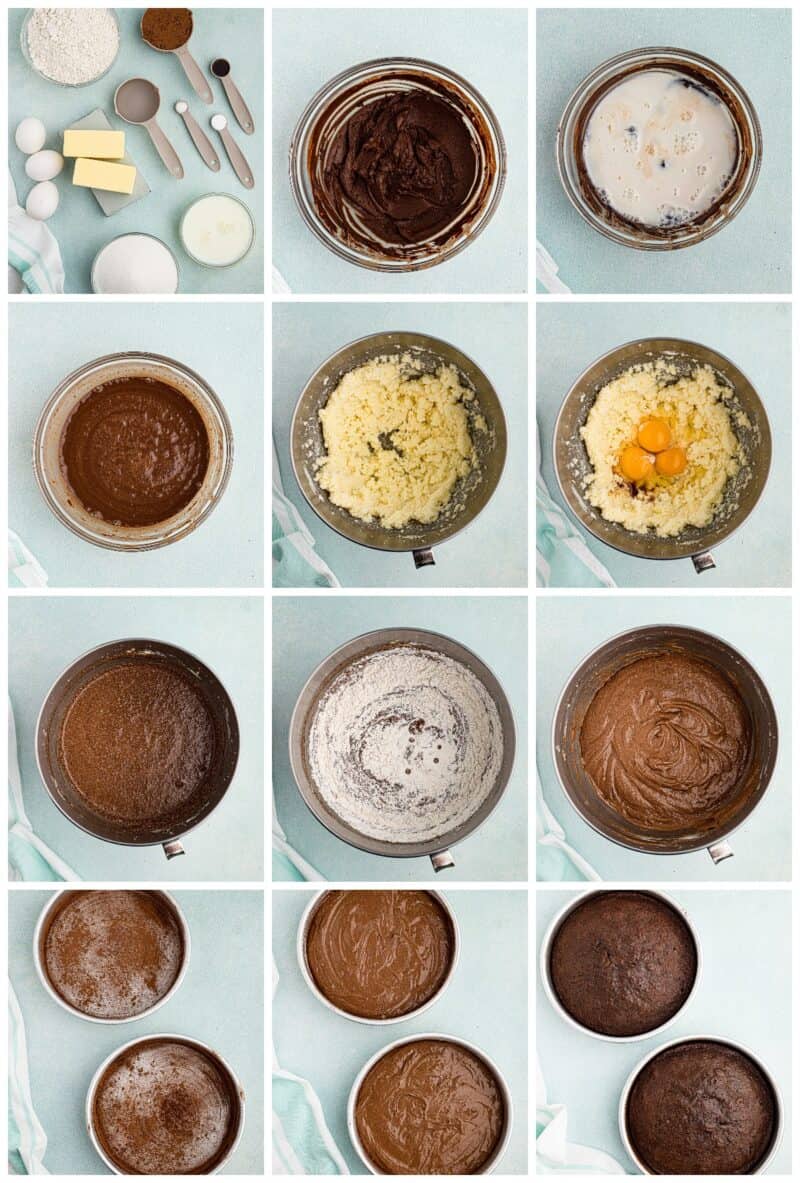
- Preheat the oven to 350°F. Coat the sides of two 8-inch round cake pans with butter, and then sprinkle a light dusting of cocoa powder over the butter. Set the pans aside until the batter is ready.
- In a medium bowl whisk together the cocoa powder and the boiling water. (If the mixture is too thick, add in 1 tablespoon of hot water until it looks like creamy chocolate frosting. Once it is well combined, allow the mixture to cool for about 2-3 minutes. Once it has cooled, whisk in the milk until it is smooth and creamy, then set aside. (The mixture should be similar to very chocolate hot cocoa, or dark chocolate milk. Be sure to whisk until all of the cocoa powder is dissolved.)½ cup unsweetened cocoa powder, ⅓ cup boiling or very hot water, ⅔ cup milk
- In a medium bowl, whisk the flour, baking soda, and salt. Set aside.2 cups all purpose flour, ½ teaspoon baking soda, ¼ teaspoon kosher salt
- In the bowl of a stand mixer fitted with the paddle attachment, beat the butter and sugar together until creamy. Continue mixing on low, adding in the vanilla, then the eggs.1 cup unsalted butter, 1½ cups granulated sugar, 1 teaspoon pure vanilla extract, 3 large eggs
- Add the cocoa mixture to the butter mixture, mixing on medium speed until it is all well combined. Add in the flour mixture in batches, while mixing on low to medium speed. Continue mixing until the batter is smooth and creamy.
- Evenly divide the batter into the two prepared pans and bake for about 28-30 minutes, until a toothpick comes out clean or the top of the cake springs back when touched.
- Remove from the oven and allow the cakes to cool before frosting.
For the Frosting
- In the bowl of a stand mixer fitted with the paddle attachment, beat the butter with the cocoa powder until well combined and creamy.1 cup unsalted butter, ¾ cup unsweetened cocoa powder
- With the mixer on low speed, slowly add in the powdered sugar, 1 cup at a time, allowing it to be mixed in. Use a rubber spatula to scrape the sides of the bowl if necessary.4 cups powdered sugar
- Add in 3 tablespoons of the milk, and the vanilla, allowing the frosting to become smooth. Add in additional milk, 1 tablespoon at a time, until it reaches your desired texture.3 tablespoons milk, 2 teaspoons pure vanilla extract
Notes
- Your ingredients should all be at room temperature. This will help them combine more easily so that you have a consistent texture throughout.
- It’s quicker and easier to mix everything together with a stand mixer, but you can make the cake by hand too. It will take a little longer, and make sure that everything is well combined.
- Ensure that the cake is fully cooled before frosting it. Warm cakes will cause the frosting to melt and separate.
- This frosting will stiffen if it is chilled. If you want to use it to design your cake, allow it to chill for about 10 minutes before piping.


I use to meme a pudding cake. I then did a pudding cake mixed cake mix I then cooked chocolate pudding and pour it all over the cake.them bake.when you spoon it the cake is on top and the pudding mix was on the bottom and it was delicious. Please help me find the recipe. Thank you. Doris Phillips
How do you put the chocolate sprinkles on the end of the cake? I like the way you decorated the top. Anxious to try it. Thanks Happy holidays!