


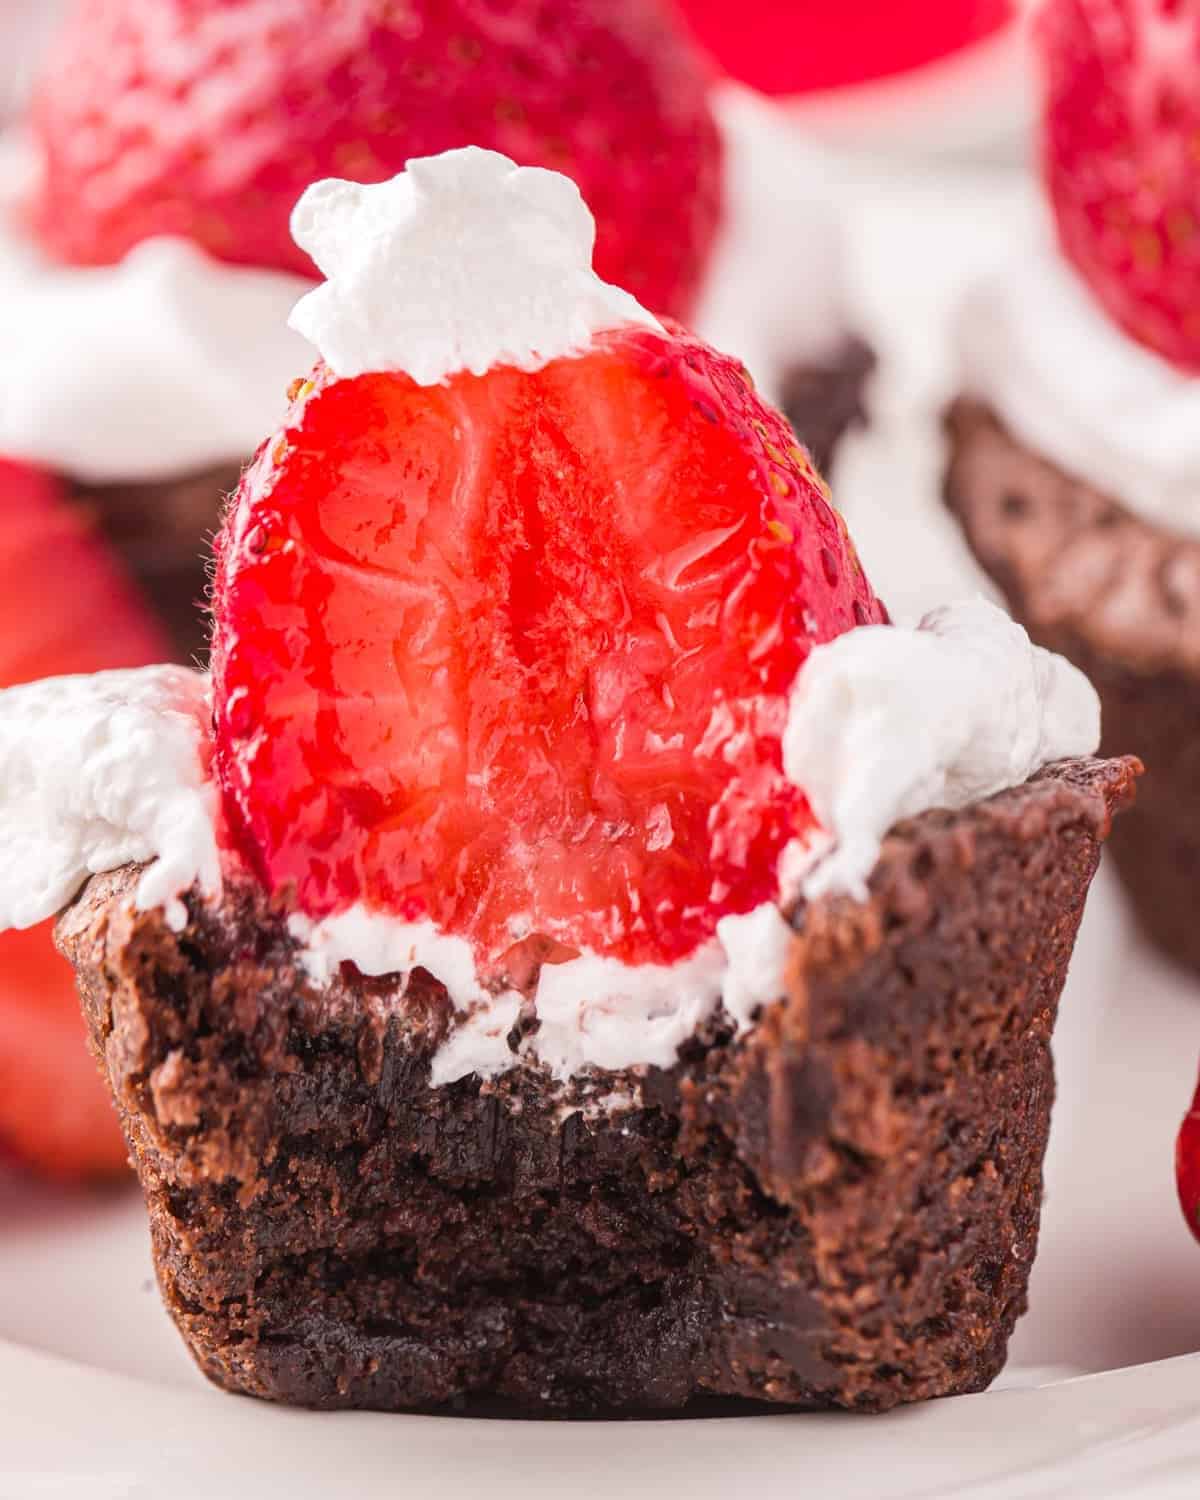
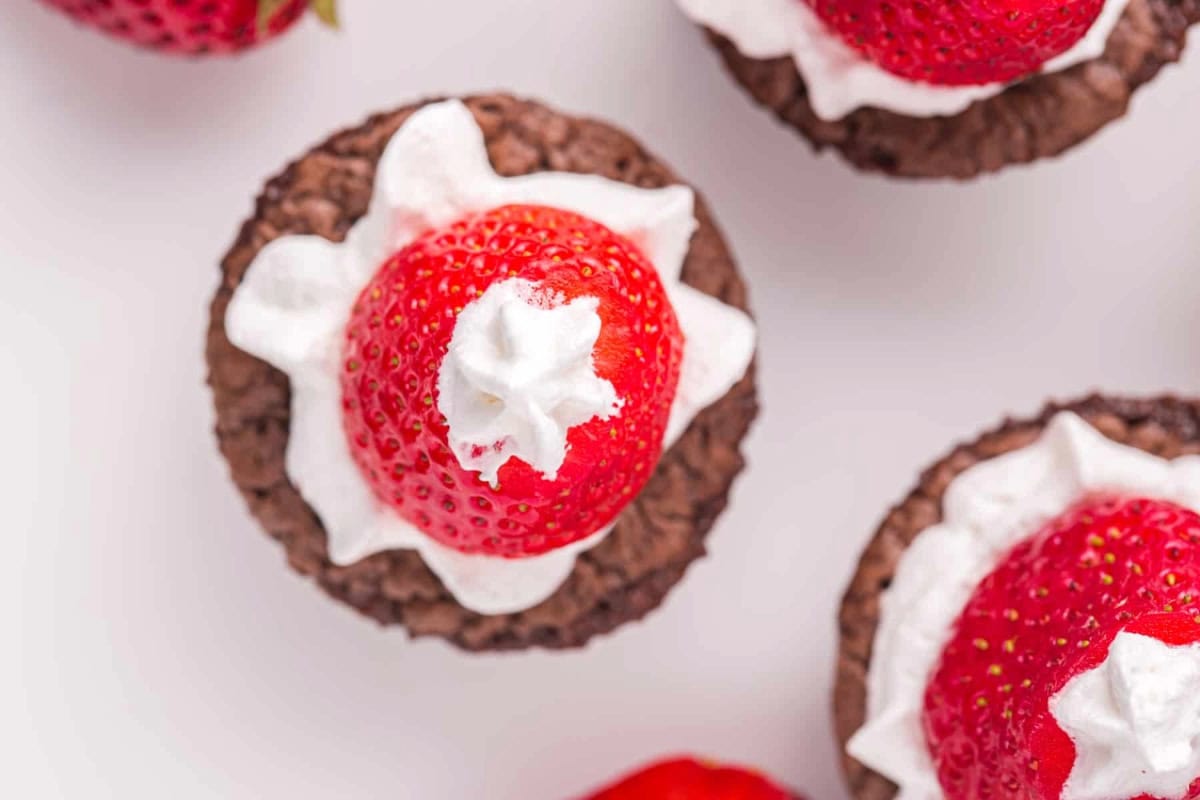
These Santa hat brownies are one of my favorite easy holiday treats because they’re adorable, kid-friendly, and genuinely foolproof. I start with a simple box of brownie mix, bake it into bite-sized cups, and top each one with whipped cream and a fresh strawberry to create the sweetest little Santa hats. My kids help me make these every year, and they always disappear fast at school parties, on cookie trays, or during Christmas movie nights. If you want festive treats with zero stress, strawberry Santa hat brownie bites are the way to go.

Strawberry Santa Hat Brownie Bites
When I’m making Santa hat brownie bites, a few simple details make all the difference. I bake the brownies in a mini muffin tin so each bite stays soft in the center but sturdy enough to hold the whipped cream and strawberry on top. For the strawberries, I always pick ones with a natural cone shape–they look more like little hats and barely need trimming. And make sure they’re dried thoroughly so they don’t slide off the whipped cream.
If you’re prepping ahead, you can bake the brownie bites the day before and assemble right before serving. And for an even cuter finish, a sprinkle of sanding sugar or a little dollop of extra whipped cream makes these Santa brownies sparkle on the dessert table.

Email this Recipe
Enter your email and we’ll send the recipe directly to you!
By submitting this form, you consent to receive emails from Easy Dessert Recipes.
How to Test Strawberry Freshness
After making hundreds of strawberry Santa hat brownie bites, I’ve learned that the biggest issue is strawberries that release moisture and cause the whipped cream to collapse. Before assembling, I give each berry a quick freshness check:
- The berry should feel firm with bright, green leaves.
- The surface should look dry and glossy–never wet.
- I gently press near the tip; if it feels soft, that strawberry will leak juice and won’t stand upright.
This tiny step ensures my Santa hat brownies hold their shape longer and keeps them looking picture-perfect for parties.

Santa Hat Brownies Recipe
Equipment
- Kitchen Scale (optional)
- 2 Mini Muffin Tin(s)
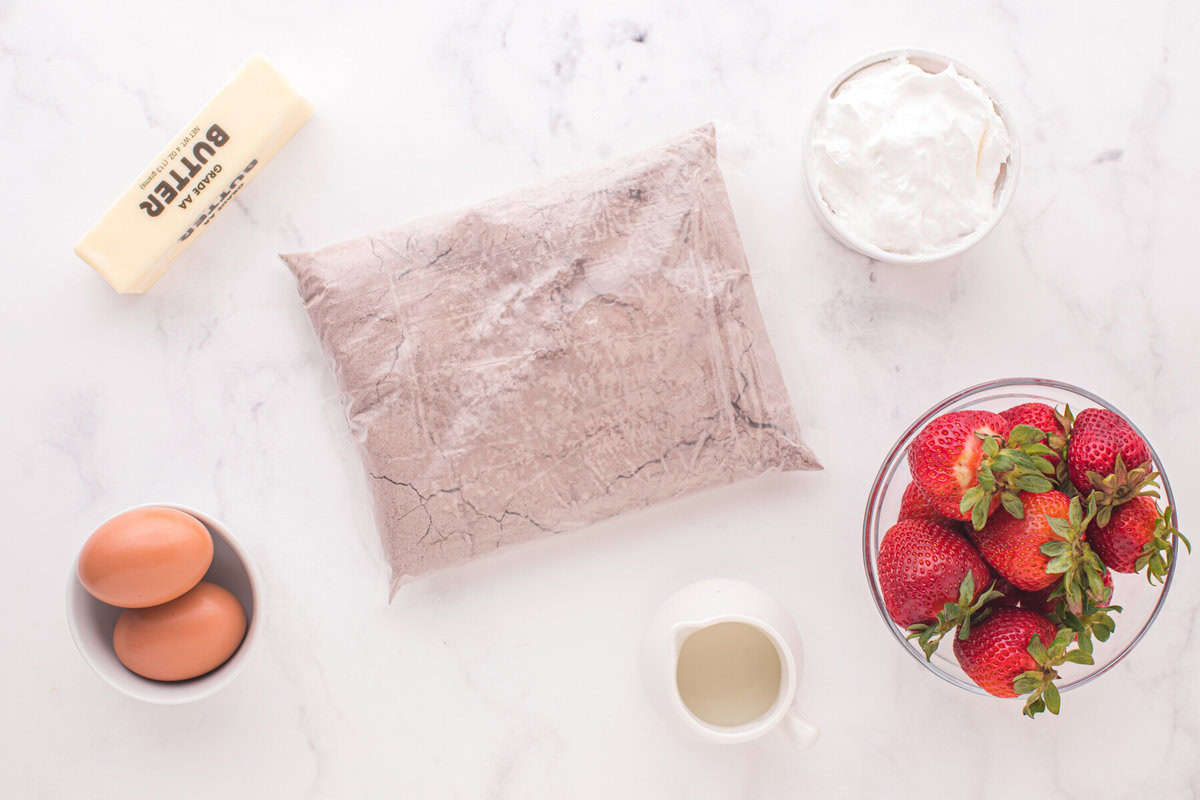
Ingredients
- 19.9 ounces dark chocolate brownie mix (1 large box)
- 2 large eggs room temperature
- ½ cup salted butter melted (1 stick)*
- ¼ cup whole milk room temperature**
- 3 dozen fresh strawberries
- 13 ounces whipped cream (1 can)***
- Sprinkles or clear sanding sugar optional, for garnish
Instructions
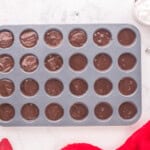
- Preheat oven to 350°F and generously grease 2 mini muffin tins with nonstick spray. Set aside.

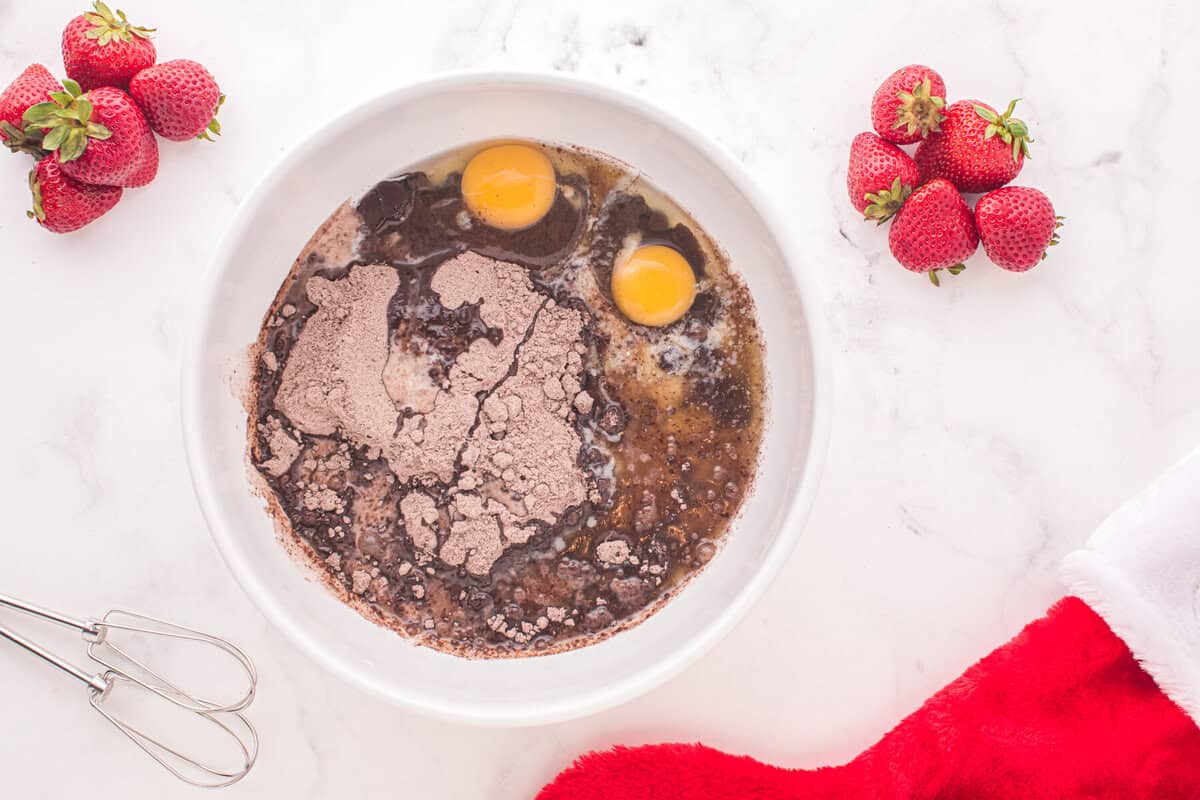
- Mix the brownie mix, eggs, melted butter, and milk together in a large bowl until smooth, about 2 minutes.19.9 ounces dark chocolate brownie mix, 2 large eggs, ½ cup salted butter, ¼ cup whole milk
- Pour the brownie mix into the prepared mini muffin tins, filling each “brownie” about ¾ of the way full (about 23 grams per muffin well).
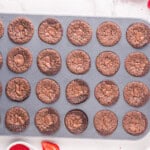
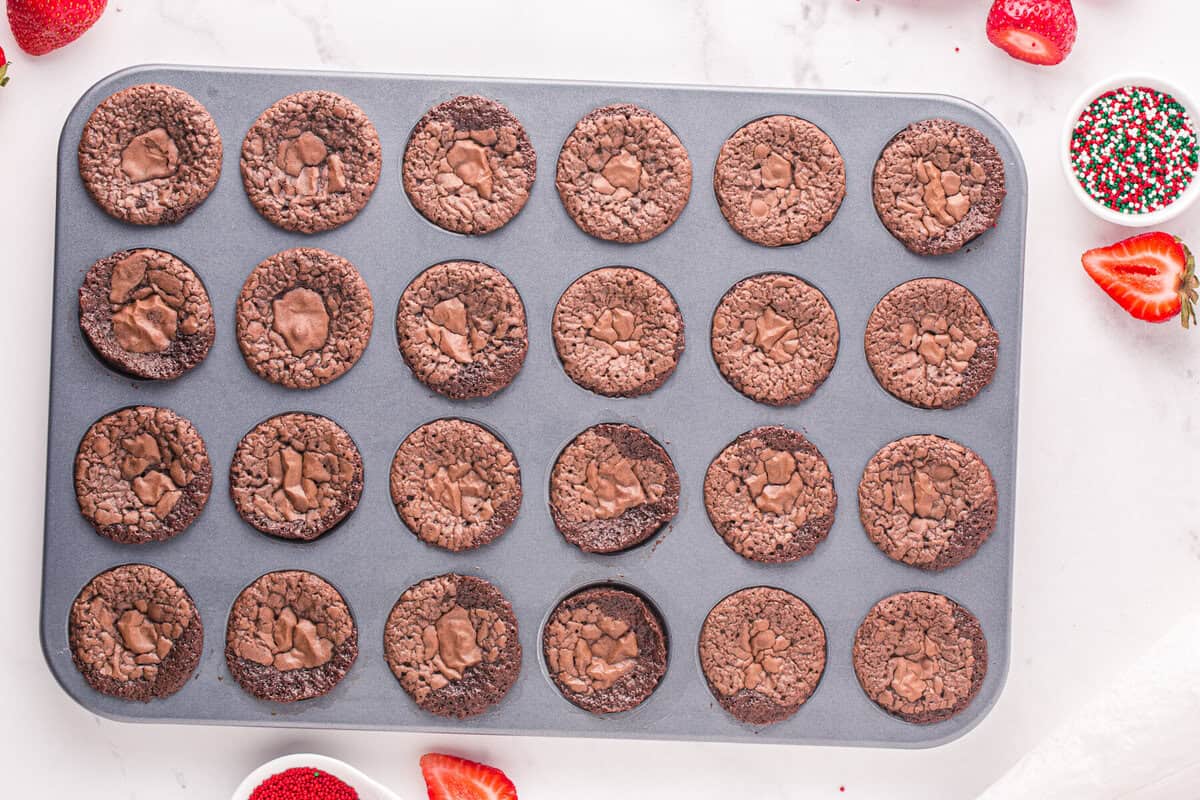
- Bake for 15-18 minutes, or until the brownies are beginning to get firm on the edges and a toothpick inserted in the center comes out mostly clean.
- Remove the brownie from the oven and allow them to cool completely.
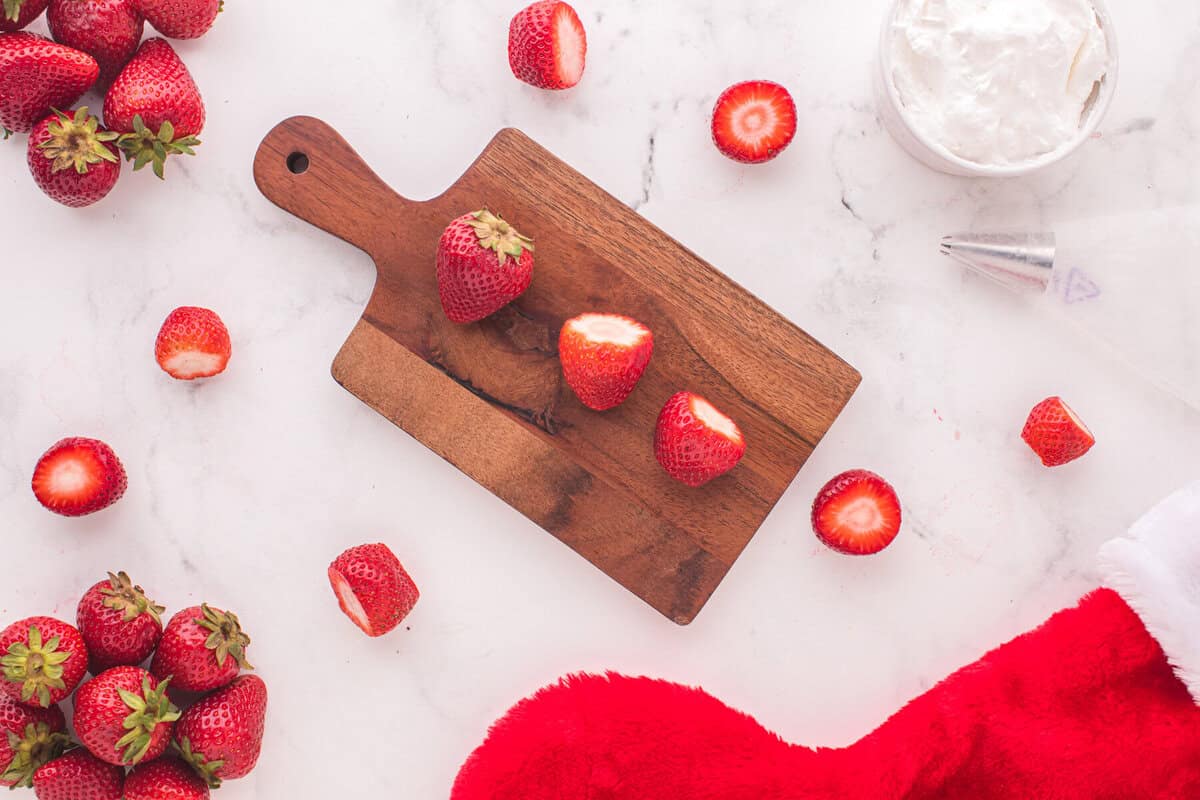
- While the brownies are cooling, rinse and dry the strawberries and then use a paring knife to cut the stem and top bit of each strawberry off. You want them to have a flat surface that allows them to “stand”.3 dozen fresh strawberries
- Once the brownies are cooled, remove them from the tin by gently swiveling them back and forth in the tin until they come loose. Use a spatula or plastic knife to loosen the edges only if absolutely necessary.
- Use the can of whipped cream to pipe a circle around the top edge of each brownie.13 ounces whipped cream
- Place 1 strawberry on each brownie, on top of the whipped topping creating the hat.
- Finish each hat with a small dollop of whipped topping and sprinkle with sprinkles or clear sanding sugar, if desired.Sprinkles or clear sanding sugar


Notes
- Instead of a boxed mix, start with these fudgy brownies for the perfect base!
- For a gluten-free option, use gluten-free brownie mix.
- When shopping for strawberries, look for ones with a regular, conical shape for best hat shaped results.
- For smaller Santa hats on top of your brownies, try using raspberries instead of strawberries!
- Mini muffin brownies can stick easily. I recommend greasing your mini muffin tins and using a rubber spatula to gently separate the brownies from the pan.
- Make sure to cool the brownies to room temperature before adding whipped cream and strawberries; otherwise, the whipped cream will melt.
- Dry the strawberries thoroughly so they don’t weep into the cream.
- If you really want to go the extra mile with these, you can add about ½ teaspoon of strawberry jam to the center of the whipped cream circle before topping it with the strawberry. This adds a sweet surprise to each treat.
- Dust the tops with powdered sugar for a snowy look.
- Nutritional information does not include optional ingredients.
How to Make Santa Hat Brownies Step-by-Step
Prep: Gather up the short list of ingredients needed to make these Santa hat brownie bites. Preheat your oven to 350°F, generously grease 2 mini muffin tins with nonstick spray, and set aside.
Mix the Batter: Mix 19.9 ounces (1 large box) of dark chocolate brownie mix, 2 large eggs, ½ cup of melted salted butter, and ¼ cup of whole milk together in a large bowl until smooth, about 2 minutes.
Portion the Brownies: Pour the brownie mix into the prepared mini muffin tins, filling each “brownie” about ¾ of the way full (about 23 grams per muffin well).

Bake the Brownies: Bake in the preheated oven for 15-18 minutes, or until the brownies are beginning to get firm on the edges and a toothpick inserted in the center comes out mostly clean. Remove the brownies from the oven and allow them to cool completely.
Cut the Strawberries: While the brownies are cooling, rinse and dry 3 dozen fresh strawberries and then use a paring knife to cut the stem and top bit of each strawberry off. You want them to have a flat surface that allows them to “stand”.
Decorate the Brownies: Once the brownies are cooled, remove them from the tin by gently swiveling them back and forth in the tin until they come loose. Use a spatula or plastic knife to loosen the edges only if absolutely necessary. Use a 13-ounce can of whipped cream to pipe a circle around the top edge of each brownie.
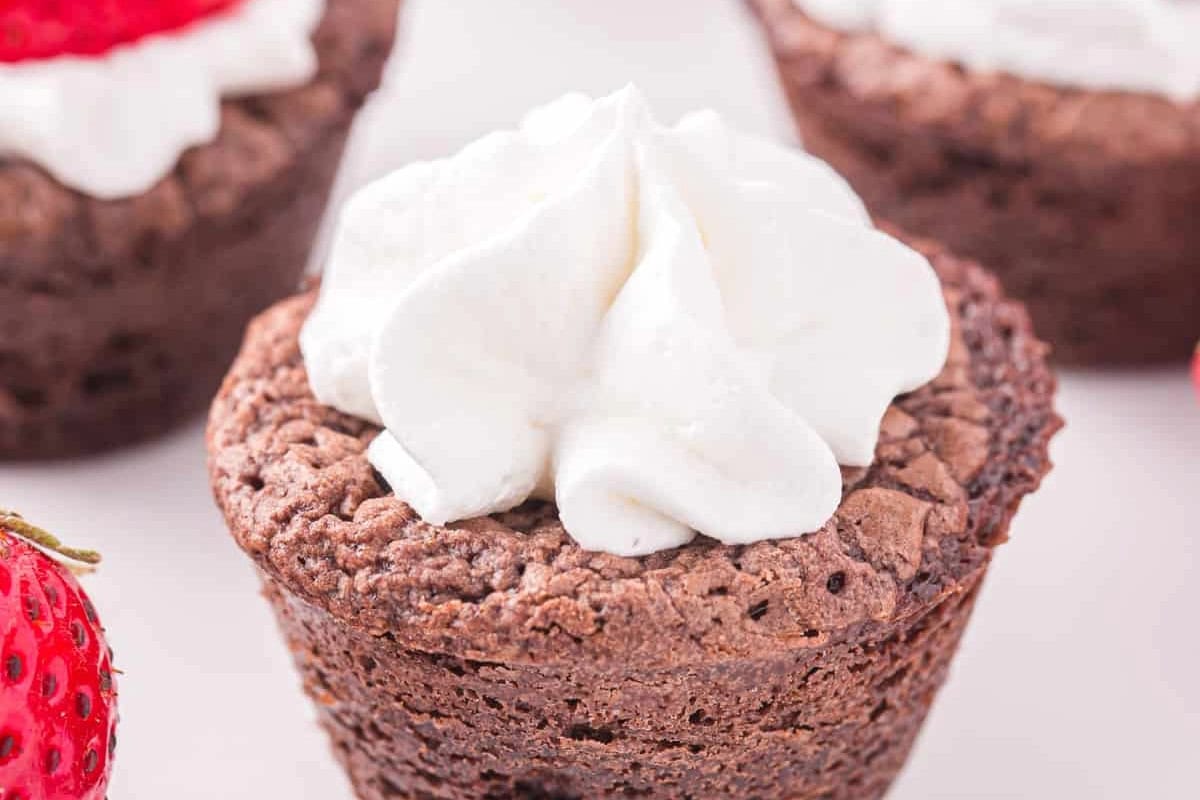
Add the Hats: Place 1 strawberry on each brownie, on top of the whipped topping creating the hat. Finish each hat with a small dollop of whipped topping and sprinkle with sprinkles or clear sanding sugar, if desired.
How to Store and Freeze
Store leftover Santa hat brownies in an airtight container in the refrigerator for up to 2 days. For longer-lasting whipped cream, use a tub of whipped topping and a piping tip set to pipe on the brownies.
You can freeze the brownie bites, but I do not recommend freezing the whipped cream or strawberries. Freeze the brownies in an airtight container or Ziplock bag for up to 3 months. Let thaw overnight in the refrigerator before decorating with fresh strawberries and whipped cream.


Leave a Reply