

Stop settling for airy, dry box cakes! My doctored white cake mix recipe uses the professional WASC (White Almond Sour Cream) method to transform a standard boxed mix into a dense, bakery-style masterpiece. I’ve perfected the ratio of buttermilk and sour cream to ensure a sturdy crumb that’s perfect for stacking. Plus, I’m sharing my “warm-wrap” method that locks in moisture better than any scratch-made recipe I’ve tried!

What is White Almond Sour Cream Cake?
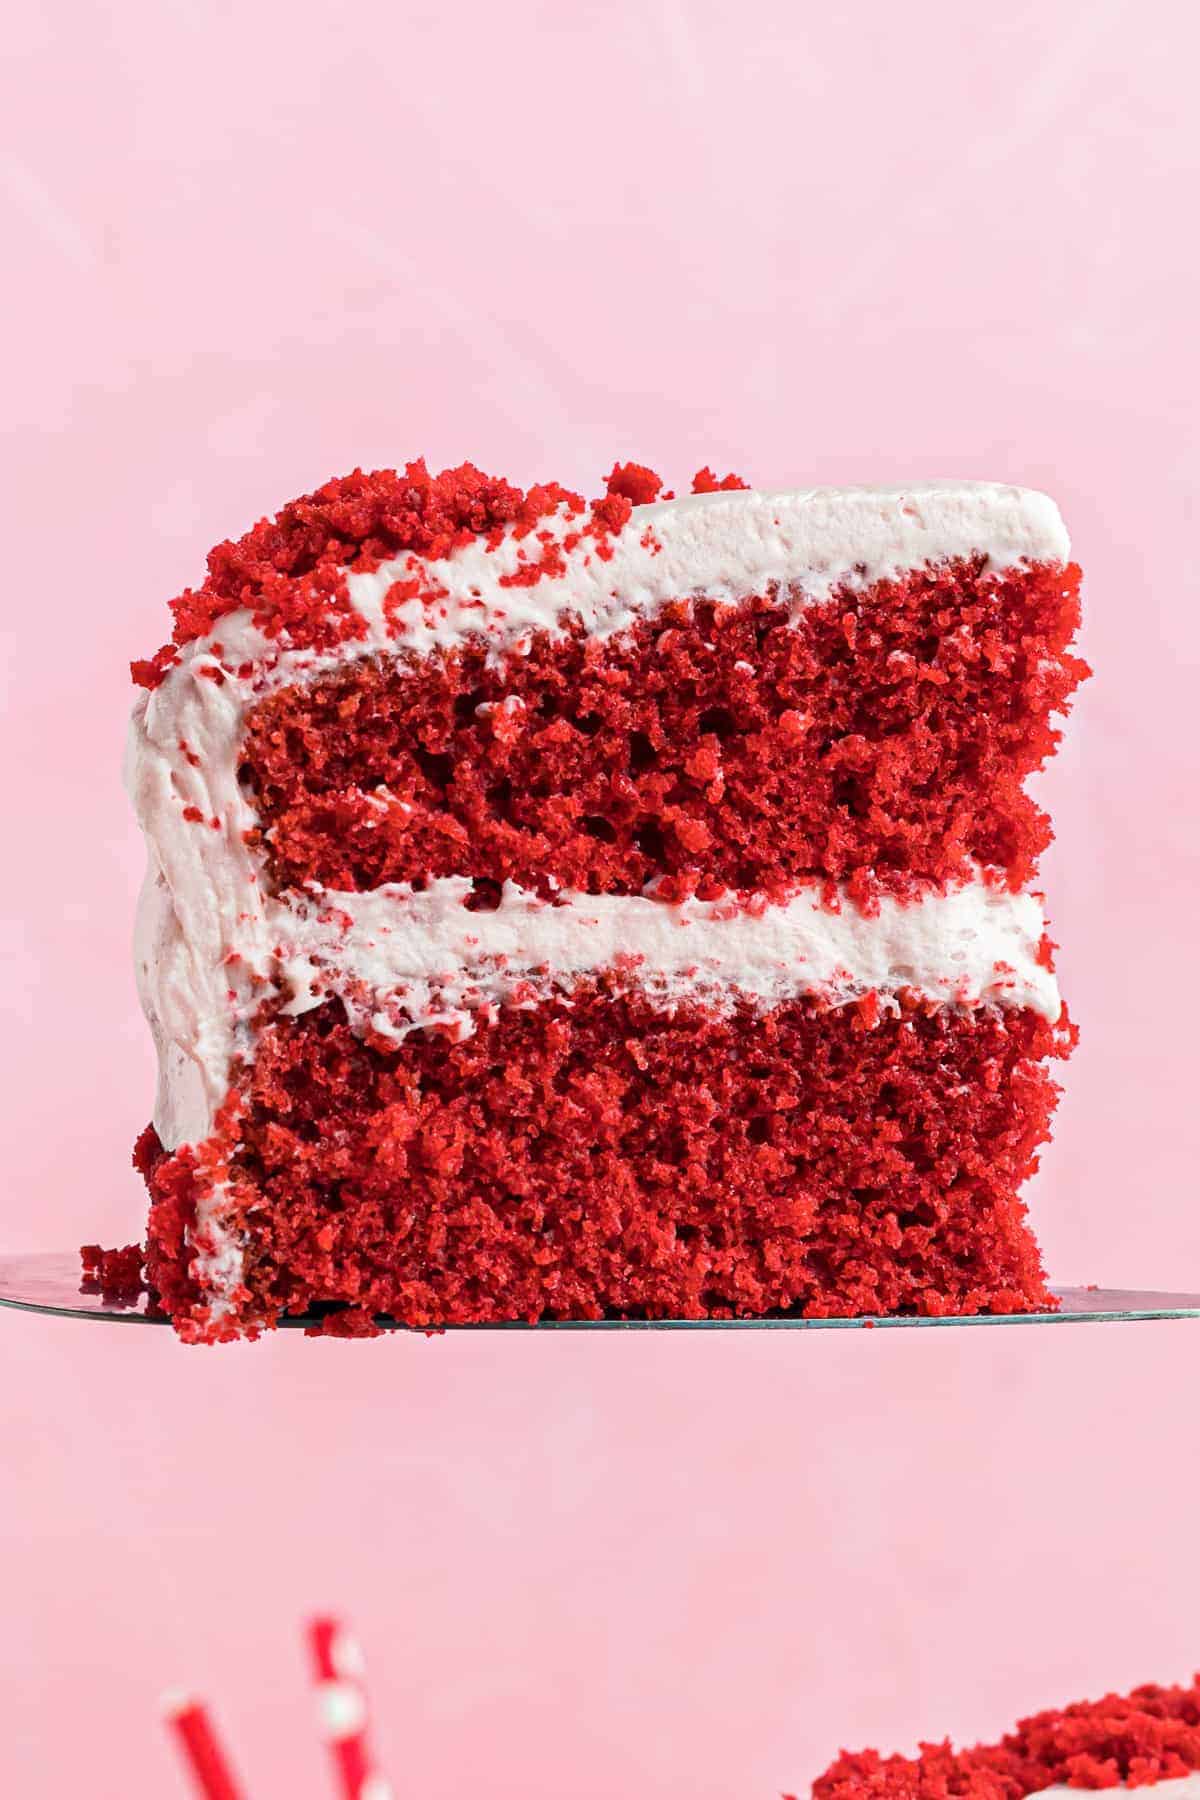
If you’ve ever bitten into a slice of wedding cake and wondered why it tasted fancier than anything you’ve made at home, you were likely eating a White Almond Sour Cream (WASC) cake. At its core, it’s a high-end hybrid: part fluffy white cake, part dense pound cake, with a distinct, velvety tang from the sour cream.
The secret I’ve learned after years of baking is that you don’t need to spend four hours measuring out five types of flour to get that gourmet result. I use a box of white cake mix as my “shortcut” base because it’s incredibly reliable–it takes the stress out of baking so I can focus on the flavor. By simply swapping the water for buttermilk and adding tangy sour cream, I’ve upgraded this basic boxed mix into a bakery-worthy treat!

Email this Recipe
Enter your email and we’ll send the recipe directly to you!
By submitting this form, you consent to receive emails from Easy Dessert Recipes.
Warm-Wrap for a Perfect Crumb
My favorite at-home trick for that melt-in-your-mouth texture is a little secret I call the “warm wrap” method. Instead of letting my cakes fully cool at room temperature, I let them cool in the pans for just 15 minutes, then I turn them out and wrap them in plastic wrap while they’re still warm. This traps the steam inside and forces it back into the cake, making it extra moist and tender. I then pop those warm layers straight into the freezer, which helps “set” everything and gets rid of that annoying crumbliness that can make decorating such a headache!
Doctored White Cake Mix (WASC Cake)
Equipment
- Kitchen Scale (optional)
- 2 8-inch Round Cake Pan(s)
- Hand Mixer or Stand Mixer
- Piping Tip Set (optional)
Ingredients
For the Cake
- 15.25 ounces white cake mix sifted (1 box)*
- 1 cup all-purpose flour sifted
- 1 cup granulated sugar
- ½ teaspoon kosher salt
- 1½ cups buttermilk room temperature
- 1 cup full-fat sour cream room temperature**
- 3 large eggs room temperature***
- 2 teaspoons pure vanilla extract ****
For the Buttercream Frosting
- 5 cups powdered sugar
- 1½ cups unsalted butter room temperature (3 sticks)
- 1 tablespoon pure vanilla extract
Optional Ingredients
- Gel food coloring for the frosting*****
- Rainbow sprinkles for topping
Instructions
For the Cake
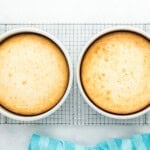
- Preheat oven to 350°F. Spray two 8-inch round cake pans with nonstick spray and line the inside bottom of each pan with parchment paper. Set aside.
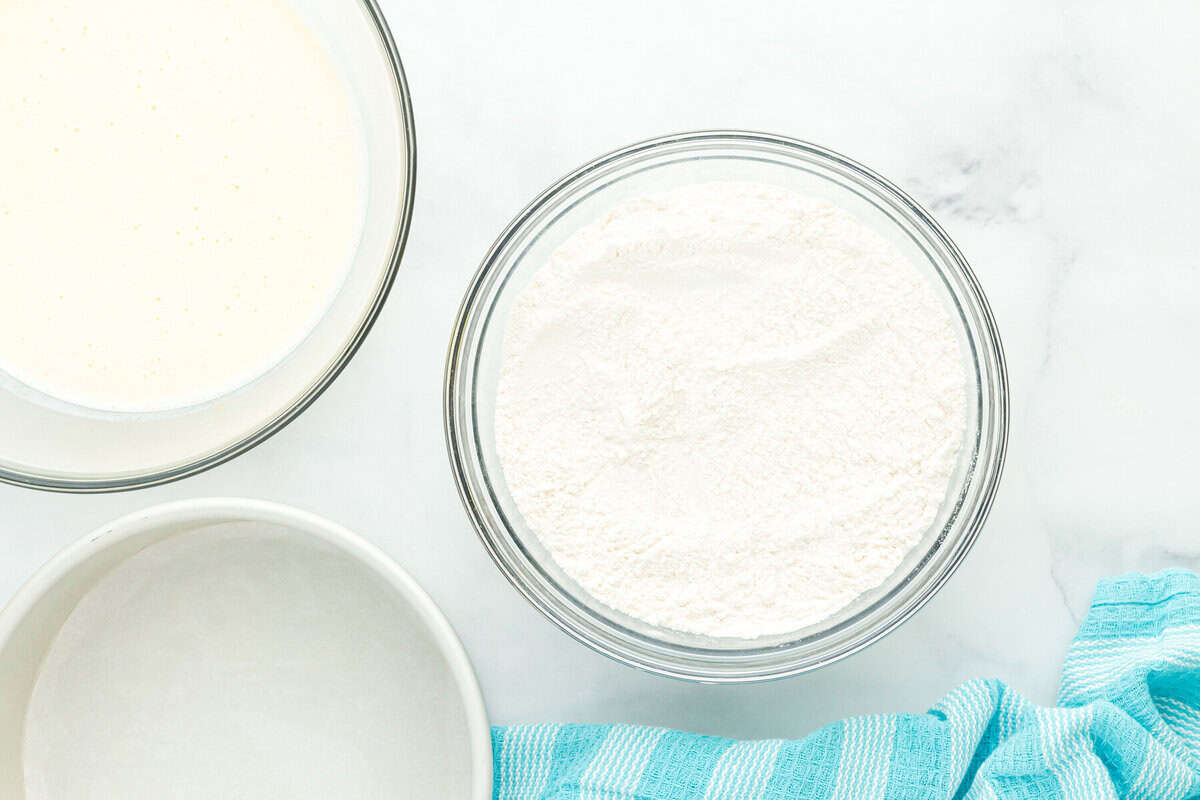
- In a medium bowl, stir the dry cake mix, flour, granulated sugar, and salt together. Set aside for now.15.25 ounces white cake mix, 1 cup all-purpose flour, 1 cup granulated sugar, ½ teaspoon kosher salt
- In the bowl of a stand mixer fitted with the paddle attachment, beat the buttermilk, sour cream, eggs, and vanilla extract on high until well combined.1½ cups buttermilk, 1 cup full-fat sour cream, 3 large eggs, 2 teaspoons pure vanilla extract

- With the mixer on low speed, beat the dry ingredients into the wet ingredients. Switch to high, and beat until smooth, about 1 minute.
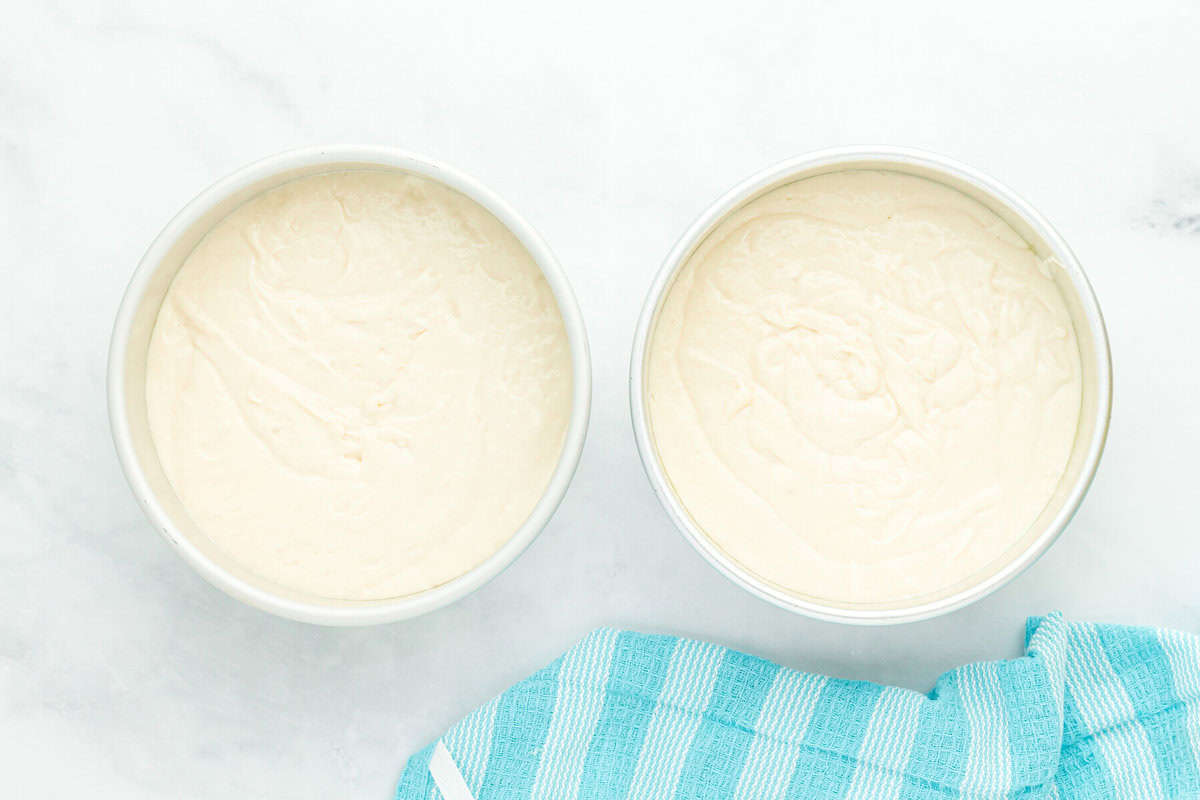
- Divide the cake batter evenly between the prepared cake pans (about 749 grams per pan).
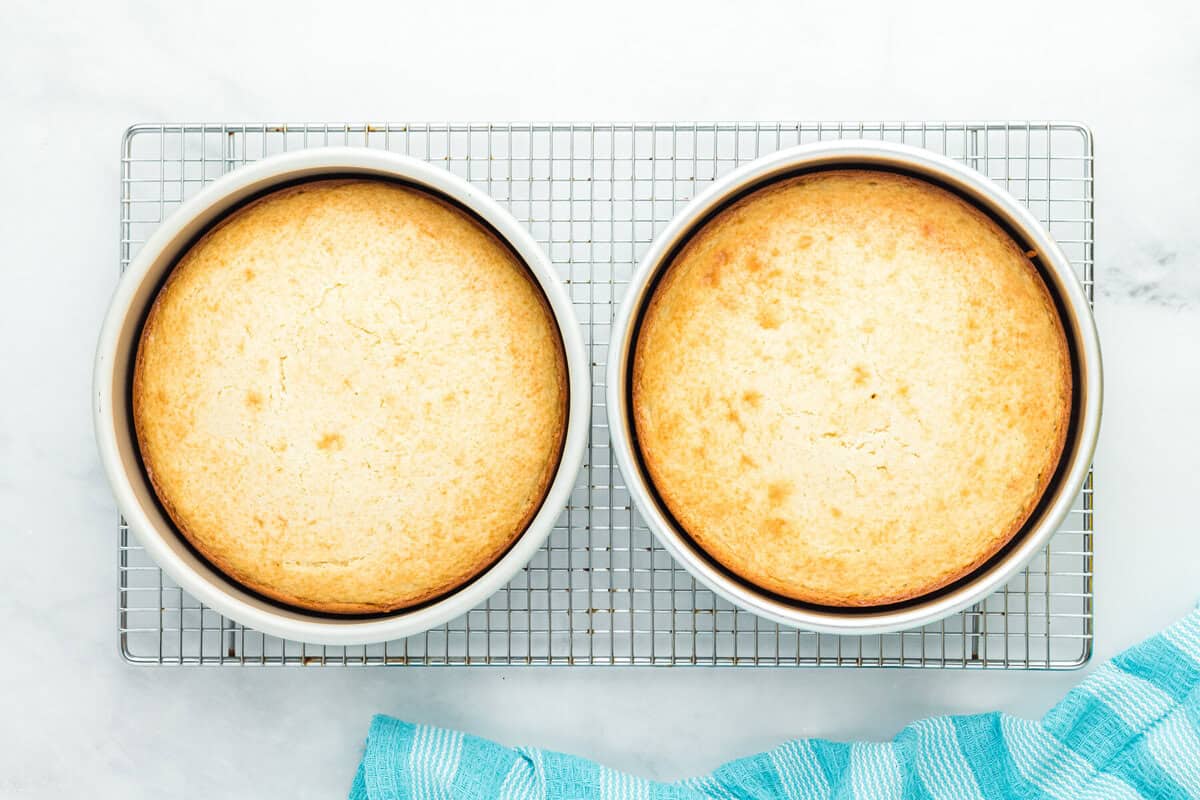
- Bake for 33-35 minutes, or until a toothpick inserted in middle comes out clean.
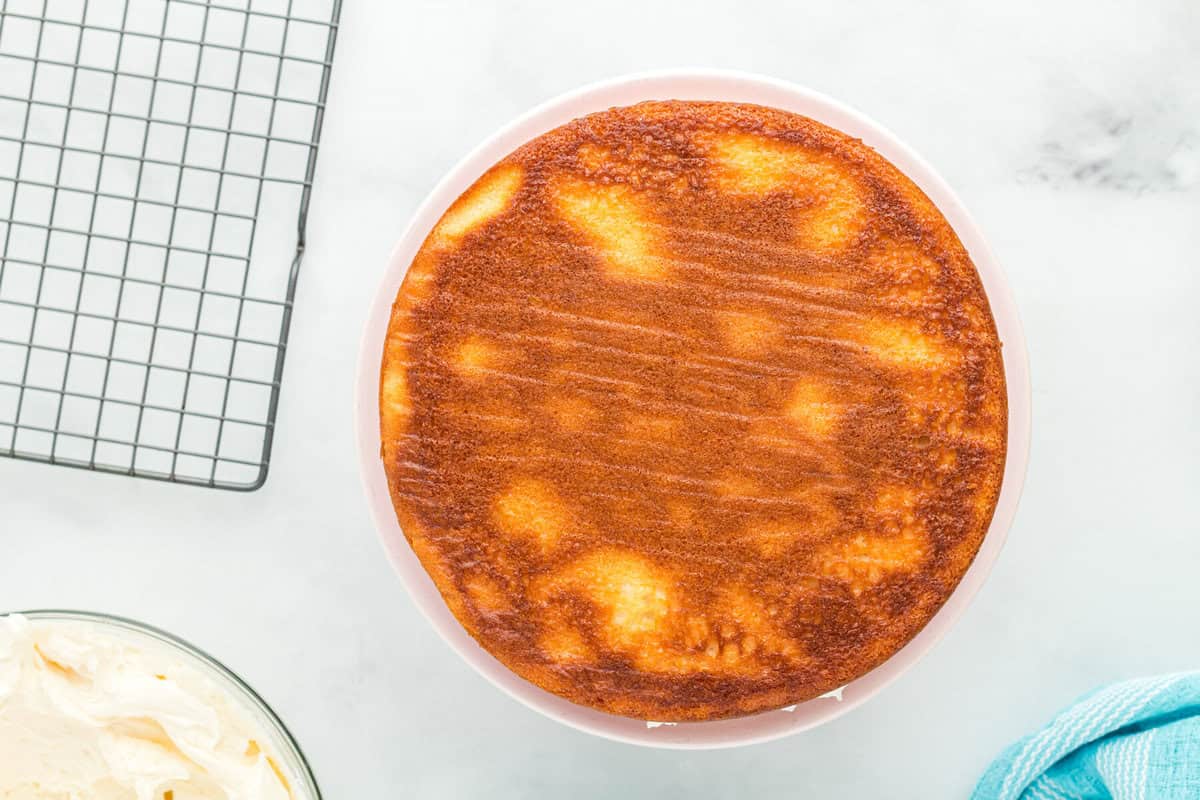
- Remove cakes from oven and let cakes cool in pans for 15 minutes before removing from the pans and immediately wrapping in plastic wrap while still warm.
- Transfer the wrapped warm cakes to the freezer to chill for at least 2 hours.
For the Buttercream Frosting
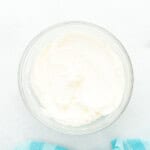
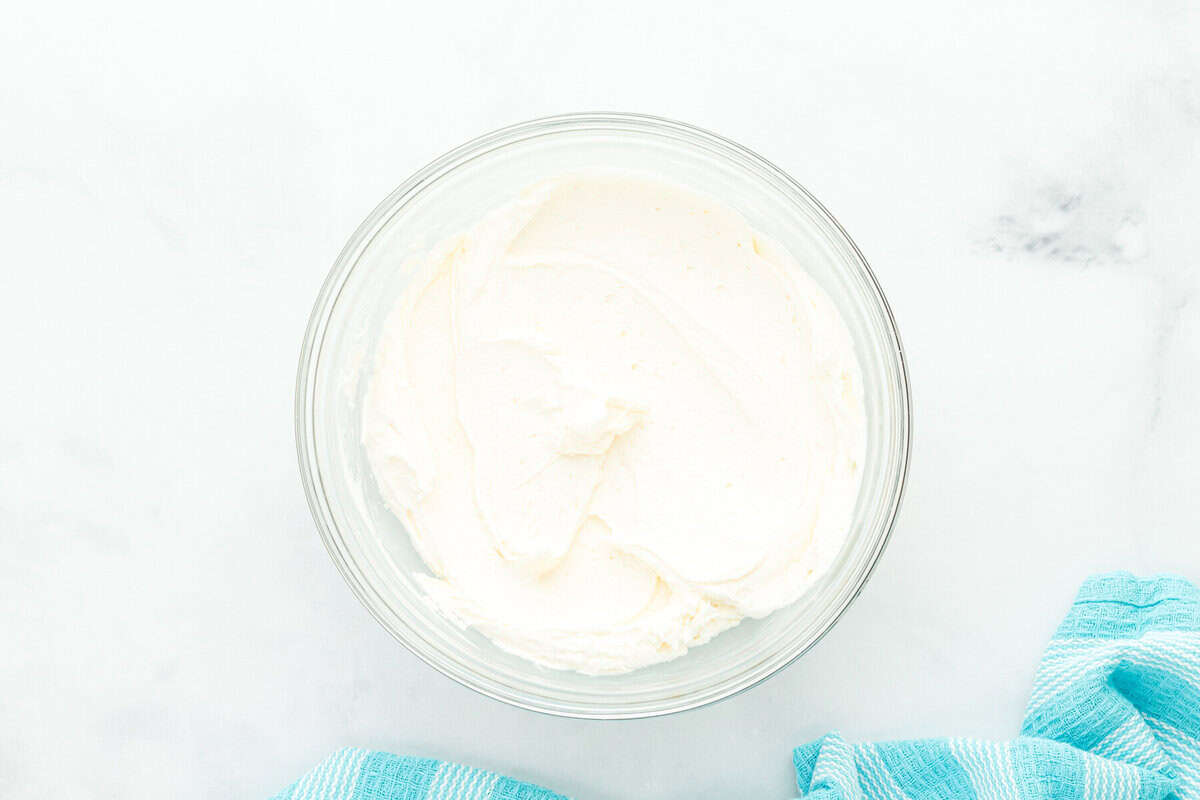
- In the bowl of a stand mixer fitted with the whisk attachment, beat the powdered sugar, butter, and vanilla extract together on high speed until light and fluffy, about 5 minutes.5 cups powdered sugar, 1½ cups unsalted butter, 1 tablespoon pure vanilla extract
For Assembly
- Once cakes have chilled, use a large serrated knife to cut the dome tops off both cakes so they both have a flat top.
- Place a thin layer of frosting (about 2 tablespoons) in the middle of a cake board or cake plate then place one cake (cut side facing up) on top of that frosting.
- Add a generous layer of frosting on top of that first cake layer then place the second cake layer (bottom facing up) on top of the first cake layer.
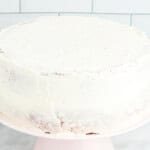
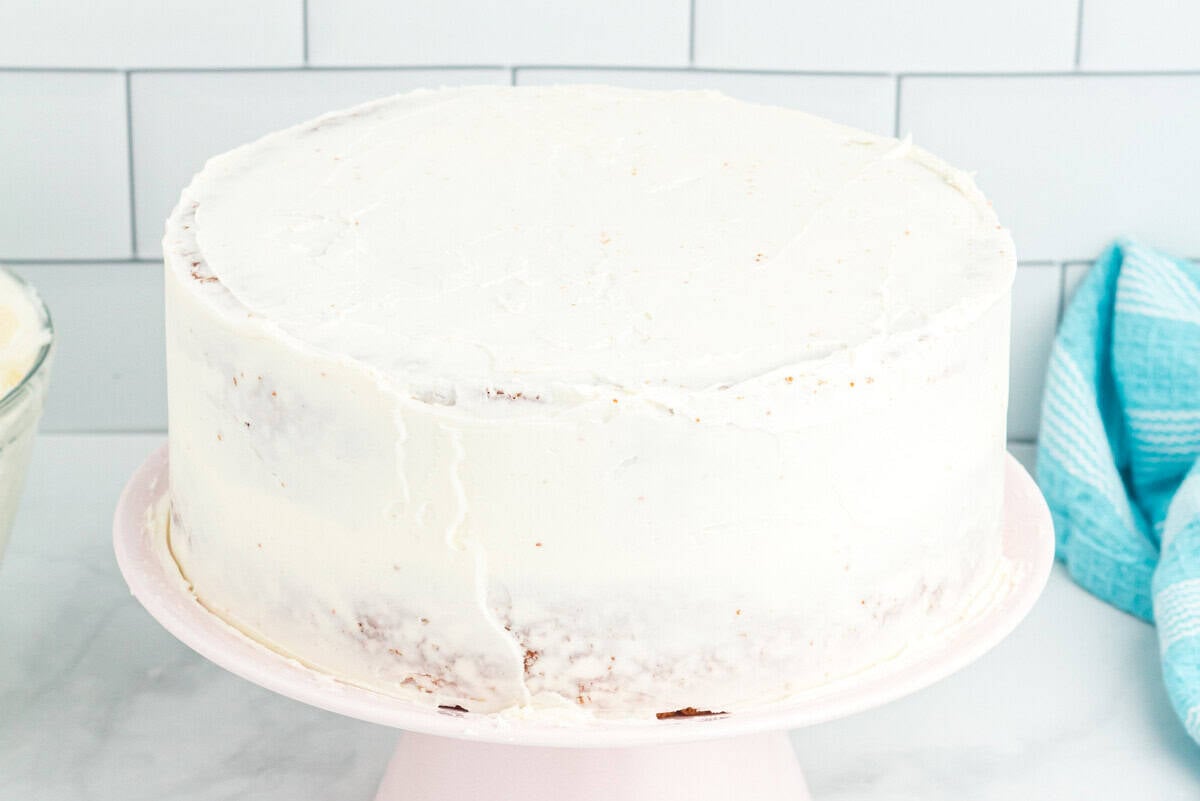
- Frost a thin layer of frosting around the top and sides of cake (crumb coat).
- Place the lightly frosted cake in the freezer for 10 minutes so the frosting hardens up a bit before frosting the next layer.
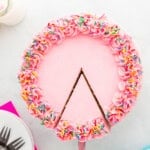
- Optional: color the remaining frosting (using gel food coloring) if you want the final layer of icing to be colored.Gel food coloring
- Remove the cake from the freezer and apply the second thicker layer of frosting. Spread this layer as smoothly as you can using the cake scraper.
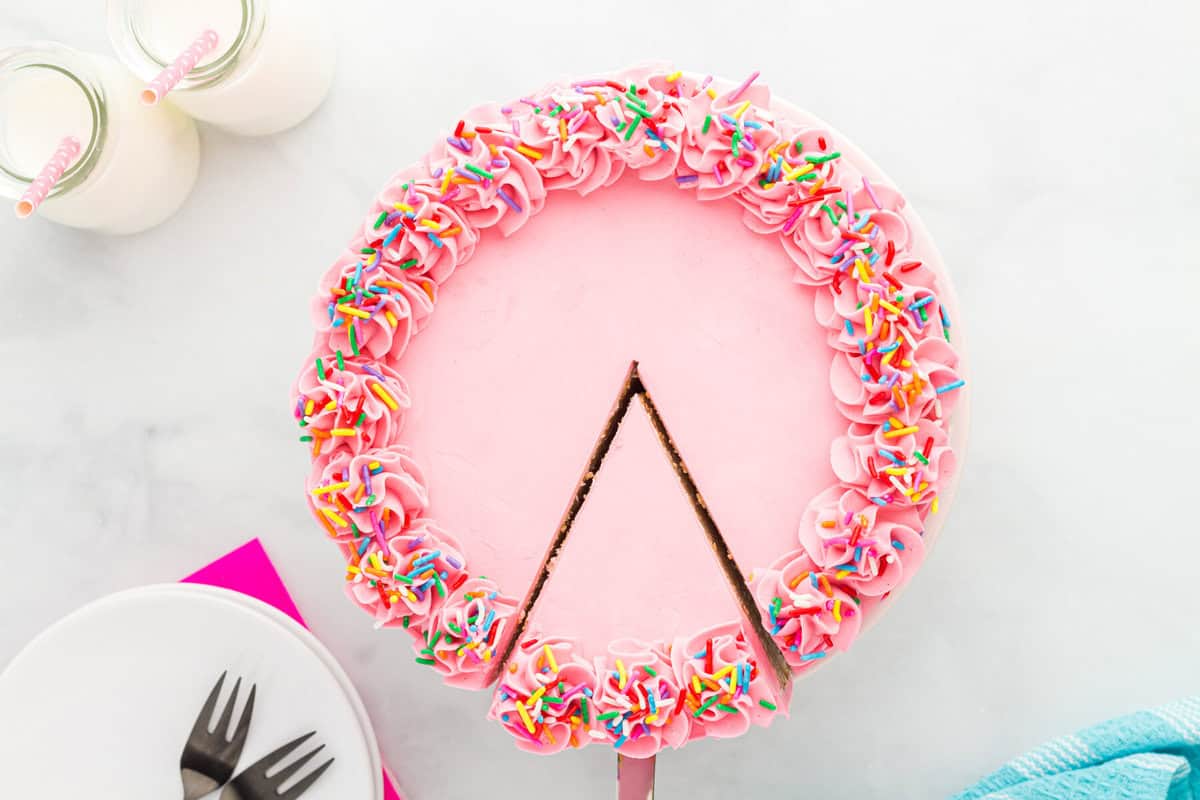
- Take about 1½-2 cups of frosting and place it in an icing bag with a Wilton 1M tip. Frost swirls around the top of the cake.
- Optional: add rainbow sprinkles to the bottom edge of the cake and add sprinkles to the icing swirls on the top of the cake.Rainbow sprinkles

Notes
- Bring all ingredients to room temperature for the best results.
- Measure the flour using the spoon-and-level method to avoid a dry cake.
- Sift the cake mix and flour together for a velvety crumb.
- Do not use the ingredients listed on the back of the box of cake mix; the cake mix is a separate, dry ingredient in this recipe.
- Do not overmix the batter; otherwise, your cakes may come out tough.
- The batter should be thick and almost pudding-like.
- Because this cake is dense, the center takes longer to bake. If the edges brown too quickly, loosely tent the pans with foil until a toothpick comes out clean.
- Chill the cakes thoroughly for the most even frosting application.
- If the frosting is too thick to smooth onto the cake, beat in a tablespoon of heavy cream. If the frosting seems too thin, add a bit more powdered sugar.
- To create a solid base for decorating, place a bit of frosting onto the cake board/stand to secure the bottom layer of cake.
- Be sure to level the cakes by cutting off any domed parts to ensure that the cakes will stack evenly.
- Crumb-coat the cake before frosting to catch any crumbs for a smoother appearance.
- Nutritional information does not include optional ingredients.
- Sheet Cake: Bake at 350°F in a greased/lined 9×13 pan for 40-45 minutes until a toothpick comes out clean; cool completely in the pan to prevent cracking.
- Cupcakes: Fill liners ⅔ full (yields ~30) and bake at 350°F for 18-22 minutes; remove from the tin after 5 minutes to prevent the liners from peeling.
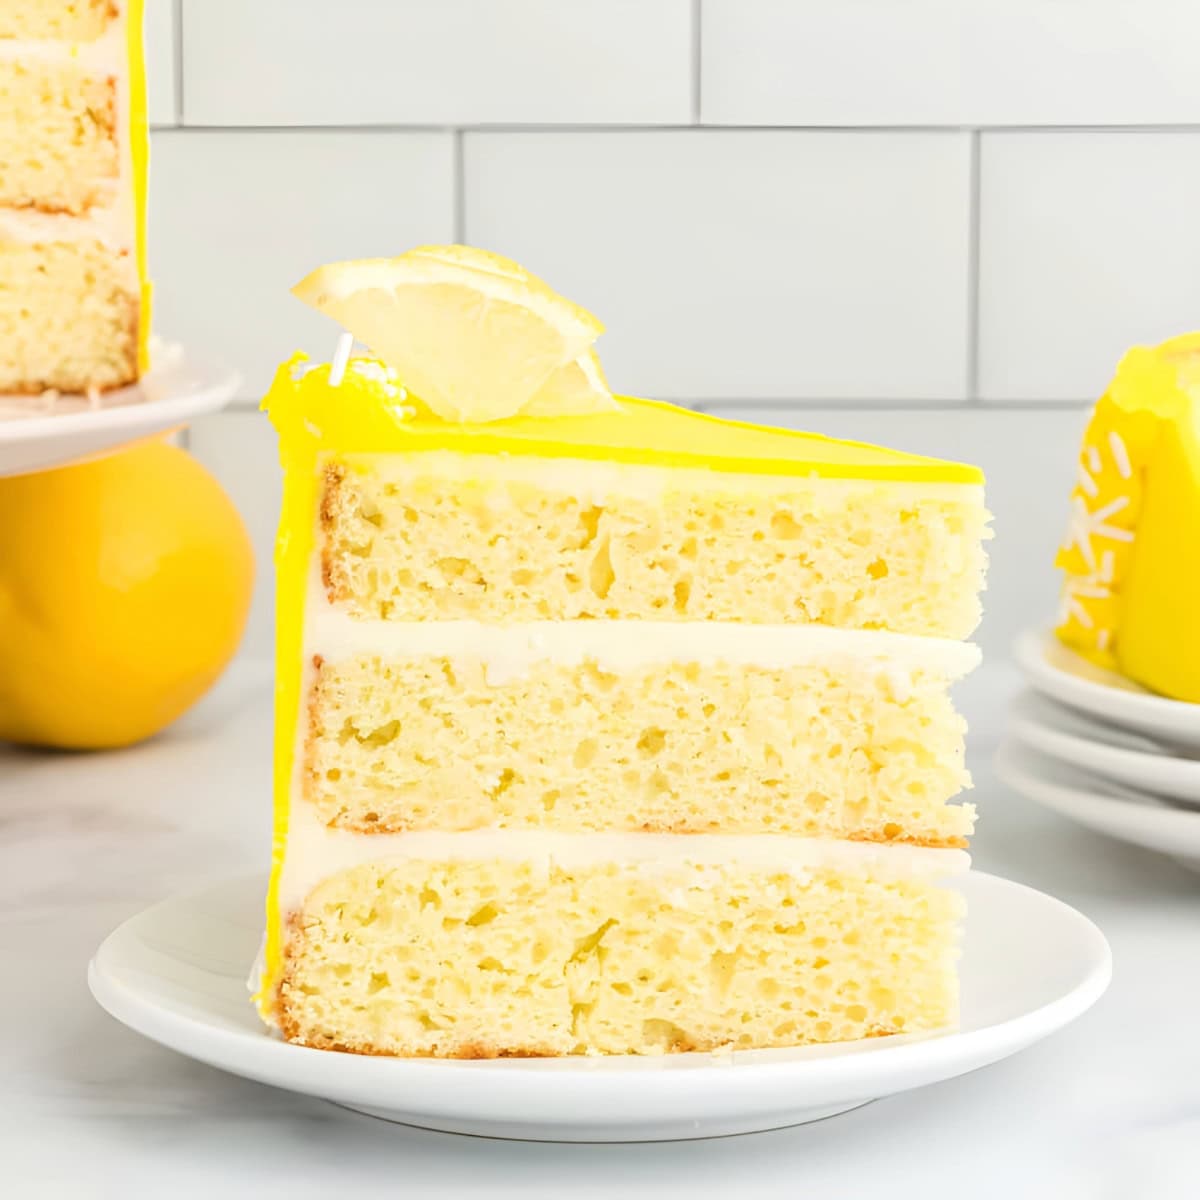
The Secret to a Pure White Cake
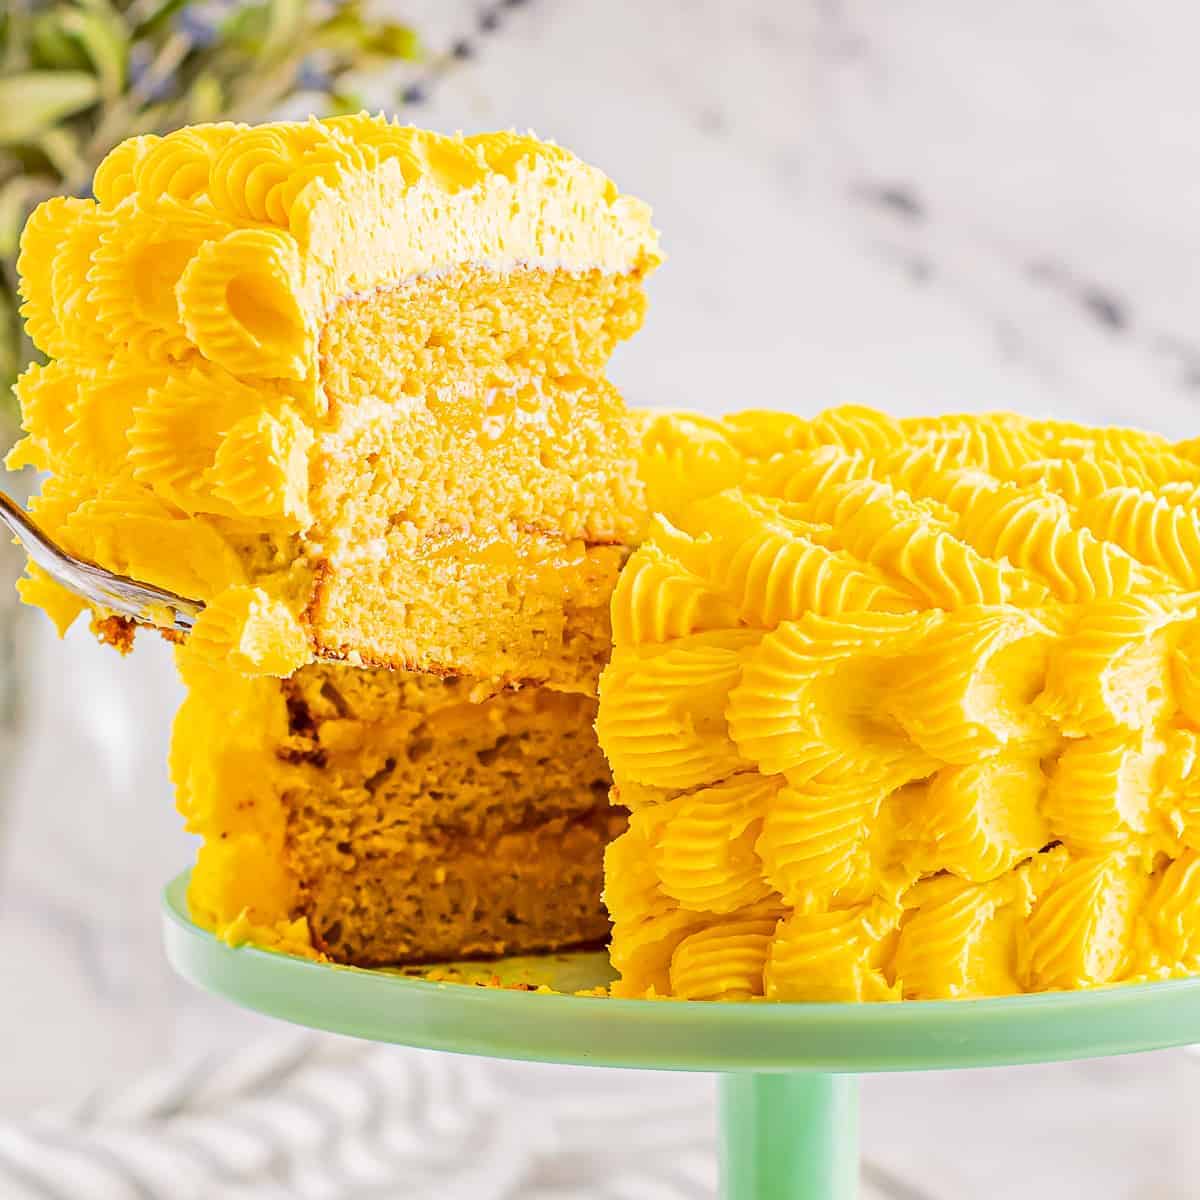
Whenever I bake a white cake, I always worry about that unwanted yellow tint. It’s a bit of a tradeoff, since the ingredients that add the most flavor–like egg yolks and pure vanilla–are the same ones that add color! My version uses whole eggs for richness and stays surprisingly pale, but if you want that ultra-bright wedding cake look, you can easily swap the eggs for five whites and opt for clear extracts.
How to Doctor Up Cake Mix Step-by-Step
Mix the Batter: Preheat your oven to 350°F, spray two 8-inch round cake pans with nonstick spray, line the inside bottom of each pan with parchment paper, and set aside. In a medium bowl, sift 15.25 ounces (1 box) of white cake mix, 1 cup of all-purpose flour, 1 cup of granulated sugar, and ½ teaspoon of kosher salt together. Set aside for now. In the bowl of a stand mixer fitted with the paddle attachment, beat 1½ cups of room-temperature buttermilk, 1 cup of room-temperature, full-fat sour cream, 3 large room-temperature eggs, and 2 teaspoons of vanilla extract on high until well combined.
Portion the Cakes: Starting on low speed, beat the dry ingredients into the wet ingredients. Once combined, beat on high until smooth, about 1 minute. Take care not to overmix, or your cakes will turn out dry and gummy. The batter will be quite thick–this is normal! Divide the cake batter evenly between the prepared cake pans. Try to get the same amount in each pan so that the cake layers bake up to the same size (about 749 grams per pan).
Bake the Cakes: Bake in the preheated oven for 33-35 minutes, or until a toothpick inserted in the middle comes out clean. Remove the cakes from the oven and let them cool in the pans for 15 minutes before removing them immediately wrapping each layer in plastic wrap. Wrapping the cakes while warm helps seal in moisture. Don’t worry about leveling them just yet; we’ll do that after chilling! Place the wrapped layers in the freezer for at least 2 hours. This helps the layers set so they’re easier to frost and slice.
Make the Buttercream: In the bowl of a stand mixer fitted with the whisk attachment, beat 5 cups of powdered sugar, 1½ cups of room-temperature unsalted butter, and 1 tablespoon of vanilla extract together on high speed until light and fluffy, about 5 minutes. If the frosting is too thick to smooth onto the cake, beat in a tablespoon of heavy cream. If the frosting seems too thin, add a bit more powdered sugar.
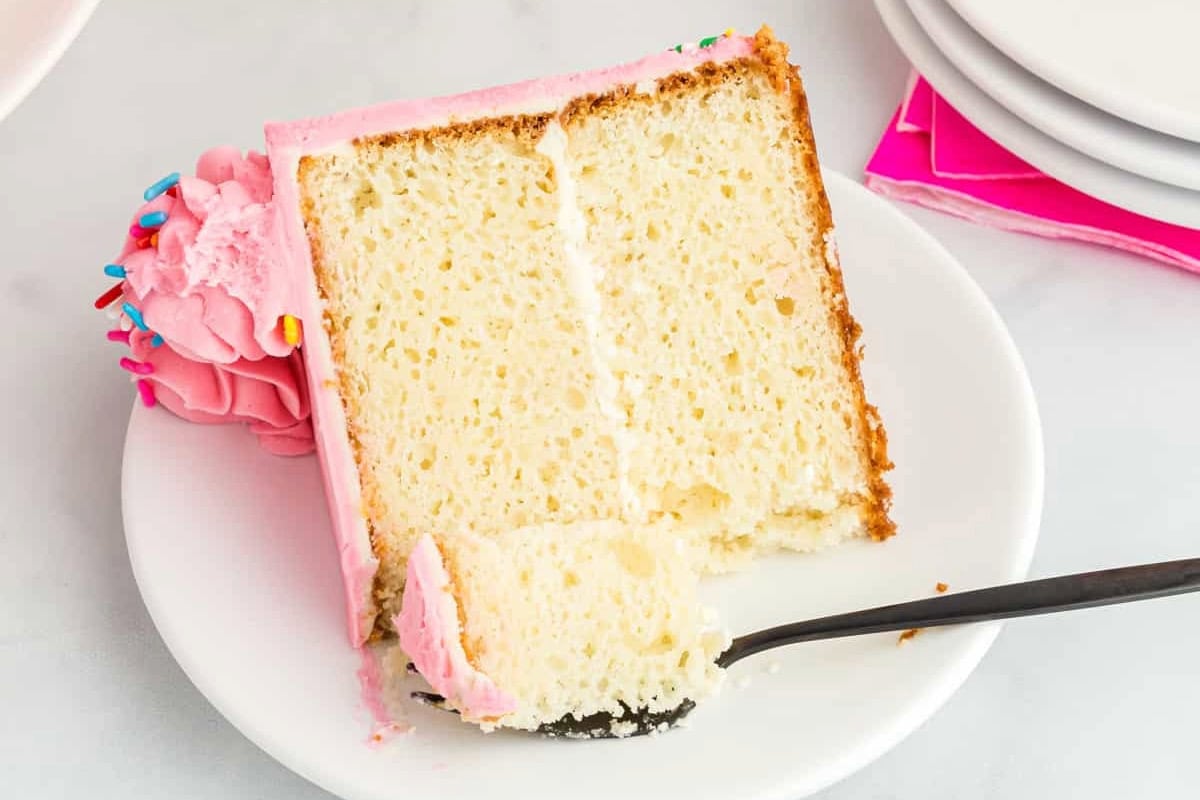
Stack the Cakes: Once the cakes have chilled, use a large serrated knife to cut the dome tops off both cakes so they both have a flat top. Place a thin layer of frosting (about 2 tablespoons) in the middle of a cake board or cake plate then place one cake (cut side facing up) on top of that frosting. This small amount of frosting helps to secure the cake to the cake plate so it doesn’t slide around during the decorating process. Add a generous layer of frosting on top of that first cake layer then place the second cake layer (bottom facing up) on top of the first cake layer.
Crumb-Coat the Cake: Frost a thin layer of frosting around the top and sides of the cake. To get the layers of frosting smooth, use a tool like a cake scraper to smooth the icing out. Place the lightly frosted cake in the freezer for 10 minutes so the frosting hardens up a bit before frosting the next layer.
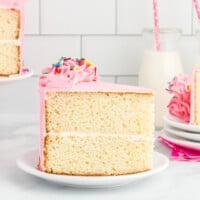
Decorate the Cake: Color the remaining frosting (using gel food coloring) if you want the final layer of icing to be colored. For this cake, I used Chefmaster Liqua-gel in the color Neon Pink. Remove the cake from the freezer and apply the second layer of frosting. Spread this layer as smoothly as you can using the cake scraper. Take about 1½-2 cups of frosting and place it in an icing bag with a Wilton 1M tip. Frost swirls around the top of the cake. Add rainbow sprinkles to the bottom edge of the cake and add sprinkles to the icing swirls on the top of the cake, if desired.
How to Store and Freeze
Store leftover doctored white cake mix cake in an airtight container or cake dome at room temperature for up to 2 days, in the refrigerator for up to 4 days, or in the freezer for up to 1 month. Let thaw overnight in the refrigerator before enjoying cold or at room temperature.
We’ve all been there. Just put your cold eggs in a bowl of warm water for 5-10 minutes and give your buttermilk a very quick 15-second zap in the microwave. You just want to take the chill off so the batter stays smooth!
Yes! You can make a “DIY” version by adding 1 tablespoon of lemon juice or white vinegar to a liquid measuring cup, then filling the rest up to the 1½ cup mark with regular milk. Let it sit for 5 minutes until it looks slightly curdled, and you’re good to go.
Not at all! Because we’ve added flour, sugar, and sour cream, this batter will be thick and luscious, almost like a soft pudding. Don’t try to thin it out with water; that thickness is exactly what gives the cake its spectacular, sturdy height.
Don’t worry! Because this is a heavy batter, the middle takes longer to set than a standard mix. If the edges are browning too fast, loosely tent a piece of foil over the pans and keep baking until that toothpick comes out clean. Every oven is different!
Totally normal! Most cakes rise more in the center. That’s why I have the snack tax. Once the cake is chilled, I just slice those domes off with a serrated knife so they stack perfectly. (And yes, you are legally required to eat the scraps!)


Leave a Reply