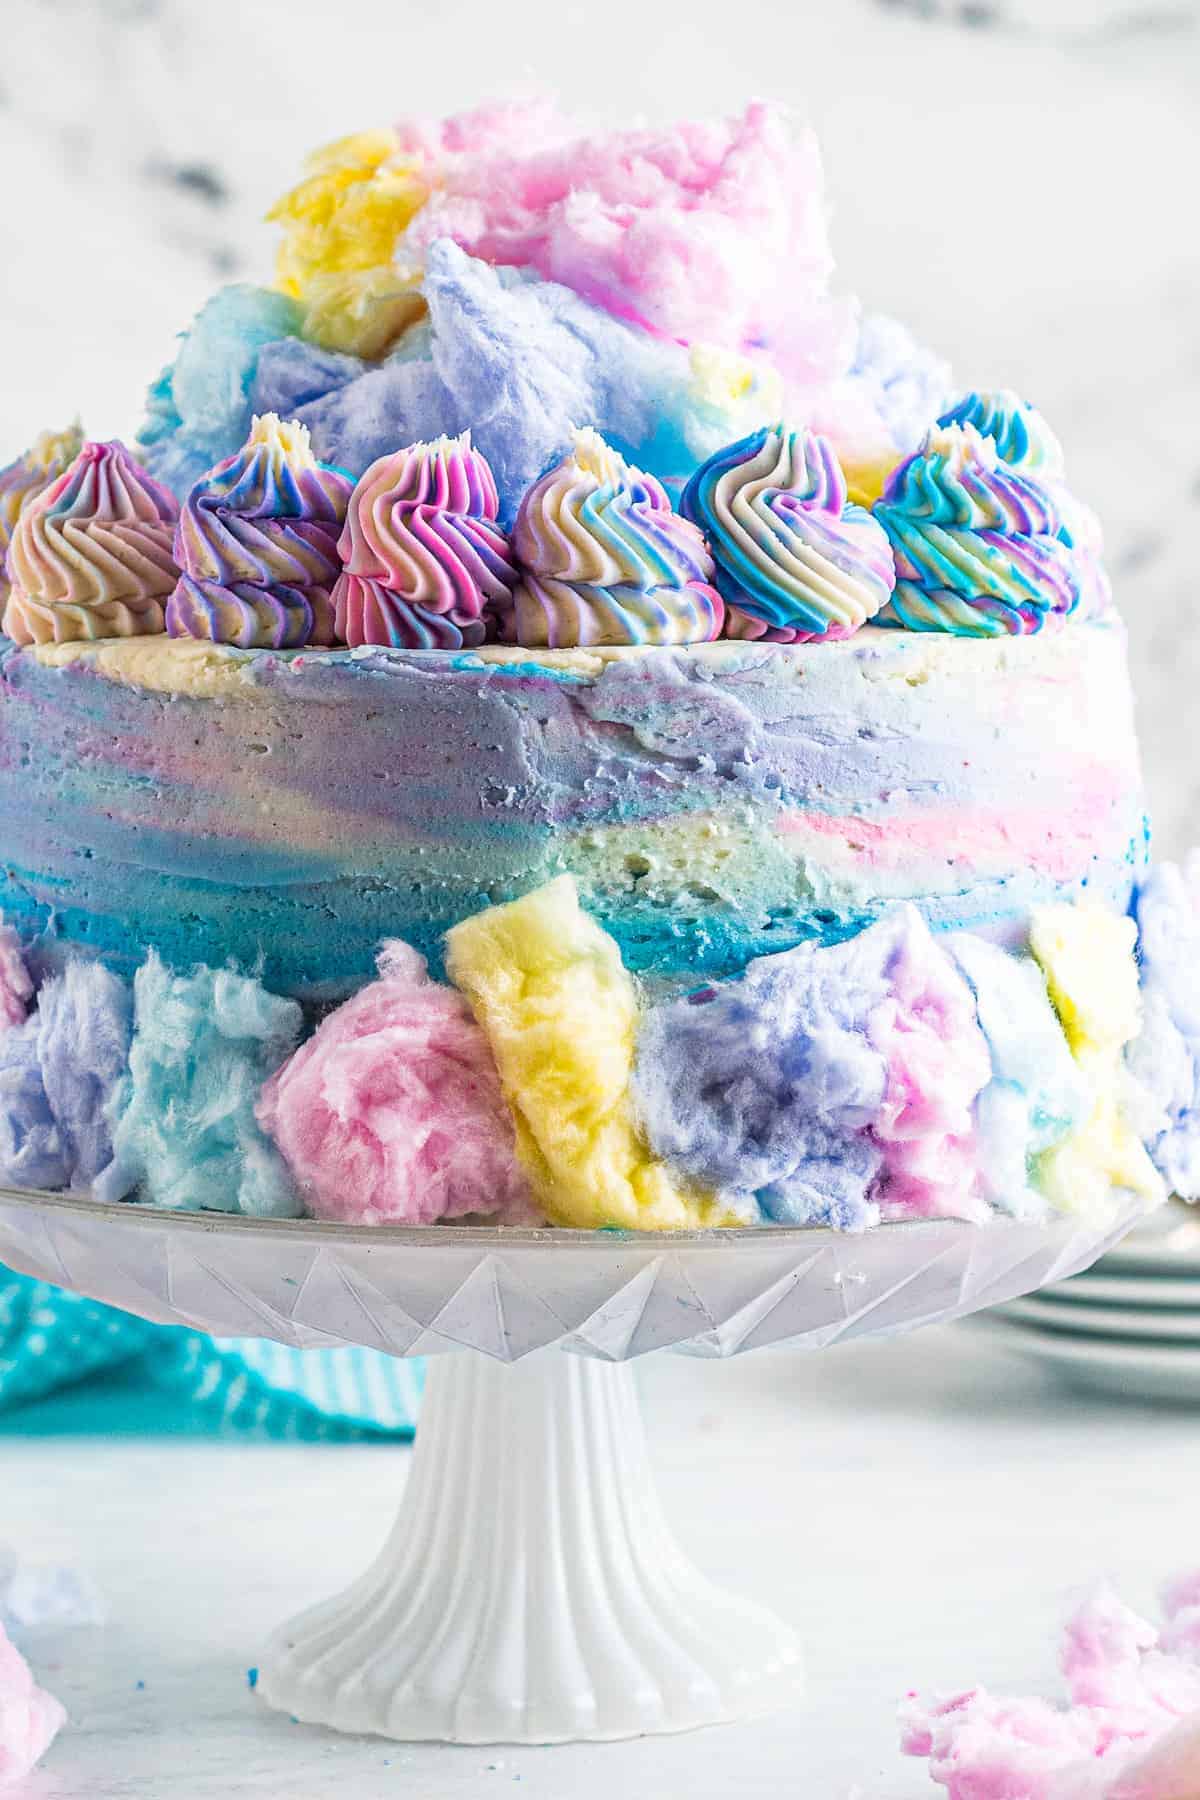
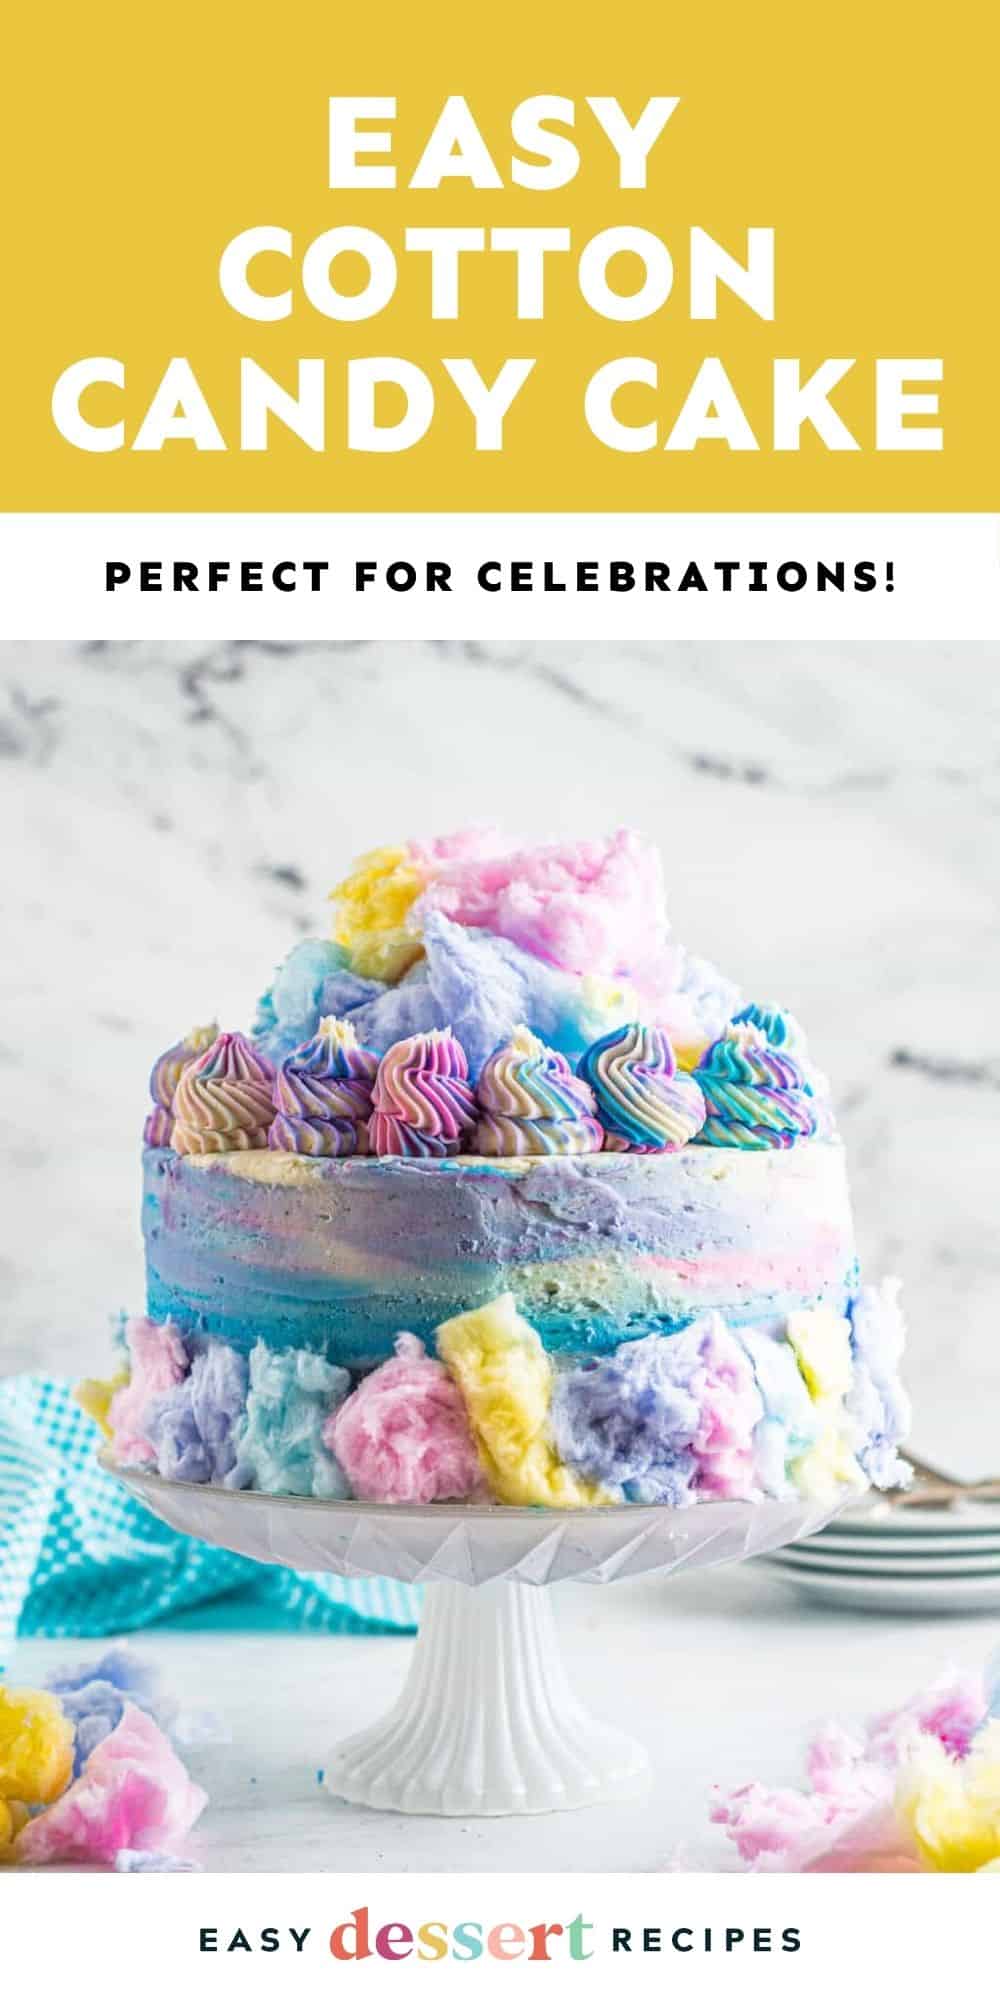
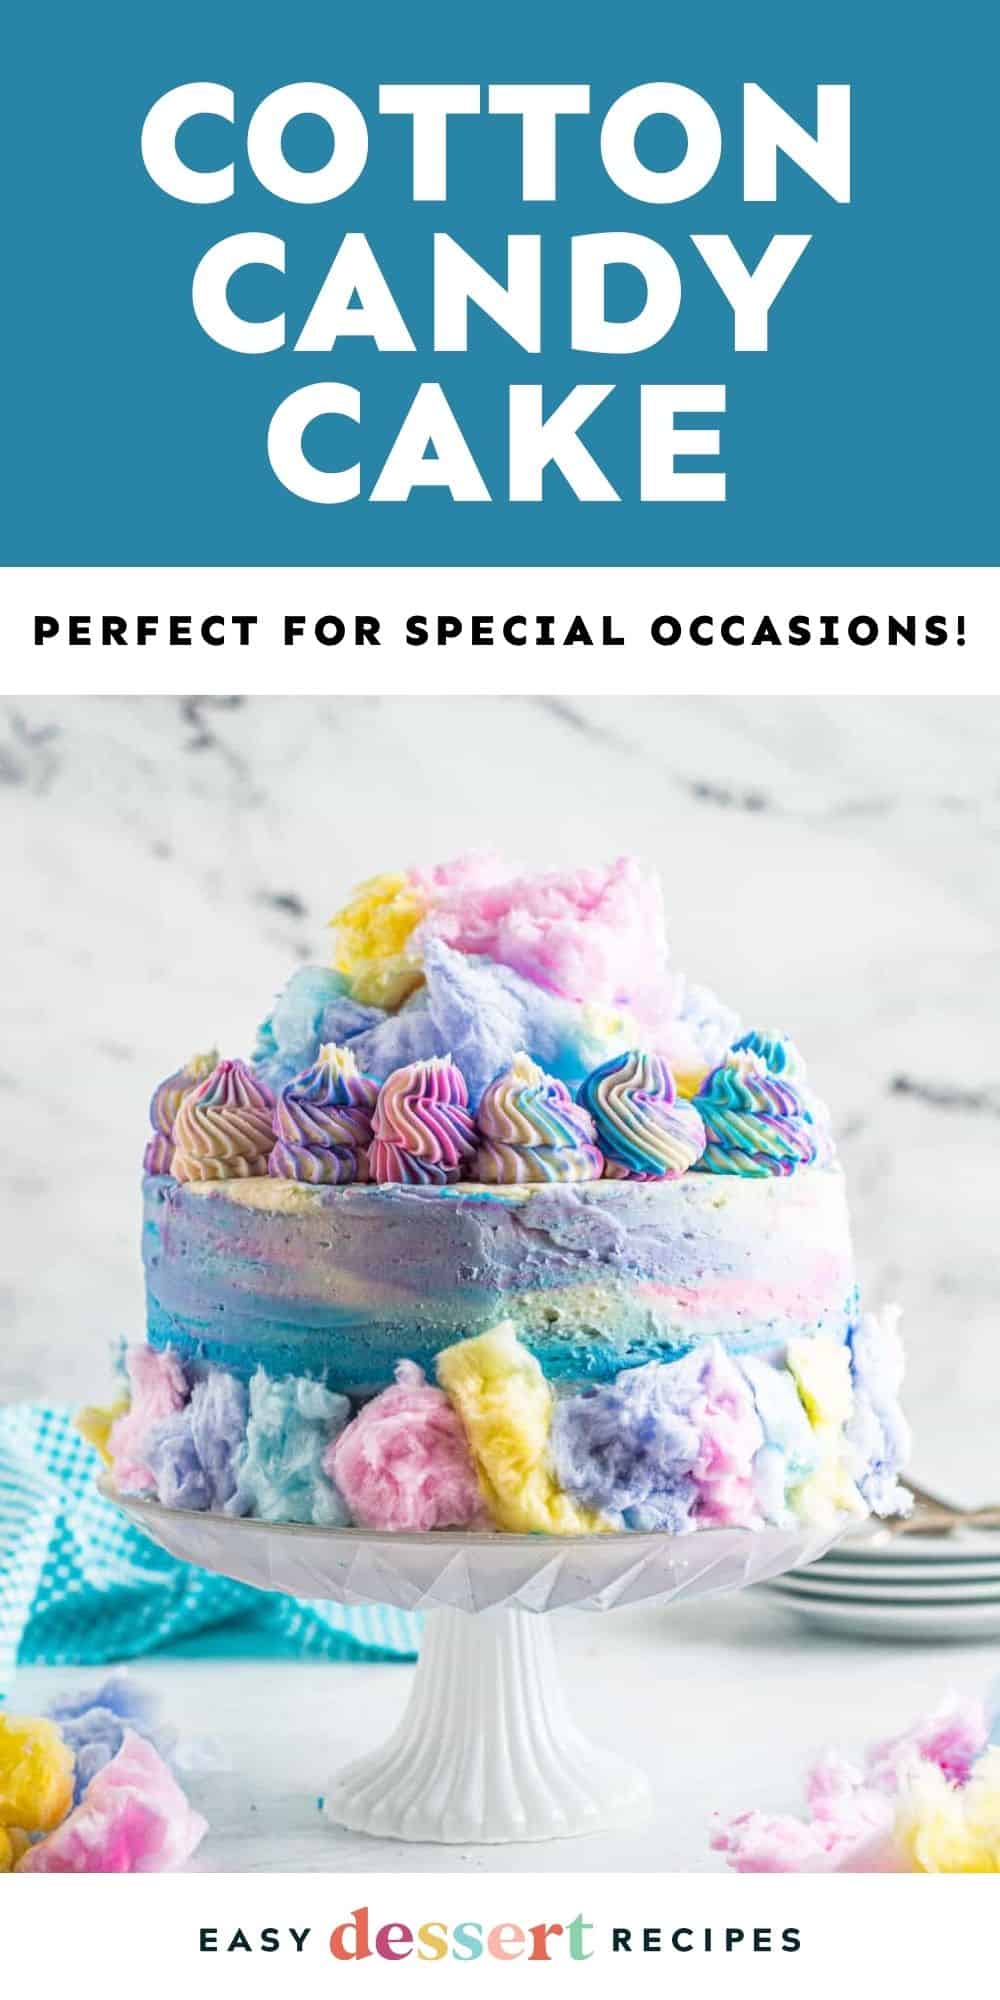
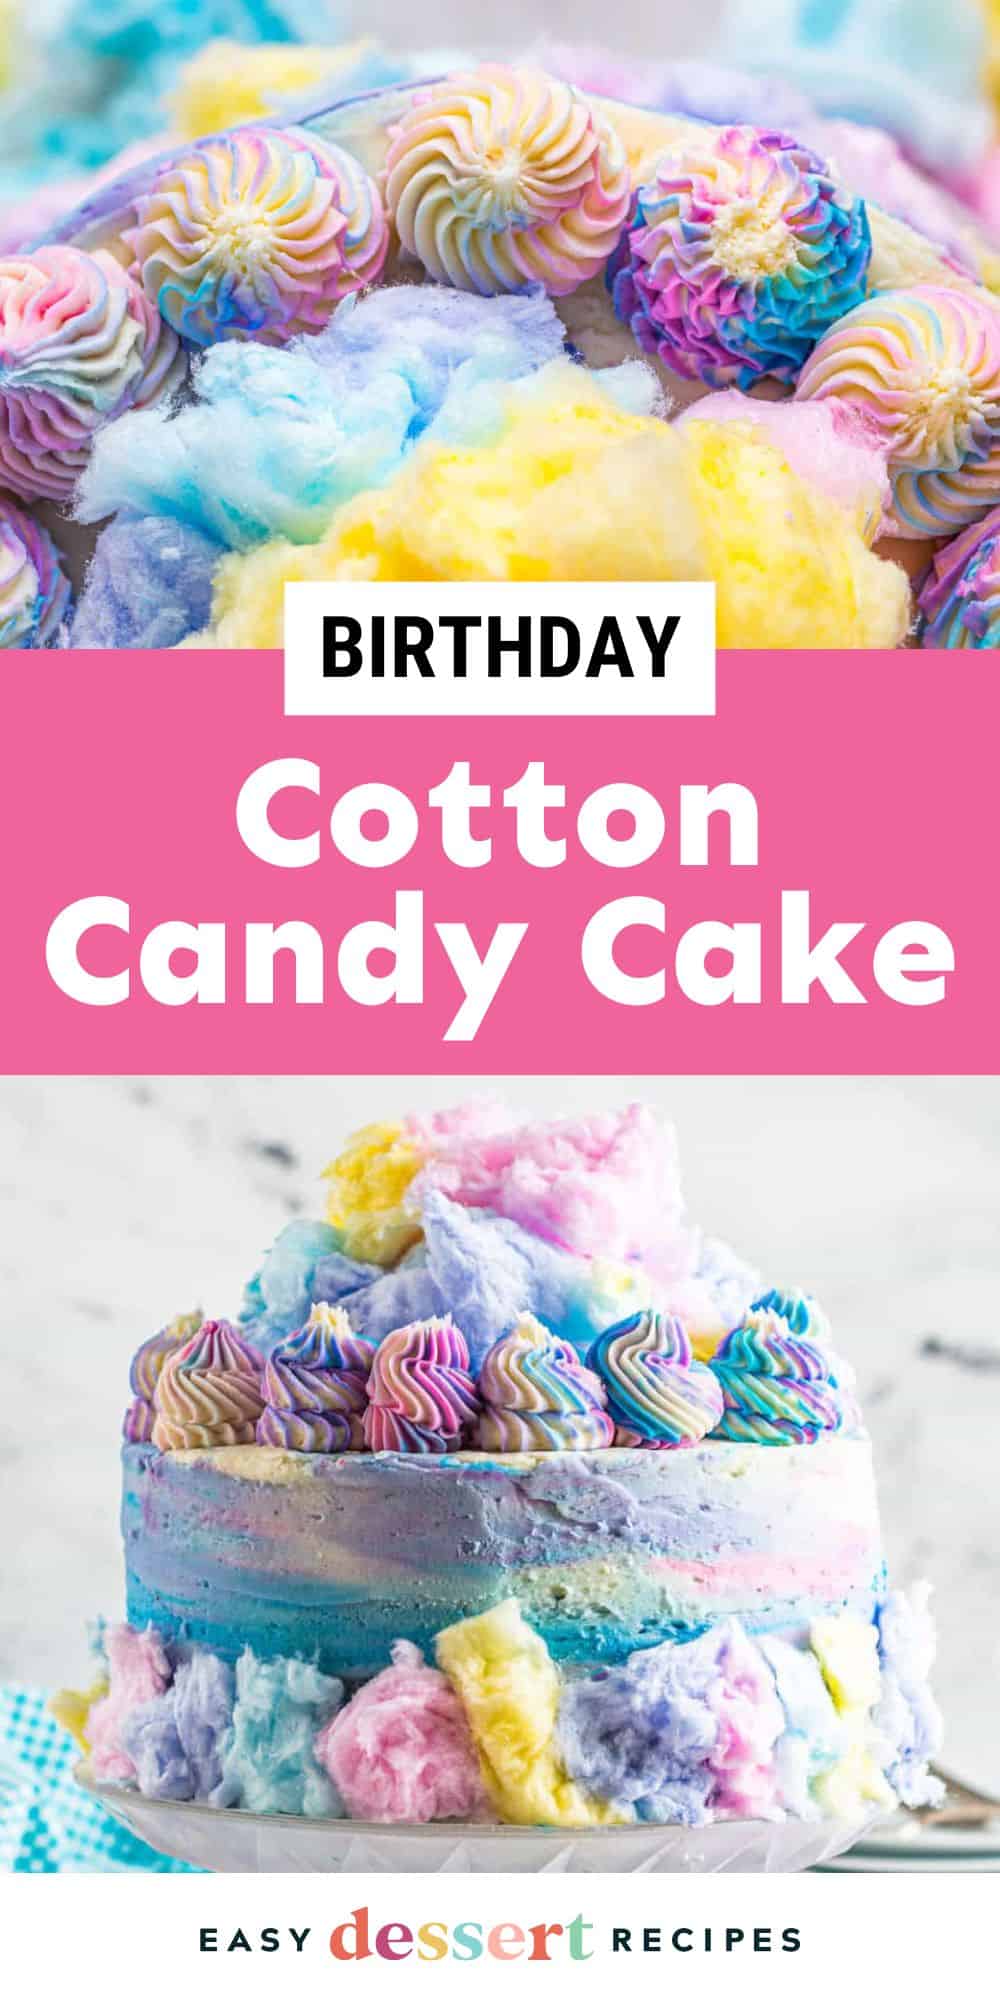
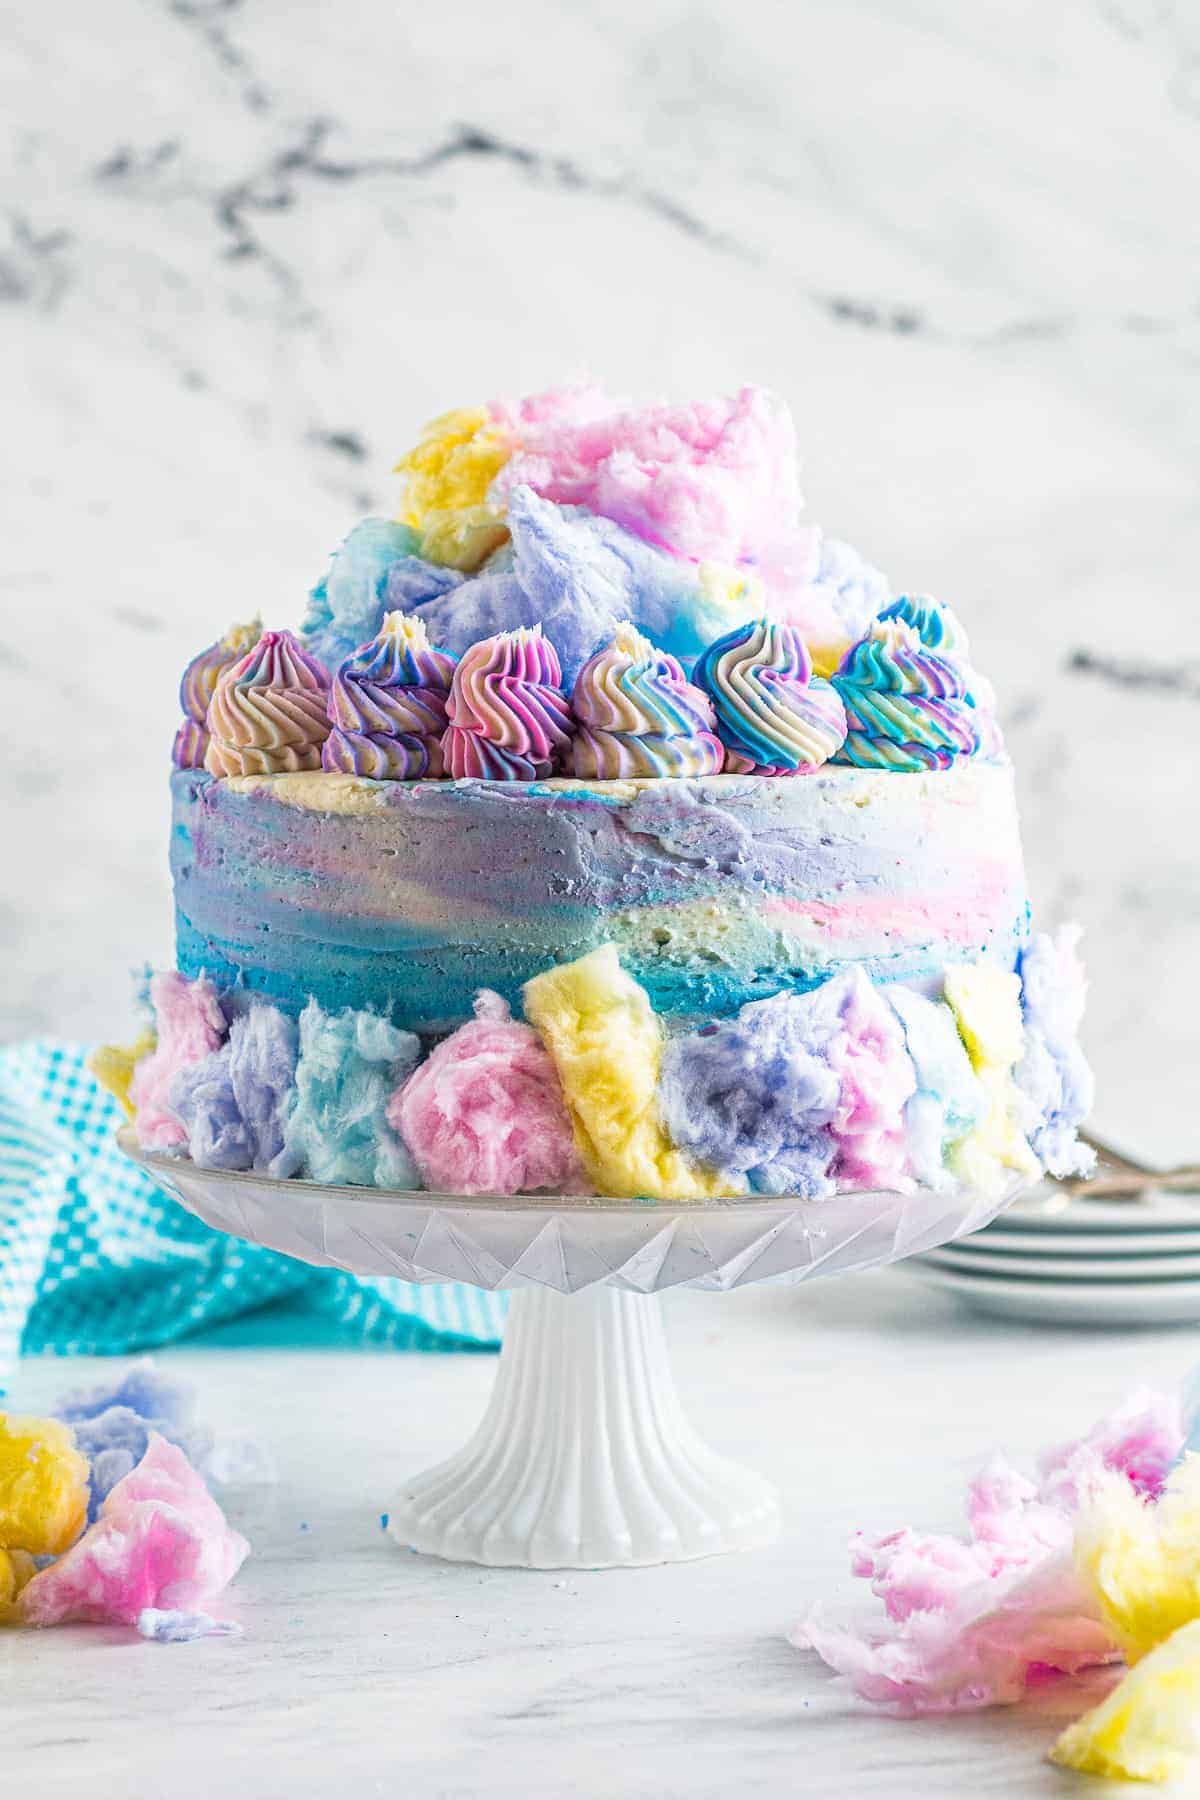
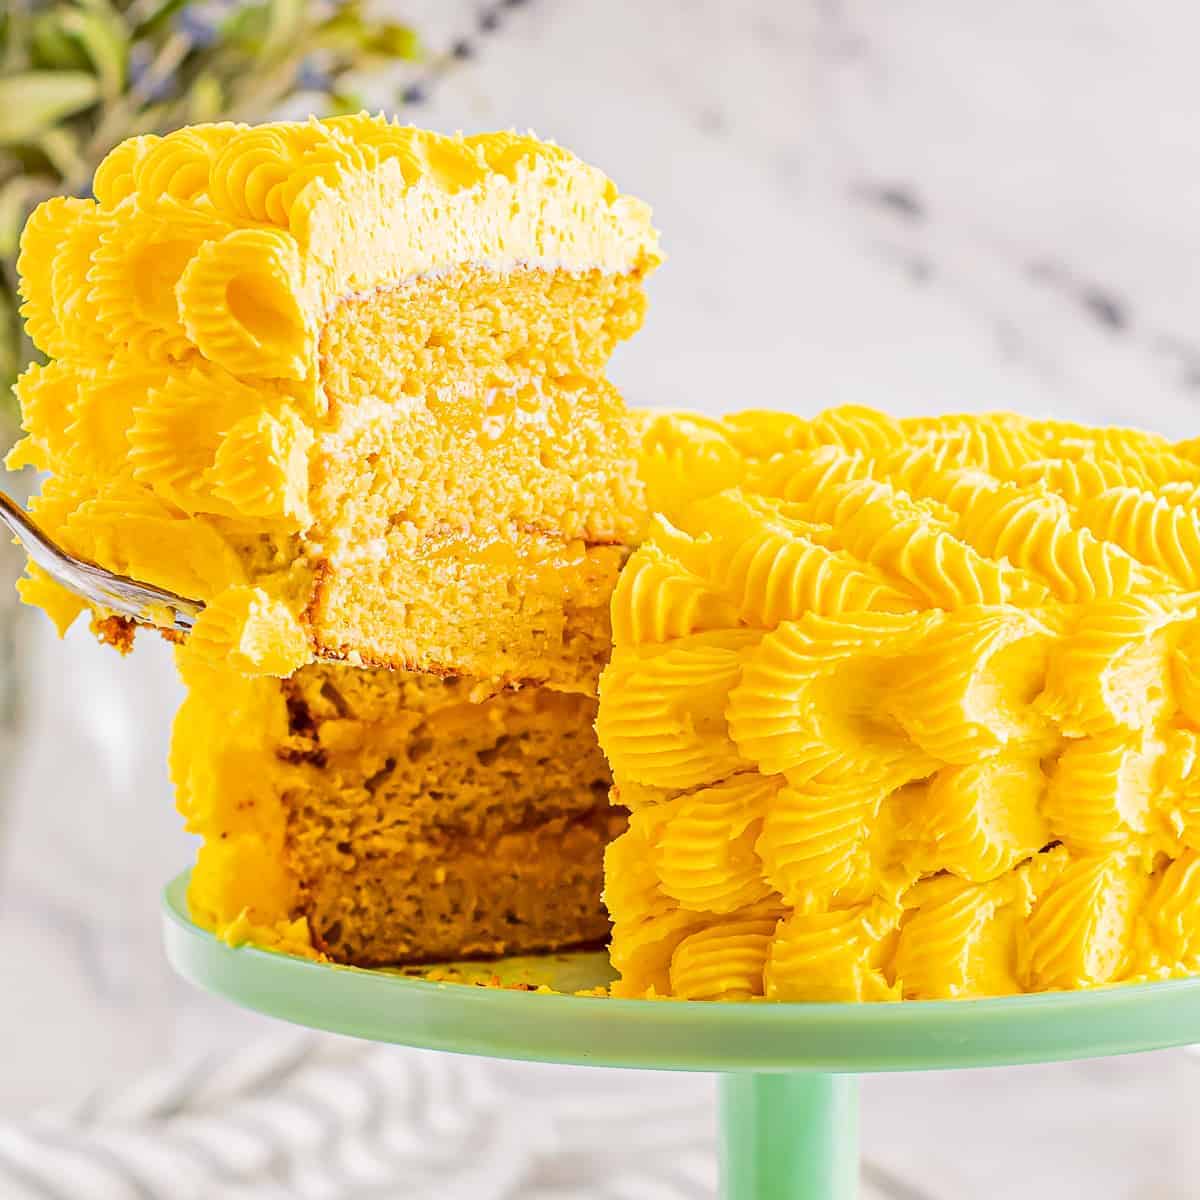
My cotton candy cake is way more fun than your average birthday cake! I stacked layers of sweet cotton candy-flavored cake with delicious swirled cotton candy buttercream frosting to create this beautiful technicolor, unicorn-inspired cake. While it may be pretty picturesque, fear not! This oh-so-sweet cake is very easy to decorate and make from scratch.
Top Reader Review
I can’t believe the comments here- I followed the exact directions and my cake came out perfectly! I used gel food coloring.
–
Cotton Candy Birthday Cake
This colorful cotton candy cake feels as magical as childhood! That nostalgic cotton candy flavor permeates every aspect of the cake, and the colors are super fun and festive too. This cake is great for whimsical birthdays or baby showers.
Trust me, this bright and colorful layered cake is well worth the effort of decorating when you want to make a splash. I use blue and pink food coloring to get a swirled look, plus cotton candy flavoring for that perfectly sweet taste. I also like to finish off the cake with real puffs of cotton candy. It’s such a showstopper dessert, and it will make anyone feel extra special on their special day!

Email this Recipe
Enter your email and we’ll send the recipe directly to you!
By submitting this form, you consent to receive emails from Easy Dessert Recipes.
Check below the recipe card for instructions on how to make this cake with a boxed mix, plus some fixes for common mistakes.
Cotton Candy Cake Recipe
Equipment
- Kitchen Scale (optional)
- 3 8-inch Round Cake Pan
- Stand Mixer
- Piping Tip Set (optional)
Ingredients
For the Cake
- 4 cups cake flour
- 1 tablespoon baking powder
- 1¼ teaspoons kosher salt
- 1 teaspoon baking soda
- 1 cup unsalted butter room temperature (2 sticks)
- 3 cups granulated sugar
- 5 large eggs room temperature
- 1¾ cups milk room temperature*
- 1½ teaspoons cotton candy flavoring (2 drams LorAnn)**
- Blue and pink food coloring optional***
For the Buttercream
- 2 cups unsalted butter room temperature (4 sticks)
- 7 cups powdered sugar
- ⅛ teaspoon kosher salt
- ¾ teaspoon cotton candy flavoring (1 dram LorAnn)
- Pink and blue food coloring optional
Instructions
Bake the Cakes:
- Preheat oven to 350°F. Line 3 8-inch cake pans with parchment paper and spray them with nonstick spray. Set aside.
- In a large mixing bowl, combine the flour, baking powder, salt, and baking soda. Set aside.4 cups cake flour, 1 tablespoon baking powder, 1¼ teaspoons kosher salt, 1 teaspoon baking soda

- In the bowl of a stand mixer fitted with a paddle or whisk attachment, beat the butter and sugar together on medium-high for about 1 minute.1 cup unsalted butter, 3 cups granulated sugar
- Add in the eggs, milk, and cotton candy flavoring. Beat on high for another 1 minute.5 large eggs, 1¾ cups milk, 1½ teaspoons cotton candy flavoring
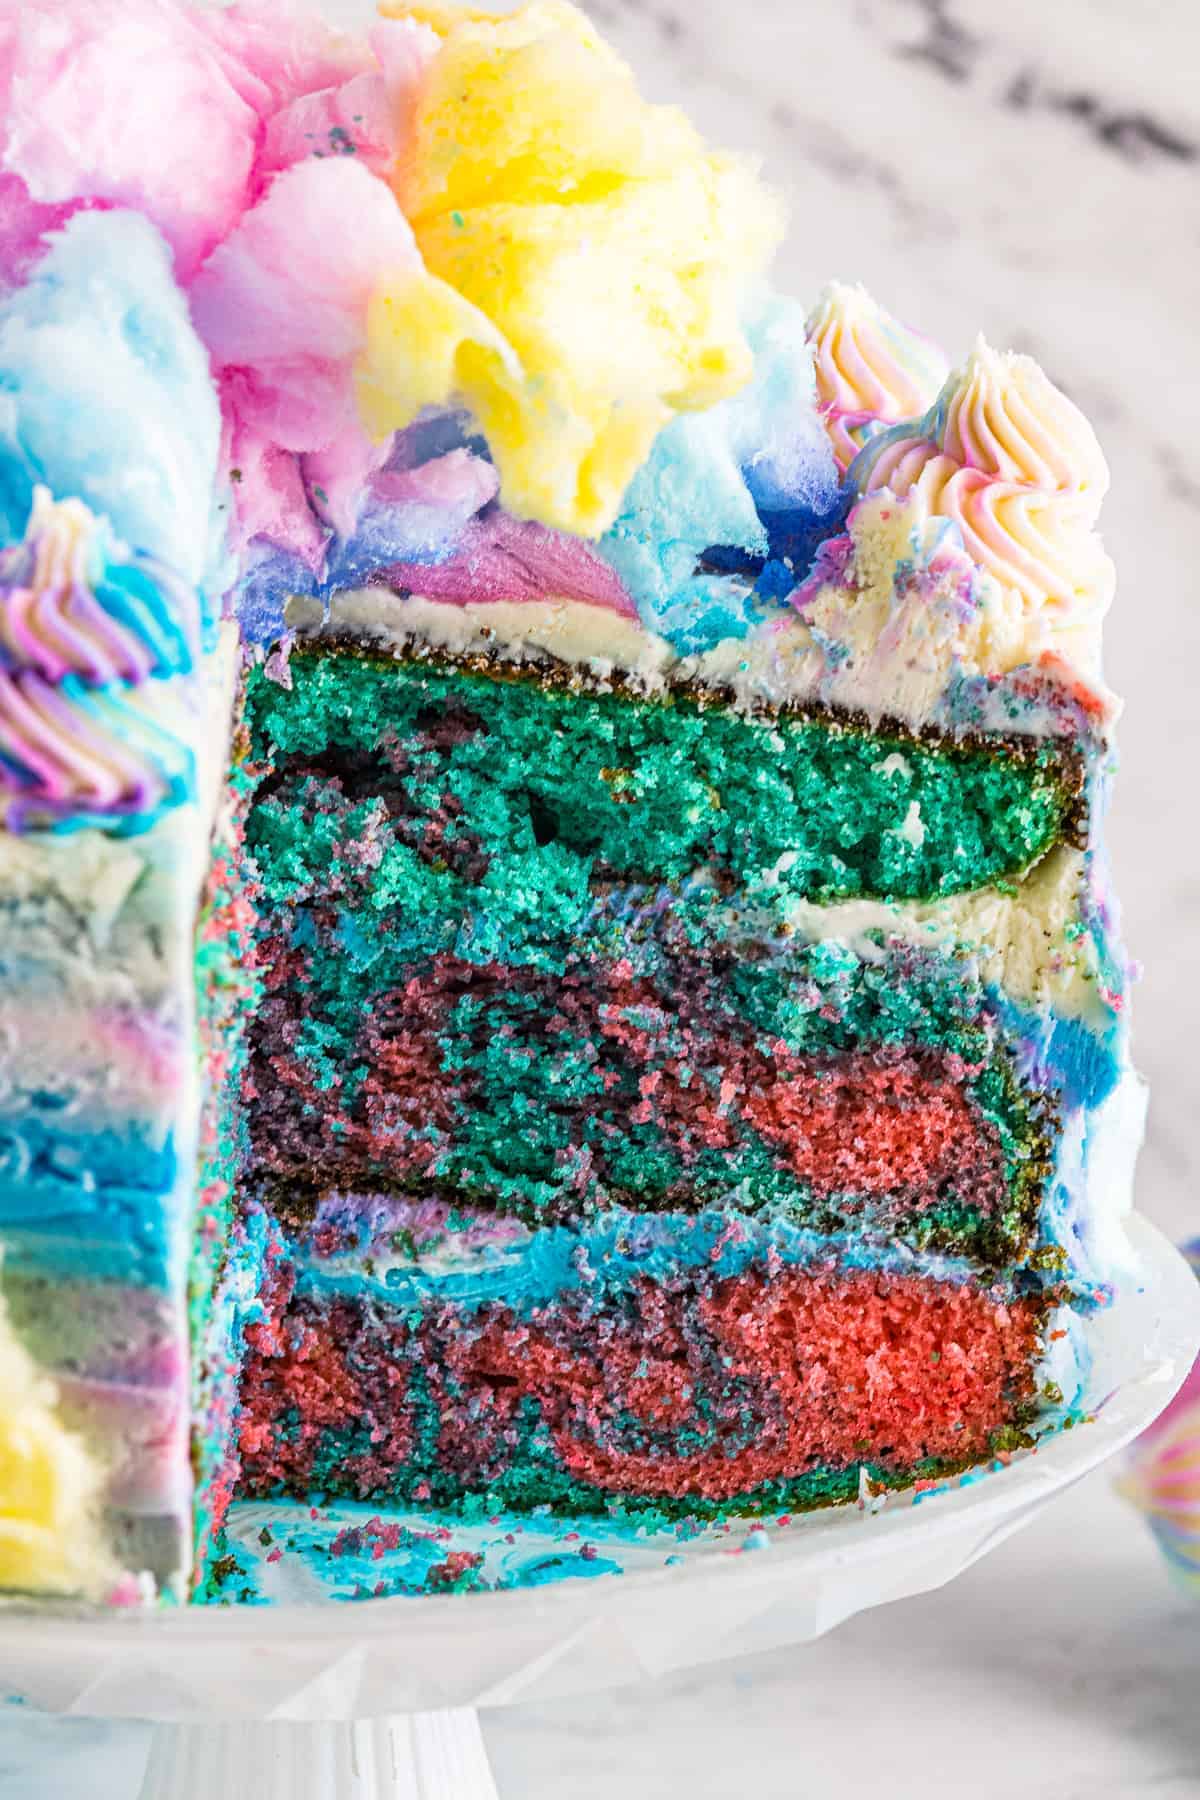
- Add in the flour mixture and stir just until the flour has been incorporated. Divide evenly into 2 smaller bowls and color with blue and pink food coloring if desired.Blue and pink food coloring
- Alternately spoon blue and pink batter into the cake pans and gently swirl them together. Don’t swirl too much or the batter will turn purple and bake into a brown color. Place into the oven to bake for 20-23 minutes, or until a toothpick inserted comes out clean, or with moist crumbs. Once baked, remove from the oven, place onto a cooling rack, and let cool to room temperature.


Make the Buttercream:
- While the cakes are cooling, make the buttercream. In the bowl of a stand mixer fitted with the paddle attachment, beat the butter, powdered sugar, salt, and cotton candy flavoring together. Beat first on low for about 2 minutes, or until the powdered sugar is almost completely incorporated, to avoid it from flying out of the bowl. Increase speed to high and let it whip for 4 minutes to create a smooth buttercream.2 cups unsalted butter, 7 cups powdered sugar, ⅛ teaspoon kosher salt, ¾ teaspoon cotton candy flavoring
- Separate the frosting evenly into 3 bowls. Color 1 bowl pink, 1 bowl blue, and leave the last bowl uncolored.Pink and blue food coloring


Decorate the Cake:
- Once the cakes are cooled, place 1 layer onto a cake stand or plate. Top with about ¼ cup of buttercream and spread to the edges.
- Place a second layer of cake on top and frost. Place the last layer of cake on top.
- Frost the top and sides of the cake with buttercream. Alternate between white, blue, and pink frosting for a cotton candy, rainbow effect.
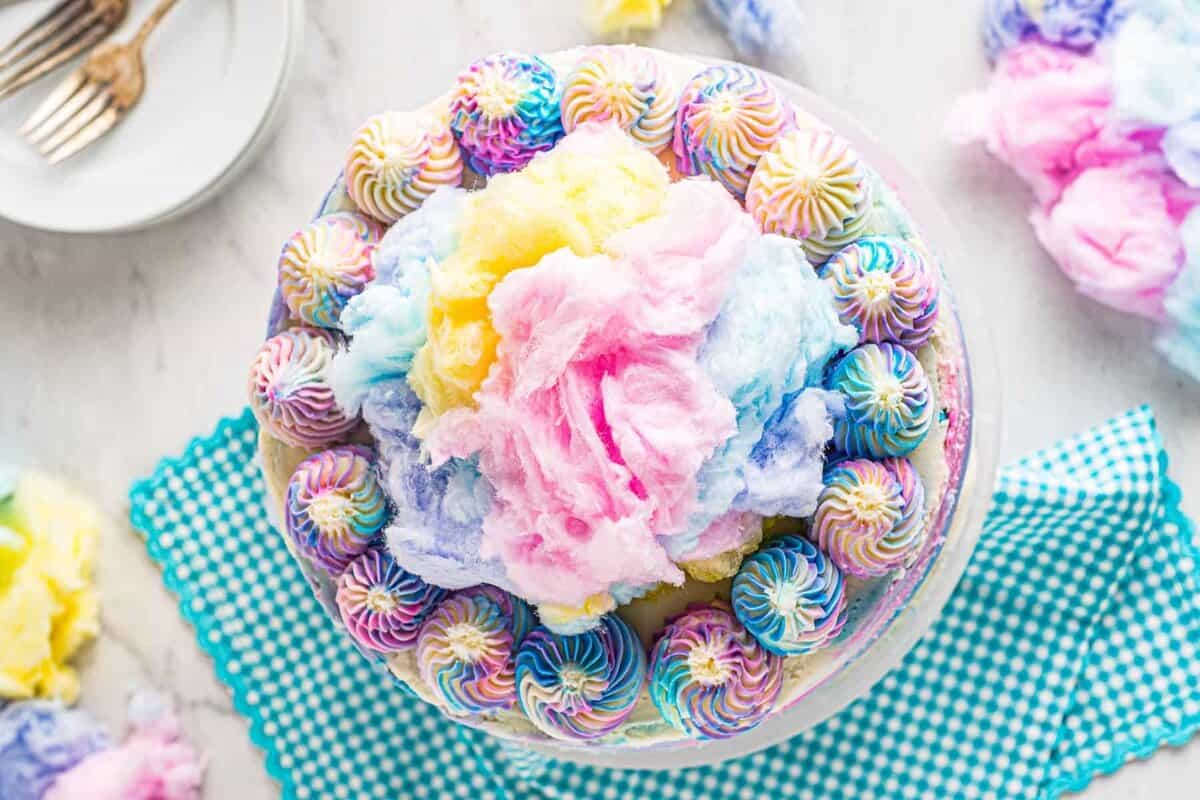
- For neat multi-colored frosting swirls, alternately spread some pink and blue buttercream onto the sides of a piping bag fitted with your choice of tip. Once you are happy with the mix of colors, fill the remainder of the bag with white buttercream. Pipe in a clock formating, piping 1 swirl each at 12:00, 6:00, 3:00, and 9:00. Continue in that fashion around the perimeter of the cake.
- If desired, top with clouds or pieces of cotton candy.
- Once the cake is frosted, slice and serve!
Notes
- If you want to make this recipe with cake mix, swap the cake ingredients for 2 boxes of white or yellow cake mix (check below for further instructions).
- Make sure the cake is fully cooled before frosting, or the frosting will melt off.
- I like to bake the cakes a day ahead of time, then assemble and decorate it the next day.
- Be sure to use active baking powder–check the expiration date!
- Measure dry ingredients using the spoon-and-level-method; or use a kitchen scale.
- Make sure your dairy ingredients are room temperature. Adding them cold straight from the fridge can lead to a lumpy batter and improper mixing.
- If you plan to top your cake with cotton candy, wait until just before serving. The moisture from the buttercream will start to melt the cotton candy pretty quickly.
How to Fix Common Mistakes
- A Flat Cake: This could be due to the leavening agent–I used both baking powder and baking soda to achieve a fluffy result. Be sure to add both in the amounts listed, and be sure they aren’t expired. The other potential cause is under-baking. If the center isn’t fully baked through, it will collapse as it cools.
- A Dry Cake: Over-mixing the batter is the most common reason for a dry or dense cake. Mix ingredients just until combined. Get rid of big dry clumps, but don’t go overboard.
- Buttercream Consistency: If your buttercream frosting is too thin, chill it for 10-20 minutes, then whip again. If it is still too thin, add powdered sugar, 1 tablespoon at a time, until it reaches the desired consistency. If your buttercream is too thick, add milk, 1 tablespoon at a time, until it reaches the desired consistency.
How to Make Cotton Candy Cake with Cake Mix
I made this cotton candy cake recipe from scratch to get the perfect fluffy texture (using cake flour) and vibrant colors. To make it easier, swap the listed cake ingredients for 2 boxes of white or yellow cake mix (enough to fill 3 8-inch cake pans).
- Prepare the cake batter according to package instructions.
- Mix in 1½ teaspoons of cotton candy flavoring, as instructed above.
- Divide the batter into 2 bowls, and dye each with blue and pink food coloring. Then swirl the batter into the cake pans, as instructed above.
- Bake the cake layers according to package instructions; or about 20-23 minutes. Then let them cool before frosting and decorating as instructed in the recipe card.
How to Store
Store decorated cotton candy cake in a cloche or cake container; or store slices in airtight containers. Keep at room temperature for up to 2 days, or in the refrigerator for up to 4 days.


Leave a Reply