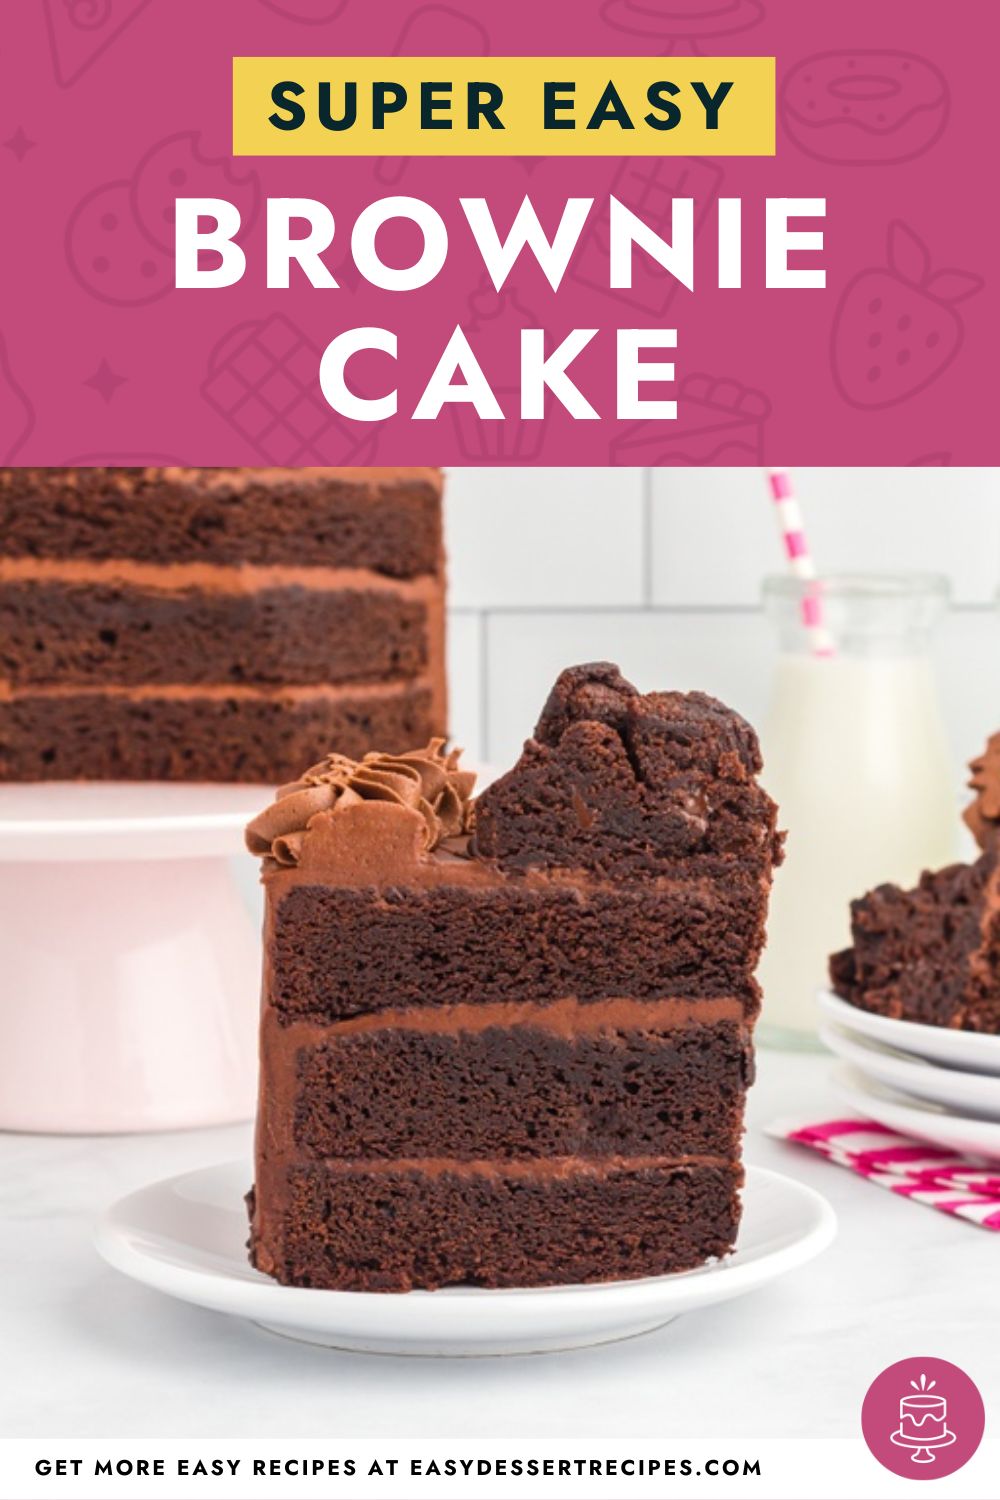

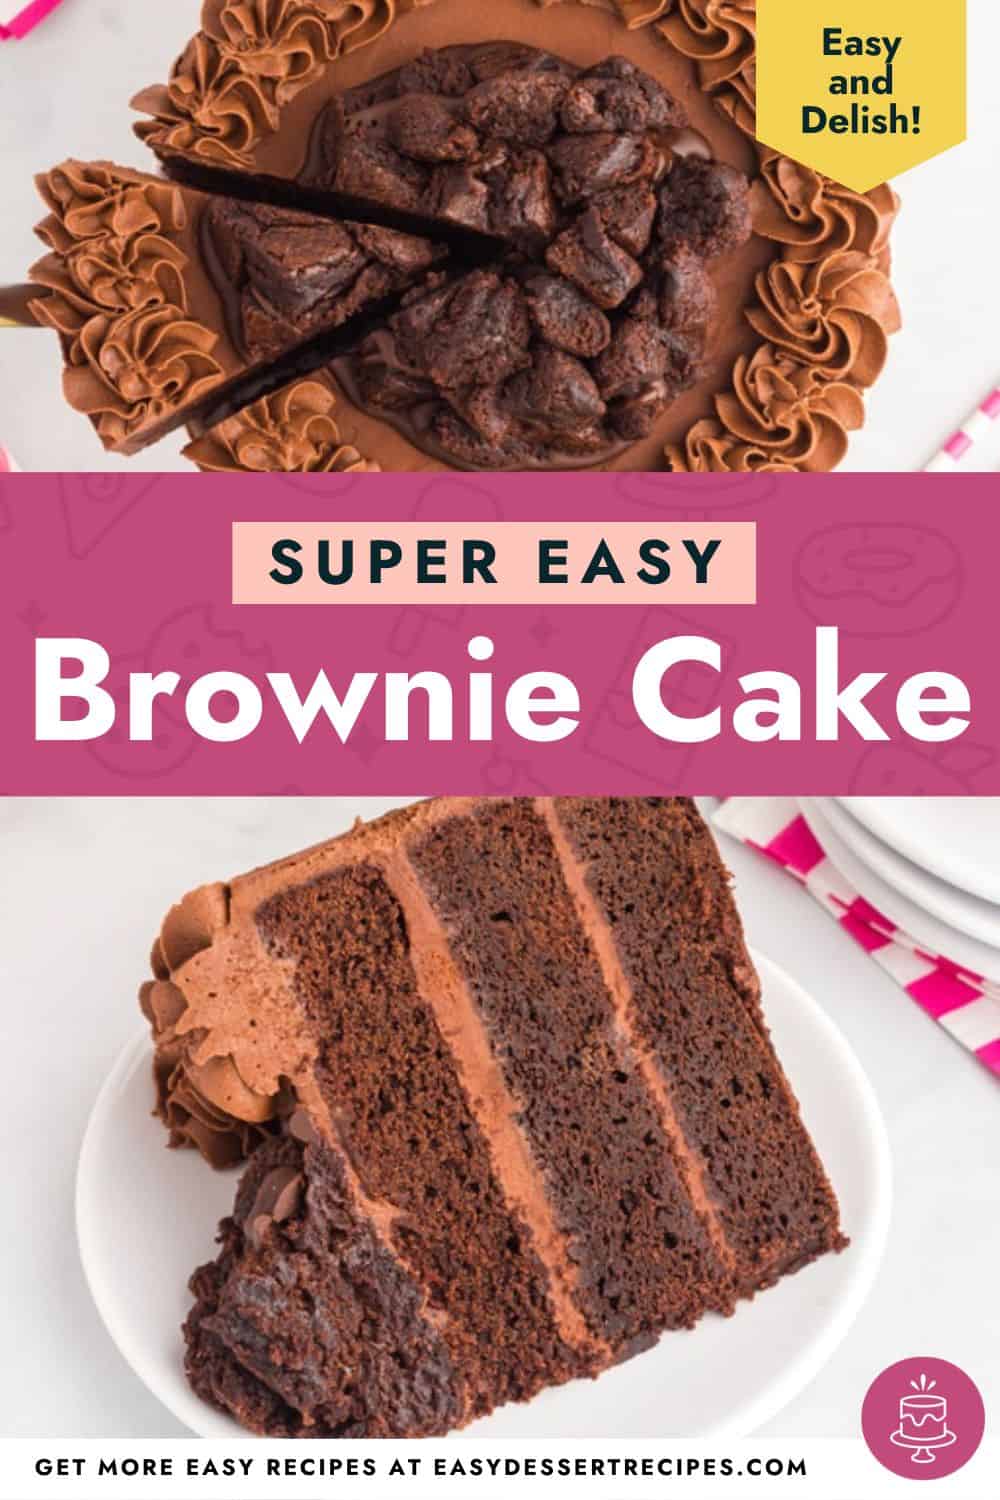
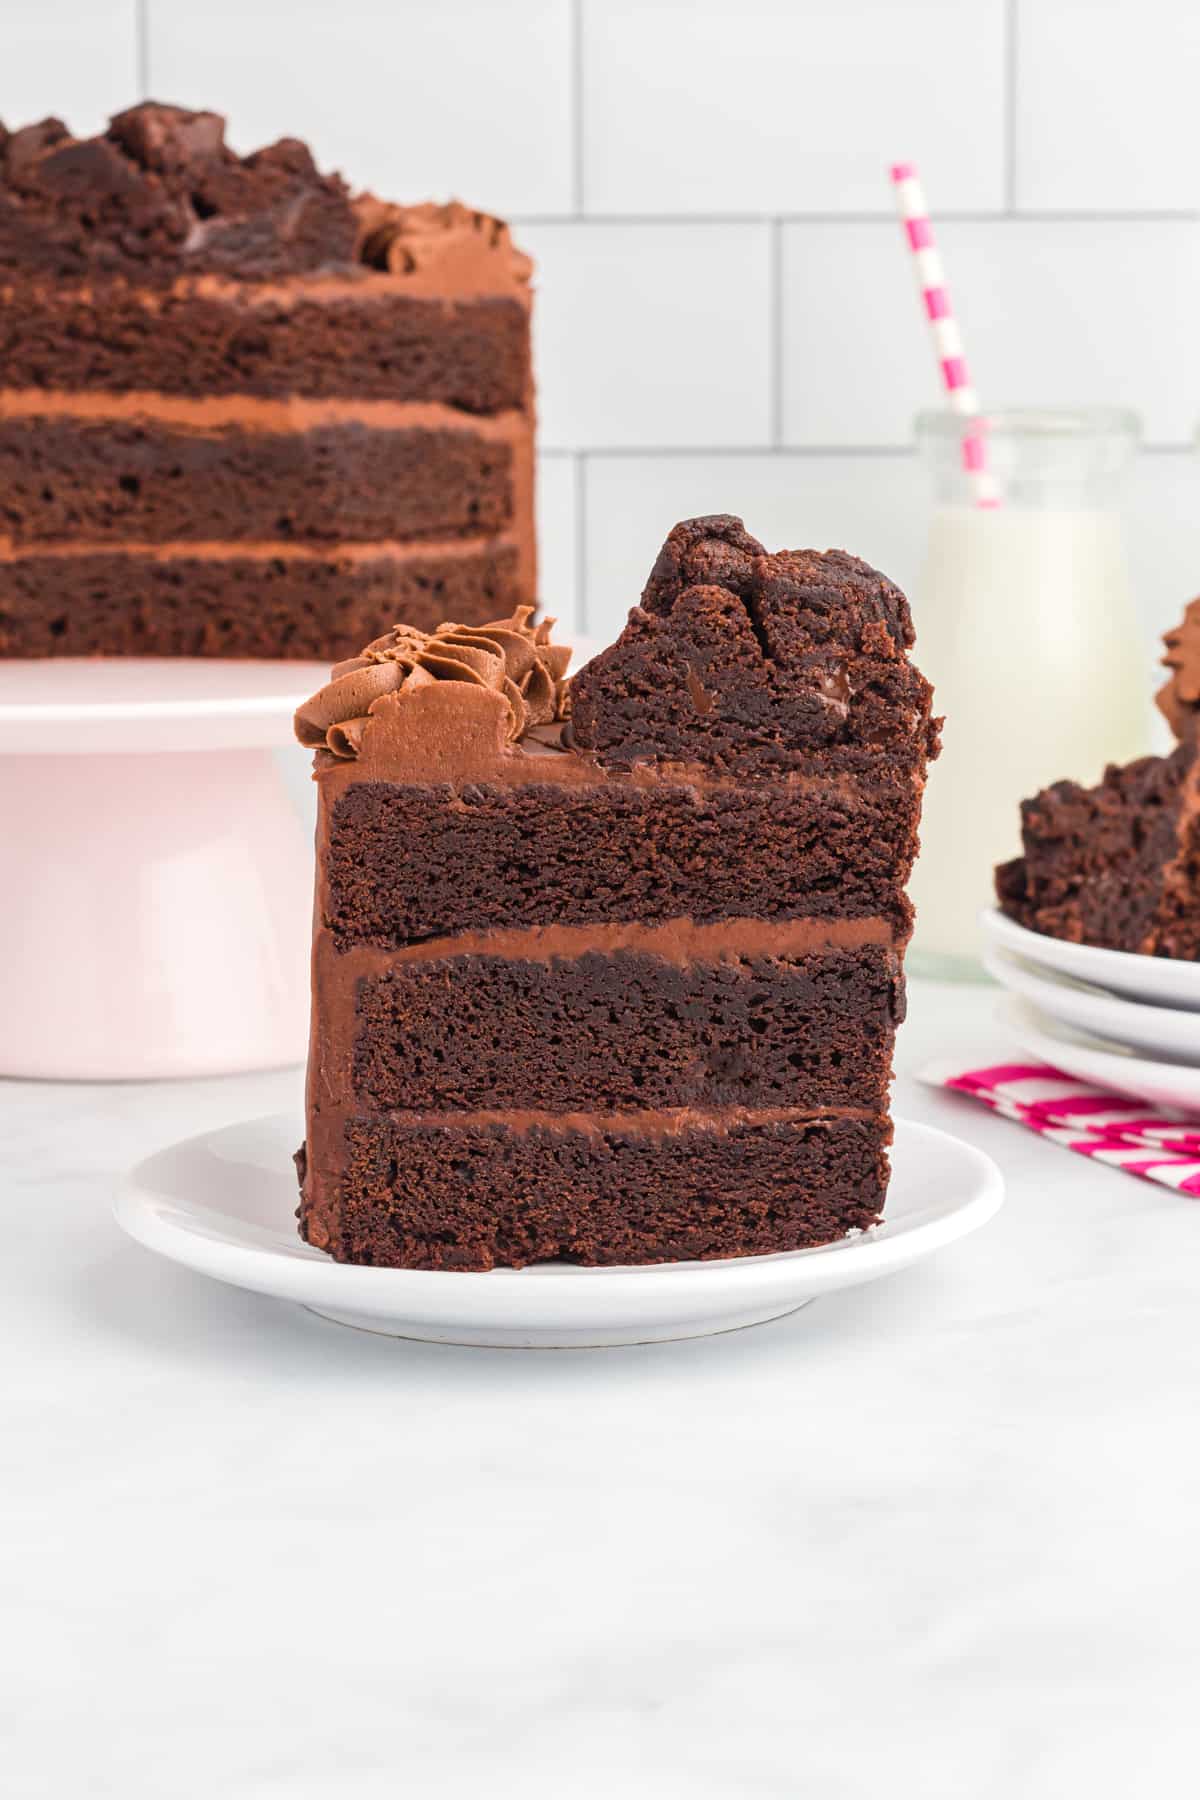
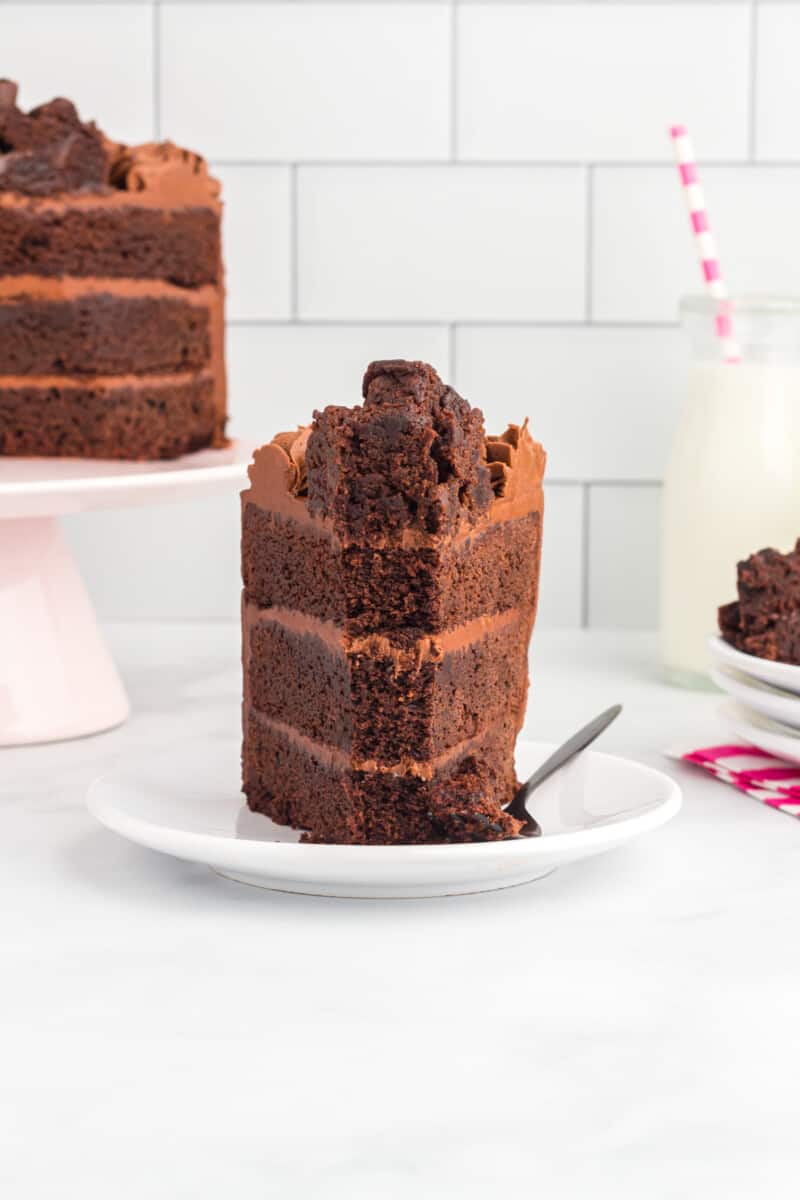
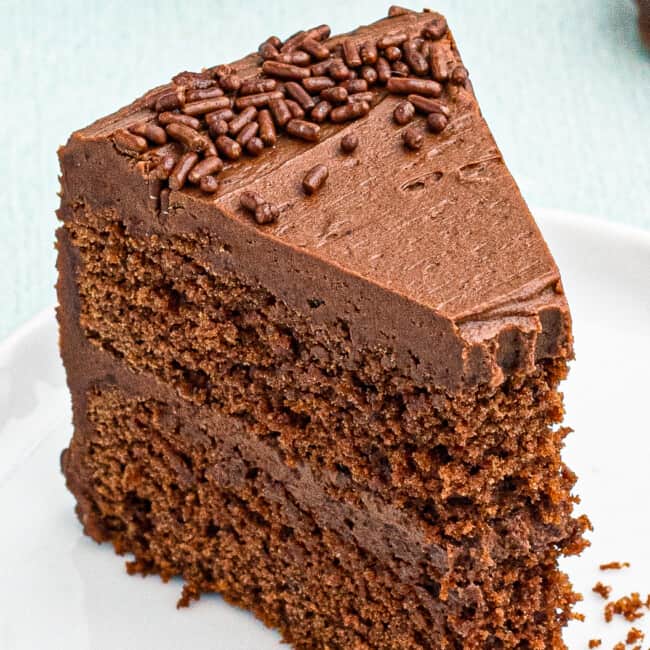
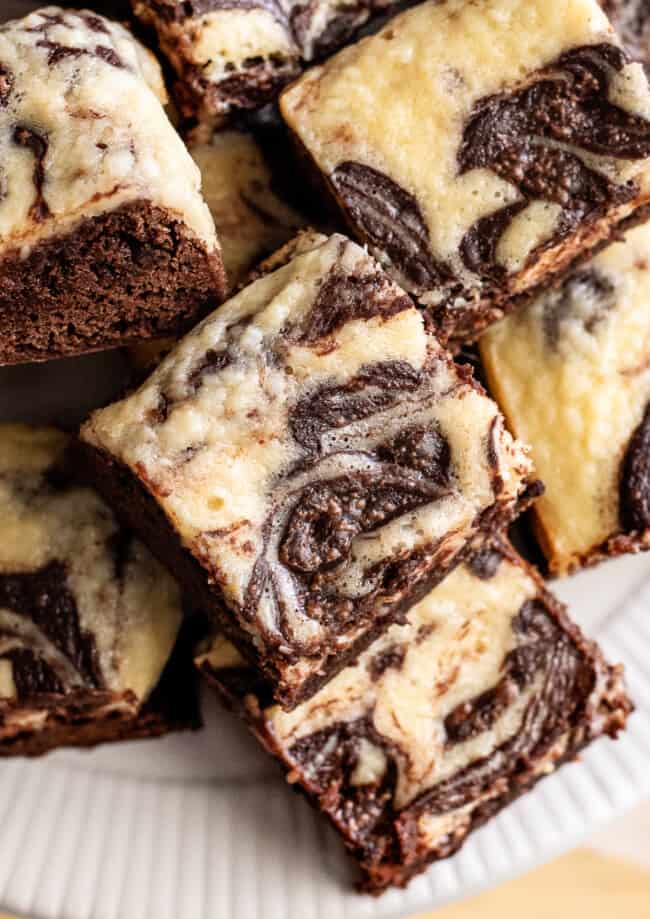
This decadent chocolate brownie cake combines two favorite desserts for the ultimate sweet treat. Its rich chocolate flavor and glorious fudgy texture will have all who try it completely hooked!
Chocolate Brownie Cake
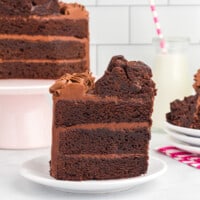
Looking for the ultimate brownie cake? This fudgey chocolate cake recipe is your secret weapon! It’s easy to make and tastes absolutely divine.
This decadent dessert is a chocolate lover’s dream, but it will easily satisfy any crowd. This fabulously fluffy cake is great for any occasion, from birthday parties to holiday celebrations!
Why You’ll Love this Brownie Cake Recipe:
- Super Chocolatey: We used cocoa powder and baker’s chocolate to get a deliciously rich chocolate cake. Decorate with brownies and sprinkles for even more chocolatey goodness!
- Easy to Love: Everyone loves brownies and cake. Put the two together, and you’ve got yourself the ultimate crowd favorite!

Email This Recipe
Enter your email and we’ll send the recipe directly to you!
How to Make Brownie Cake
Be sure to see the recipe card below for full ingredients & instructions!
- Combine ingredients according to the recipe instructions to make the cake batter, then pour into three round cake pans.
- Bake the cakes, let them cool, then wrap each layer in plastic wrap and chill them in the fridge.
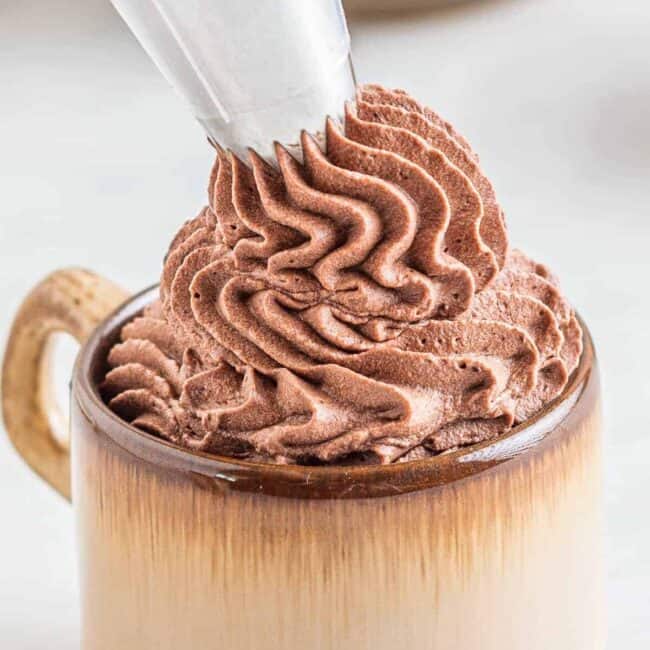
- Combine ingredients to make the frosting.
- Shave rounded tops from each cake layer (so they lay flat). Then frost and assemble the cake layers.
- Frost the full cake lightly, chill in the freezer, then add another layer of frosting.
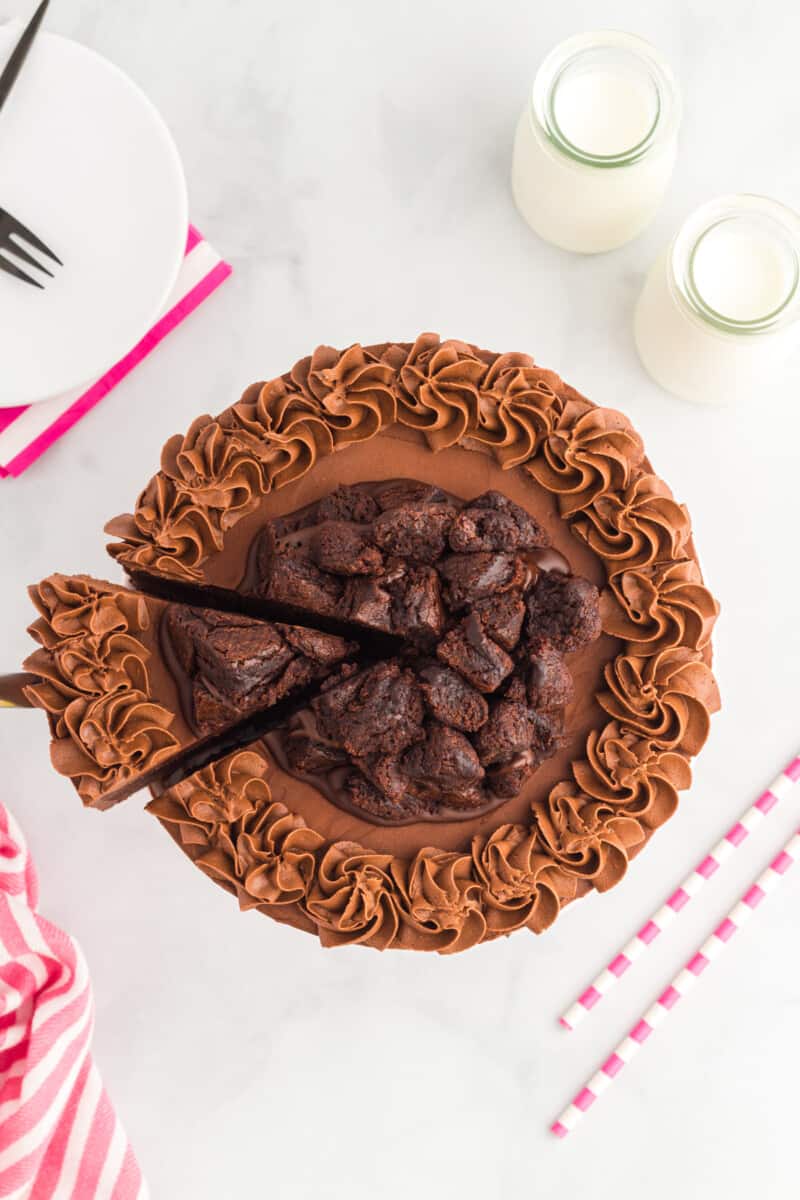
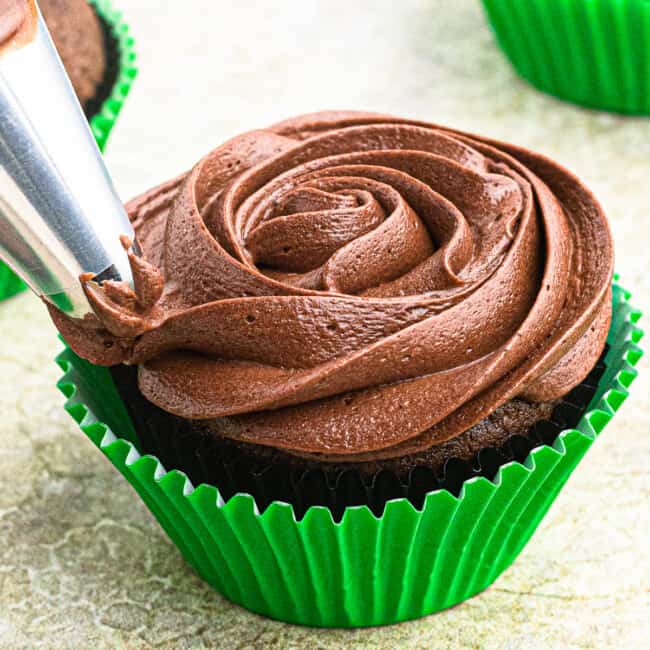
- Lastly, you can decorate as you like: add brownie bites on top, sprinkles, and more.

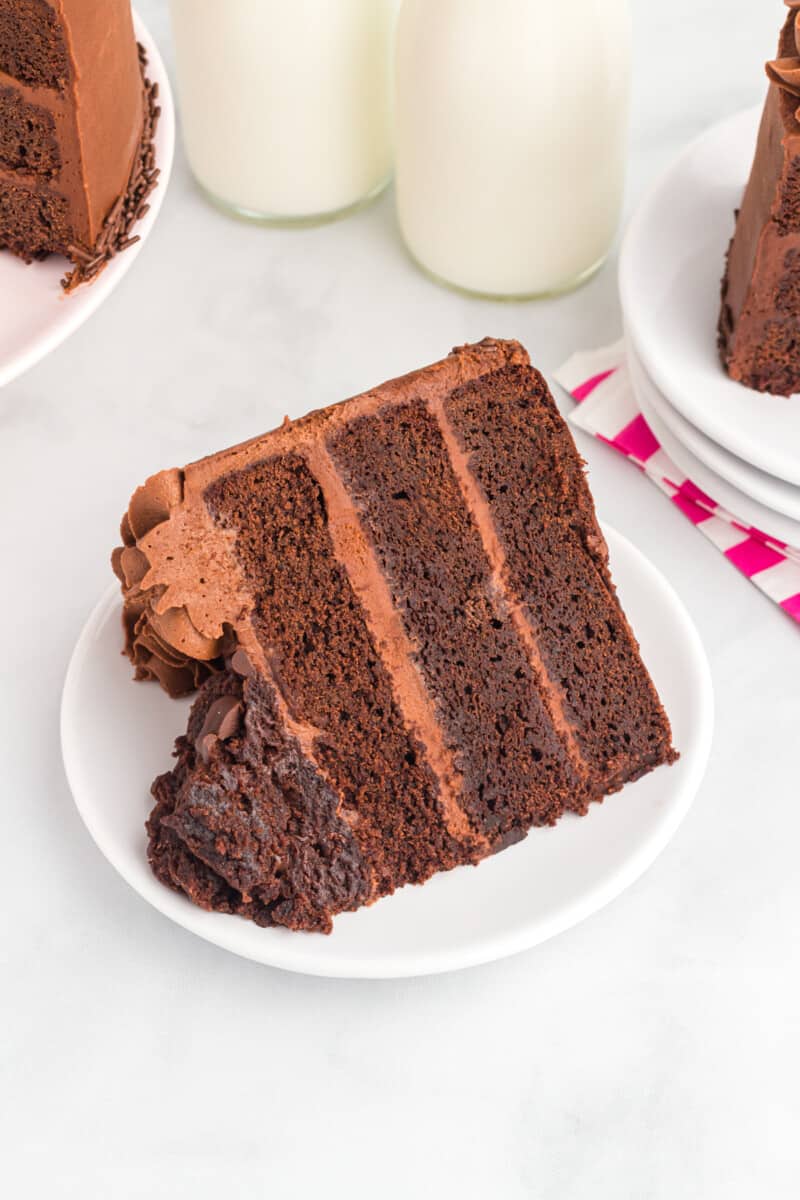
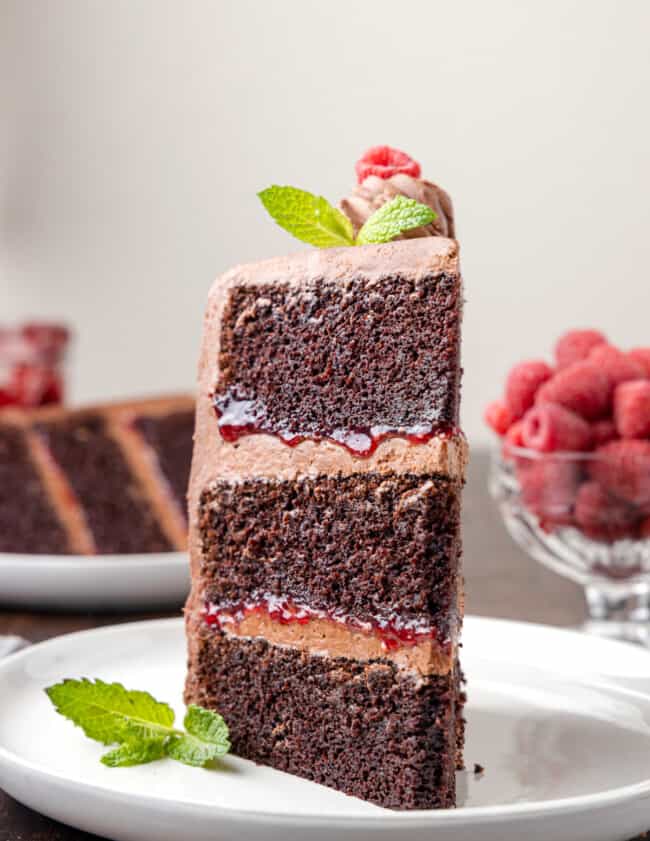
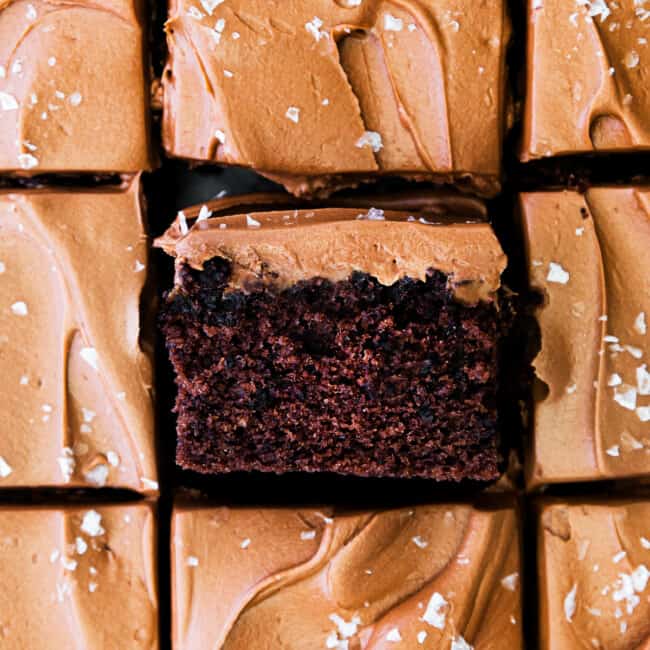
Brownie cake is a fusion between chocolate cake and brownies. It is rich and fudgy like brownies but also moist and fluffy like a cake.
The main difference between a standard chocolate cake and a chocolate brownie cake is that chocolate brownie cake has more chocolate and is made with butter rather than oil. This brownie cake contains both cocoa powder and melted chocolate, boosting the chocolatey flavor to the next level!
While you can use any unsweetened cocoa powder you prefer, I like to use natural cocoa powder here because the baking soda helps to neutralize the acidity of natural cocoa powder, letting its rich flavor shine.
Having all ingredients around the same temperature helps them to combine together properly.
Absolutely! Swap the all-purpose flour for a gluten-free 1:1 baking flour.
Because brownie cake is supposed to be extra moist, it can be tough to tell when the cake is done baking. If using the toothpick test, the toothpick should come out with sticky but thick, nearly dry batter. If the batter is thin and glossy, it needs more time to bake.
It sounds like there may have been too much flour added. When measuring flour, use a food scale if you have one. If not, use the spoon scoop method: place the measuring cup on the counter and scoop flour from the bag with a spoon and lightly place that flour into the measuring cup. If you use the measuring cup to scoop flour directly from the bag, you’ll end up with about 25% more flour than your recipe needs.
Chilling the cake in the fridge for at least an hour is an important step so the cake firms up a bit before frosting or cutting to flatten the tops. If the frosting is too thick to smooth onto the cake, beat in 1 tablespoon of heavy cream.
Recipe Tips and Tricks
- Measure your flour and cocoa powder with a food scale to ensure you use the correct amount. Otherwise, your cake will come out dry and crumbly. You can also spoon the flour into a measuring cup instead of scooping with the measuring cup for better accuracy.
- It’s very important to use room-temperature ingredients to help all the ingredients mix together better. This will allow your cake to bake more evenly and come out light and fluffy.
Make Ahead Instructions
The cake layers can be baked up to 2 days in advance and stored tightly wrapped in plastic wrap in the refrigerator until ready to decorate.
The frosting can be made up to 5 days in advance and stored in an airtight container or Ziplock bag until ready to use. You may wish to rewhip the frosting before using it.
Storage Instructions
Store leftover brownie cake in an airtight container at room temperature for up to 3 days or tightly wrapped in plastic wrap in the refrigerator for up to 5 days. Enjoy cold or at room temperature.
Freezing Instructions
Freeze brownie cake whole or in individual slices tightly wrapped in 2 layers of plastic wrap and 1 layer of aluminum foil for up to 1 month. Let come to room temperature before serving.
Substitutions
- For a gluten-free cake, replace the all-purpose flour with an equal amount of gluten-free 1:1 baking flour.
- You can use any kind of cocoa powder you have on hand for this cake.
- In the cake only, place of the butter, you can use an equal amount of slightly melted coconut oil.
- For a richer flavor, use dark brown sugar instead of light.
- If you don’t have buttermilk, you can make your own by measuring out ½ cup of milk, removing ½ tablespoon, and adding ½ tablespoon of white vinegar or lemon juice. Mix well and let stand for about 5 minutes before using.
- If you’d prefer, you can use milk or dark baking chocolate instead of semisweet.
Tips for the Best Brownie Cake
- Carefully measure your ingredients (with a kitchen scale, if possible) for the best results. Too much flour or cocoa powder could lead to a dry cake.
- Use room temperature ingredients so that they combine more easily, creating a uniform batter.
- Do not overmix the cake batter; otherwise, your cakes will come out tough.
This chocolate fudge brownie cake is a great recipe to have in your arsenal for any special occasion. Enjoy!
If you make this recipe be sure to leave us a comment or rating. Enjoy!
Brownie Cake Recipe

Email This Recipe
Enter your email and we’ll send the recipe directly to you!
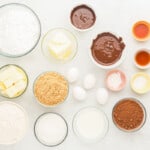
Ingredients
For the Cake
- 3¼ cups all-purpose flour 455 grams
- 1 cup unsweetened cocoa powder 100 grams
- 2 teaspoons baking powder 8 grams
- 1 teaspoon baking soda 6 grams
- 1½ cups unsalted butter 340 grams, slightly melted (3 sticks)
- 1½ cups brown sugar 300 grams
- ¾ cup granulated sugar 150 grams
- 4 large eggs 200 grams, room temperature
- 1 tablespoon pure vanilla extract 4 grams
- ½ cup buttermilk 114 grams, room temperature
- 12 ounces semisweet Baker’s chocolate 340 grams, melted and cooled (3 bars)
For the Frosting
- 5 cups powdered sugar 600 grams
- 1½ cup unsalted butter 340 grams, slightly melted (3 sticks)
- 6 ounces semisweet Baker’s chocolate 170 grams, melted and cooled (1½ bars)
- 2 teaspoons pure vanilla extract 8 grams
- Brown gel food coloring optional, to boost color
Optional Toppings
- 4 ounces Baker’s semisweet chocolate melted
- Brownies cut into bite-sized pieces
- Chocolate sprinkles
Equipment
- Kitchen Scale (optional)
- 3 8-inch Round Cake Pan
- Stand Mixer
- Piping Tip Set
Instructions
For the Cake
- Preheat oven to 350°F. Spray three 8-inch round cake pans with nonstick spray and line the inside bottom of each pan with parchment paper (the parchment paper will help the cakes slide easily out of the pan once baked and cooled). Set pans aside for now.

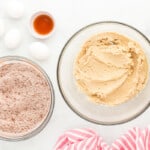
- In a medium bowl, stir the flour, cocoa powder, baking powder, and baking soda together. Set aside.3¼ cups all-purpose flour, 1 cup unsweetened cocoa powder, 2 teaspoons baking powder, 1 teaspoon baking soda
- In the bowl of a stand mixer fitted with the paddle attachment, beat the butter, brown sugar, and granulated sugar on high until mixed well, about 2 minutes.1½ cups unsalted butter, 1½ cups brown sugar, ¾ cup granulated sugar
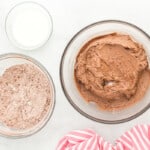
- Beat the eggs and vanilla extract into the butter mixture until well combined.4 large eggs, 1 tablespoon pure vanilla extract
- Beat half of the flour mixture into the wet ingredients. Beat this on low speed just until combined. Do not overmix.
- Beat in all of the buttermilk just until combined. Again, don’t overmix.½ cup buttermilk
- On low speed, beat in the remaining flour mixture just until combined.
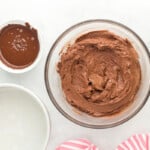
- Stir in the melted chocolate by hand until well mixed. Do not use the electric beaters for this step.12 ounces semisweet Baker’s chocolate
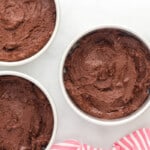
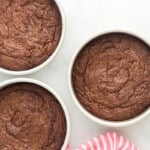
- Divide the cake batter evenly between the 3 prepared cake pans (about 672 grams per pan). Try to get the same amount in each pan so that they bake at the same speed.
- Bake in oven for 30 minutes or until toothpick inserted in middle of each comes out clean or with moist crumbs.
- Remove cakes from oven and let cakes cool in pans for 15 minutes. After 15 minutes, remove cakes from pans and let cool completely on a wire rack.
- Once cakes have completely cooled to room temperature, wrap each cake individually in food-safe plastic wrap and place cakes in fridge for at least 1 hour. Chilling the cakes in the fridge before frosting will help them hold their shape and not crumble during decorating.
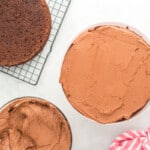
- Removed chilled cakes from the fridge and use a large serrated knife to cut any dome tops off cakes so they have flat tops. These cakes bake up pretty flat (like brownies) so there won’t be a lot to cut off the tops.
For the Frosting
- In the bowl of a stand mixer fitted with the whisk attachment, beat the powdered sugar, butter, melted chocolate, and vanilla extract together on high speed until light and fluffy, about 5 minutes. Add a few drops of brown food coloring to deepen the color, if desired.5 cups powdered sugar, 1½ cup unsalted butter, 6 ounces semisweet Baker’s chocolate, 2 teaspoons pure vanilla extract, Brown gel food coloring
- Place a thin layer of frosting (about 2 tablespoons) in the middle of a cake board or cake plate then place one cake (cut side facing up) on top of that frosting. This helps secure the cake to the cake board or plate so it doesn’t slide off during decorating.
- Add a generous layer of frosting on top of that first layer of cake and use an angled cake spatula to smooth that frosting into an even layer.
- Add the second layer of cake (cut side up) over that frosting then add another generous layer of frosting on top and smooth it out using the angled cake spatula.
- Add the third and final layer of cake with the bottom side facing up. You’ll now have a 3-layer cake.
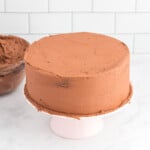
- Frost a thin layer of frosting around the top and sides of cake. This first coating of frosting (called a crumb coat) is meant to secure all the crumbs to the cake. To get the layers of frosting smooth, use a tool like a cake scraper to smooth the icing out.
- Place the lightly frosted cake into the freezer for 10 minutes so the crumb coat hardens up a bit before frosting the next layer.
- Remove cake from freezer and smooth on a second layer of frosting around the top and sides of the cake. Use the cake scraper to smooth this out.
- Using a Wilton 1M icing tip and an icing bag, frost swirls along the top border of the cake.
- Optional: add 4 ounces of melted chocolate to the top of the cake and top with cut brownie pieces. The melted chocolate is used to secure the brownie pieces to the cake.4 ounces Baker’s semisweet chocolate, Brownies
- Optional: add chocolate sprinkles to the bottom border of the cake.Chocolate sprinkles
Notes
- For a gluten-free cake, replace the all-purpose flour with an equal amount of gluten-free 1:1 baking flour.
- You can use any kind of cocoa powder you have on hand for this cake.
- In the cake only, place of the butter, you can use an equal amount of slightly melted coconut oil.
- For a richer flavor, use dark brown sugar instead of light.
- If you don’t have buttermilk, you can make your own by measuring out ½ cup of milk, removing ½ tablespoon, and adding ½ tablespoon of white vinegar or lemon juice. Mix well and let stand for about 5 minutes before using.
- If you’d prefer, you can use milk or dark baking chocolate instead of semisweet.
- Carefully measure your ingredients (with a kitchen scale, if possible) for the best results. Too much flour or cocoa powder could lead to a dry cake.
- Use room temperature ingredients so that they combine more easily, creating a uniform batter.
- Do not overmix the cake batter; otherwise, your cakes will come out tough.
- Nutritional information does not include optional ingredients.


Leave a Review