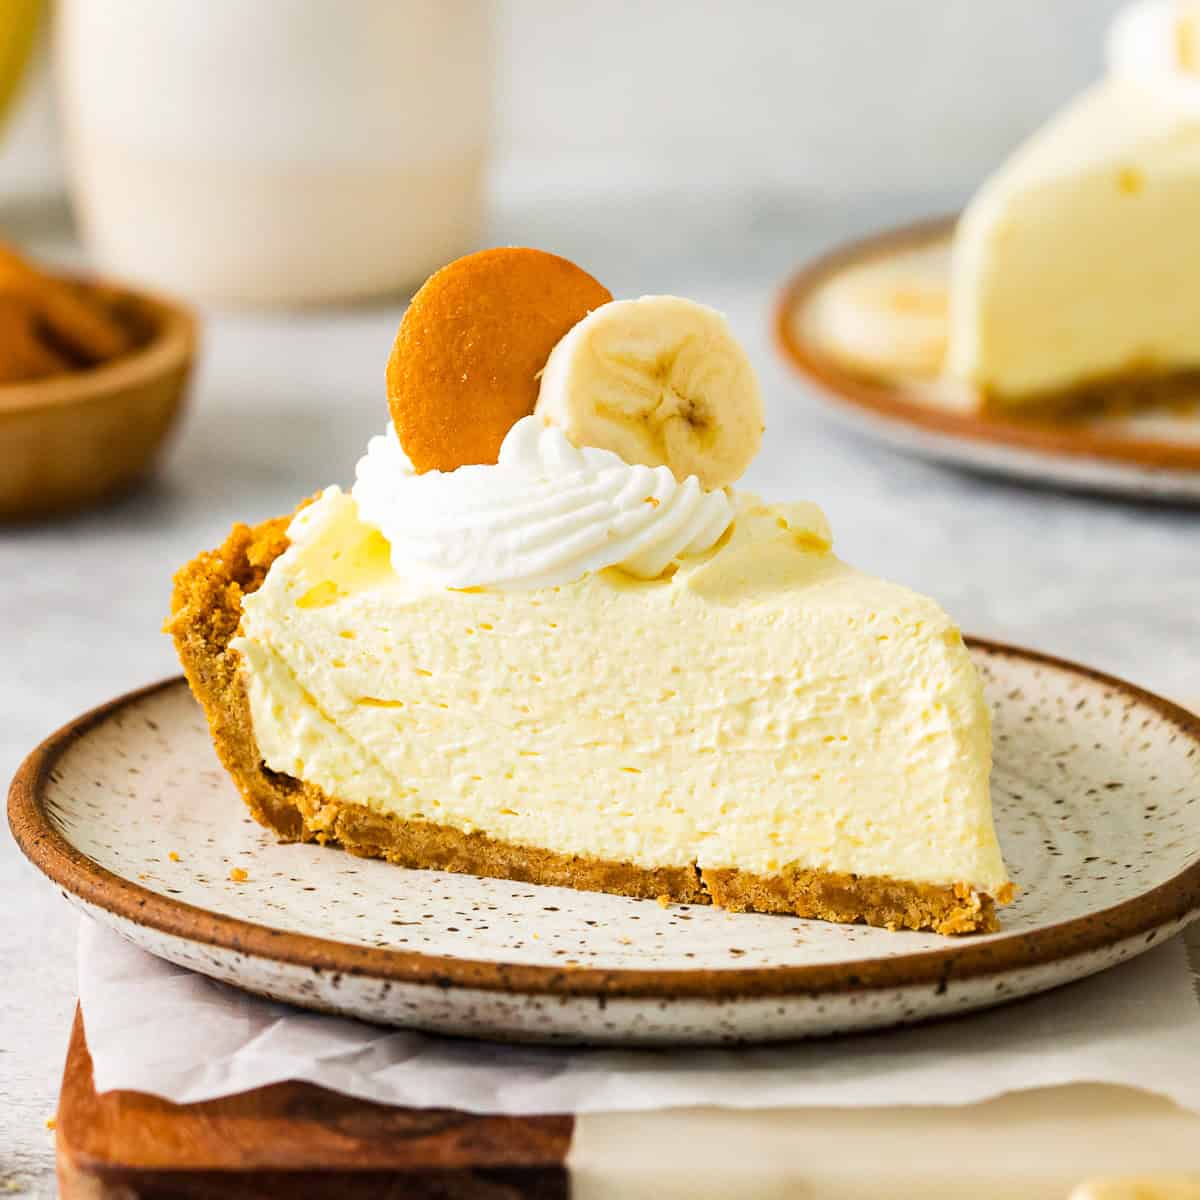
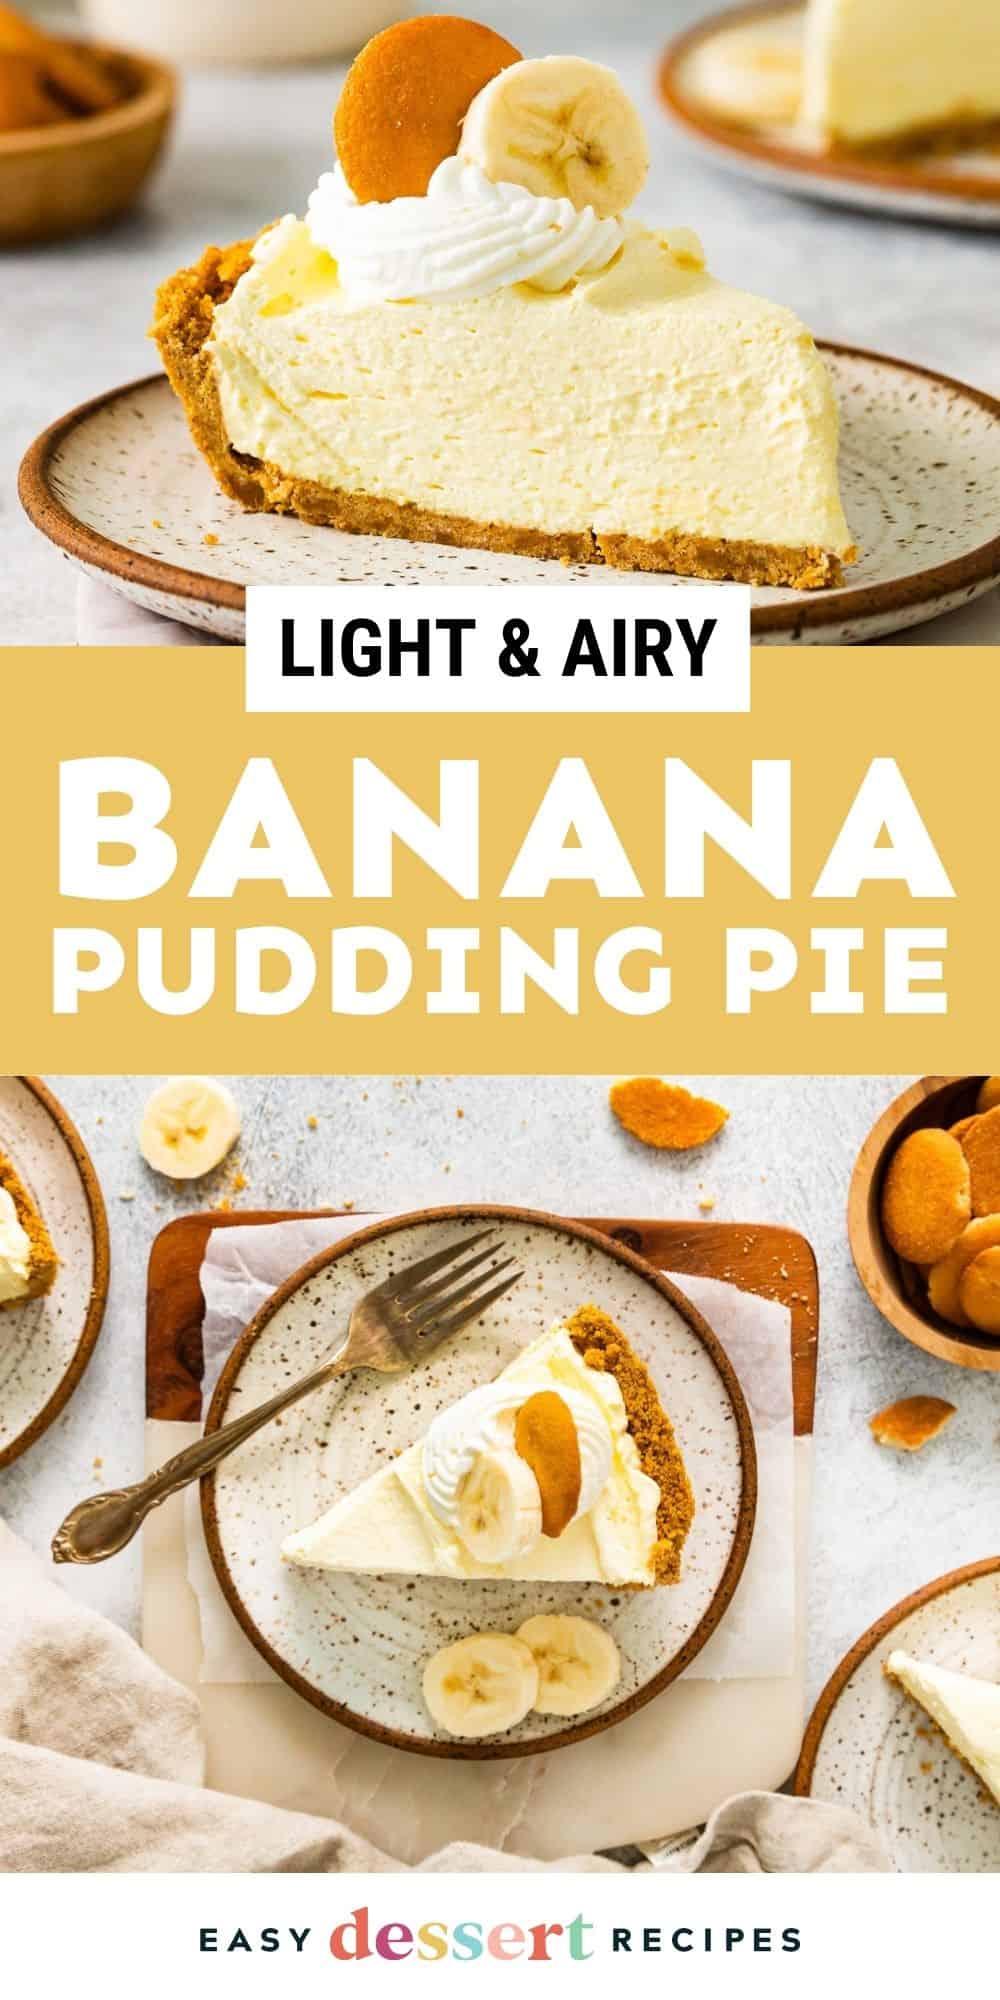
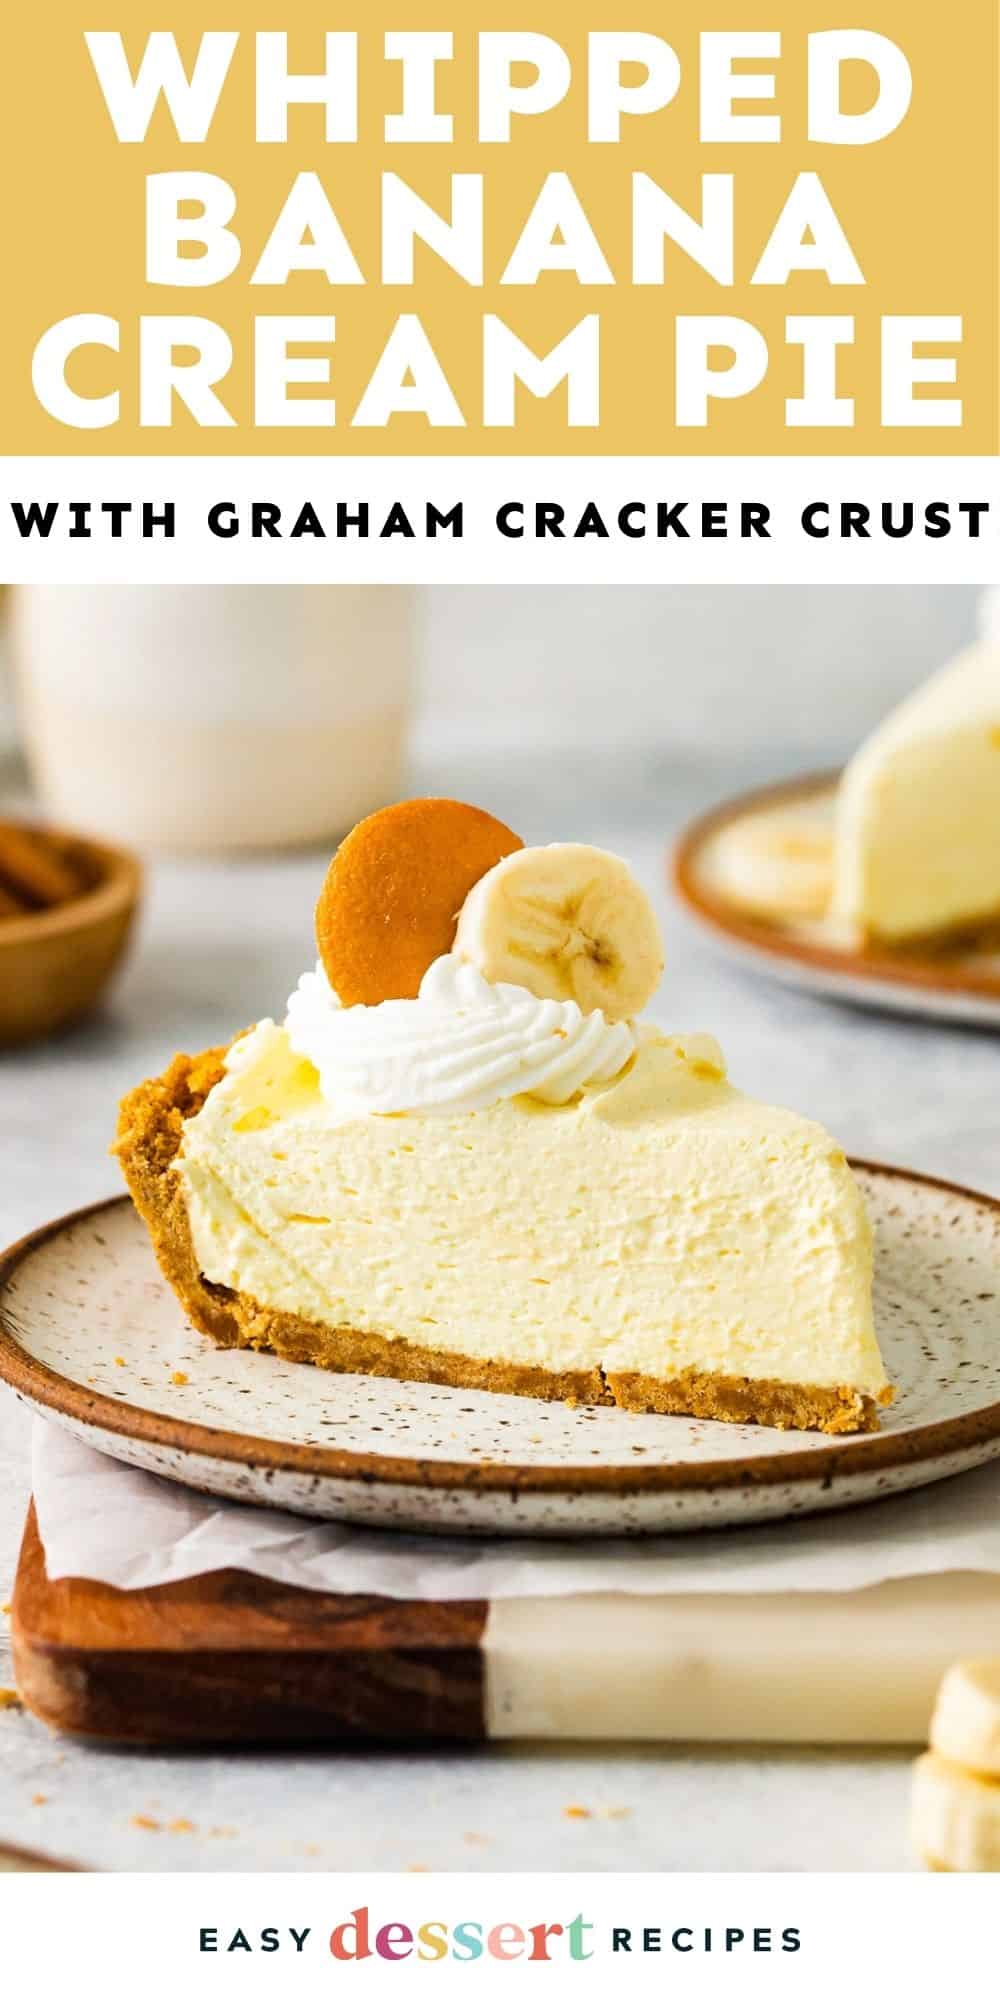
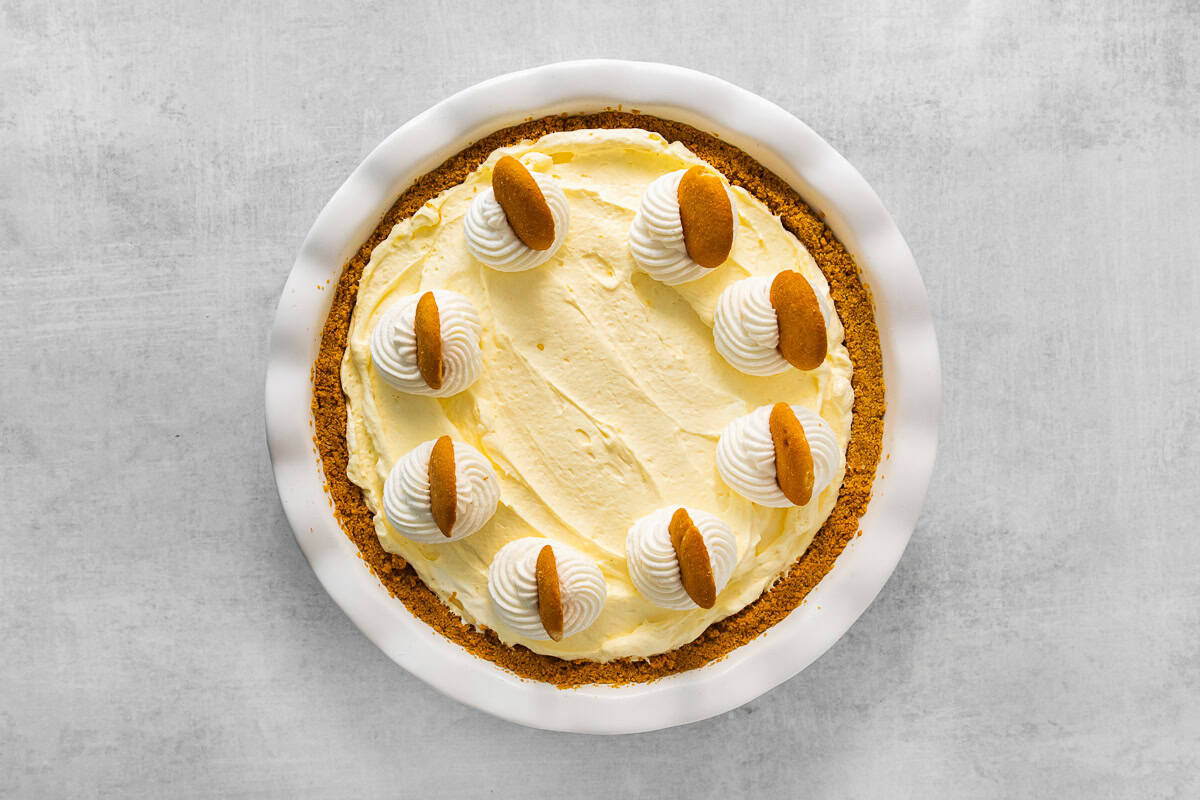
My banana pudding pie features a buttery, cinnamon-spiked graham cracker crust filled with light-as-air banana mousse! I use instant pudding mix to make this take on banana cream pie extra easy, while retaining all that classic flavor I love. With a simple crust and a no-bake banana filling, this is an effortless make-ahead dessert that always disappears in minutes!
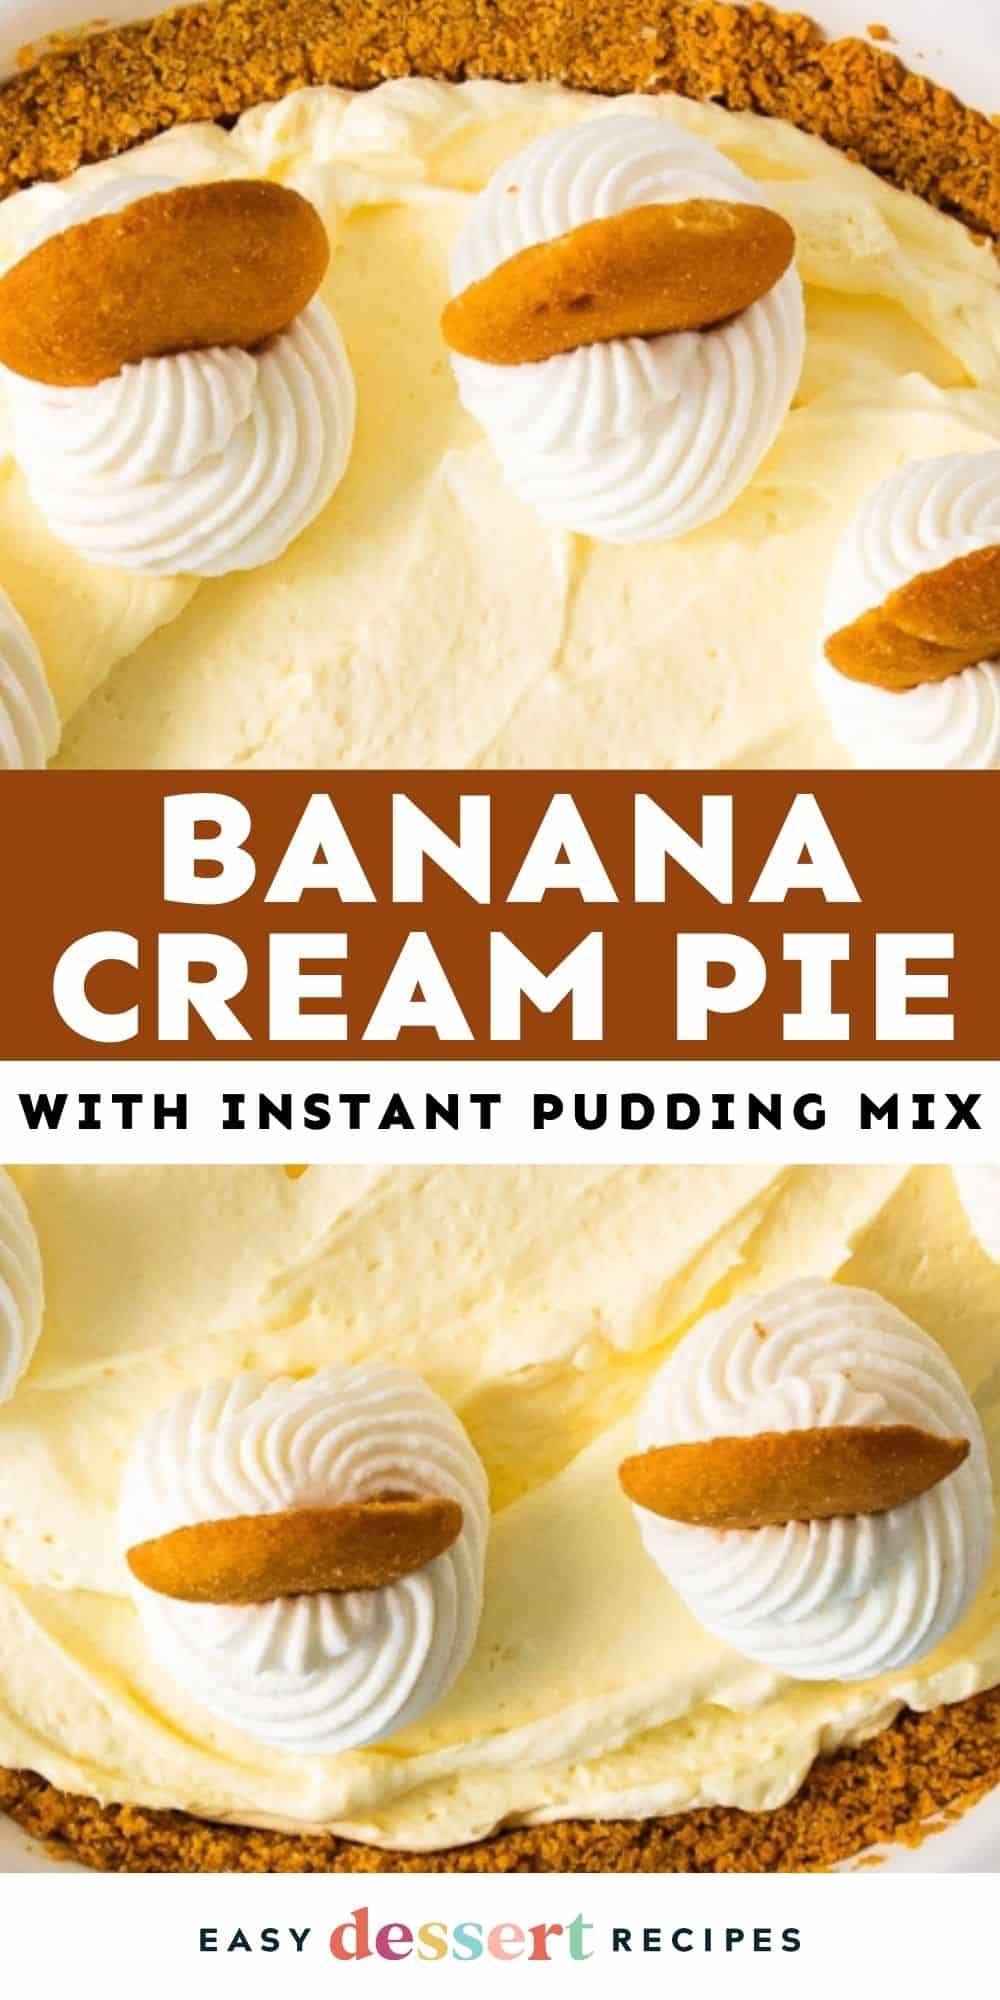
Light & Fluffy Banana Cream Pie with Instant Pudding
This easy dessert combines the banana pudding flavor I crave with the slice-ability of a cream pie. Instead of relying on a traditional pie crust, I make my banana pudding pie with a graham cracker crust for a sturdier foundation that easily stands up to the creamy filling. And speaking of the pie filling, I make it with a combination of vanilla and banana instant pudding mixes to achieve that nostalgic sweetness in every bite. Mixing in frozen whipped topping creates a light and airy mousse-like texture, resulting in a pie unlike any I’ve had before!

Email this Recipe
Enter your email and we’ll send the recipe directly to you!
By submitting this form, you consent to receive emails from Easy Dessert Recipes.
Stop Hand-Pressing Your Crust!
To prevent your crust from crumbling when you cut the pie, don’t just use your fingers. Use the flat bottom of a measuring cup to firmly pack the graham cracker mixture. A tightly packed crust acts as a structural foundation, ensuring every slice comes out clean and intact!
Banana Pudding Pie Recipe
Equipment
- Kitchen Scale (optional)
- 9-inch Pie Pan
- Hand Mixer or Stand Mixer
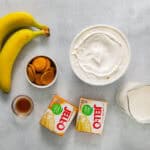
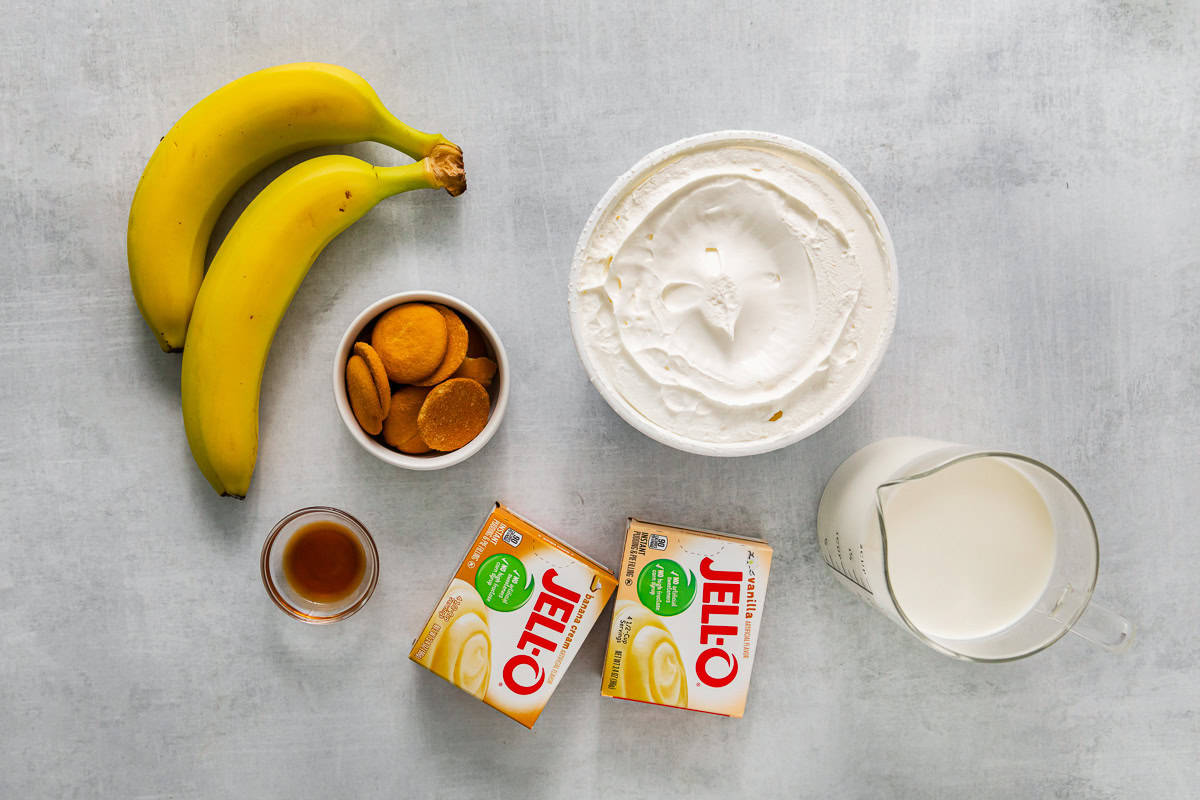
Ingredients
For the Crust:
- 1½ cups graham cracker crumbs (from about 14 cracker sheets)*
- ¼ cup granulated sugar
- ½ teaspoon ground cinnamon
- ½ teaspoon kosher salt
- 6 tablespoons unsalted butter melted (¾ stick)
For the Pie:
- 3.4 ounces instant vanilla pudding mix (1 box)**
- 3.4 ounces instant banana pudding mix (1 box)
- 2 cups half-and-half ***
- 8 ounces whipped topping thawed if frozen (1 tub)
- 1 teaspoon pure vanilla extract
Optional Toppings:
- Whipped cream
- Nilla Wafers
- Sliced fresh bananas
Instructions
- Preheat oven to 350°F and lightly grease a 9-inch pie pan with nonstick spray.

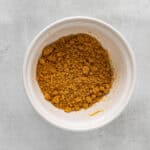
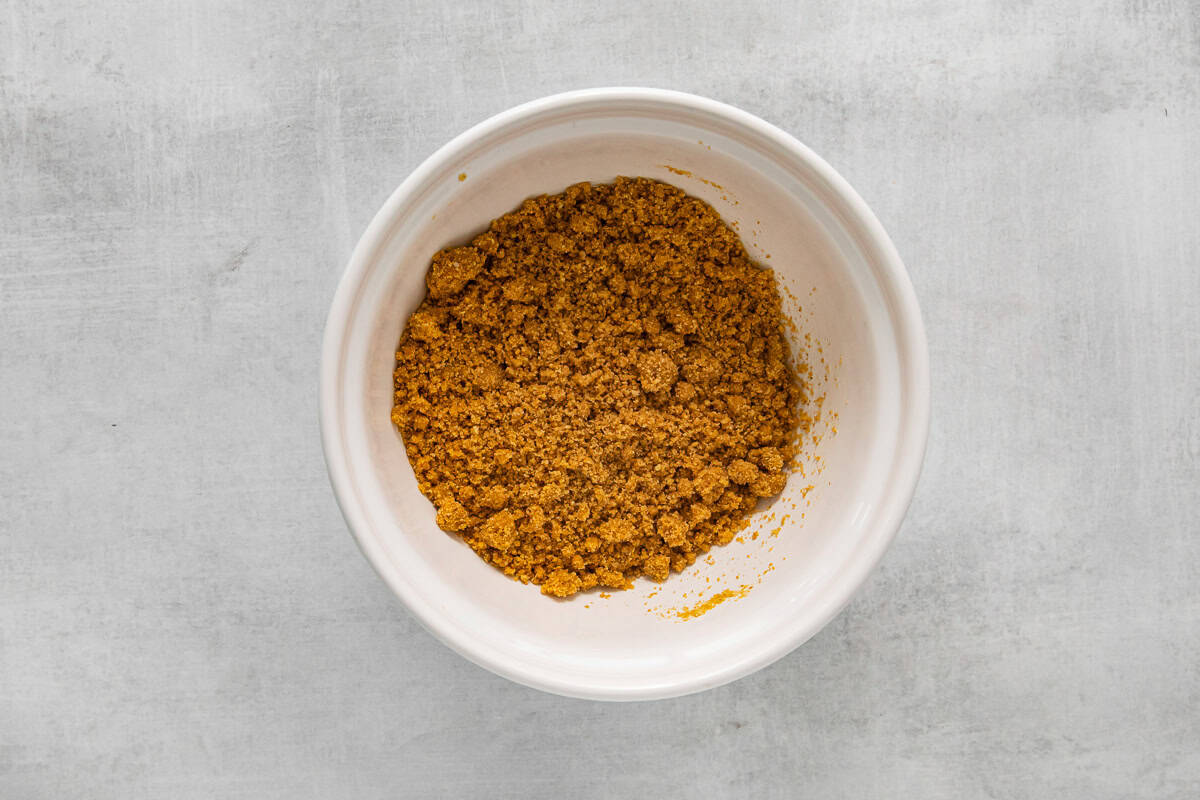
- Add the graham cracker crumbs, sugar, cinnamon, and salt to a medium bowl and stir to combine. Add the melted butter and stir until the mixture resembles wet sand.1½ cups graham cracker crumbs, ¼ cup granulated sugar, ½ teaspoon ground cinnamon, ½ teaspoon kosher salt, 6 tablespoons unsalted butter
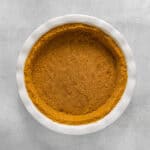
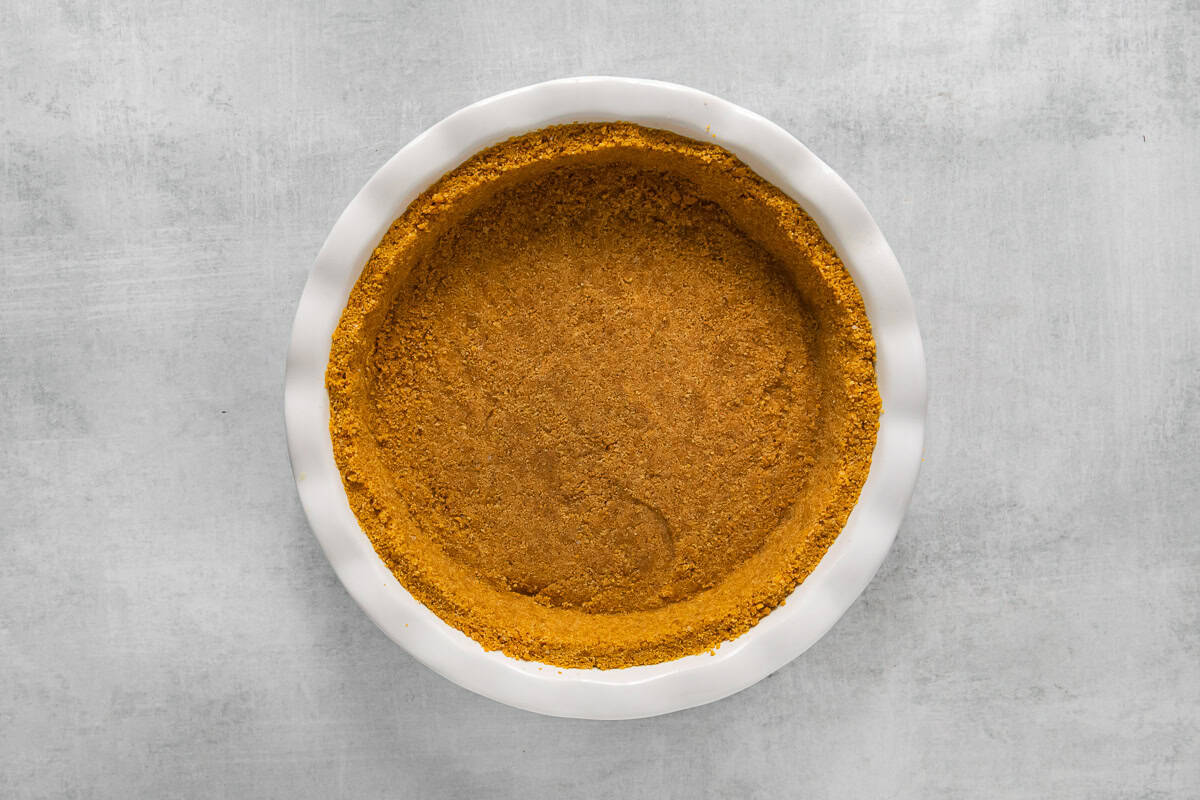
- Transfer the graham cracker mixture to the prepared pie dish and press it into an even, compact, ¼-inch thick layer on the bottom and sides.
- Bake for 10 minutes, then remove the crust from the oven and allow it to cool completely.
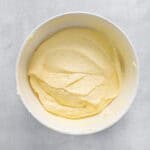
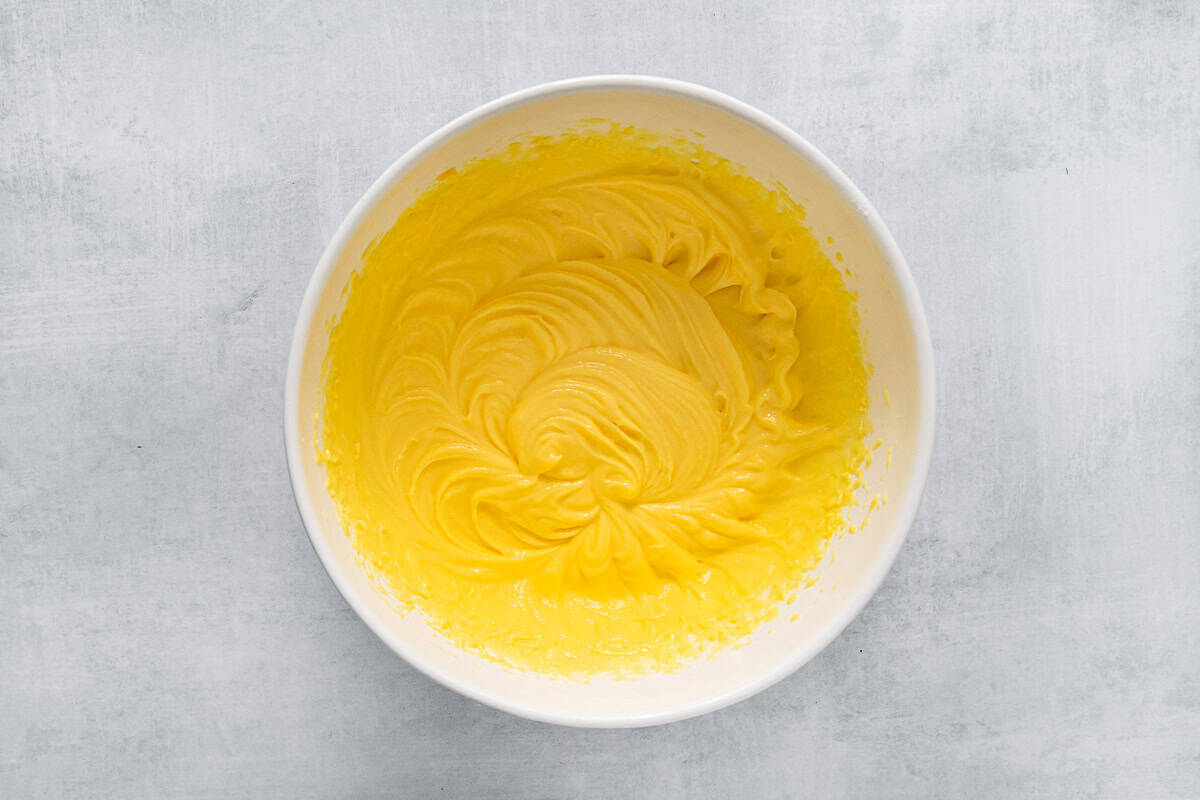
- Add the vanilla pudding, banana pudding, and half-and-half to a large bowl. Beat with a hand or stand mixer for 2 minutes.3.4 ounces instant vanilla pudding mix, 3.4 ounces instant banana pudding mix, 2 cups half-and-half
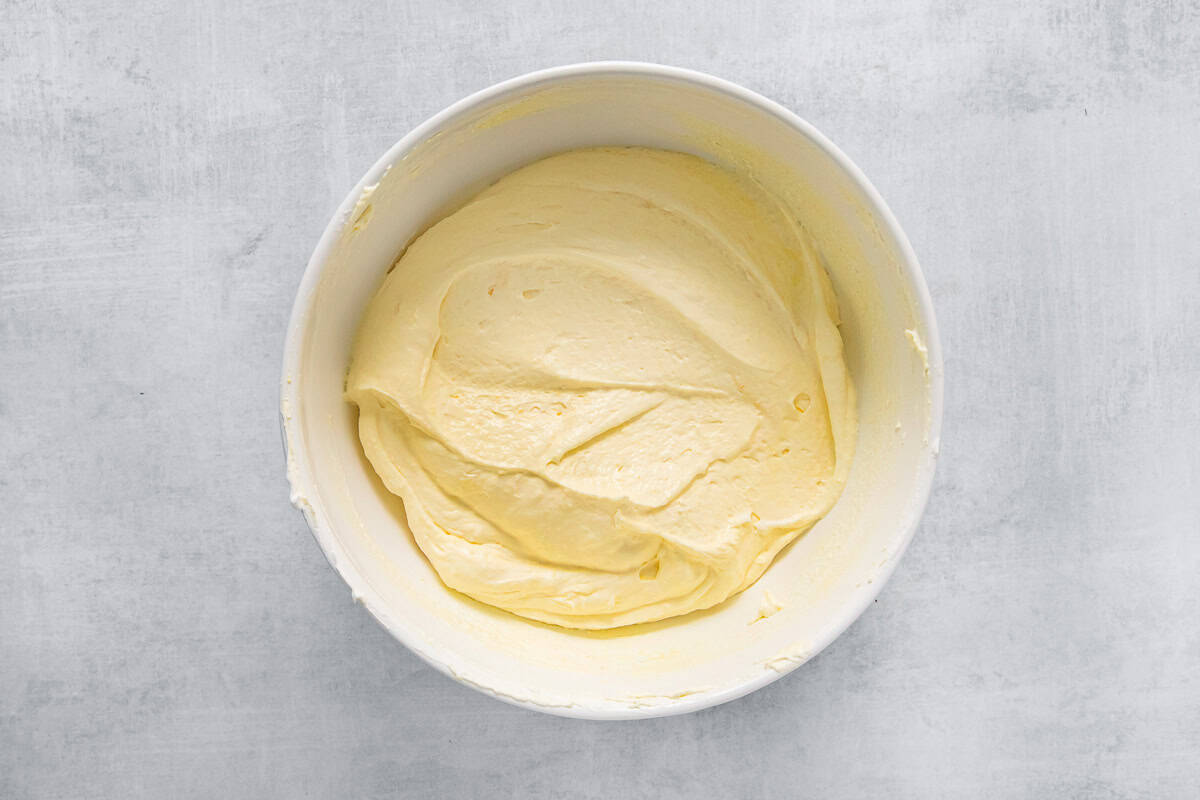
- Gently fold in the whipped topping and vanilla extract.8 ounces whipped topping, 1 teaspoon pure vanilla extract
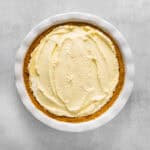
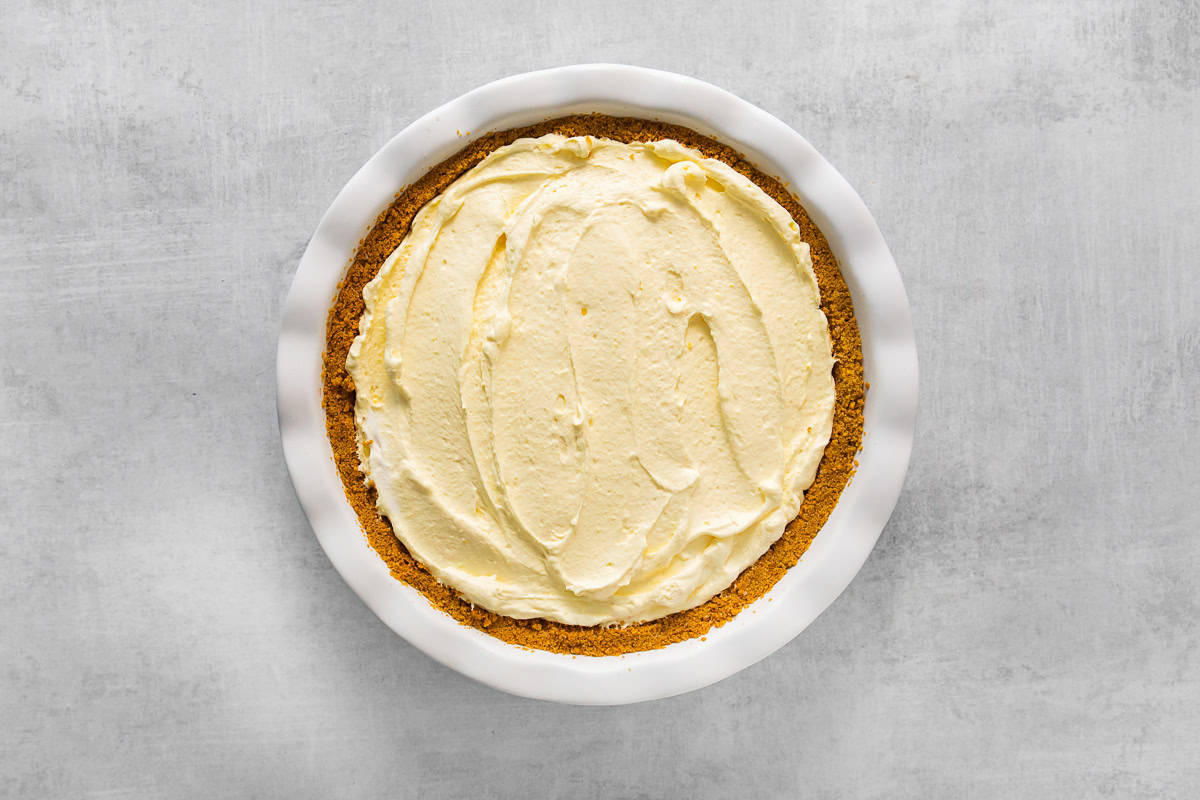
- Spread the filling into the cooled crust. Place the pie in the fridge for 4 hours, or until firm and fully set.
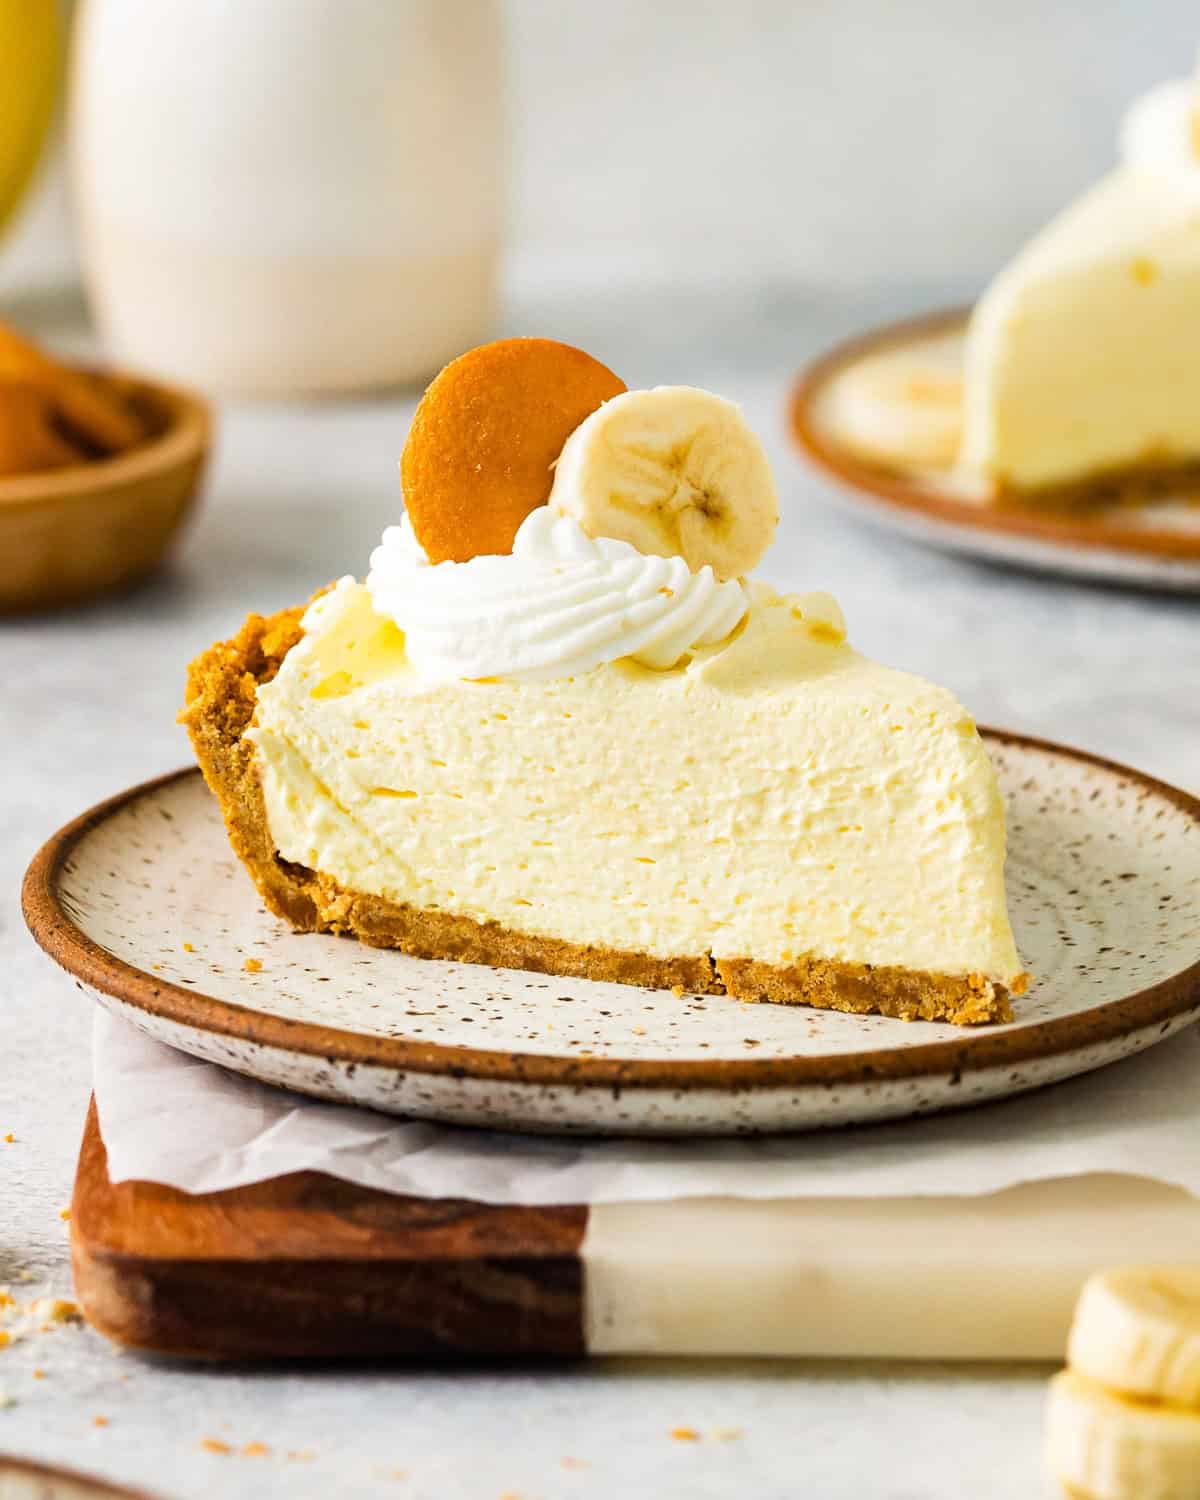
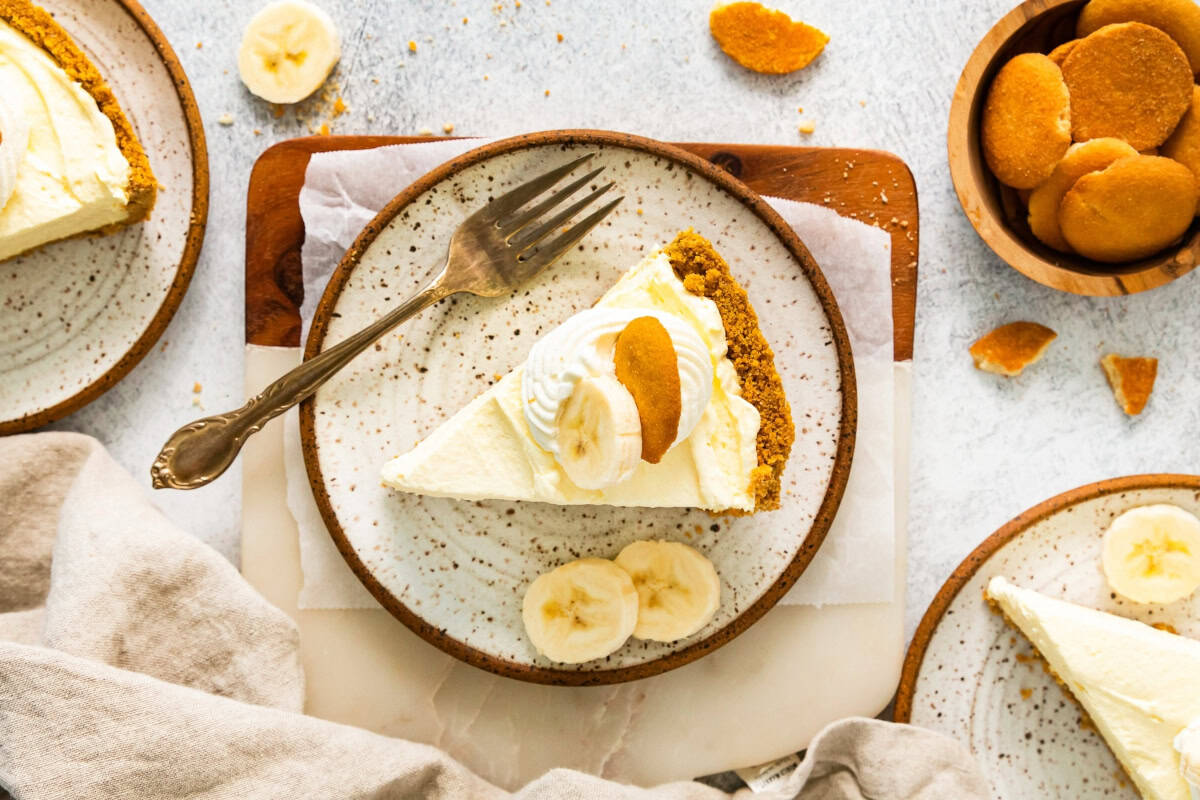
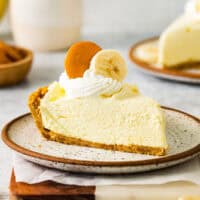
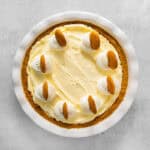
- Garnish with whipped cream, sliced banana, and Nilla Wafers. Slice and enjoy.Whipped cream, Nilla Wafers, Sliced fresh bananas

Notes
- Pulse whole graham crackers in a food processor or place in a sealed zip-top bag and crush with a rolling pin.
- Optionally add a pinch of salt to the pudding mixture before folding in the whipped topping for a less sweet filling.
- You can layer fresh banana slices over the crust (under the filling) for extra banana flavor and texture.
- Do not add the Nilla Wafers or the fresh banana slices until right before serving. The wafers will turn into mush in the fridge, and the bananas will weep.
- Toss your banana slices in a little bit of lemon juice before topping the pie to prevent browning.
How to Make Banana Cream Pudding Pie Step-by-Step
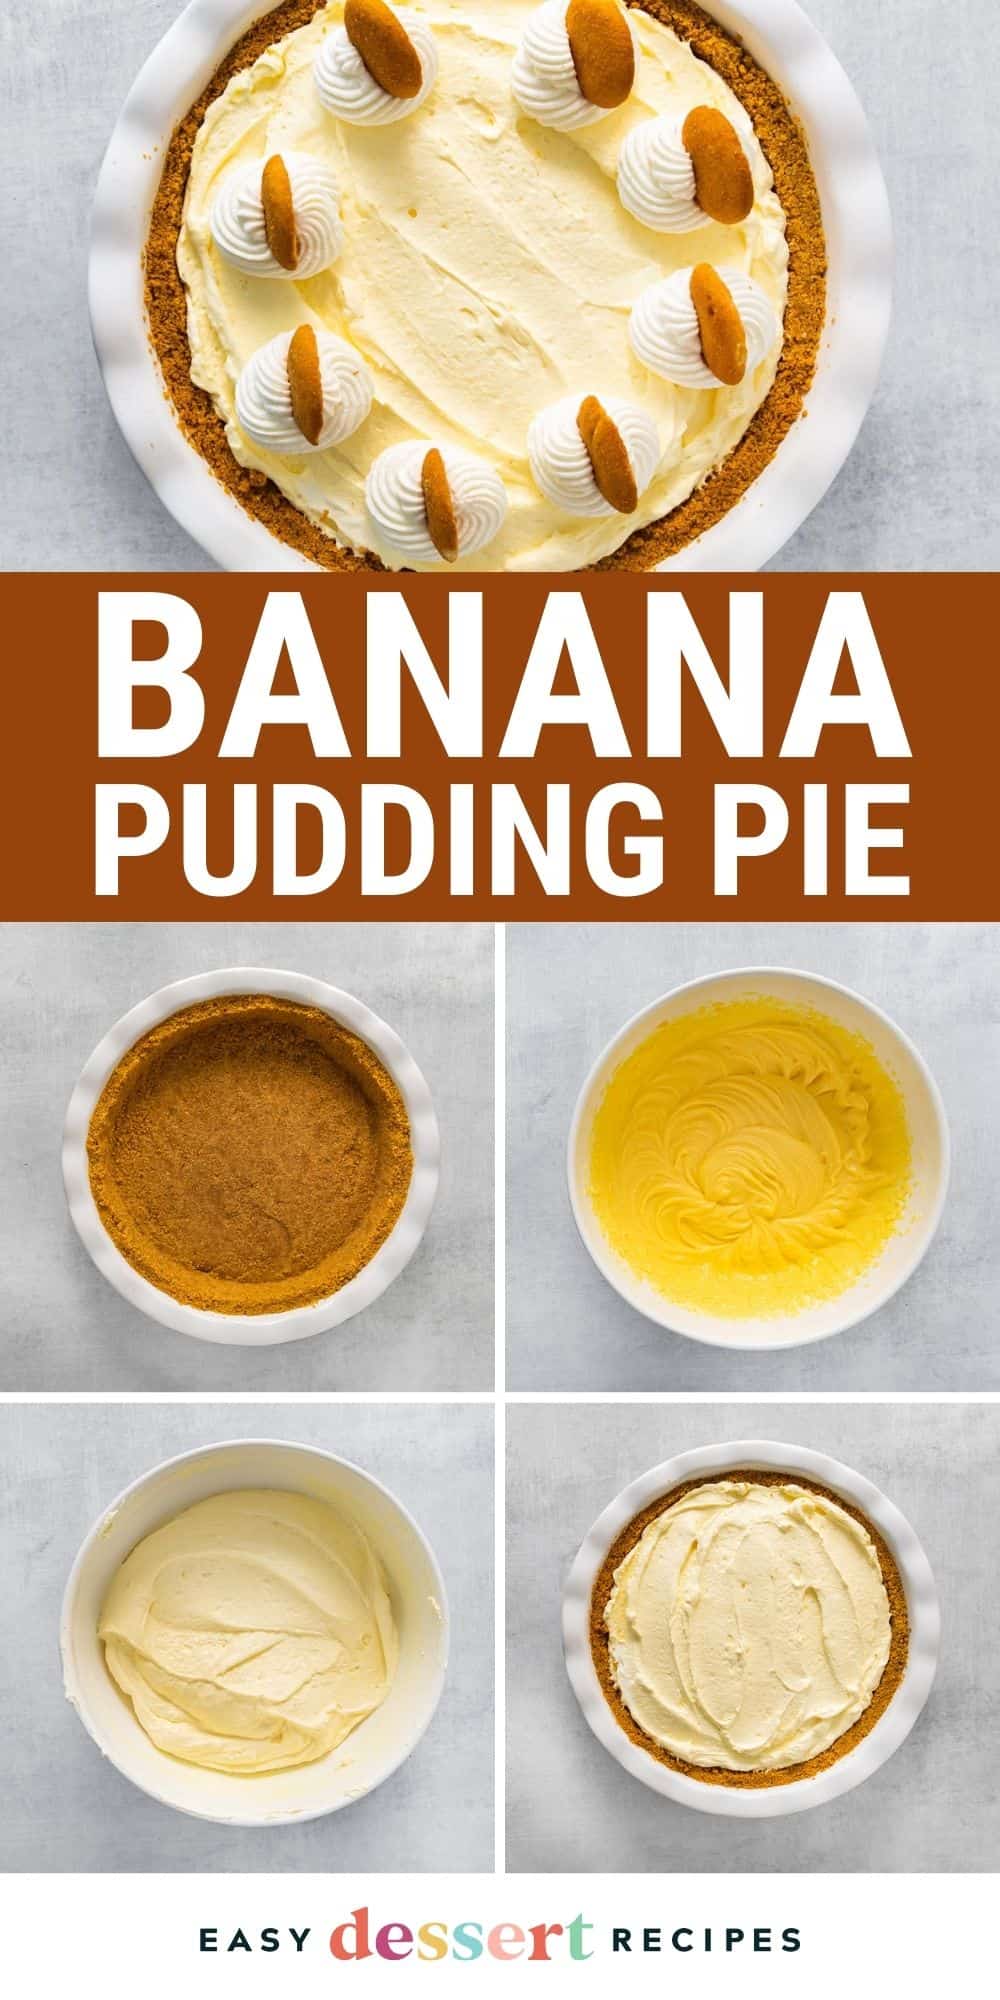
Prep: Preheat your oven to 350°F and lightly grease a 9-inch pie pan with nonstick spray. Thaw the whipped topping at room temperature for 30 minutes (or 4 hours in the fridge) before beginning. Melt the butter in the microwave in 30-second bursts until liquid. Pulse whole graham crackers in a food processor, or by sealing them in a zip-top bag and breaking up with a rolling pin.
Mix the Crust: Add 1½ cups of graham cracker crumbs, ¼ cup of granulated sugar, ½ teaspoon of ground cinnamon, and ½ teaspoon of kosher salt to a medium bowl and stir to combine. Add 6 tablespoons of melted unsalted butter and stir until the mixture resembles wet sand. If the mixture feels too crumbly, add another tablespoon of melted butter and mix again.
Bake the Crust: Transfer the graham cracker mixture to the prepared pie dish and press it into an even, compact, ¼-inch thick layer on the bottom and sides–I like to use the bottom of a round measuring cup to do this. Bake in the preheated oven for 10 minutes, then remove the crust from the oven and allow it to cool completely before adding the filling.
Mix the Puddings: Add 3.4 ounces (1 box) of instant vanilla pudding mix, 3.4 ounces (1 box) of instant banana pudding mix, and 2 cups of half-and-half to a large bowl. Beat with a hand or stand mixer for 2 minutes, or until smooth.
Fold in the Whipped Topping: Use a rubber spatula to gently fold in 8 ounces (1 tub) of thawed whipped topping and 1 teaspoon of vanilla extract. Take care not to knock any air out of the whipped topping.
Chill the Pie: Spread the filling evenly into the cooled crust. Place the pie in the fridge for 4 hours, or until firm and fully set. You can leave it unwrapped for this initial chill, or wrap it with plastic wrap to protect it from fridge odors.
Garnish and Serve: Garnish your banana pudding pie with whipped cream, sliced banana, and Nilla Wafers. Slice and enjoy!
How to Store and Freeze
This banana pudding pie is best eaten within 2 days. After that, the whipped topping can start to weep, and the crust will soften.
This pie freezes beautifully though! It tastes like a high-end ice cream cake. Freeze it without the toppings, then thaw for 30 minutes before serving.


Leave a Reply