


Crunchy, chewy, and oh-so-sweet, this Butterfinger fudge takes everything I love about the classic candy bar and transforms it into the perfect square of chocolate peanut butter fudge bliss. It’s rich, creamy, and studded with crispy Butterfinger bits in every bite. I always make a double batch of this rich fudge because one pan never seems to last long!
Top Reader Review
This is the best fudge recipe I have ever used.
– Diana H.
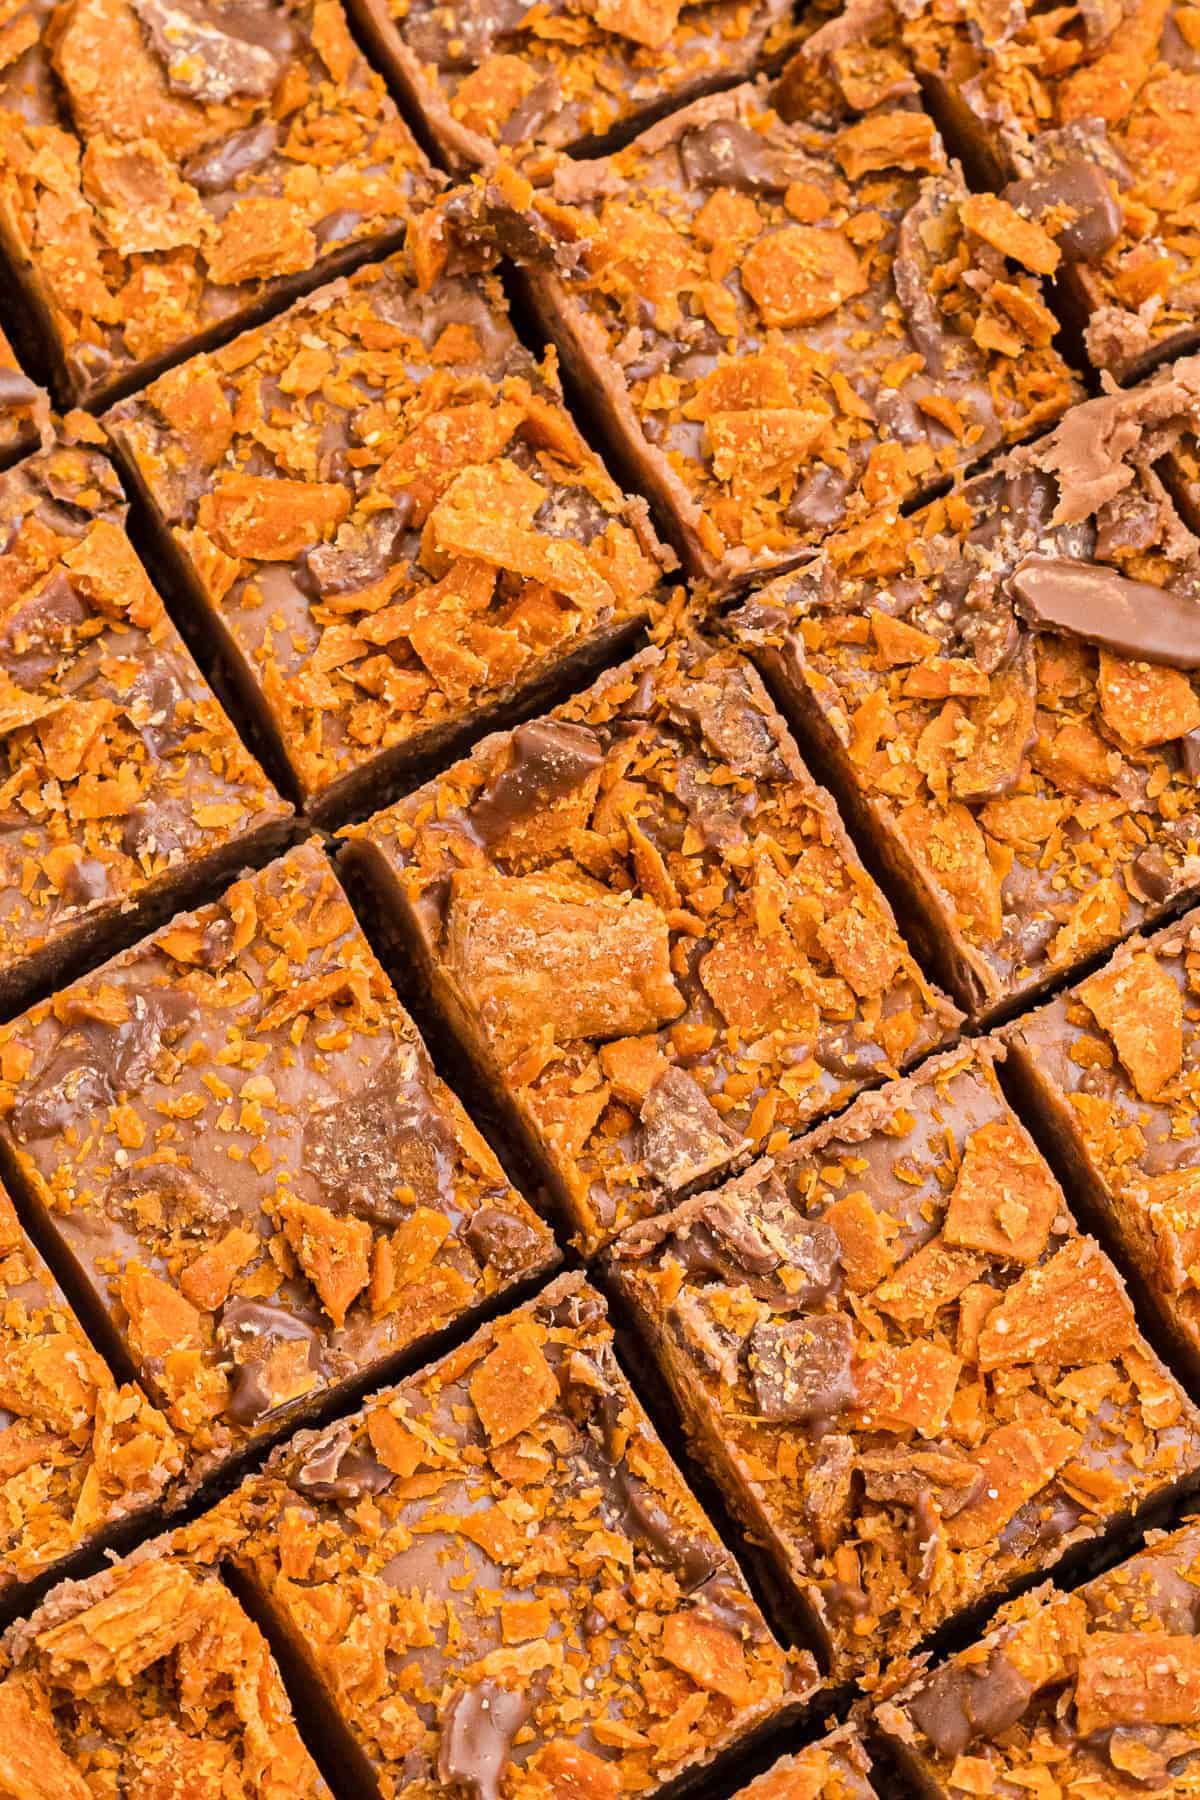
Chocolate Peanut Butter Fudge with Marshmallow and Butterfinger Candy
There’s just something about Butterfinger candy bars that makes them downright addictive! That signature crunch, the peanut buttery flavor, the chocolate coating…So naturally, adding Butterfinger pieces to homemade fudge was a no-brainer. The result is a decadent chocolate and peanut butter fudge with bold flavor and contrasting textures in every bite.
This Butterfinger fudge recipe is super easy to make with just 8 ingredients and it’s practically foolproof! It’s a riff on my favorite fantasy fudge recipe, and I use marshmallow creme and evaporated milk for a stress-free, silky-smooth finish. Peanut butter chips and semisweet chocolate chips combine for that perfect sweet-salty balance, and chopped Butterfinger bars bring the fun, crunch, and caramelized flavor you expect. It’s everything I love about the candy bar, but better!


Email this Recipe
Enter your email and we’ll send the recipe directly to you!
By submitting this form, you consent to receive emails from Easy Dessert Recipes.
Avoid this Mistake!
Butterfinger candy bars are coated in chocolate, which can melt and smear into the fudge mixture if added too early. I learned the hard way that folding them in while the fudge is still piping hot causes the bars to melt into streaks instead of leaving those chewy, crunchy bites. Instead, let the mixture cool for just a minute or two before stirring in the chopped candy. It makes all the difference!
Butterfinger Fudge Recipe
Equipment
- Kitchen Scale (optional)
- 8×8 Baking Pan
- Candy Thermometer (optional)
Ingredients
- 3 cups granulated sugar
- ¾ cup unsalted butter (1½ sticks)
- 5 ounces evaporated milk *
- ¾ cup peanut butter flavored baking chips
- ¾ cup semisweet chocolate chips **
- 7 ounces marshmallow creme (1 tub)
- 1 teaspoon pure vanilla extract
- 1 cup chopped Butterfinger candy bars (4 (1.9-ounce) bars)
For Topping
- ¼ cup chopped Butterfinger candy bars optional (1 (1.9-ounce) bar)
Instructions
- Line an 8×8-inch baking pan with a piece of parchment paper. Cut the parchment paper a few inches too long on all sides so you can easily lift the fudge out of the pan once it hardens. Set the prepared pan to the side.
- In a large saucepan set over medium, heat the sugar, butter, and evaporated milk, stirring until it melts together. Continue to stir the mixture until it begins to boil. It will begin to become foamy and bubbly.3 cups granulated sugar, ¾ cup unsalted butter, 5 ounces evaporated milk

- Continue stirring the fudge for an additional minute. Once done, remove it from the heat and stir in the peanut butter chips, chocolate chips, and marshmallow creme. Continue stirring the mixture until the chips have completely melted and mixed in with the marshmallow creme, about 1-2 minutes.¾ cup peanut butter flavored baking chips, ¾ cup semisweet chocolate chips, 7 ounces marshmallow creme
- Once combined, stir in the vanilla. The mixture will begin to harden as it cools so before it begins to set, quickly stir in the butterfinger candy bar pieces.1 teaspoon pure vanilla extract, 1 cup chopped Butterfinger candy bars
- Pour the fudge into the prepared pan and spread evenly with a rubber spatula. Sprinkle the top of the fudge with the remaining crushed Butterfinger candy bar (optional), and very gently press it into the top of the fudge.¼ cup chopped Butterfinger candy bars
- Cover the pan with plastic wrap and let the fudge cool in the refrigerator for a few hours, until the fudge is completely cooled and has set. Cut into 1-inch squares and serve.


Notes
- Smashing up candy bars can get messy pretty quickly. To avoid getting candy crumbs all over your kitchen, place the bars in a durable Ziplock bag. Then, smash the candy until it reaches the desired consistency you want! You can use a rolling pin or something similar to do the smashing.
- The fudge needs to reach 234°F to properly set.
- To test for doneness without a thermometer, drop a small bit of fudge into a glass of cold water. If it forms a soft and pliable ball, it’s ready. If it hardens, dissolves, or remains liquid, it needs more time.
- Once you remove the fudge mixture from the heat on the stove, remember to move quickly! The fudge will harden as it cools, making it difficult to stir in the remaining ingredients. Avoid a sore arm by working expeditiously.
- To avoid a lot of flaky mess, be sure to lightly press the candies into the fudge before it sets. I have made candy fudge and forgotten to do this, and the candy will flake off a little.
- The best way to make sure your fudge is cool, set, and ready to serve it is by letting it cool overnight in the refrigerator. I know it can be tempting to not wait that long, but I promise it’s worth the wait!
How to Store
This Butterfinger fudge will stay fresh and delicious for up to 1 week if kept at room temperature in an airtight container. Want to keep it fresh a bit longer? In an airtight container, this chocolate peanut butter fudge will stay fresh for up to 3 weeks in the fridge or 3 months in the freezer! Just let it thaw overnight in the refrigerator before enjoying. It’s delish cold or at room temp.


Leave a Reply