

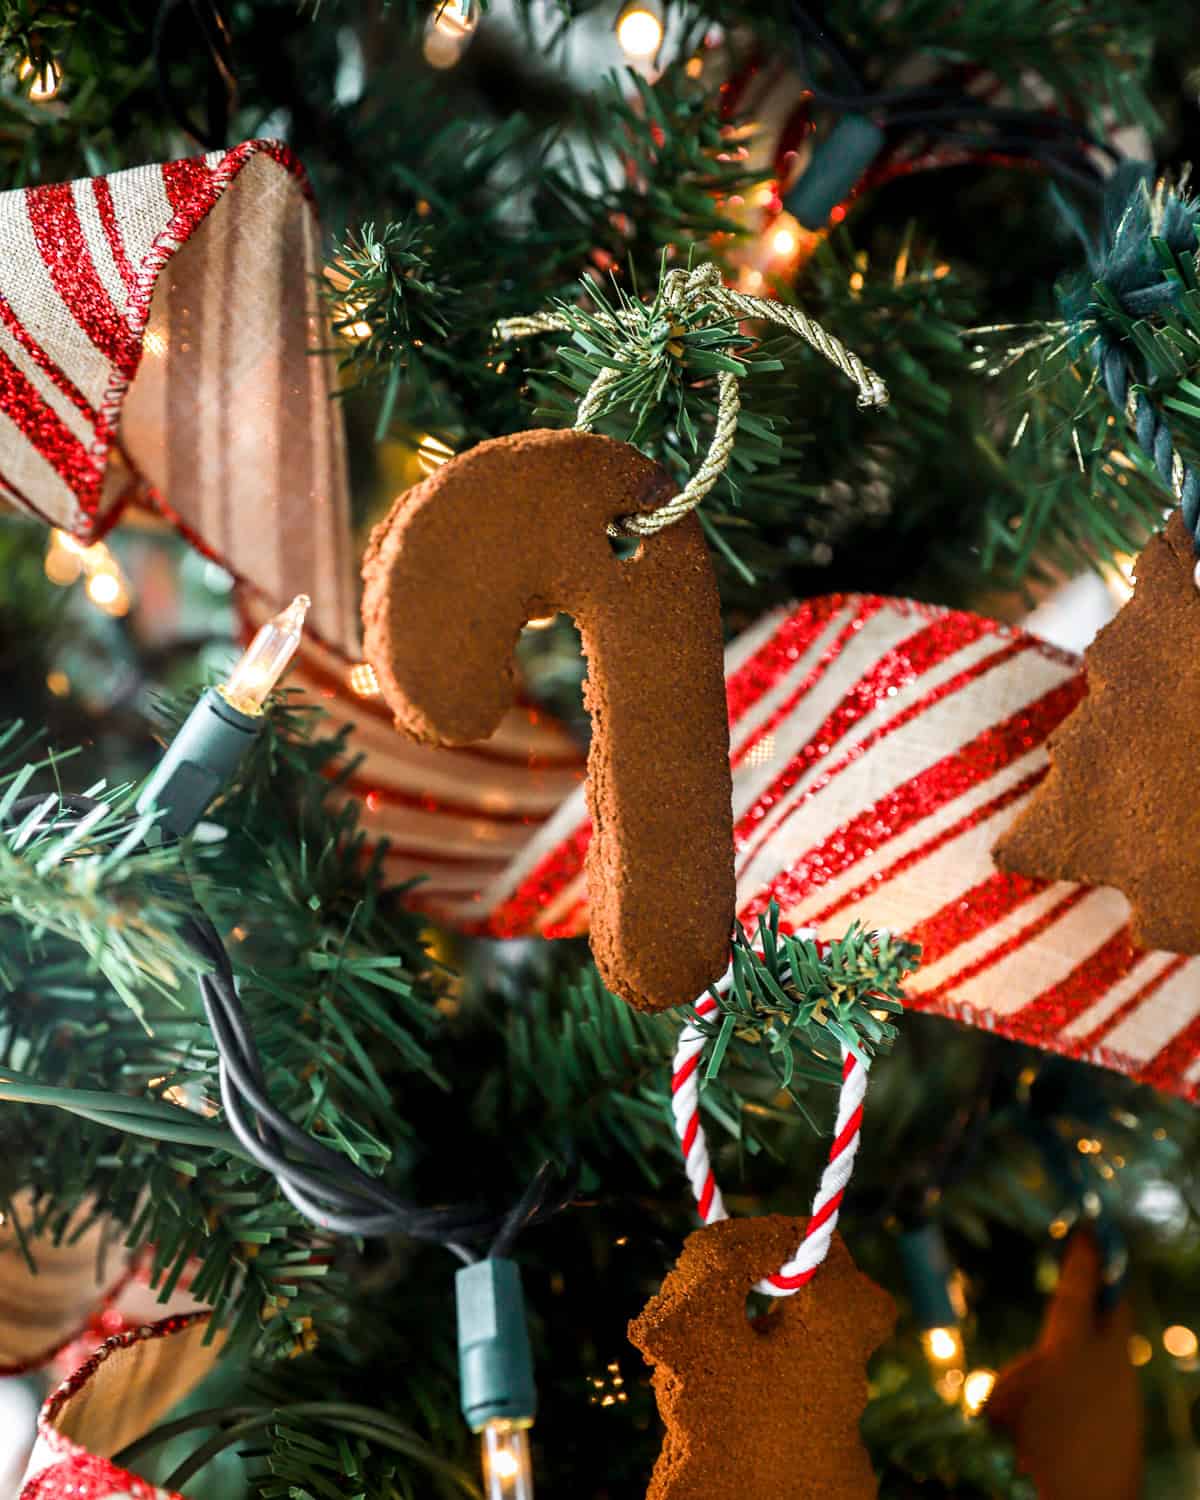

These homemade cinnamon ornaments are one of my favorite family Christmas crafts! Made with just 2 simple ingredients, these cinnamon dough ornaments smell incredible and look so beautiful hanging on my Christmas tree. Plus they’re completely non-toxic and safe for kids to help make. My kids have a blast every year cutting out the festive shapes!

Top Reader Review
- “I have made these decorations years ago with my family when they were young. I have kept them in a container and they are still in one piece – the scent almost gone. I put their names on the back – scratched in with a pin. Great way to remember those moments. Remember not to eat them!!! LoL.” –P Goian Bell
2 Ingredient Applesauce Cinnamon Ornaments
These 2 ingredient cinnamon ornaments are the easiest Christmas DIY you’ll make this season! The applesauce and cinnamon dough comes together in minutes using pantry staples, and you can air dry or bake them depending on how much time you have. Plus, they last for years–just store them carefully in an airtight container, and they’ll bring back memories every Christmas. I never get tired of the cozy and comforting scent they add to the tree!


Email this Recipe
Enter your email and we’ll send the recipe directly to you!
By submitting this form, you consent to receive emails from Easy Dessert Recipes.
Control the Texture with Moisture
If your dough feels crumbly or cracks when rolled, add a teaspoon of applesauce at a time until it feels soft and moldable, like sugar cookie dough. The right balance of moisture helps the ornaments dry evenly and stay sturdy all season.

Cinnamon Ornaments Recipe
Equipment
- Kitchen Scale (optional)
- Rolling Pin
Instructions
- In a medium bowl, combine the cinnamon and the applesauce until a soft dough forms.1 cup ground cinnamon, ¾ cup applesauce

- Roll the dough out until it is about ¼-inch thick.
- Use cookie cutters to carefully cut shapes out of the dough.
- Transfer the pieces to a baking sheet and use a straw or toothpick to make holes (to add string to hang the ornaments).
- Continue re-rolling the dough and cutting out shapes until you have used all of the dough.
- Allow the ornaments to dry completely by either leaving them at room temperature for 24 hours or baking for 2 hours at 200°F.
- Run string or ribbon through the holes and hang your ornaments on your tree.


Notes
- You can dust your work surface with a little bit of cinnamon to prevent the ornaments from sticking. I rolled mine out on plastic wrap.
- If you find that your ornaments are breaking, you may need to add more applesauce (moisture) to the dough to make it less brittle. Add 1 teaspoon at a time and work it in fully before adding more. We’re looking for a sugar cookie dough consistency.
- You can also try adding a bit of craft glue for an even stronger dough.
- For best results, keep the dough between ¼ and ⅓ inch thick. Thinner ornaments may curl or crack, while thicker ones take much longer to dry.
- Have fun with several different festive cookie cutters!
- Air drying your cinnamon ornaments takes longer, but it helps them keep a richer scent and smoother texture than baking.
- If you’re air drying, flip the ornaments halfway through (after 12 hours) to help them dry evenly and prevent curling.
- If baking, prop the oven door slightly open (use a wooden spoon) to allow moisture to escape and help the ornaments dry faster without overbaking.
- These ornaments aren’t made to be eaten, but they’re also non-toxic. If your little one takes a bite, it won’t be the end of the world, but they also probably won’t enjoy it too much. Once decorated, I recommend keeping them away from young kids who like to put things in their mouths!
- The best part about these ornaments is the scent! I find it lasts all season on my tree, and sometimes even longer if properly stored in an airtight container.
- You can decorate these ornaments with acrylic paint, glitter, puff paint, or permanent markers.
- You can use Mod Podge to attach beads, paper, or fabric, or as a sealer to keep the decorations looking their best. It may mask their cinnamon scent, though.
Tested for the Perfect Texture and Scent
I’ve made these cinnamon Christmas ornaments with my kids for years, and in that time, I’ve picked up a few tips. The secret to long-lasting, fragrant ornaments is all about moisture balance. The dough should feel like soft sugar cookie dough–pliable but not sticky.
Air drying helps preserve more of the cinnamon’s natural oils than baking, which means a stronger scent and smoother texture. A little patience really pays off with homemade ornaments that look gorgeous and smell amazing all season long.
How to Make Cinnamon Ornaments Step-by-Step
Prep: Gather up everything you need to make this DIY cinnamon ornaments recipe. Place a sheet of plastic wrap, wax paper, or parchment paper on your work surface. Alternatively, you can dust your tabletop with a bit of ground cinnamon to help prevent the ornaments from sticking.

Mix the Dough: In a medium bowl, combine 1 cup of ground cinnamon and ¾ cup of applesauce until a soft dough forms. The dough should have the consistency of sugar cookie dough. If you find your dough is too crumbly, add a bit more applesauce, 1 teaspoon at a time, mixing fully before adding more. If it’s too soft, add a bit more cinnamon and work it in fully.

Roll the Dough: Roll the dough out until it is about ¼-inch thick. For the best results, go no thicker than ⅓ inch. Thinner ornaments may curl or crack, while thicker ones take much longer to dry.

Cut the Dough: Use cookie cutters to carefully cut shapes out of the dough. Have fun with lots of different shapes and sizes!

Dry the Dough: Transfer the pieces to a baking sheet and use a straw or toothpick to make holes (to add string to hang the ornaments). Continue re-rolling the dough and cutting out shapes until you have used all of the dough. Allow the ornaments to dry completely by either leaving them at room temperature for 24 hours or baking for 2 hours at 200°F. If air drying, I recommend flipping the ornaments over after 12 hours to help them dry evenly and prevent curling. If baking, prop the oven door slightly open with a wooden spoon to allow moisture to escape.

String the Ornaments: Once fully cooled and dried, thread a string or ribbon through the holes and hang your ornaments on your tree. Keep them high enough off the ground that young kids or pets can’t reach and accidentally eat them. They’re non-toxic for humans, but not considered safe for dogs or cats!

How to Store
If stored carefully, these ornaments will last indefinitely, but I find they keep their scent best within 1 year. I love making these every year with my family, so I usually write the year they’re made with marker on the back of each ornament. It’s a great way to remember when you spent that time with your family!


Leave a Reply