
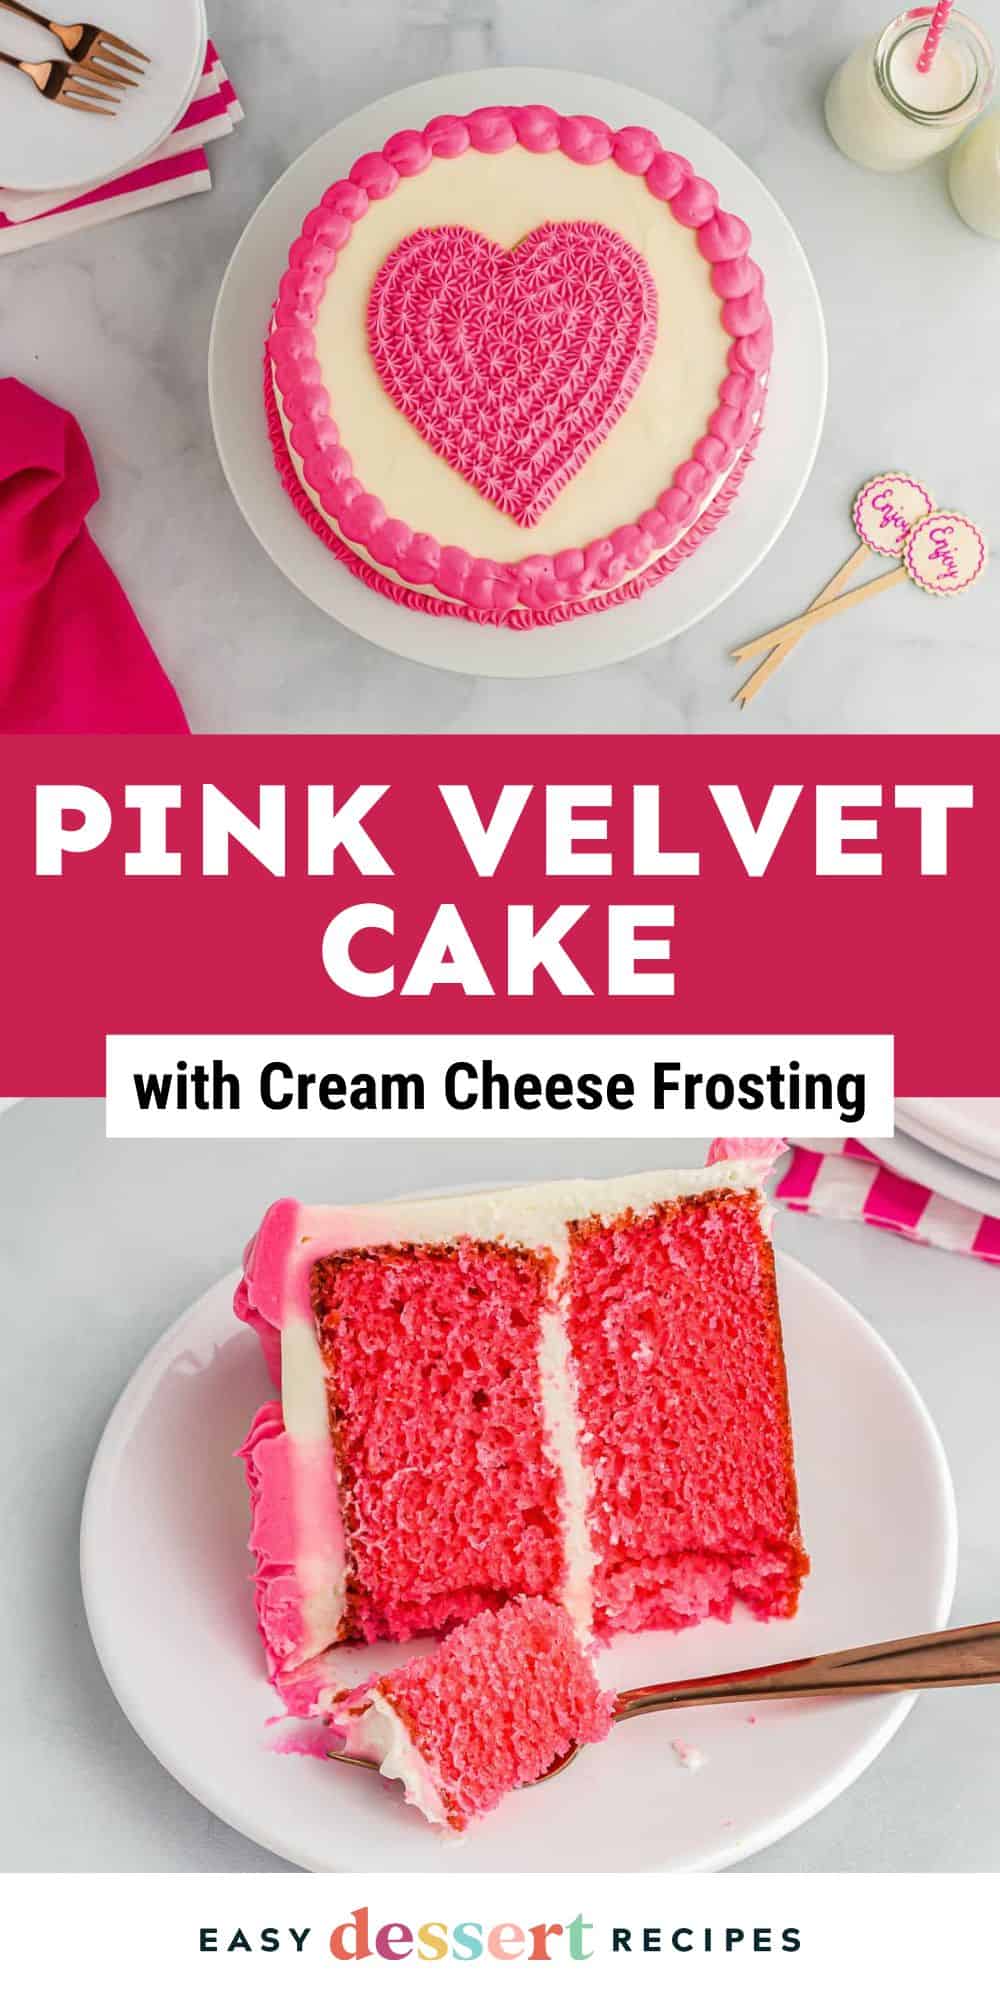
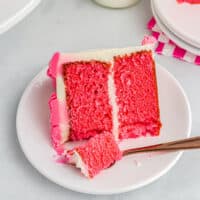
This pink velvet cake is the sweeter, cuter little sister to classic red velvet cake, and it’s perfect for a kid-centric V-Day celebration. I upgrade boxed cake mix with buttermilk and vinegar for a super tender texture, plus gel food coloring for a fun neon pink finish. And with just 10 ingredients, this Valentine’s Day cake is super easy to make.
My Favorite Kid-Friendly Valentine’s Day Cake
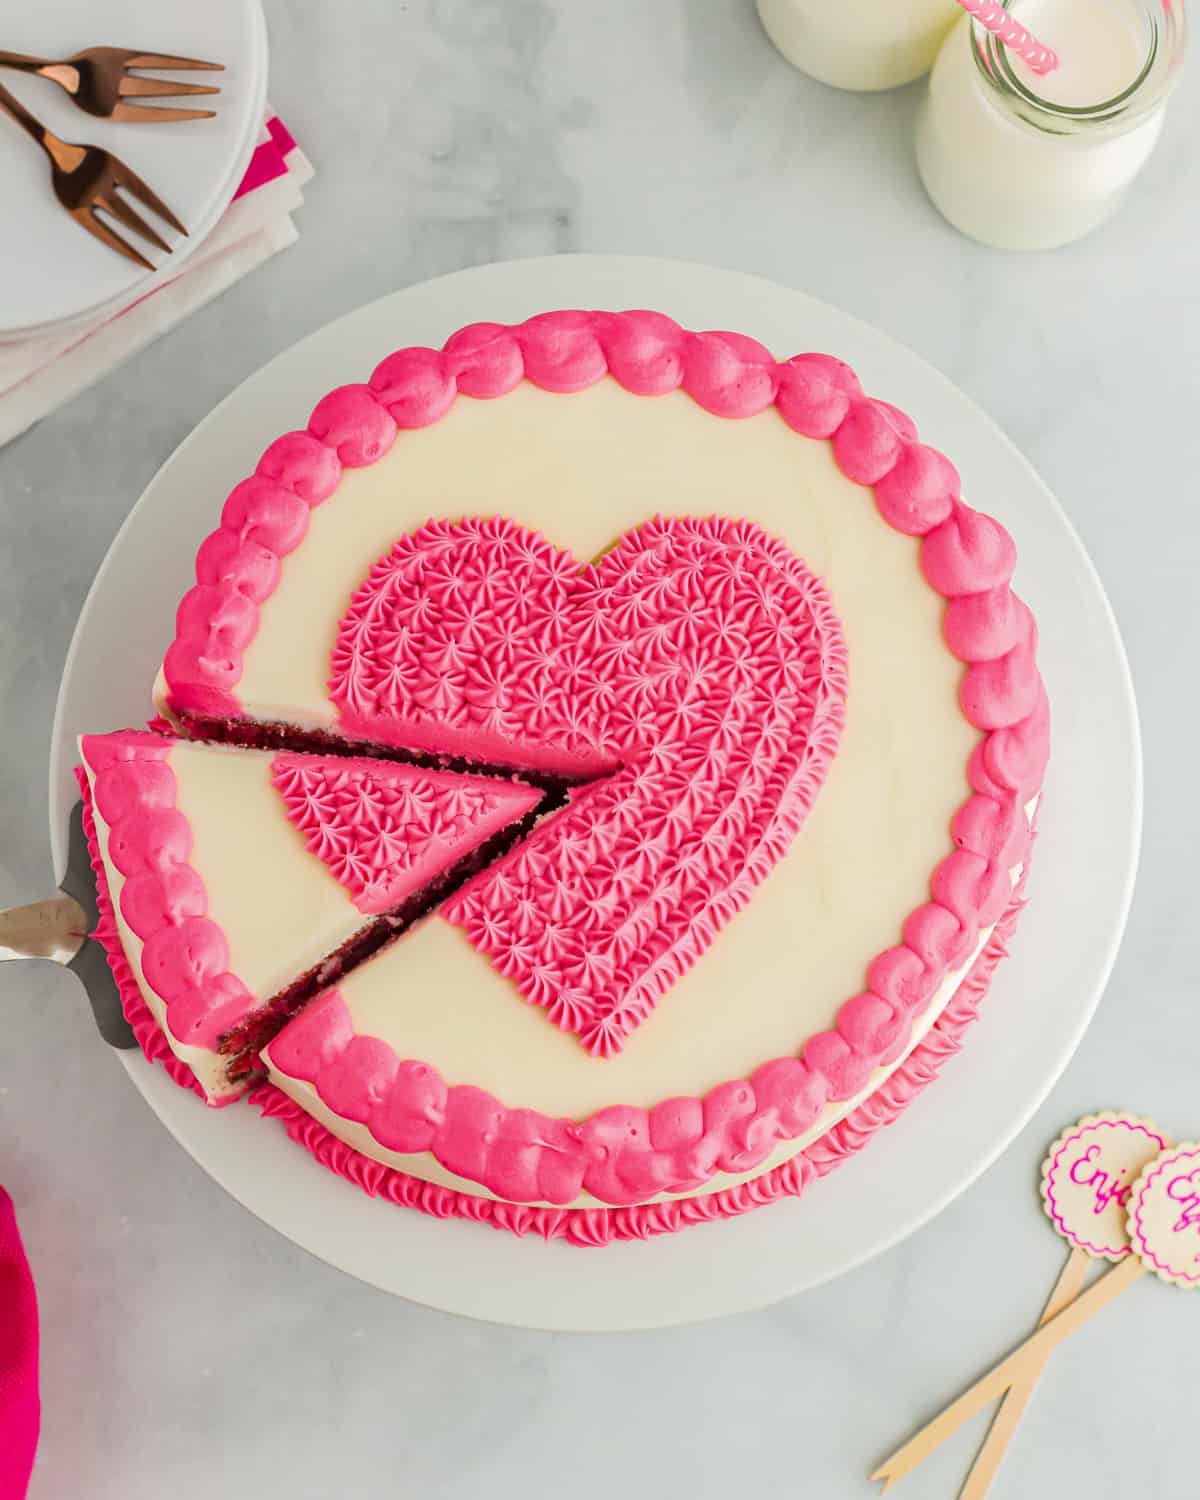
As I’ve gotten older, Valentine’s Day has become less about my husband and me and more about my kids. This pink velvet cake is so much more fun than the classic red velvet, and way more kid-friendly! I kept things simple with boxed cake mix, so I had time to work on getting the decorations just right. I went for a cute heart on top of my cake for Valentine’s Day, but you could definitely keep things simpler with all-white, all-pink, or marbled white and pink icing.
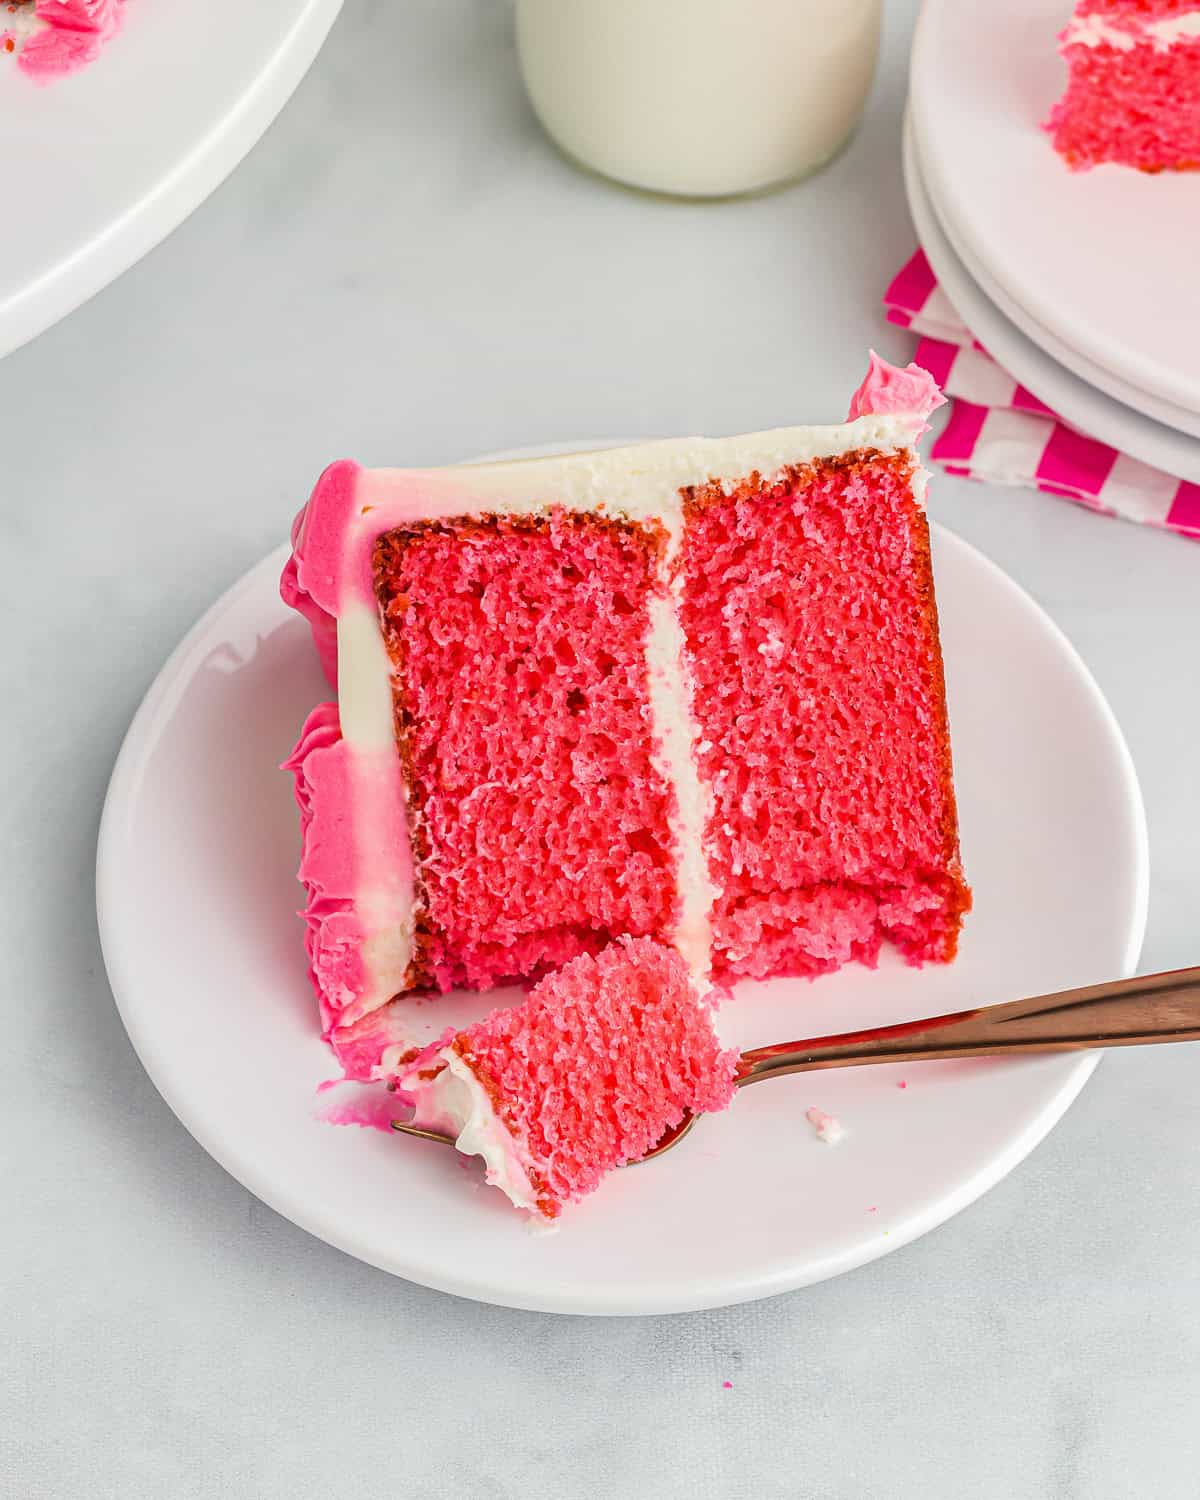
The cake is melt-in-your-mouth fluffy thanks to tenderizing buttermilk and white vinegar, and I topped it with a tangy cream cheese frosting for a bit of zing. I achieved the electric pink color with gel food coloring, which is so fun!

Email this Recipe
Enter your email and we’ll send the recipe directly to you!
By submitting this form, you consent to receive emails from Easy Dessert Recipes.
The Secret to a Softer, Brighter Pink Cake
The acidity in the buttermilk and vinegar breaks down gluten slightly, keeping the cake super soft and preventing it from getting dense. This also helps the pink color stay vivid instead of turning dull or brownish during baking.
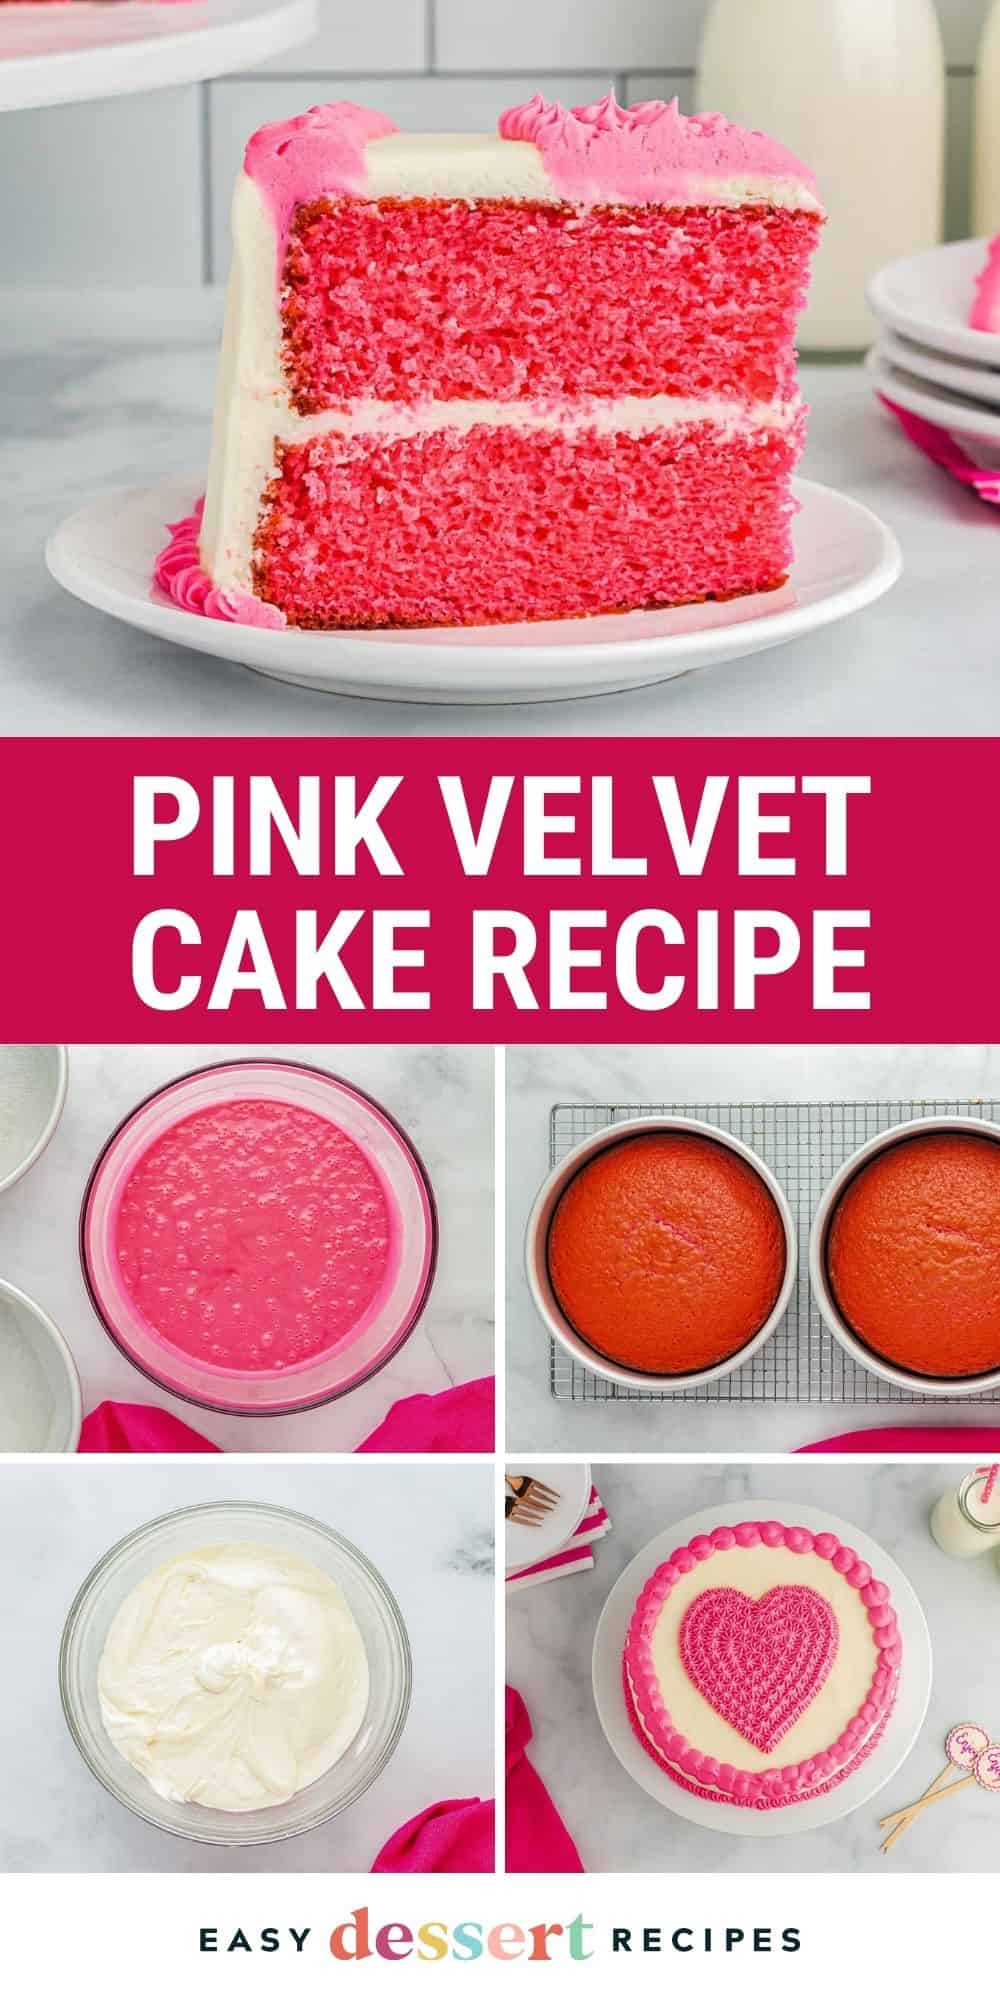
Pink Velvet Cake Recipe
Equipment
- Kitchen Scale (optional)
- 2 8-inch Round Cake Pan(s)
- Hand Mixer
- Piping Tip Set
Ingredients
For the Cake
- 26.5 ounces white cake mix (2 boxes)*
- 1½ cups buttermilk room temperature
- 3 large eggs room temperature
- ½ cup vegetable oil
- 1 tablespoon white vinegar **
- 2 teaspoons pure vanilla extract
- 1-2 drops pink gel food coloring ***
For the Cream Cheese Frosting:
- 8 ounces cream cheese room temperature (1 brick)
- ¾ cup unsalted butter slightly melted (1½ sticks)
- 1 tablespoon pure vanilla extract
- 5 cups powdered sugar
- 1-2 drops pink gel food coloring
Instructions
- Preheat oven to 350°F. Spray two 8-inch round cake pans with nonstick spray and line the inside bottom of each pan with parchment paper. Set aside.
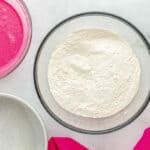
- Place the cake mix in a large bowl and set aside.26.5 ounces white cake mix

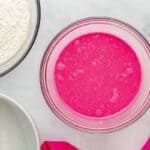
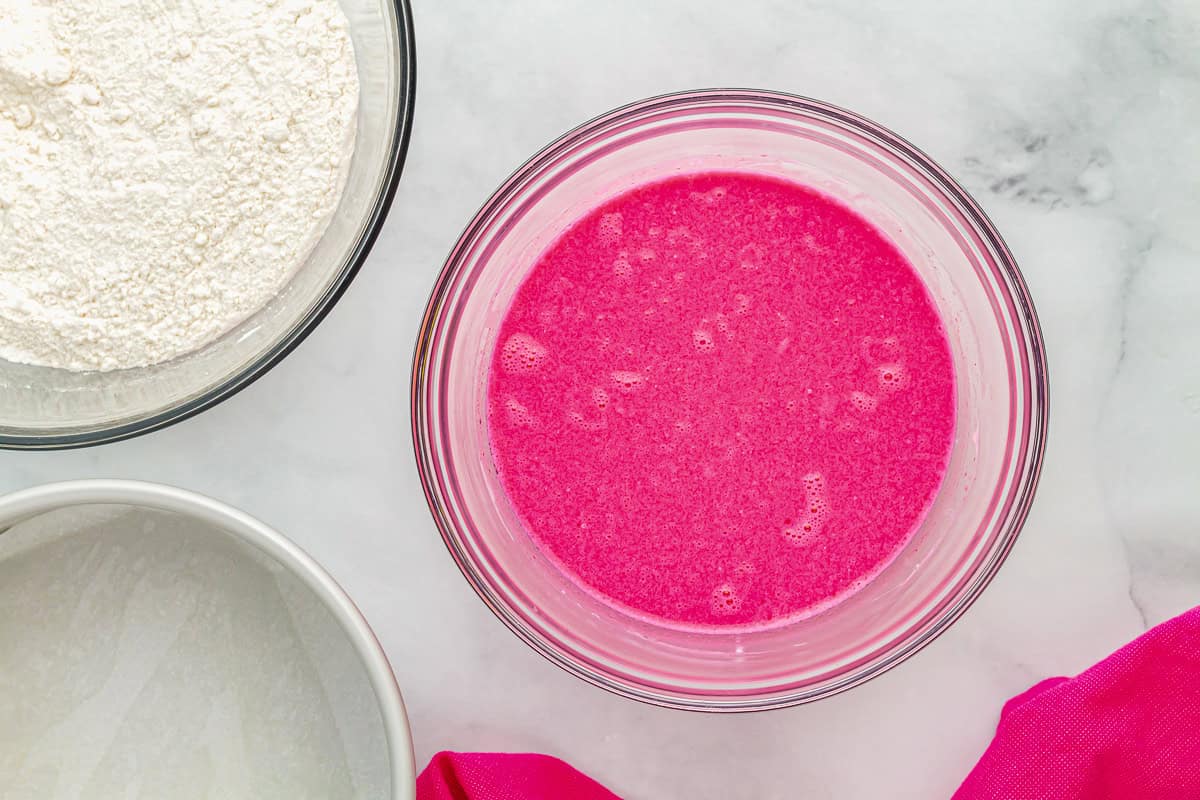
- In a medium bowl, using a hand mixer, beat the buttermilk, eggs, vegetable oil, white vinegar, vanilla extract, and pink gel food coloring together on low speed just until mixed.1½ cups buttermilk, 3 large eggs, ½ cup vegetable oil, 1 tablespoon white vinegar, 2 teaspoons pure vanilla extract, 1-2 drops pink gel food coloring
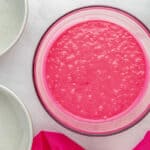
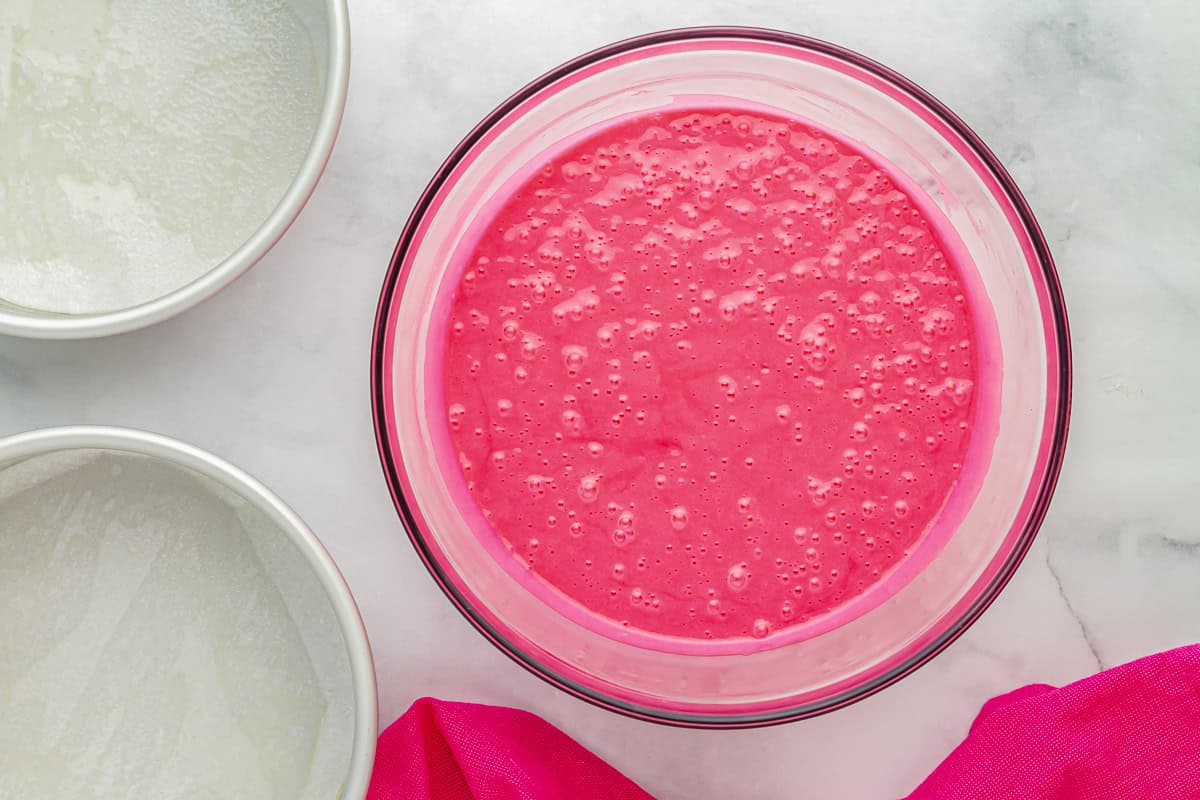
- Pour the wet mixture into the cake mix and beat on a low speed just until mixed. Use a spatula to scrape down the sides of the bowl.
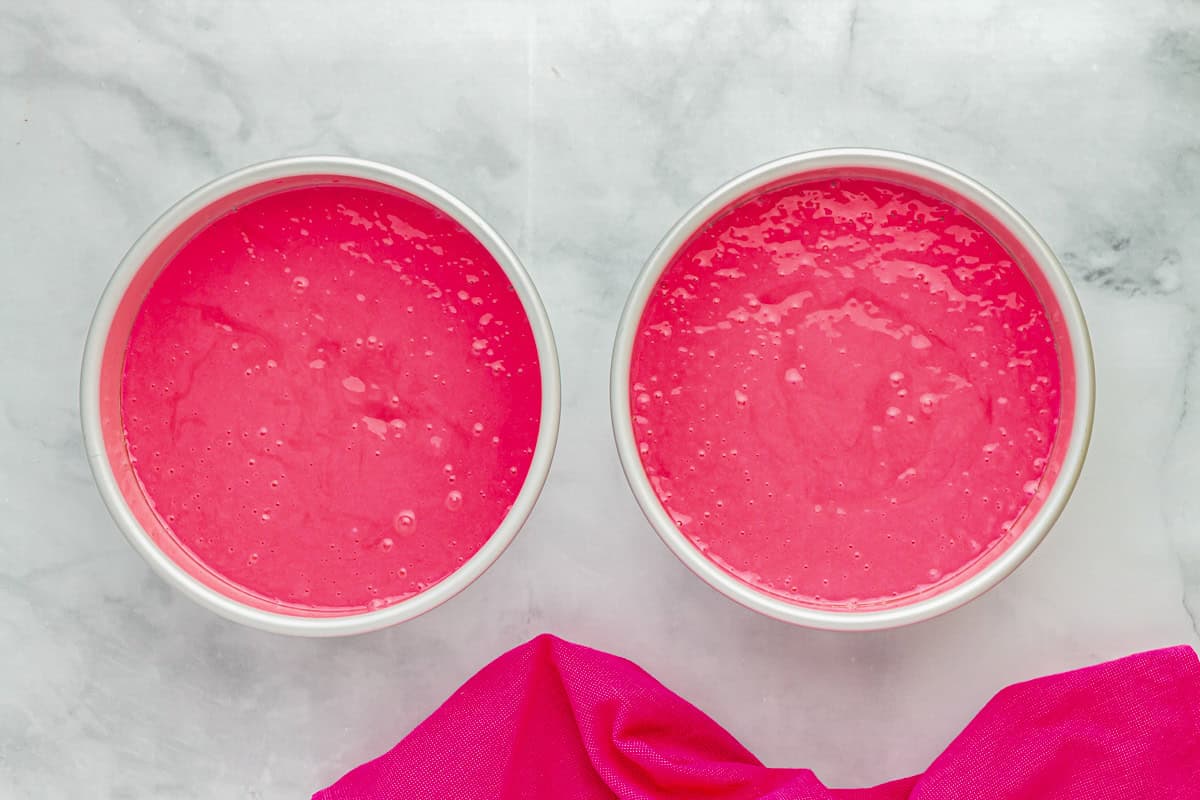
- Divide the cake batter evenly between both prepared cake pans (about 691 grams per pan).
- Bake in the preheated oven for 33-35 minutes, or until a toothpick inserted in the middle comes out clean.
- Remove the cakes from the oven and let them cool in the pans for 15 minutes before removing and cooling completely on wire racks.
- Once cakes have cooled to room temperature, wrap each cake layer separately in food-safe plastic wrap and refrigerate for at least 2 hours.
- Make the cream cheese frosting: In a large bowl, beat the cream cheese, butter, and vanilla extract on high speed until smooth, about 2 minutes. Beat in the powdered sugar until smooth, about another 2 minutes.8 ounces cream cheese, ¾ cup unsalted butter, 1 tablespoon pure vanilla extract, 5 cups powdered sugar
- Once the cakes have chilled, use a large serrated knife to cut the dome tops off both cakes so they both have a flat top.
- Place a thin layer of frosting (about 2 tablespoons) in the middle of a cake board or cake plate then place one cake (cut side facing up) on top of that frosting.
- Add a generous layer of frosting on top of that first layer of cake then place the second layer of cake (bottom facing up) on top of the first layer of cake.
- Frost a thin layer of frosting around the top and sides of the cake to crumb coat. Use a tool like a cake scraper to smooth the icing out.
- Place the lightly frosted cake in the freezer for 10 minutes so the first layer of frosting firms up a bit.
- Remove cake from freezer and apply the second layer of frosting. Spread this layer as smoothly as you can using the cake scraper.
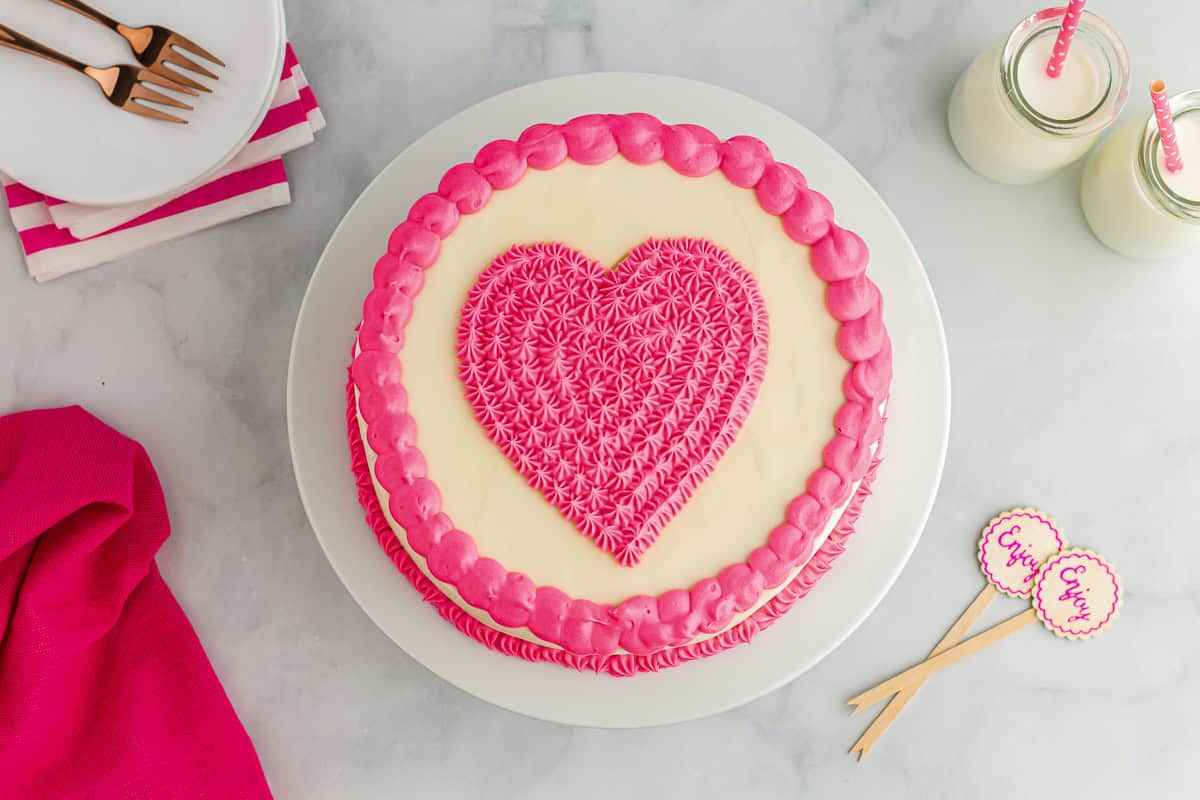
- Take the remaining frosting and color it pink. Place 1 cup of pink frosting in an icing bag fitted with a small star tip and pipe a heart on the top of the cake in the middle. Then, pipe small stars around the bottom outer edge of the cake.1-2 drops pink gel food coloring
- With the remaining pink frosting, place it in an icing bag fitted with a small round tip and frost circles around the top of the cake. Don’t pipe the circles too close to the edge, or they may drip down the sides of the cake.
- Place the cake back into the freezer for about 10 minutes just to firm up those icing details.


Notes
- Room temperature ingredients mix more easily and have a lighter texture
- Add food coloring a drop at a time and mix well to avoid streaks.
- The cake color will deepen slightly as it bakes, so stop adding color once the batter looks bright pink.
- Fill each pan about ⅔ full for even baking.
- Cakes are done when the edges pull away, and the center springs back when pressed.
- Chill cake layers to make them easier to level and frost with fewer crumbs.
- Avoid overmixing frosting, or it will become too soft.
- If the frosting or piping bag warms up, chill for 10-15 minutes before continuing.
- I used a Wilton 32 tip for the heart and a Wilton 12 tip for the border.
- Don’t worry about perfect piping–the design is forgiving and still looks festive.
How to Make Pink Velvet Cake Step-by-Step
Prep: Preheat your oven to 350°F, spray two 8-inch round cake pans with nonstick spray, line the inside bottom of each pan with parchment paper, and set aside. Bring the buttermilk, eggs, and cream cheese to room temperature for at least 15 minutes before beginning so they mix more easily (they also make the cake more tender!). Place 26.5 ounces (2 boxes) of white cake mix in a large bowl and set aside.
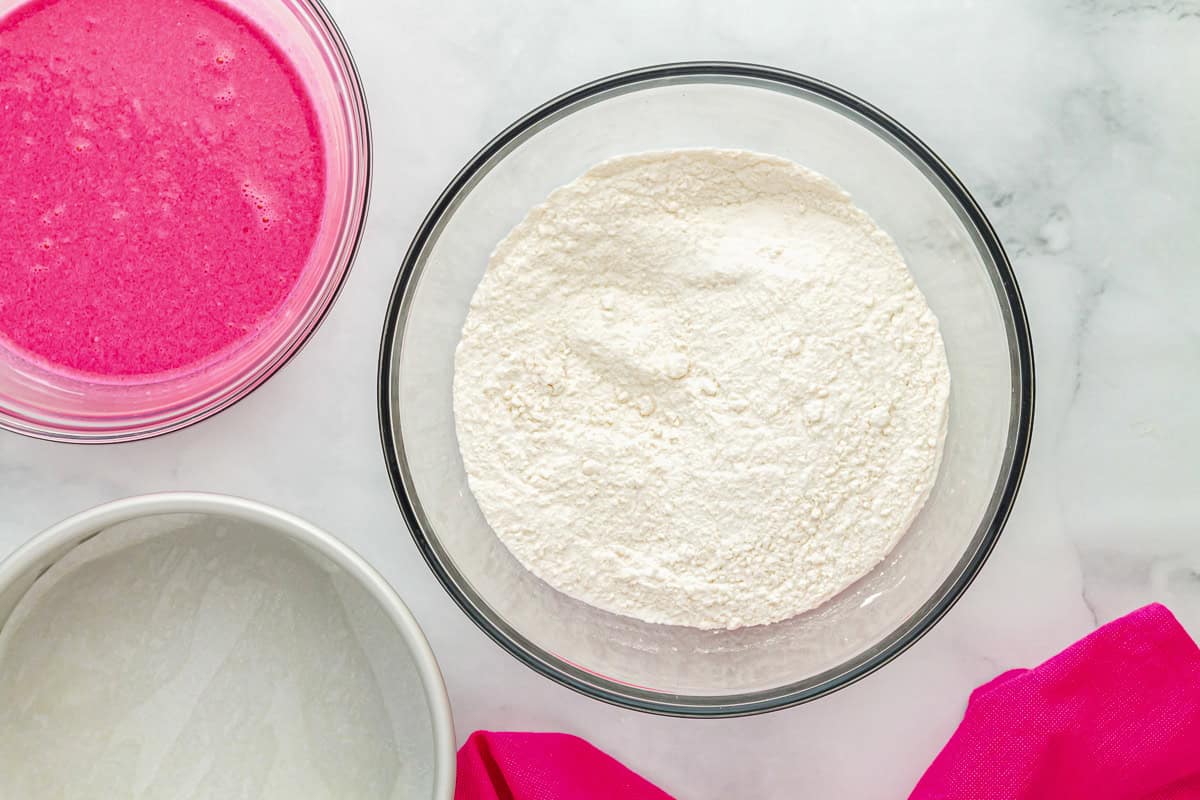
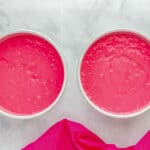
Mix the Wet Ingredients: In a medium bowl, using a hand mixer, beat 1½ cups of room-temperature buttermilk, 3 large, room-temperature eggs, ½ cup of vegetable oil, 1 tablespoon of white vinegar, 2 teaspoons of vanilla extract, and 1-2 drops of pink gel food coloring (I used Chefmaster Liqua-gel in the shade Neon Pink) together on low speed just until mixed. Add the food coloring one drop at a time and mix well. You want the batter bright pink–it will darken slightly as it bakes.
Combine the Batter: Pour the wet mixture into the cake mix and beat on a low speed just until mixed. Use a spatula to scrape down the sides of the bowl. Don’t overmix here; overmixing makes boxed cake mix dense and dry.
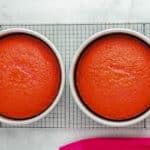
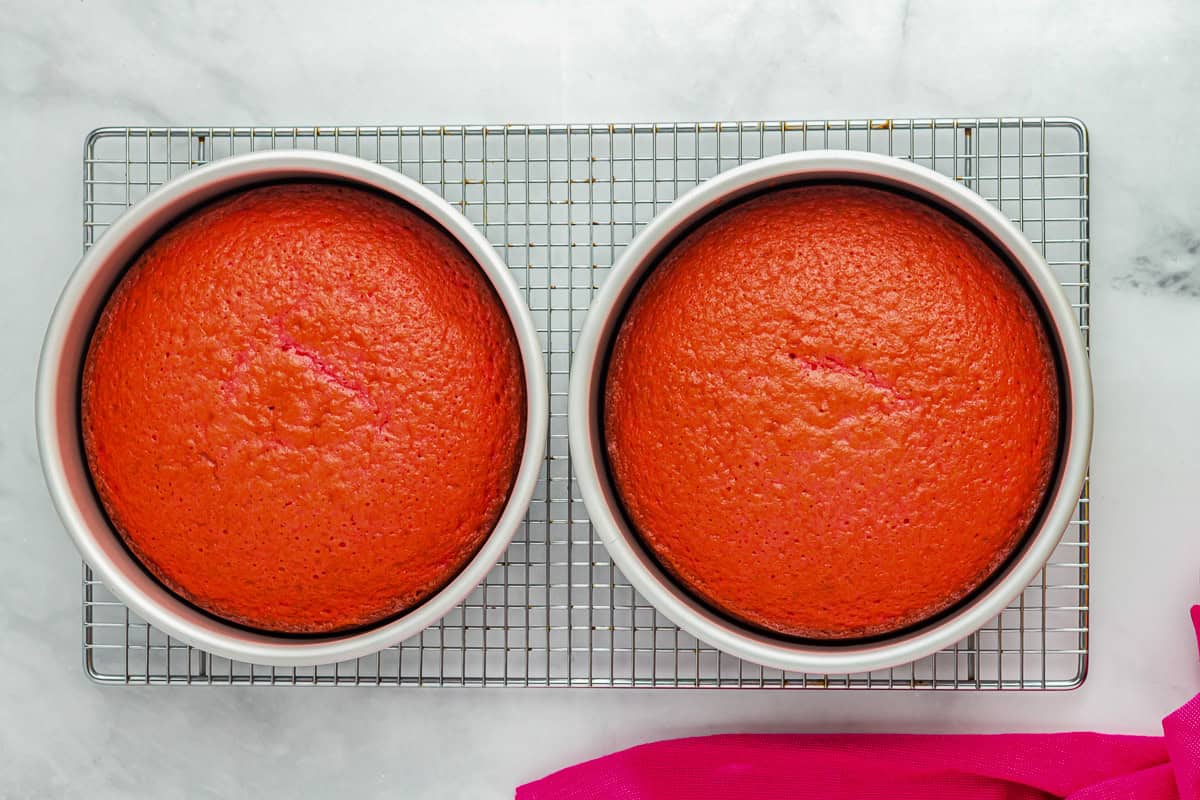
Bake the Cakes: Divide the cake batter evenly between both prepared cake pans (about 691 grams per pan). Each pan should be about ⅔ full–that’s the sweet spot for even baking. Bake in the preheated oven for 33–35 minutes, or until a toothpick inserted in the middle comes out clean. You’ll know they’re done when the edges pull away from the pan, and the center springs back slightly when pressed.
Cool and Chill the Cakes: Remove the cakes from the oven and let them cool in the pans for 15 minutes before removing and cooling completely on wire racks–this helps prevent them from crumbling when you take them out. Once cakes have cooled to room temperature, wrap each cake layer separately in food-safe plastic wrap and refrigerate for at least 2 hours. Chilling the cake layers makes them easier to level and frost with fewer crumbs.
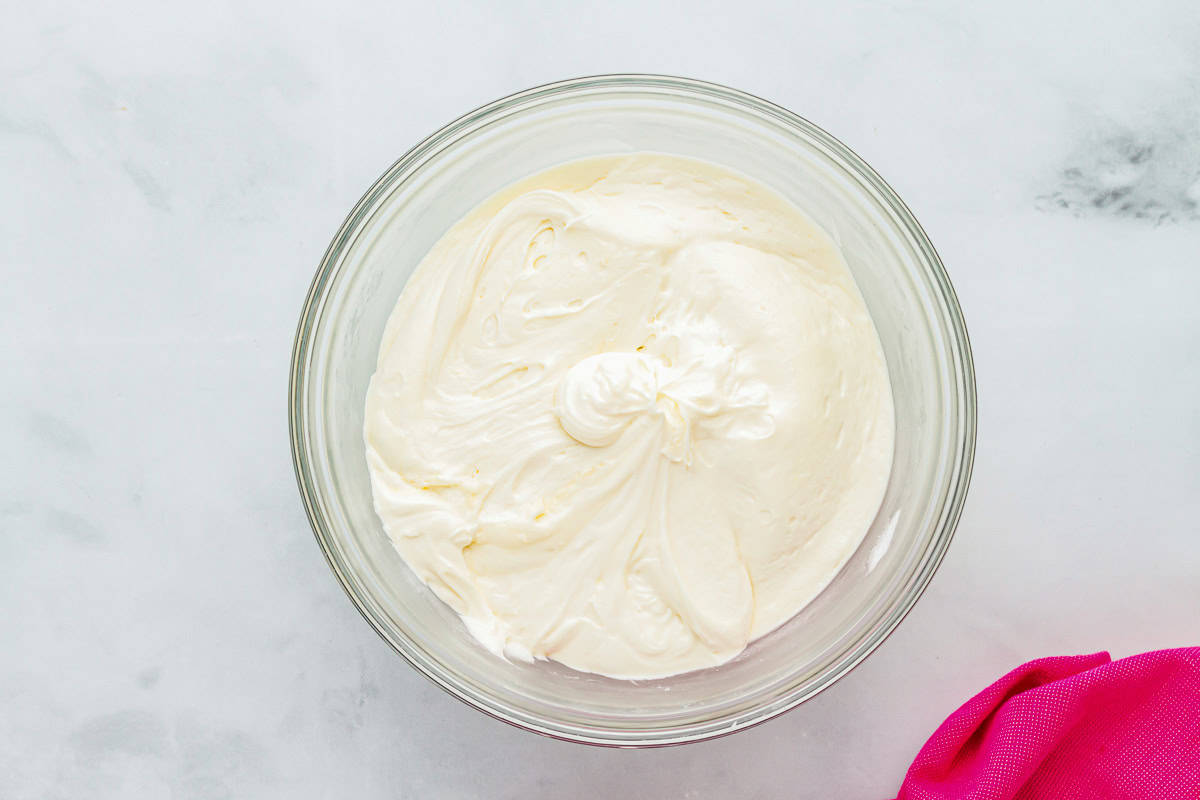
Make the Cream Cheese Frosting: In a large bowl, beat 8 ounces (1 brick) of room-temperature cream cheese, ¾ cup of slightly melted unsalted butter, and 1 tablespoon of vanilla extract on high speed until smooth, about 2 minutes. Beat in 5 cups of powdered sugar until smooth, about another 2 minutes. Take care not to overbeat the frosting, or it will go from firm to soft and soupy.
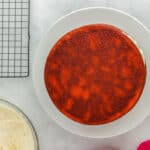
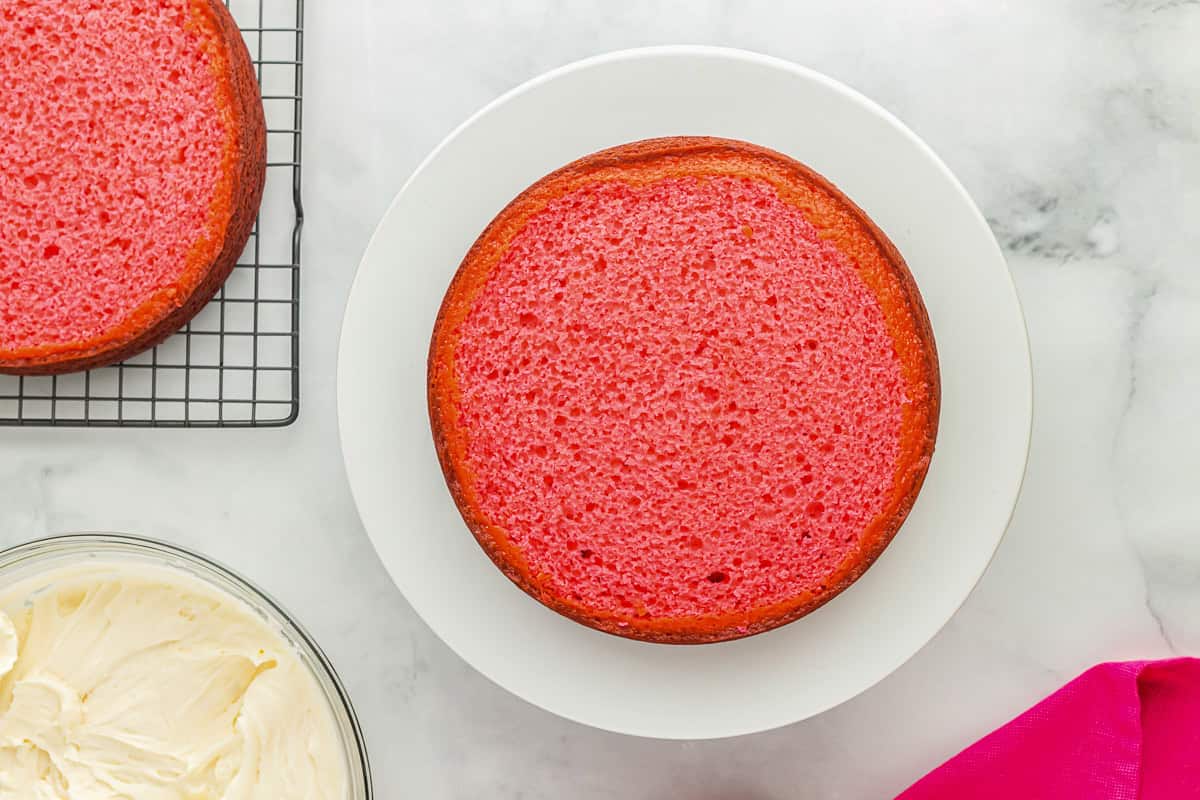
Level and Secure the Cake: Once the cakes have chilled, use a large serrated knife to cut the dome tops off both cakes so they both have a flat top. You don’t need these dome tops, so these can be used for snacking. Place a thin layer of frosting (about 2 tablespoons) in the middle of a cake board or cake plate, then place one cake (cut side facing up) on top of that frosting.
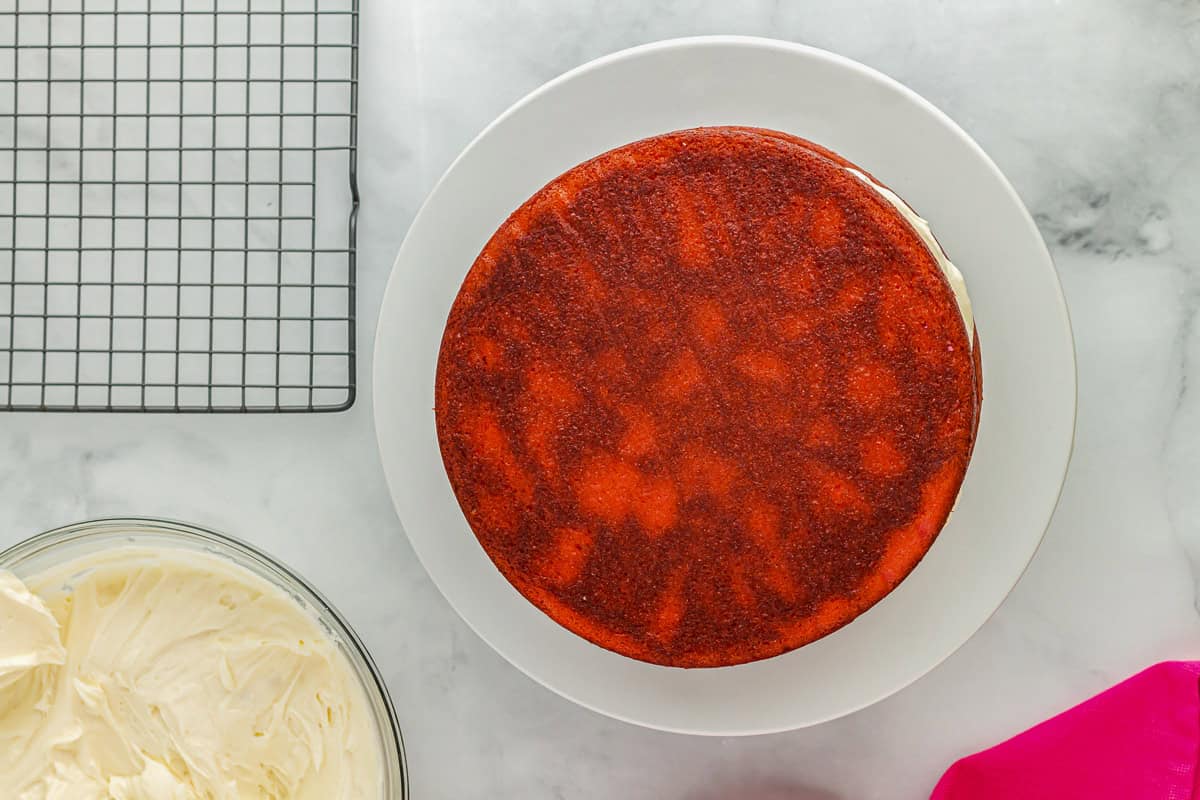
Stack the Layers: Add a generous layer of frosting on top of that first layer of cake, then place the second layer of cake (bottom facing up) on top of the first layer of cake.
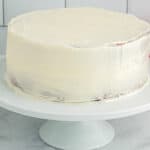
Crumb-Coat the Cake: Frost a thin layer of frosting around the top and sides of the cake to crumb coat. Use a tool like a cake scraper to smooth the icing out. Place the lightly frosted cake in the freezer for 10 minutes so the first layer of frosting firms up a bit.
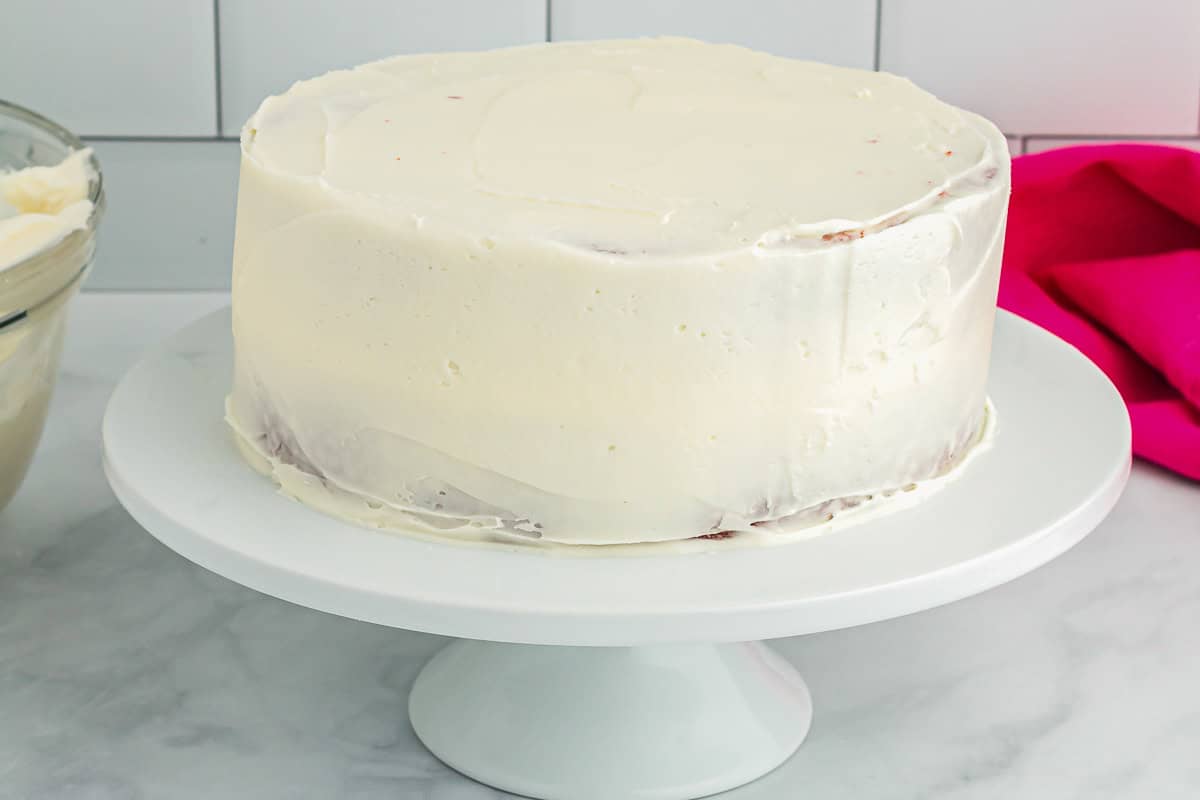
Decorate the Cake: Remove the cake from the freezer and apply the second layer of frosting. Spread this layer as smoothly as you can using the cake scraper. Take the remaining frosting and color it pink with 1-2 drops of pink gel food coloring. Place 1 cup of pink frosting in an icing bag fitted with a small star tip (like a Wilton 32) and pipe a heart on the top of the cake in the middle. Then pipe small stars around the bottom outer edge of the cake. With the remaining pink frosting, place it in an icing bag fitted with a small round tip (like a Wilton 12), and frost circles around the top of the cake. Don’t pipe the circles too close to the edge, or they may drip down the sides of the cake. If at any point the frosting or piping bag warms up in your hands, chill it for 10-15 minutes before continuing. Place the cake back into the freezer for about 10 minutes just to firm up those icing details.
How to Store and Freeze
Store leftover pink velvet cake in an airtight container in the refrigerator for up to 4 days or in the freezer for up to 3 months. Let thaw overnight in the refrigerator before serving.


Leave a Reply