


My kids and I love making these Easter egg sugar cookies every year. I use the simplest sugar cookie dough, cut out egg shapes, then throw together a buttercream frosting to pipe on top. Decorating these Easter cookies together is our next favorite activity after dyeing eggs. Make this an Easter tradition at your house like it is at ours!
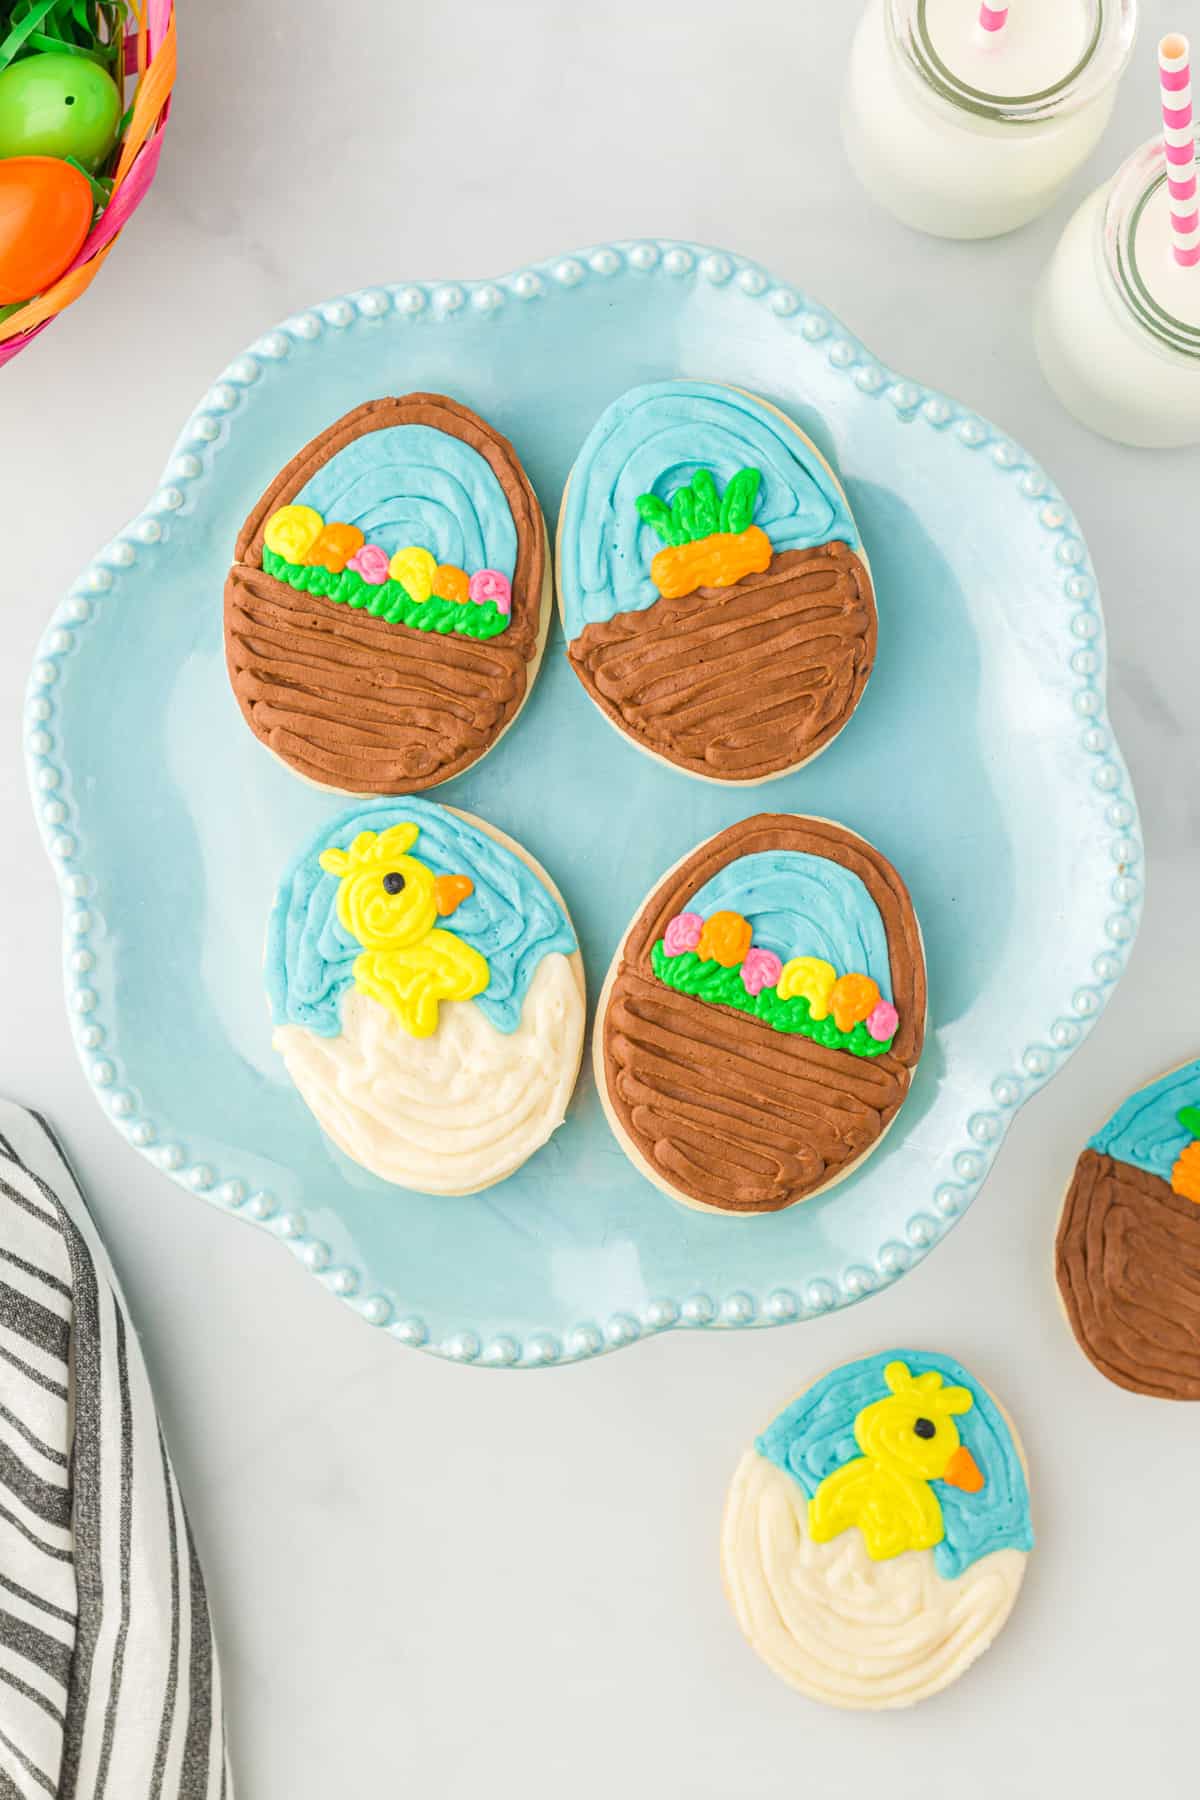
Decorated Egg-shaped Sugar Cookies for Easter
My kids love a craft project, especially around holidays. They always remind me when we need to decorate sugar cookies for Easter, and I’ve got this recipe ready in my back pocket. I wanted the baking part to be easy-as-can-be since this treat is really all about how cute they look. I use shortening instead of butter to keep my sugar cookies moist and plush without losing their cut-out shapes. So they taste amazing and hold up under layers of frosting! There’s really no limit to what shapes you make or how you decorate, so have fun with these Easter egg cookies.

Email this Recipe
Enter your email and we’ll send the recipe directly to you!
By submitting this form, you consent to receive emails from Easy Dessert Recipes.
Decorate with Buttercream or Royal Icing
I’ve decorated these Easter cookies with both buttercream and royal icing, and it’s really up to your preference. Royal icing is firmer, hardens quickly, holds its shape, and is better for storage. But buttercream tastes better in my opinion, and has a better texture if eating right away. Both options are in the recipe card!

Easter Egg Sugar Cookies Recipe
Equipment
- Kitchen Scale (optional)
- Hand Mixer or Stand Mixer
- 2 Baking Sheet(s)
- Rolling Pin
- Piping Tip Set (optional)
Ingredients
For the Sugar Cookies
- 1 cup vegetable shortening (1 stick)
- 1 cup granulated sugar
- 2 large eggs room temperature
- 2 tablespoons milk room temperature
- 1 tablespoon pure vanilla extract
- 3½ cups all-purpose flour
- 2 teaspoons baking powder
- ½ teaspoon kosher salt
For the Buttercream
- 1 cup unsalted butter slightly melted (2 sticks)
- 2½ cups powdered sugar
- 1 tablespoon pure vanilla extract
- gel food coloring
Instructions
For the Sugar Cookies
- In a large bowl, using a hand mixer, beat the shortening, sugar, eggs, milk and vanilla extract together until smooth, about 1-2 minutes.1 cup vegetable shortening, 1 cup granulated sugar, 2 large eggs, 2 tablespoons milk, 1 tablespoon pure vanilla extract
- In a separate bowl, stir together flour, baking powder, and salt.3½ cups all-purpose flour, ½ teaspoon kosher salt, 2 teaspoons baking powder
- Add dry ingredients to wet ingredients and beat just until well combined and the dough starts to stick together, about 1–2 minutes. Do not overmix.
- Line a baking sheet with parchment paper. Set aside.
- Sprinkle a clean work surface lightly with flour, then place about ⅓ of the dough onto the prepared surface to roll out. Sprinkle the top of the dough with flour to prevent the dough from sticking to the rolling pin.
- For soft and thick cookies, it’s recommended to use a rolling pin with thickness rings and use the ⅜-inch thickness ring. If you aren’t cutting these cookies out thick, you’ll want to reduce your baking time to reflect that (start checking cookies after 8 minutes instead of 12 minutes).
- Cut the cookies out using egg-shaped cookie cutters. The eggs shown here are about 3 inches in size, but slightly larger works just fine.
- Place the cut-out cookies onto the prepared baking sheet. The cookies can be placed close together on the baking sheet for this step. Place sugar cookies in the freezer for 20 minutes to chill before baking.
- While the cookies chill, preheat oven to 350°F.
- Line a second baking sheet with parchment paper. Place some cookies onto the baking sheet (about 2 inches apart) and bake for 12-14 minutes for thick-cut cookies, 8-10 minutes for thinner cookies, or until tops of cookies look set (no longer wet but not yet brown) and the bottoms of cookies are slightly brown. The middle of cookies will still be slightly soft to the touch but will continue baking once removed from the oven. Only bake one tray of cookies at a time to ensure even baking time for all cookies.
- Repeat baking steps with remaining cookies.
- Let cookies cool completely before frosting.
For the Buttercream
- In a large bowl, using a hand mixer, beat the butter, powdered sugar, and vanilla together until light and fluffy, about 5 minutes. If the frosting seems too thick, beat in a tablespoon of water.1 cup unsalted butter, 2½ cups powdered sugar, 1 tablespoon pure vanilla extract
Decorating Steps
- Separate the frosting into separate smaller bowls. Use food coloring to color icings in desired colors. Stir completely to make sure all color is worked into the icing.gel food coloring
- Place icings into tipless piping bags and close the ends (the side you were putting the icing in) using clips or elastics. Cut small openings in the tips of each icing bag. For background colors, the tips can be cut larger. For icings you’ll be printing with or doing finer details with, keep the tip cut small.
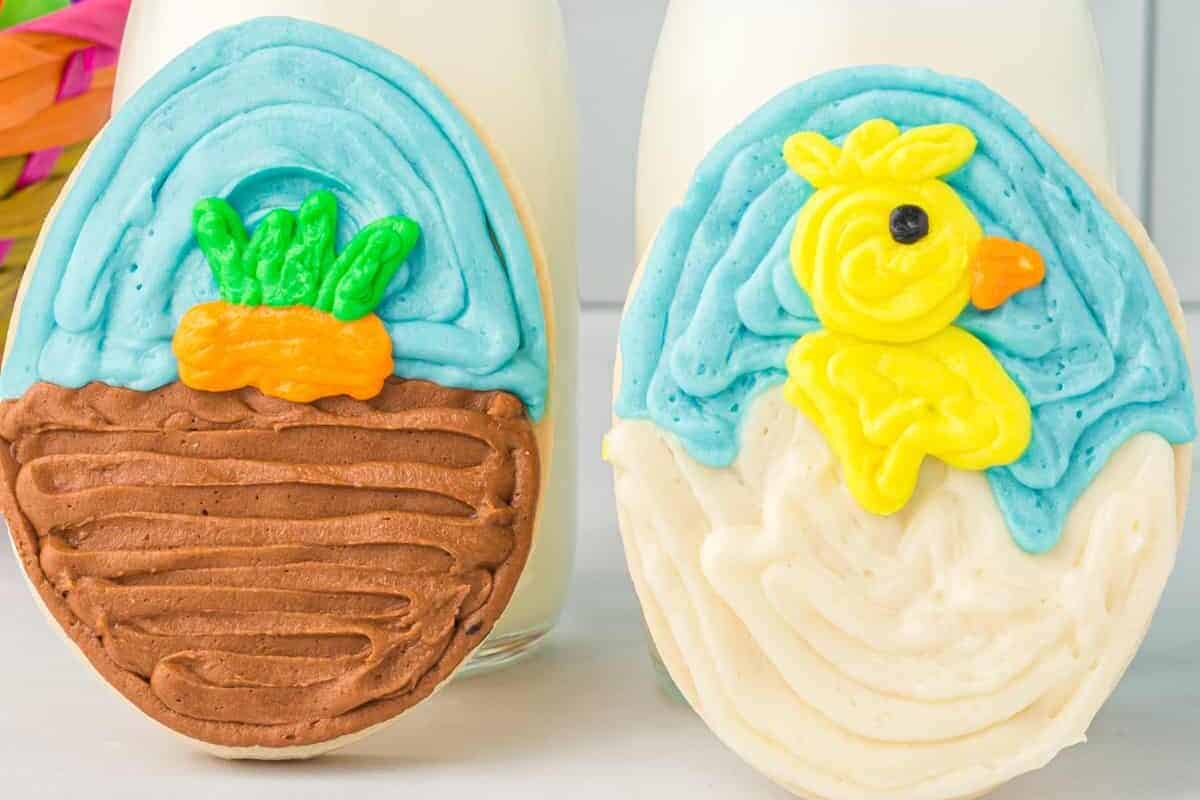
- Start decorating with background colors on all cookies (like the brown of the basket and the blue of the sky). Simply start by lining the outside of the cookie then continue filling in following the shape of the cookie. If icings are not squeezing out of the bags smoothly, roll piping bags between hands to warm icing a bit making it easier to squeeze out. Do not microwave icing – even 5 seconds in the microwave can turn the icing into a melted mess.
- Work on decorating cookies in layers – first the background color, then finer details like the carrot top or eggs in basket. Lay cookies out in a single layer to dry.
Notes
- Roll out the dough to ⅜-inch thickness for soft, thick cookies. Use a rolling pin with thickness rings for accuracy.
- For thinner cookies, roll the dough out thinner and adjust the baking time down by a few minutes.
- Don’t skip chilling the cookies! They will spread out and become misshapen if you don’t chill them.
- Be careful not to overbake the cookies! Bake until just beginning to brown on the bottom.
- Make sure the cookies are completely cool before frosting them; otherwise, the frosting will melt and slide off.
- Divide the frosting into as many bowls as you’d like colors. Be sure to add extra frosting to the colors you think you’ll use a lot, and be sure to leave one bowl white!
- For richer, darker frosting colors, use more gel food coloring. For pastel colors, use just a drop.
- Cut wider tips in the icing bags for backgrounds and flooding, and cut smaller tips for details and text.
- Start with simpler designs first until you get the hang of piping; then, move on to more complicated designs.
- Always work from the background to the foreground, piping the sky and ground, for example, before piping any food or figures.
- Don’t worry if you make a mistake. This frosting is easy to scrape off with a butter knife and start again!
How to Make Easter Sugar Cookies Step-by-Step
Prep the Ingredients: In a large bowl, using a hand mixer, beat 1 cup of vegetable shortening, 1 cup of granulated sugar, 2 large eggs, 2 tablespoons of milk, and 1 tablespoon of vanilla extract together until smooth, about 1-2 minutes. In a separate bowl, stir together 3½ cups of all-purpose flour, ½ teaspoon of kosher salt, and 2 teaspoons of baking powder.

Mix the Dough: Add the dry ingredients to the wet ingredients and beat just until well combined and the dough starts to stick together, about 1–2 minutes. Do not overmix.

Roll and Cut the Cookies: Line a baking sheet with parchment paper. Set aside. Sprinkle a clean work surface lightly with flour, then place about ⅓ of the dough onto the prepared surface to roll out. Sprinkle the top of the dough with flour to prevent the dough from sticking to the rolling pin. For soft and thick cookies, I recommend rolling out to ⅜-inch thickness. Cut the cookies out using egg-shaped cookie cutters. Mine were 3 inches.

Chill and Bake the Cookies: Place the cut-out cookies onto the prepared baking sheet and place the sheet in the freezer for 20 minutes to chill before baking. While the cookies chill, preheat your oven to 350°F and line a second baking sheet with parchment paper. Place some cookies onto the baking sheet (about 2 inches apart) and bake for 12-14 minutes for thick-cut cookies, 8-10 minutes for thinner cookies, or until the tops of cookies look set (no longer wet but not yet brown) and the bottoms of cookies are slightly brown. Repeat the baking steps with the remaining cookies. Let the cookies cool completely before frosting.

Beat the Frosting: In a large bowl, using a hand mixer, beat 1 cup of unsalted butter, 2½ cups of powdered sugar, and 1 tablespoon of vanilla extract together until light and fluffy, about 5 minutes. If the frosting seems too thick, beat in a tablespoon of water.

Color the Frosting: Separate the frosting into separate smaller bowls. Use food coloring to color icings in desired colors. Stir completely to make sure all color is worked into the icing. Place the icings into tipless piping bags and close the ends (the side you were putting the icing in) using clips or elastics. Cut small openings in the tips of each icing bag. For background colors, the tips can be cut larger. For icings you’ll be printing with or doing finer details with, keep the tip cut small.

Decorate the Cookies: Start decorating with background colors on all cookies (like the brown of the basket and the blue of the sky). Simply start by lining the outside of the cookie then continue filling in following the shape of the cookie. If icings are not squeezing out of the bags smoothly, roll piping bags between hands to warm icing a bit making it easier to squeeze out. Do not microwave icing – even 5 seconds in the microwave can turn the icing into a melted mess. Work on decorating cookies in layers – first the background color, then finer details like the carrot top or eggs in a basket. Lay cookies out in a single layer to dry.

How to Store and Freeze
Store Easter egg sugar cookies in an airtight container at room temperature for up to 3 days, in the refrigerator for up to 1 week, or in the freezer (with parchment between each to protect the frosting) for up to 1 month. Be sure that the icing has been chilled and hardened before stacking the cookies. Let them come to room temperature before serving.


Leave a Reply