


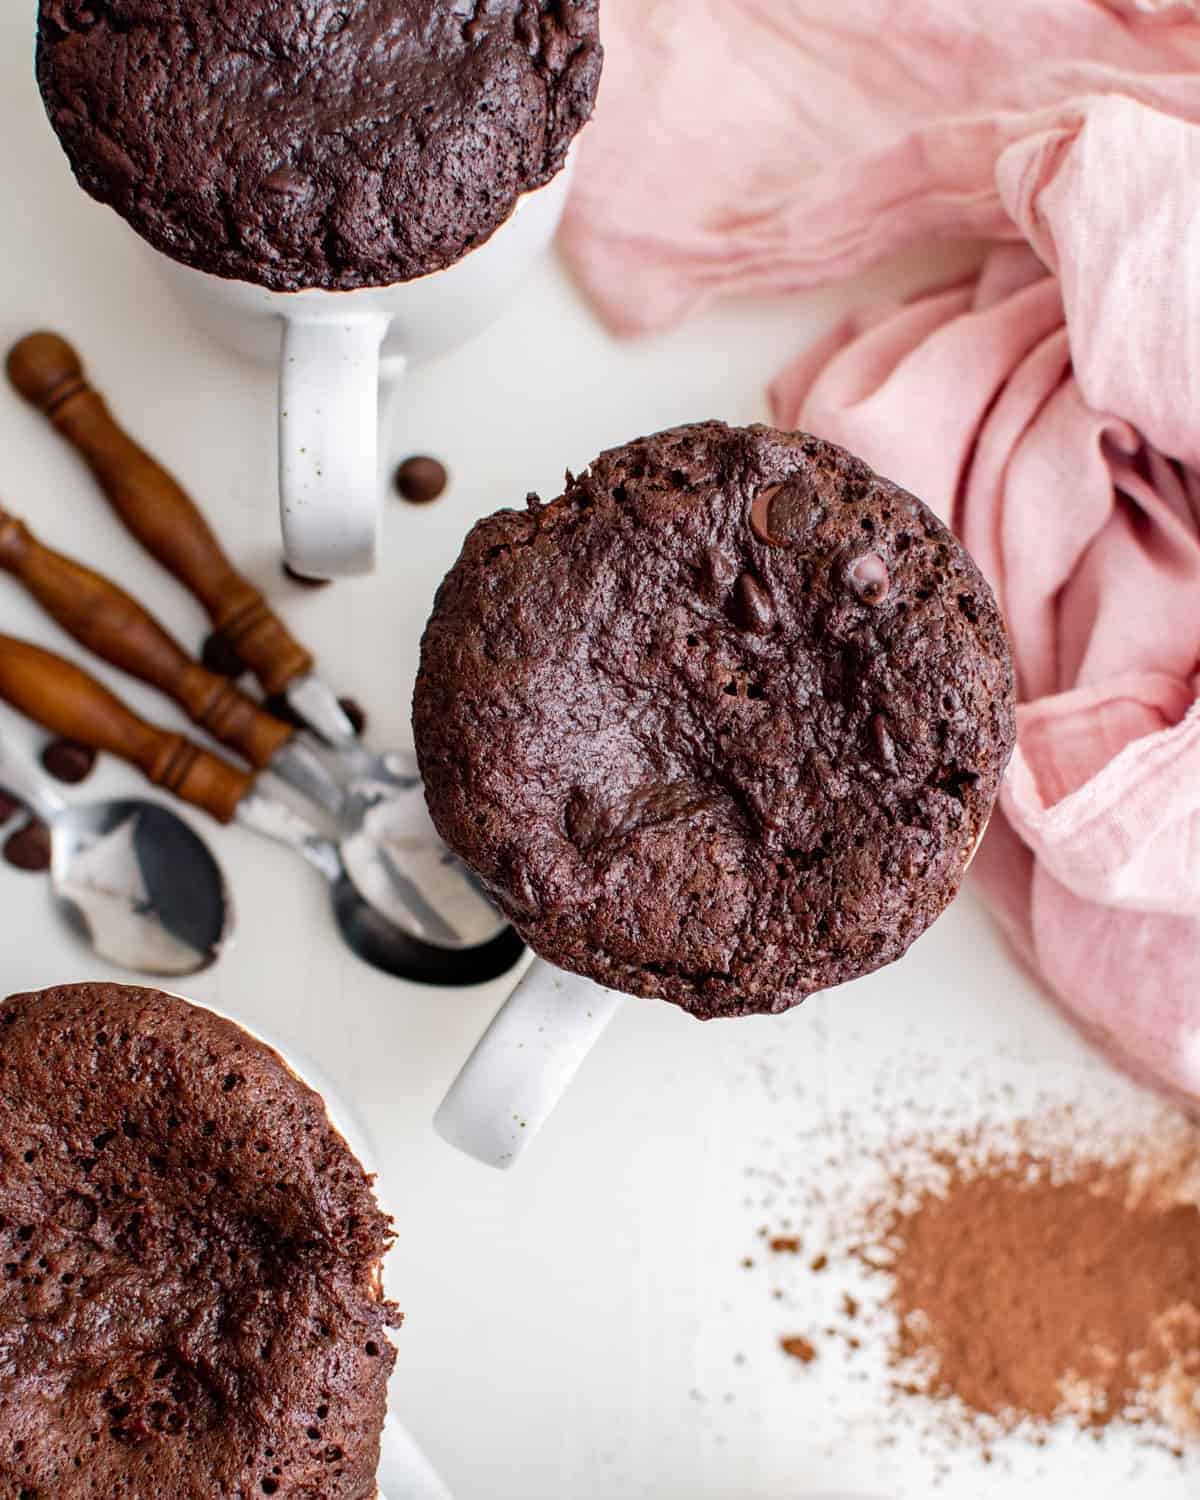
When I need a serious chocolate fix ASAP, this microwave brownie in a mug is the only thing that hits the spot. Unlike those tiny, spongy versions that always leave me wanting more, my mug brownie is a super-sized masterpiece that uses pantry staples to create a deep-dish, bakery-style texture in under 10 minutes. It’s the ultimate treat yourself dessert for those rare quiet nights alone: no sharing with Pat and the boys, zero fuss, and only one mug to clean when I’m done. What more could I want?!
Super-Sized Mug Brownie Made in the Microwave
Don’t get me wrong, I love a good cakey brownie, but I don’t always have the patience to wait an hour for a full tray to bake. When that chocolate craving hits, I need a fix that is fast, foolproof, and–most importantly–substantial. I’ve already made my ultimate chocolate mug cake, but I figured it’s time to step it up a notch with a rich, chocolatey brownie.
Unlike those tiny, two-bite mug treats that leave me raiding the pantry again ten minutes later, my mug brownie is a deep-dish, super-sized dessert designed to actually satisfy. Made in a 12-ounce mug, it’s big enough for a single-serving sugar overload or sharing with a friend. There’s no fancy equipment or melting butter required; just stir it right in the mug, pop it in the microwave, and you’ve got dessert in under 10 minutes. Whether you’re splitting the sweetness or tackling it solo, this is the massive chocolate fix you’ve been looking for.

Email this Recipe
Enter your email and we’ll send the recipe directly to you!
By submitting this form, you consent to receive emails from Easy Dessert Recipes.
Choosing the Right Mug
Warning: This isn’t your average tiny mug cake! You’ll need a larger 12-ounce ceramic mug to contain all this chocolatey goodness. If you’re rocking a standard tea cup, play it safe by splitting the batter into two mugs or using a microwave-safe bowl. Whatever you do, skip the plastic–only ceramic can handle a brownie this big!
Microwave Mug Brownie Recipe
Equipment
- Kitchen Scale (optional)
- 12-ounce Microwave-Safe Mug
Ingredients
- 6 tablespoons all-purpose flour
- ¼ cup semisweet chocolate chips *
- 3 tablespoons unsweetened cocoa powder **
- 3 tablespoons brown sugar
- 2 tablespoons granulated sugar
- ½ teaspoon baking powder
- ¼ teaspoon kosher salt
- ⅓ cup milk ***
- 2 tablespoons vegetable oil ****
- 1½ teaspoons pure vanilla extract
Instructions
- Add the flour, chocolate chips, cocoa powder, brown sugar, granulated sugar, baking powder, and salt to a large mug and stir to combine.6 tablespoons all-purpose flour, ¼ cup semisweet chocolate chips, 3 tablespoons unsweetened cocoa powder, 3 tablespoons brown sugar, 2 tablespoons granulated sugar, ½ teaspoon baking powder, ¼ teaspoon kosher salt

- Pour in the milk, vegetable oil, and vanilla extract and stir again until combined.⅓ cup milk, 2 tablespoons vegetable oil, 1½ teaspoons pure vanilla extract
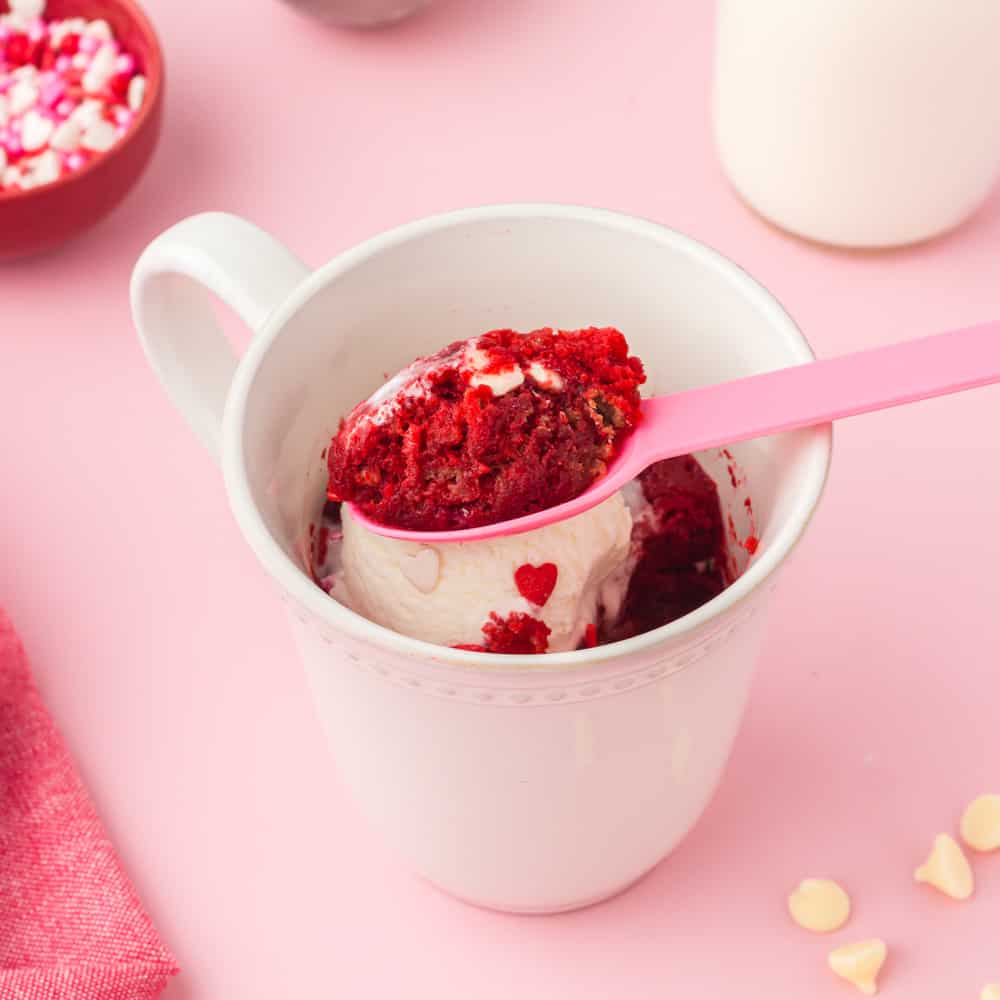
- Microwave for 1 minute and 45 seconds, then let it cool for 5 minutes before serving with vanilla ice cream if desired.


Notes
- Avoid using a plastic mug if it’s not a microwave-safe one. You don’t want the plastic to start melting in the microwave.
- Use a fork to mix together all of your ingredients directly in the mug.
- Optional flavor enhancements: ¼ tsp espresso powder, cinnamon, or almond extract.
- Once you add the liquid to the flour, stop stirring as soon as the flour streaks disappear. Overmixing will make your brownie chewy and tough.
- Your batter should not fill more than half of the mug. If it looks too full, split it into two smaller mugs or use a microwave-safe cereal bowl to avoid a chocolate explosion.
- For a molten center, press a scoop of chocolate chips, nut butter, or a candy bar piece directly into the center of the mug right before microwaving.
- Microwave ovens vary in power and intensity. If your brownie keeps coming out dry, try cooking it at 70% or 80% power for a slightly longer time.
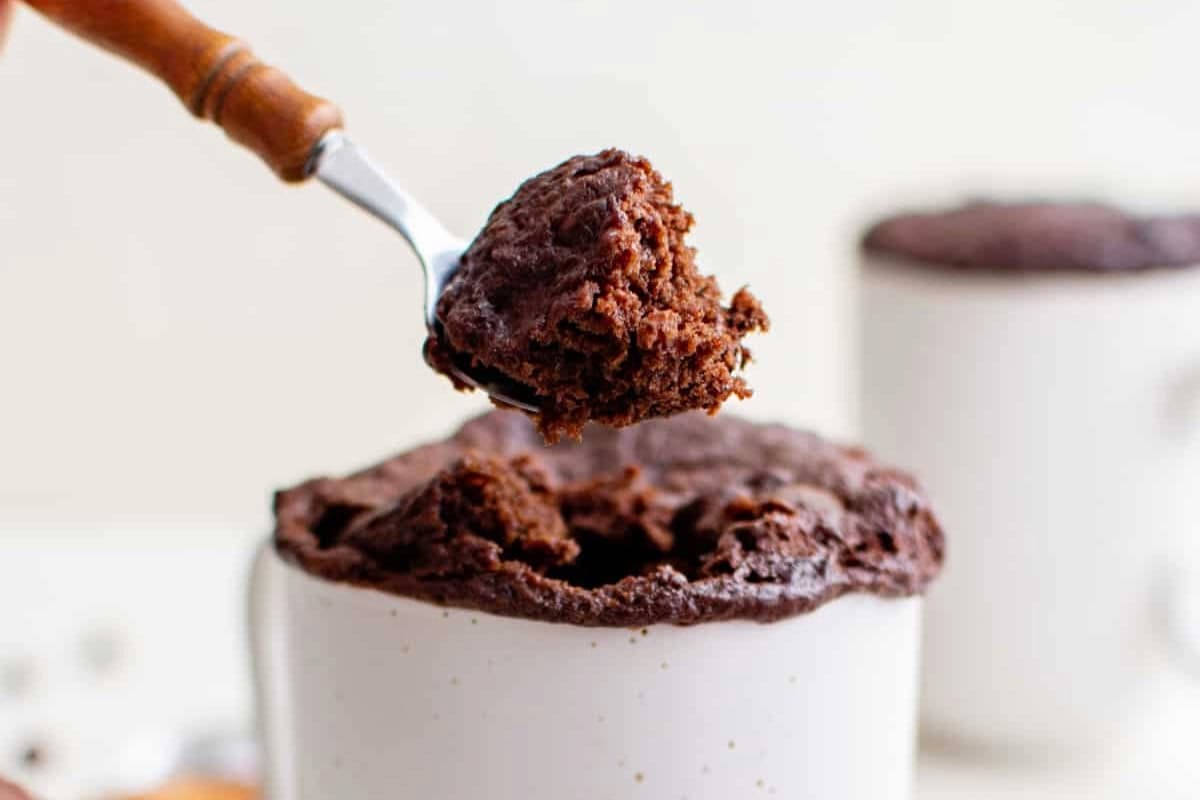
- Pull your brownie when the edges look set and dry, but the very center is still slightly wet. If it seems underdone, pop it back in for another 10-15 seconds.
How to Make a Brownie in a Mug Step-by-Step
Mix the Dry Ingredients: Add 6 tablespoons of all-purpose flour, ¼ cup of semisweet chocolate chips, 3 tablespoons of unsweetened cocoa powder, 3 tablespoons of brown sugar, 2 tablespoons of granulated sugar, ½ teaspoon of baking powder, and ¼ teaspoon of kosher salt to a 12-ounce ceramic mug and stir to combine.

Add the Wet Ingredients: Pour in ⅓ cup of milk, 2 tablespoons of vegetable oil, and 1½ teaspoons of vanilla extract and stir gently until just combined and you no longer see streaks of flour. Take care not to overmix, or the brownie will turn out chewy and dry. Your batter should not fill the mug more than halfway. If it is over-filled, it may overflow and make a mess. Transfer to a larger vessel if needed, or split between two mugs.

Microwave the Brownie: Microwave for 1 minute and 45 seconds. You’ll know it’s ready when the edges look set and firm but the very center still looks slightly shiny/wet (it will finish cooking as it rests!). If it starts to pull away from the sides of the mug, stop immediately, or it’ll turn out dry! Let it cool for 5 minutes to allow it to finish setting inside before serving with vanilla ice cream if desired.

How to Store and Reheat
If you can’t finish it all in one sitting, allow your mug brownie to cool completely in the mug. Cover the top tightly with plastic wrap or transfer the leftovers to an airtight container. It will stay moist at room temperature for up to 24 hours.
To bring back that just-baked fudginess, microwave the leftovers in 10-second bursts at 50% power until warmed through. You can drizzle a little bit of milk over the top before heating to add a bit of moisture back.


Leave a Reply