


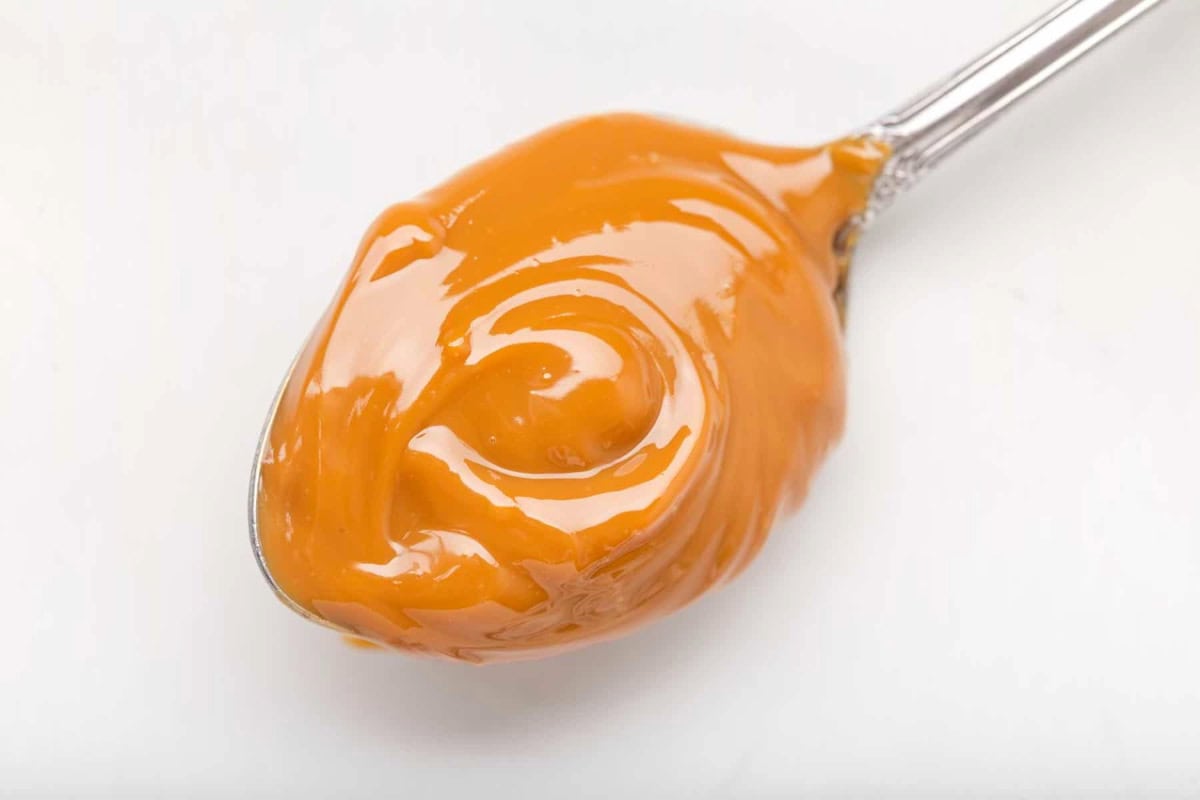
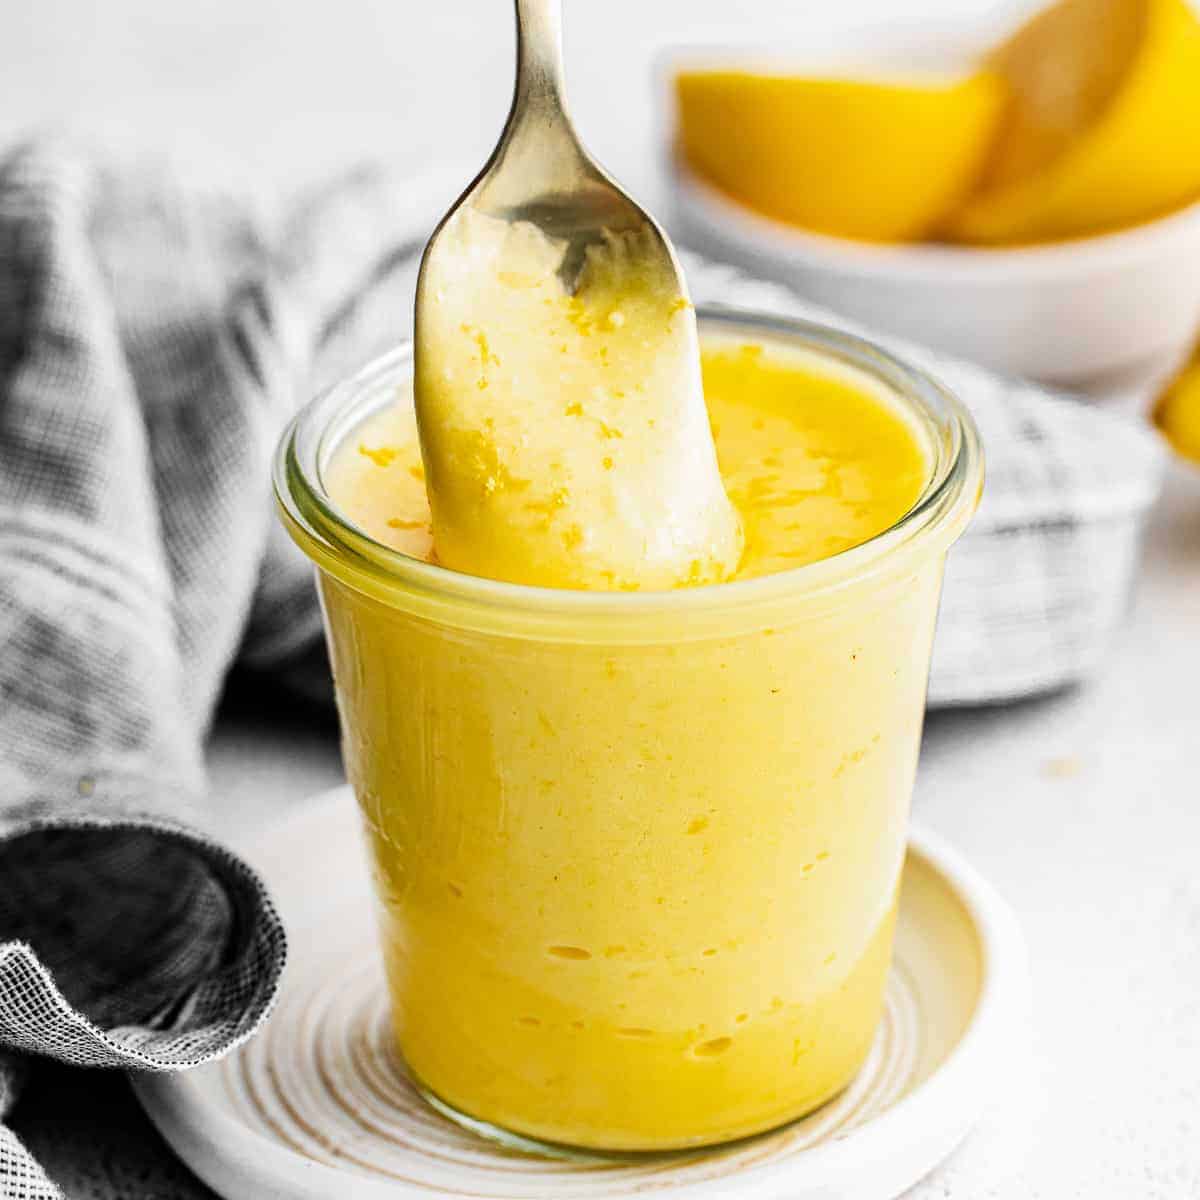
Making homemade dulce de leche is easier than I ever imagined. All it takes is one simple ingredient and a little patience! By gently simmering a single can of sweetened condensed milk, I transform it into a thick, luscious, caramelized sauce that puts store-bought jars to shame. Whether you’re drizzling it over a bowl of ice cream or sandwiching it between cookies, this foolproof method is a total game-changer!

One-Ingredient Dulce de Leche from Sweetened Condensed Milk
This dulce de leche might just be the easiest recipe on my entire site! But what makes it so easy isn’t just the single ingredient; it’s the foolproof method. Simmering the sweetened condensed milk right inside the can protects it from burning and guarantees a silky, golden result every single time. No stirring, no scorching, and no guesswork!
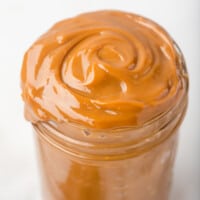
But the real magic is in the convenience. Because the can stays factory-sealed during the process, it’s shelf-stable! I love to simmer a few cans at once to keep my pantry stocked with liquid gold for up to three months. Whether you need a quick gift or a midnight ice cream topping, this recipe’s got your back!

Email this Recipe
Enter your email and we’ll send the recipe directly to you!
By submitting this form, you consent to receive emails from Easy Dessert Recipes.
Glue Removal Tip
If you don’t remove the label and glue from the can, it will melt into the water as the dulce de leche cooks and can stick to your pot. I have found that the best way to remove the label and glue from a can of sweetened condensed milk is to use a product like Goo Gone to dissolve the glue. In my experience, generic canned goods have stickier glue than name brands.
Dulce de Leche Recipe
Equipment
- Kitchen Scale (optional)
Instructions
- Remove the label and its glue from the can.14 ounces sweetened condensed milk
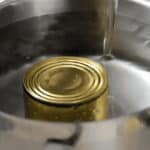
- Leaving the can closed, place it in a medium pot. Fill the pot with water, so that there are at least 2 inches of water above the can.

- Bring the water to a simmer over high heat. Reduce the heat and allow the water to simmer for 3 hours, adding in more water if needed to keep the can completely submerged throughout the cooking.
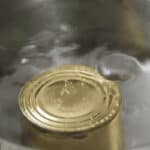
- Carefully remove the can from the water and allow the can to cool completely before opening.

Notes
- If using an aluminum pot, add a splash of white vinegar or lemon juice to the boiling water to prevent the pot from developing scale on the inside.
- Avoid cans with tab openers, as they are more likely to burst than those that require a can opener.
- Ensure the top of the can is always completely submerged under at least 2 inches of water to prevent it from breaking and exploding. I set a timer for every 30 minutes to add more water.
- You can lay the can on its side to prevent it from rattling as the water boils, which can be noisy and annoying.
- Allow the can to completely cool, or the pressure in the can will send hot dulce de leche spraying everywhere.
- If you open the can and it looks grainy or lumpy, simply whisk it vigorously or give it 10 seconds in a blender, and it will become silky smooth again.
- Add a pinch of flaky sea salt, a tsp of vanilla bean paste, or a splash of dark rum for extra flavor.
- Once opened, do not store it in the can! Instead, store it in a food-safe airtight container.
- Crockpot: Remove the label from the can and place it on its side in a slow cooker, covering with at least 2 inches of hot water; cook on LOW for 8-10 hours (ensure the water stays above the cans), then turn off the heat and allow the cans to cool completely in the water before removing and opening.
- Oven: Preheat your oven to 425°F and pour the sweetened condensed milk into a pie dish. Cover the dish tightly with foil, then place it into a hot water bath and bake for 90-105 minutes, or until it reaches your desired color, adding more water to the water bath as needed. Let cool to room temperature before using.
Customize Your Consistency
As a general rule, I always cook my dulce de leche for 3 hours. This makes it thick (but not too thick!) and spreadable, which is great for a variety of uses. But you can cook it for more or less time for a thinner or thicker consistency. Use this chart as a guide:
| Cook Time | Color | Consistency | Use |
|---|---|---|---|
| 2 hours | light | saucy | drizzling over desserts |
| 3 hours | deep golden | ideal; spreadable | spreading and dipping |
| 4 hours | dark | fudgy | filling cookies, candy |
How to Make Dulce de Leche Step-by-Step
Submerge the Can: Remove the label and its glue from a 14-ounce can of sweetened condensed milk. Leaving the can closed, place it in a medium pot. Fill the pot with water so that there are at least 2 inches of water above the can.
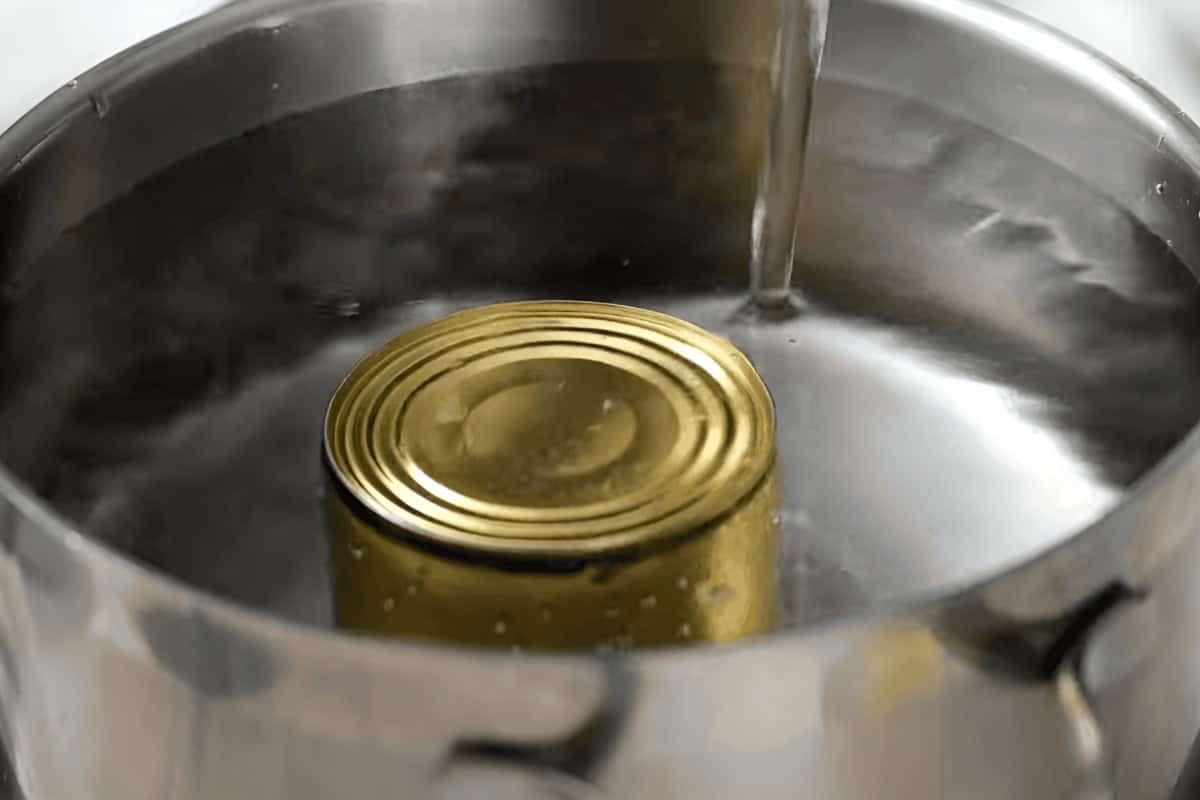
Simmer the Can: Bring the water to a simmer over high heat. Reduce the heat and allow the water to simmer for 3 hours, adding more water as needed to keep the can completely submerged throughout the cooking process. I set a timer for every 30 minutes to add more water.

Cool and Open: Carefully remove the can from the water (I recommend using kitchen tongs for this) and allow the can to cool completely before opening. If you attempt to open it before the can has cooled, the pressure will send molten dulce de leche flying everywhere.

How to Store, Freeze, and Reheat
An unopened can of dulce de leche will last for 3 months at room temperature. I recommend storing any leftover opened dulce de leche in an airtight container in the refrigerator for up to 2 weeks or in the freezer for up to 3 months. Do not store it in the original can once opened! Let thaw overnight in the refrigerator before using. If you find it a little too stiff after being in the fridge, microwave it for 10-15 seconds to soften.


Leave a Reply