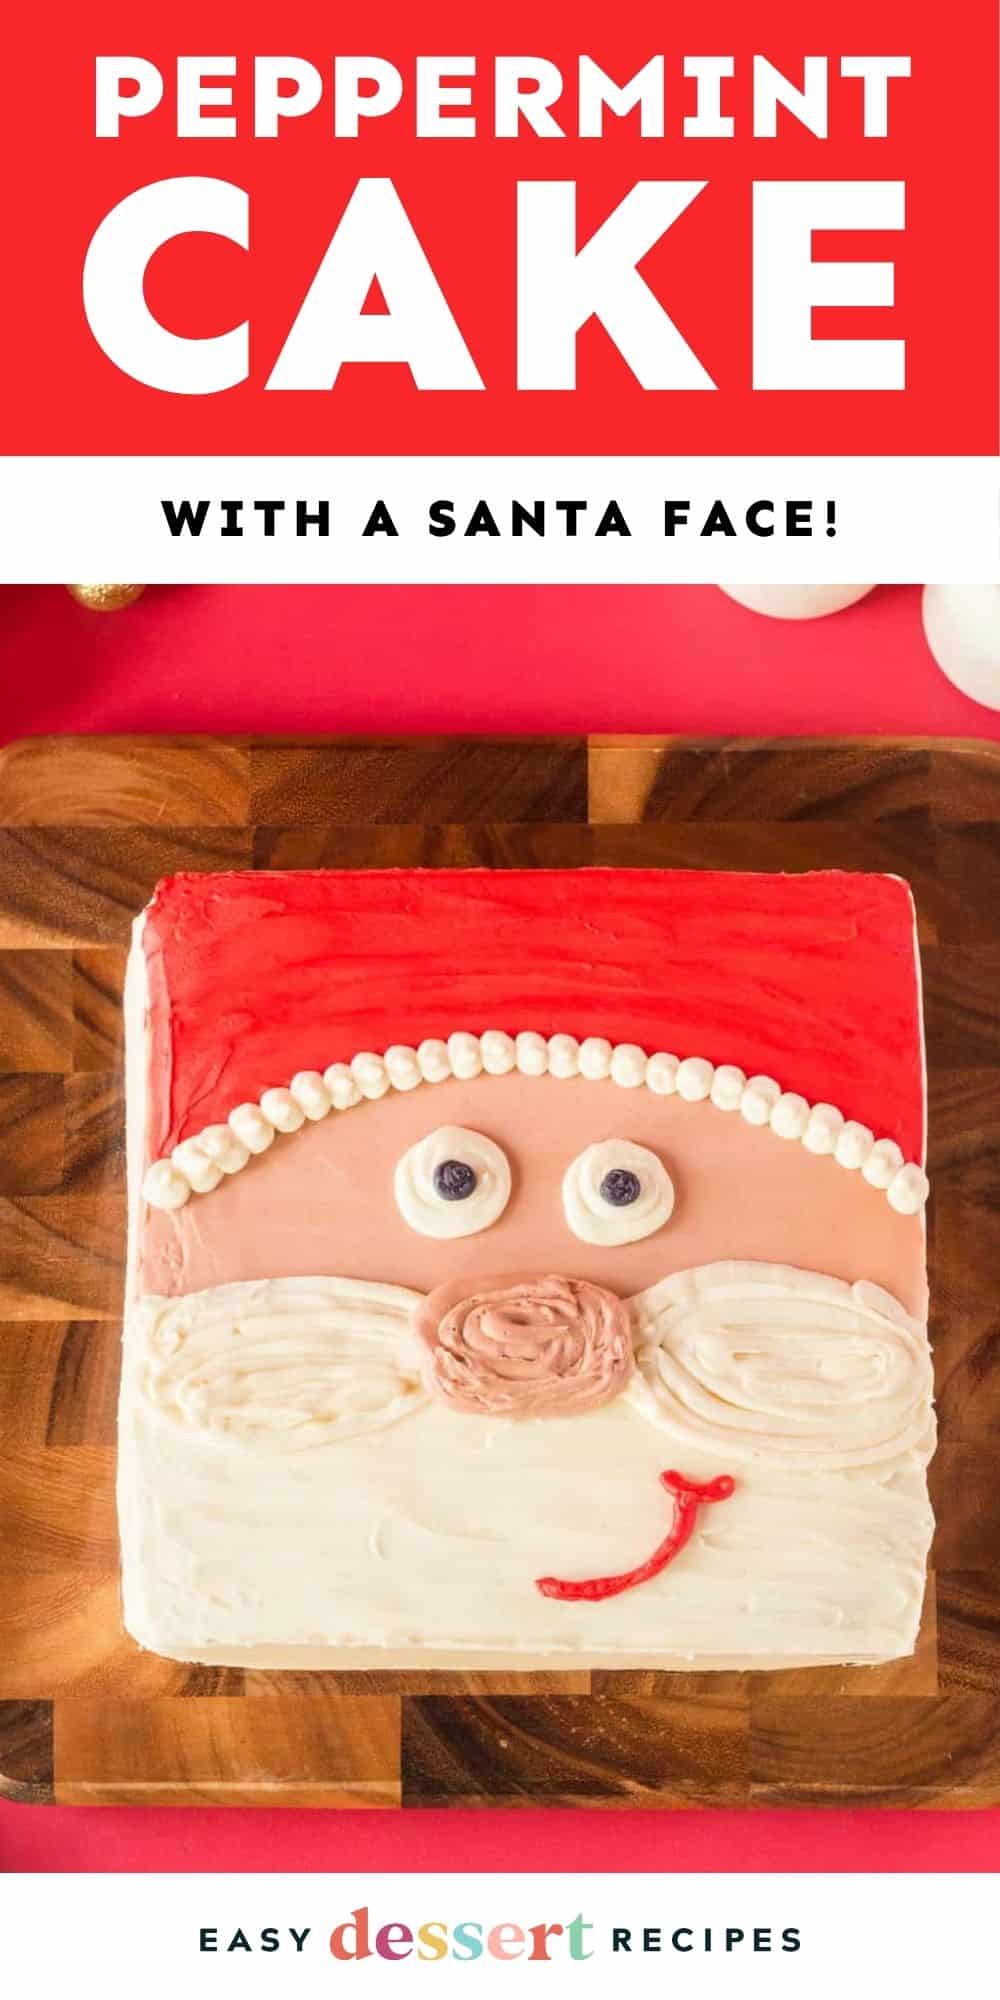
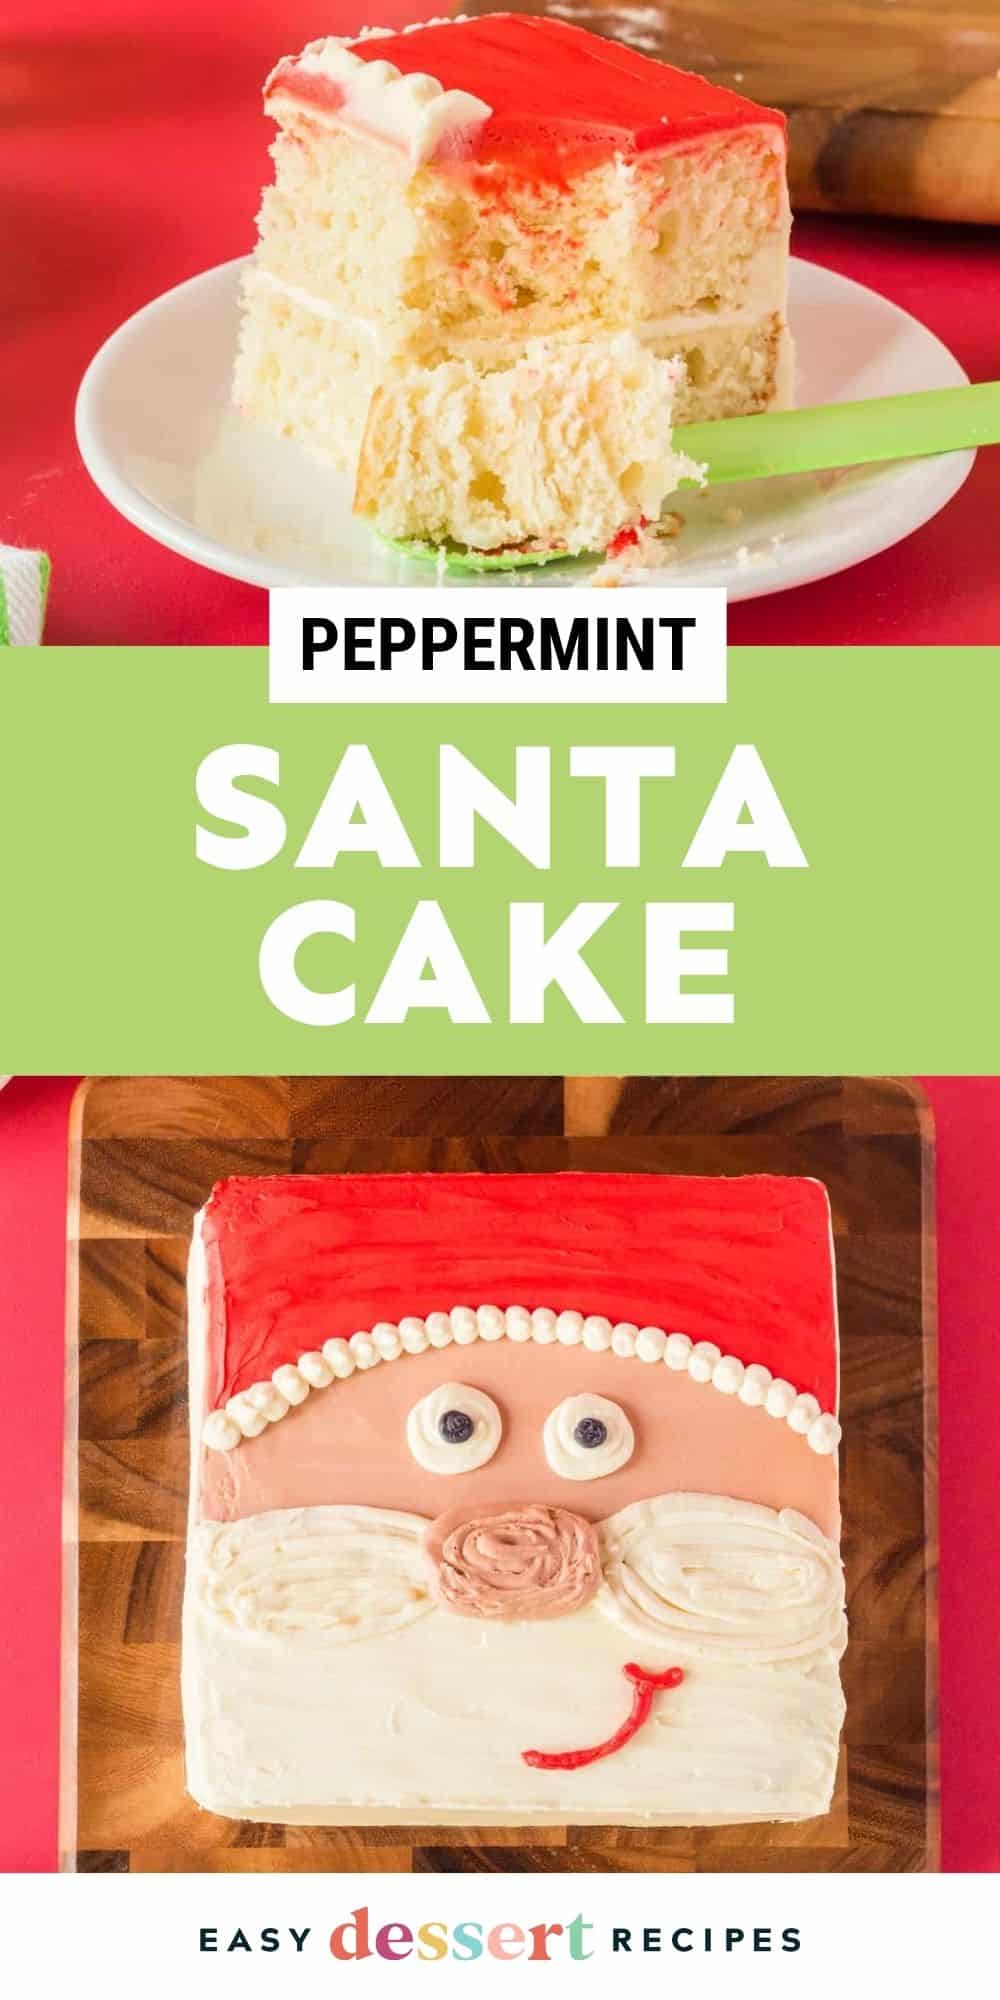
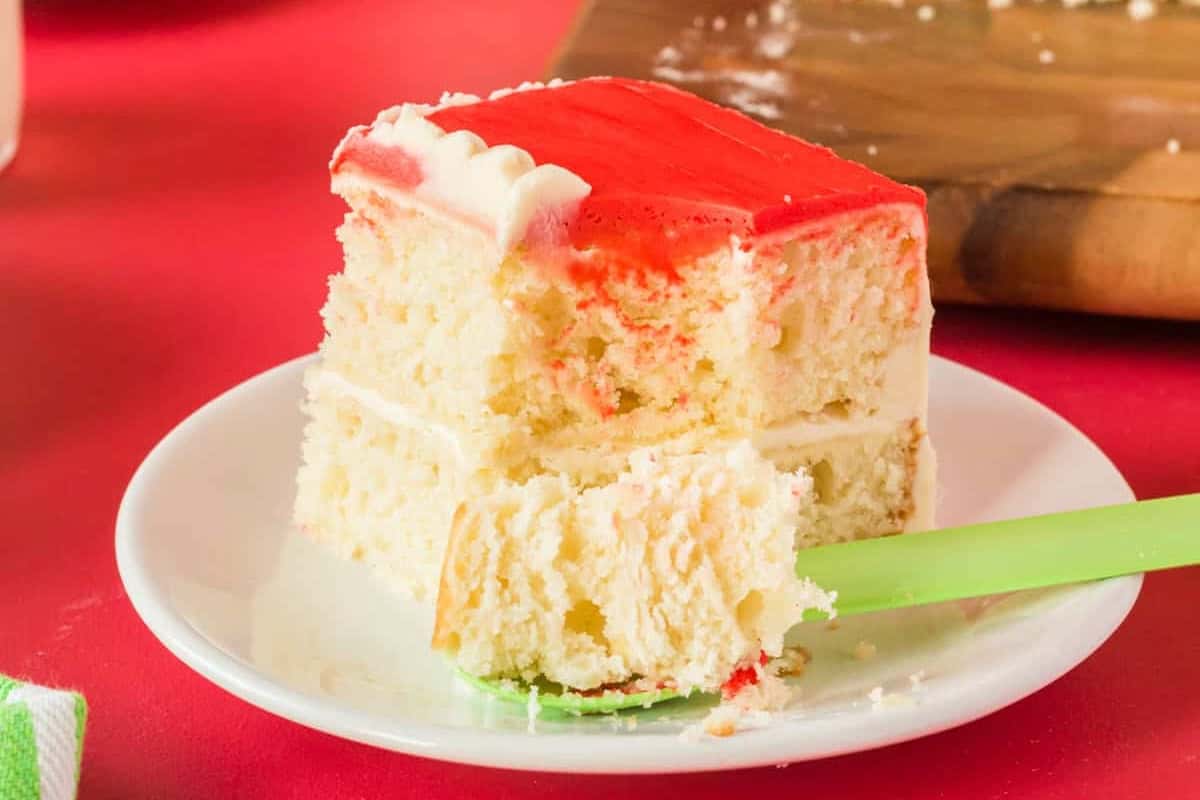
Looking for a show-stopping dessert this holiday season? My Santa cake recipe combines the fun of holiday decorating with the sweet flavor of peppermint. I stack soft, fluffy layers of homemade peppermint cake and frost them to resemble Santa Claus himself, complete with his jolly red hat, rosy cheeks, and iconic white beard. This Santa face cake is the perfect centerpiece for holiday parties or festive family gatherings, and it’s surprisingly doable at home!

Peppermint Cake with Santa Face Frosting
My Santa Claus cake is so fun to make, and even more fun to eat! This Christmas peppermint cake has just the right touch of mint to balance its buttery vanilla flavor, and it bakes up so soft and fluffy. My 3-ingredient buttercream frosting makes decorating surprisingly easy, and dividing it into festive red, white, and skin-tone colors brings Santa to life in the cutest (and simplest) way. It’s a recipe that looks bakery-perfect but comes together with totally beginner-friendly steps. My kids absolutely love this festive decorated cake, and it’s a hit at Christmas parties!

Email this Recipe
Enter your email and we’ll send the recipe directly to you!
By submitting this form, you consent to receive emails from Easy Dessert Recipes.
Chill Between Frosting Colors for the Best Results
To achieve clean, crisp lines when decorating your Santa face cake, chill the crumb-coated cake in the freezer for 10–15 minutes before piping colored frosting. After each frosting color, chill again! This firms the cake slightly, prevents colors from bleeding, and makes frosting glide smoothly.

Santa Cake Recipe
Equipment
- Kitchen Scale (optional)
- 2 9×9-inch Baking Pan(s)
- Stand Mixer
- Piping Tip Set
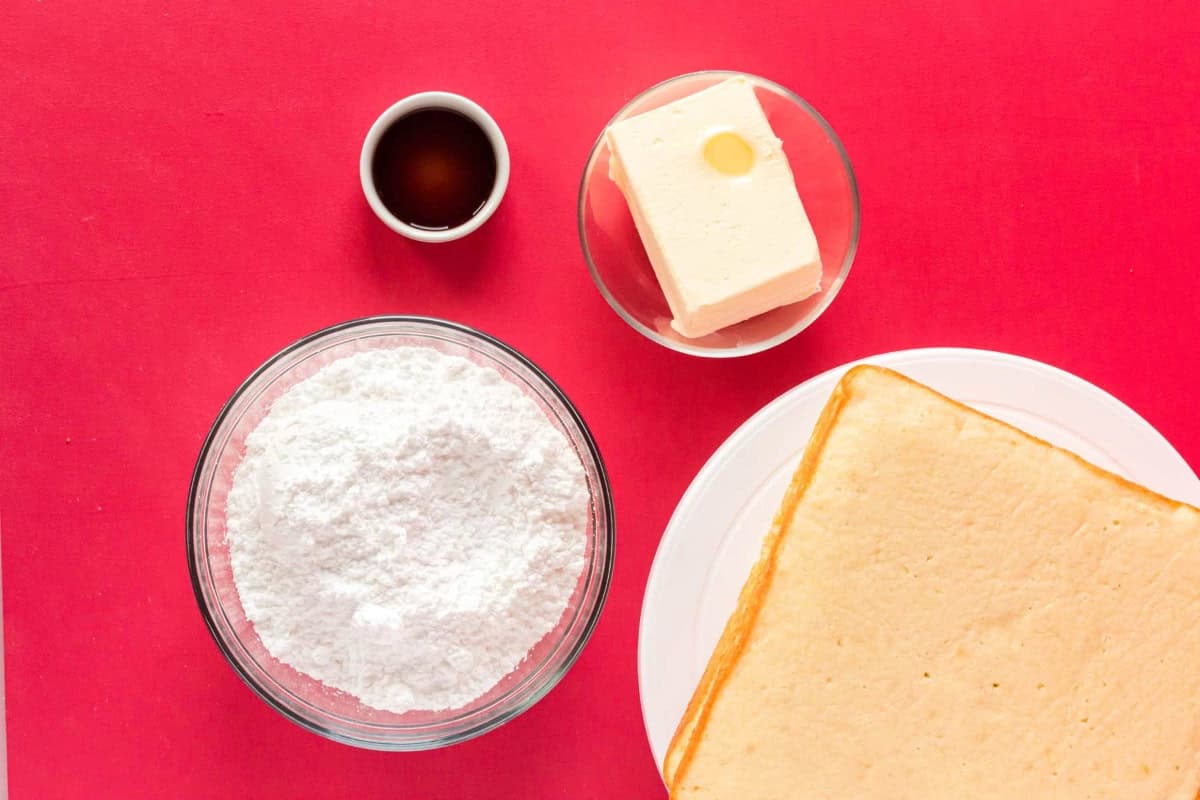
Ingredients
For the Peppermint Cake
- ¾ cup unsalted butter room temperature (1½ sticks)*
- 1½ cups granulated sugar
- 3 large eggs room temperature
- 2 teaspoons pure vanilla extract
- ½ teaspoon pure peppermint extract **
- 2¼ cups all-purpose flour
- 2¼ teaspoons baking powder
- ¾ teaspoon kosher salt
- 1 cup buttermilk room temperature***
For the Buttercream Frosting
- 2 cups unsalted butter room temperature (4 sticks)
- 5 cups powdered sugar
- 1 tablespoon pure vanilla extract
- Food coloring black, red, and skin tone
Instructions
Make the Peppermint Cake
- Preheat oven to 350°F. Line two 9×9-inch square baking pans with parchment paper on the inside bottom and spray the entire inside (bottom and sides) with nonstick spray. Set aside.

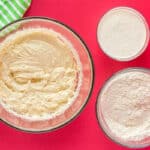
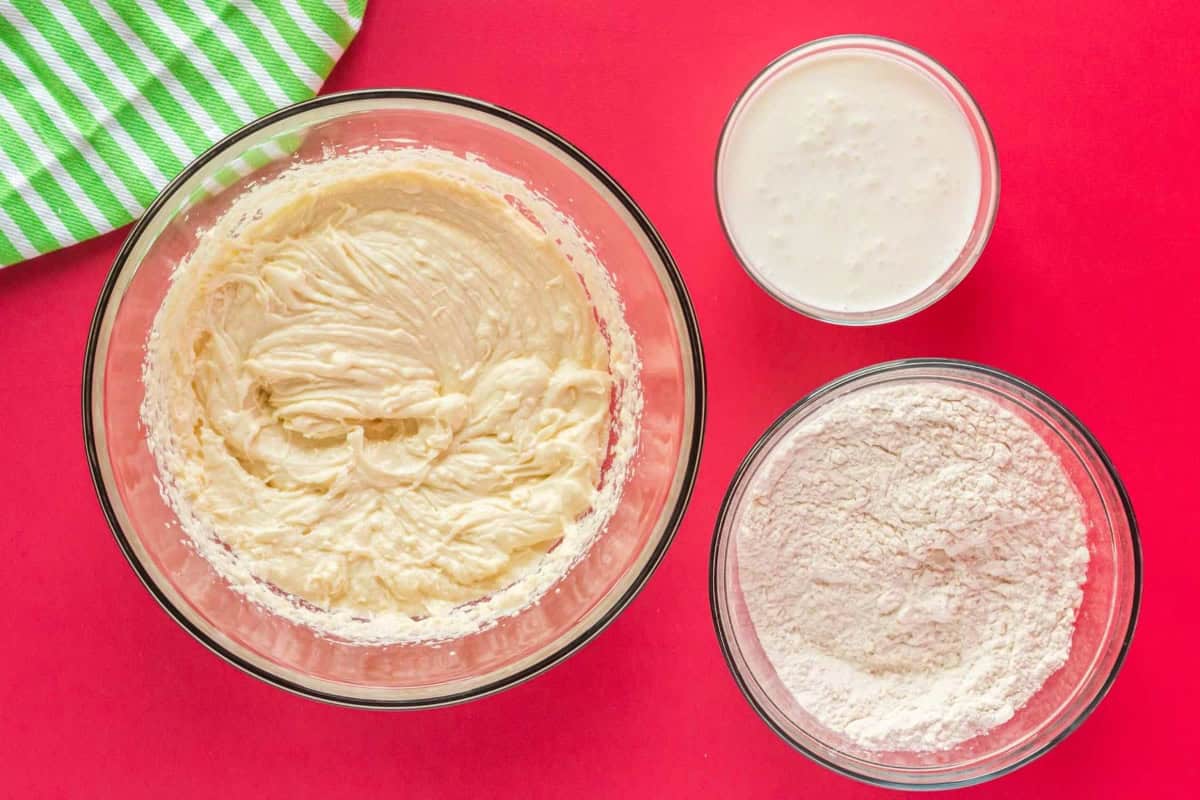
- In the bowl of a stand mixer fitted with the paddle attachment, beat the butter, granulated sugar, eggs, vanilla extract, and peppermint extract until creamy, about 3-4 minutes.¾ cup unsalted butter, 1½ cups granulated sugar, 3 large eggs, 2 teaspoons pure vanilla extract, ½ teaspoon pure peppermint extract
- In a separate bowl, whisk the flour, baking powder, and salt together.2¼ cups all-purpose flour, 2¼ teaspoons baking powder, ¾ teaspoon kosher salt
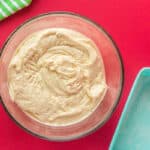
- Pour half of the dry mixture into the wet mixture and beat just until mixed.
- Pour all the buttermilk into the wet mixture and beat just until combined.1 cup buttermilk
- Add the remaining dry mixture to the wet mixture and beat until combined. Be careful not to overmix.
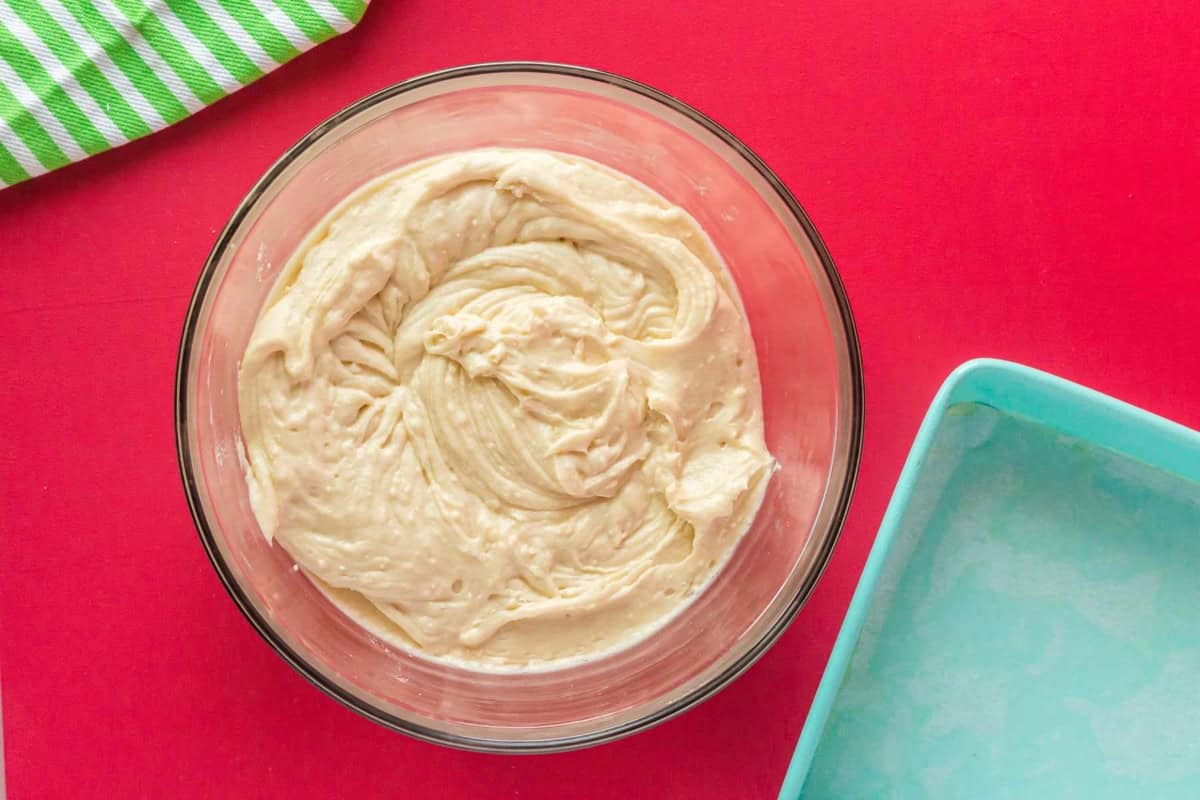
- Divide the mixture evenly between the two baking pans (about 591 grams per pan).
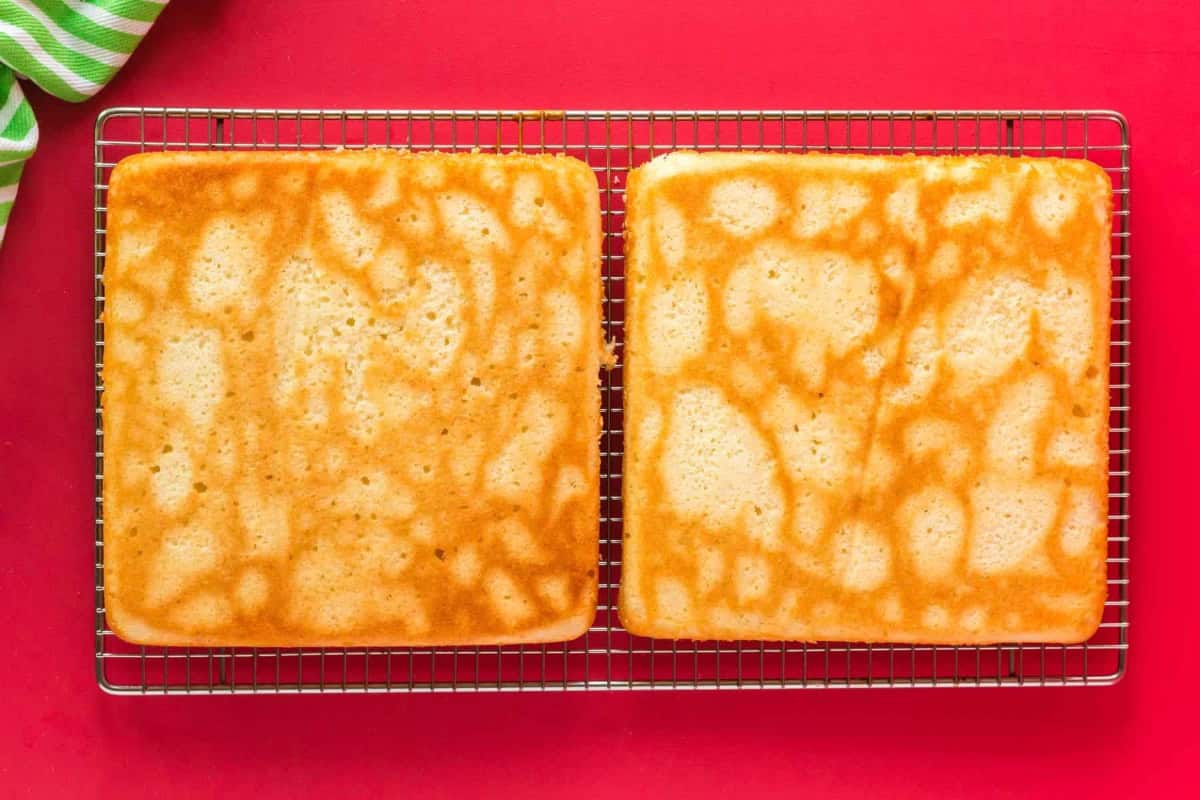
- Bake for 30 minutes, or until toothpick inserted in middle comes out clean.
- Let cool completely before decorating.


Make the Buttercream Frosting
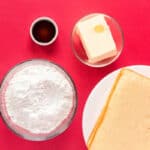
- In the bowl of a stand mixer fitted with the whisk attachment, beat together butter, powdered sugar, and vanilla extract until light and fluffy, about 4-5 minutes.2 cups unsalted butter, 5 cups powdered sugar, 1 tablespoon pure vanilla extract
Assemble & Decorate
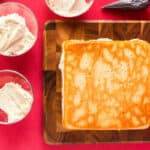
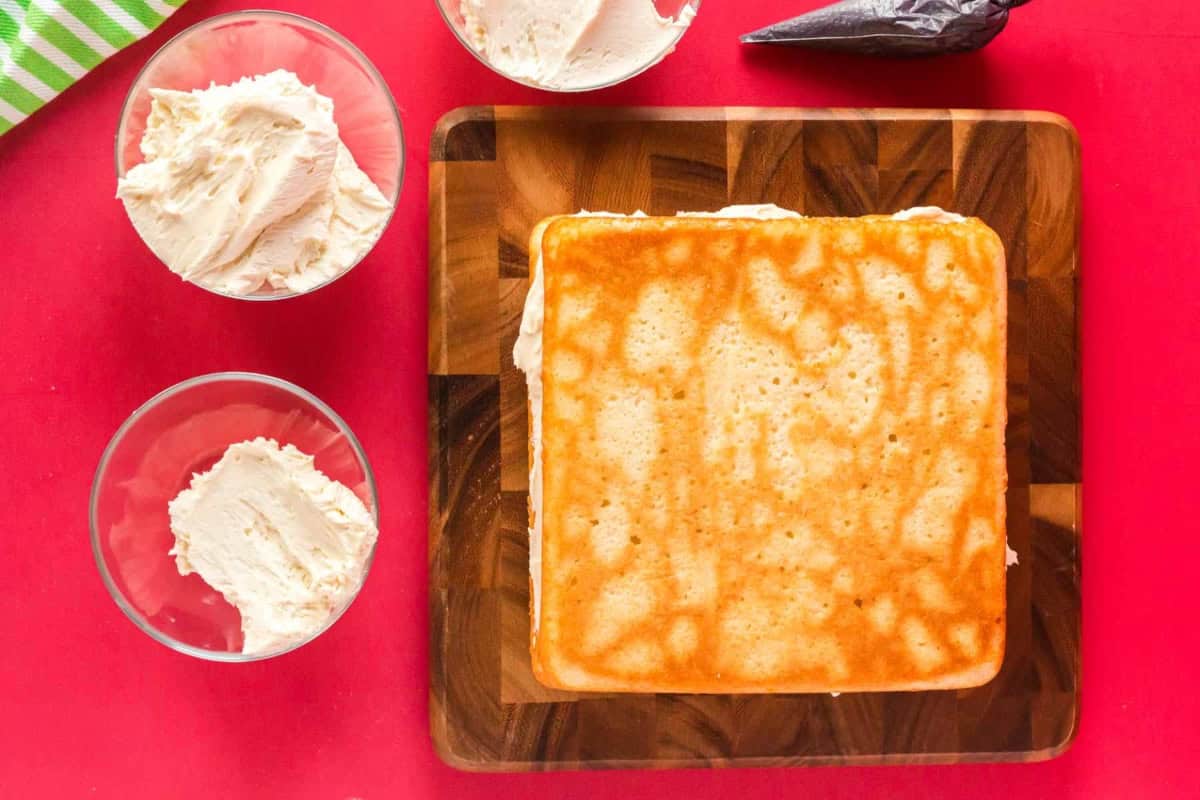
- Start by setting one layer of cake on a flat square dish (or cardboard cake plate) and covering the top with a layer of white icing. Put the second cake layer (bottom side facing up) on top of the first layer. You should now have a two-layer cake.
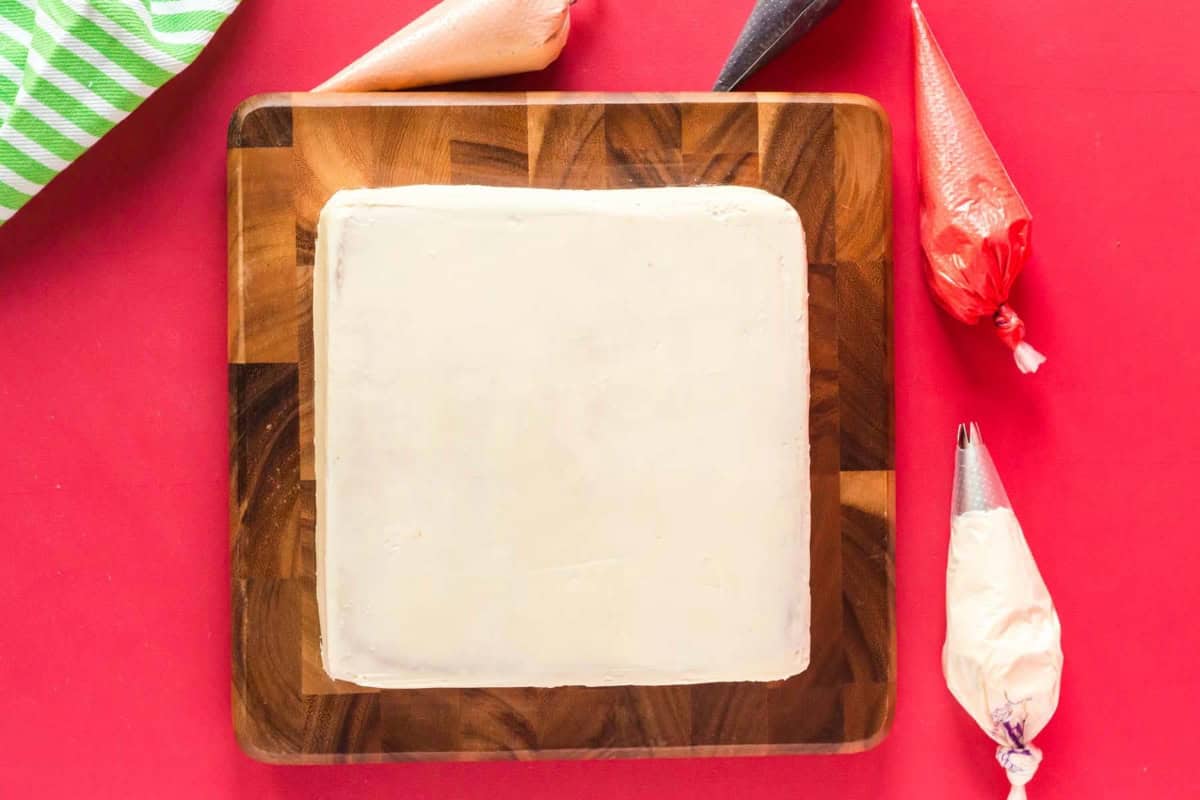
- Cover the cake in a thin “crumb” coating of white icing. Place the cake in the freezer for about 10 minutes to let it harden a bit.
- Remove the cake from the freezer and smooth out the “crumb” coating using a cake smoother.
- With the remaining white icing, take about 1 tablespoon out to color with black food coloring, take about ½ cup out to color with skin tone food coloring, take about ½ cup out to color with red food coloring and leave the rest of the icing white.Food coloring
- Place all the icings into icing bags.
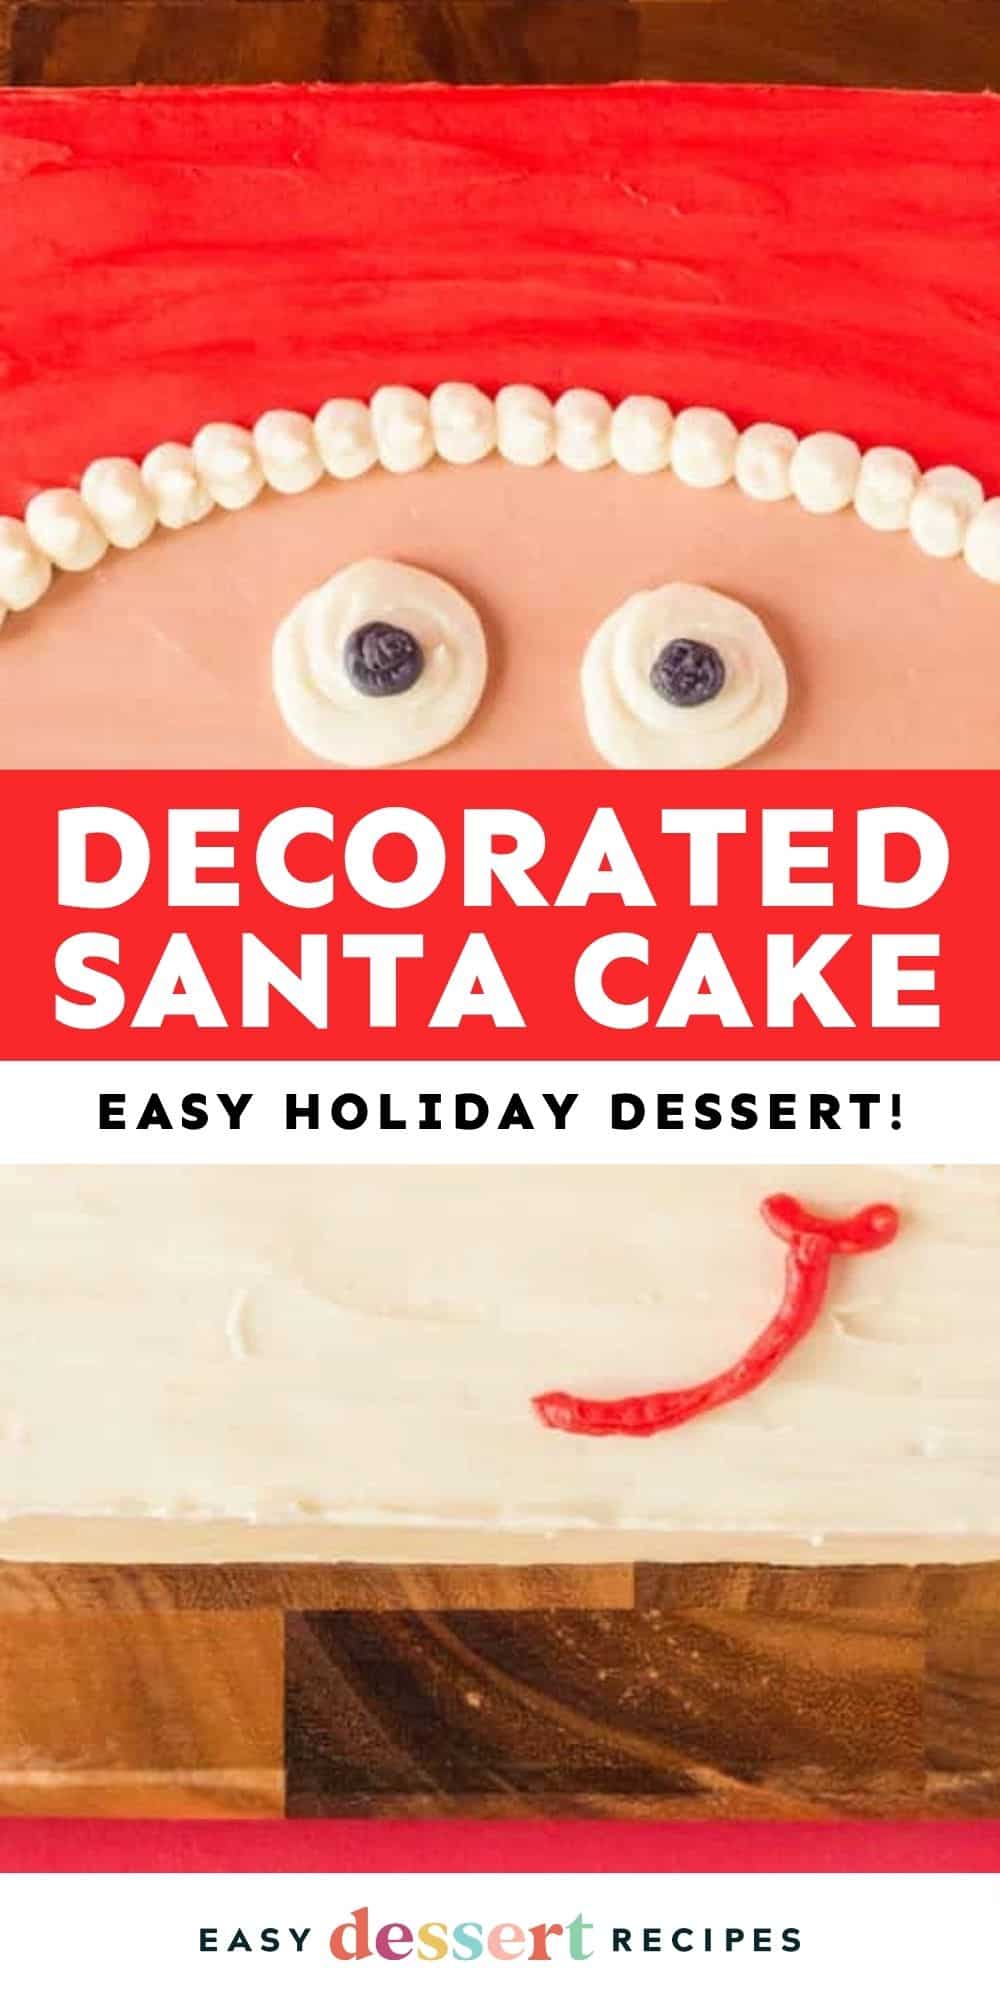
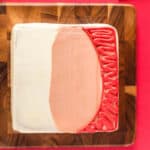
- Start with the skin tone icing, pipe the outline of where you’ll want Santa’s face to be. Lightly fill this in with icing and use an icing spatula to smooth.
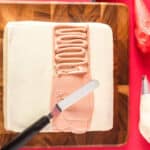
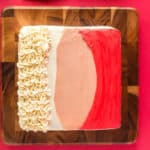
- Use the red to outline where you’ll want his hat to be. Then fill in with red icing and use the icing spatula to smooth.
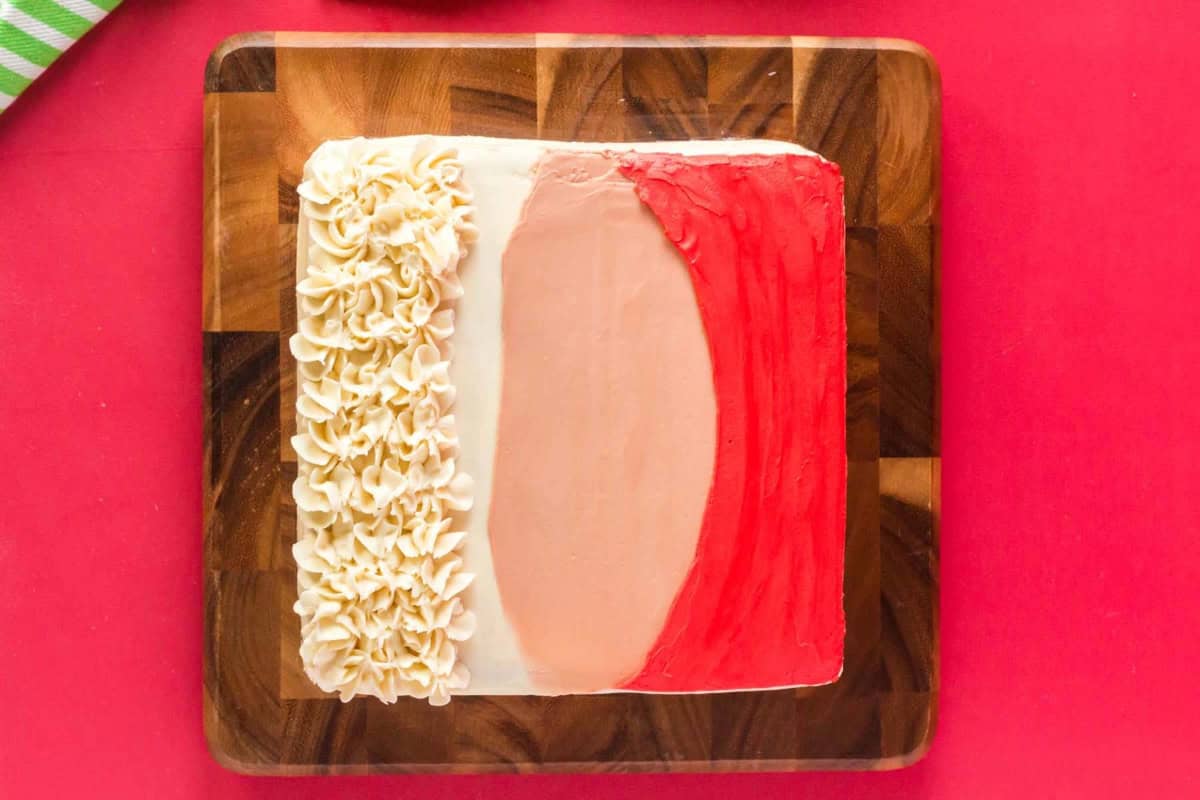
- Move on to the beard. You can do this with a Wilton 1M icing tip for a curly look, or flatten the icing like in the previous steps.
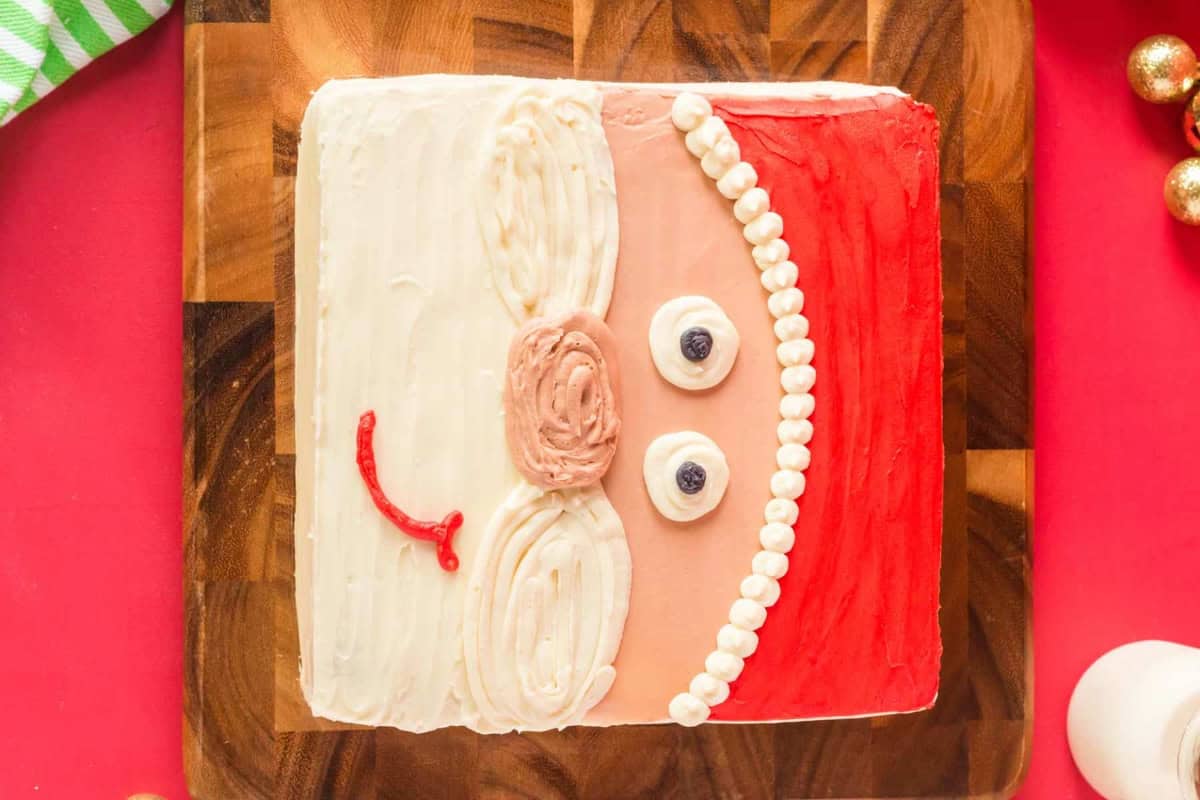
- Do the white mustache and the trim around his hat. Then, draw in a skin color nose overlapping with the moustache. Finish off with the white and black to make the eyes. Optionally, add a little red grin over his beard.


Notes
- Measure your dry ingredients using the spoon-and-level method to avoid adding too much flour.
- Do not overmix the cake batter; otherwise, you will end up with dry, tough cakes.
- Once cooled to room temperature, I recommend chilling the two cake layers in the fridge for 30 minutes before decorating to prevent the cake from breaking apart.
- Alternately, you can wrap them each separately tightly in food wrap and leave them in the fridge overnight.
- Use a serrated knife or cake leveler to trim the domed tops of the cakes before stacking. This ensures Santa’s face looks even and smooth.
- If the frosting is too thick, add in 1-2 teaspoons of milk and mix well. If it becomes too thin, mix in 1-2 tablespoons of powdered sugar.
- Fill the cake with about ⅓ of the frosting, and save the rest for decorating.
- A crumb coat, or thin layer of white icing across the top and sides of the cake, will seal in any loose cake crumbs to ensure a clean finish.
- Chill the crumb-coated cake for 10-15 minutes between adding different colored icings. This prevents colors from bleeding into each other.
- Do the decorating close to a sink so you can keep running the smoother under hot water.
- If you don’t have piping tips, you can cut the corner off of a Ziplock bag.
How to Make Santa Peppermint Cake Step-by-Step
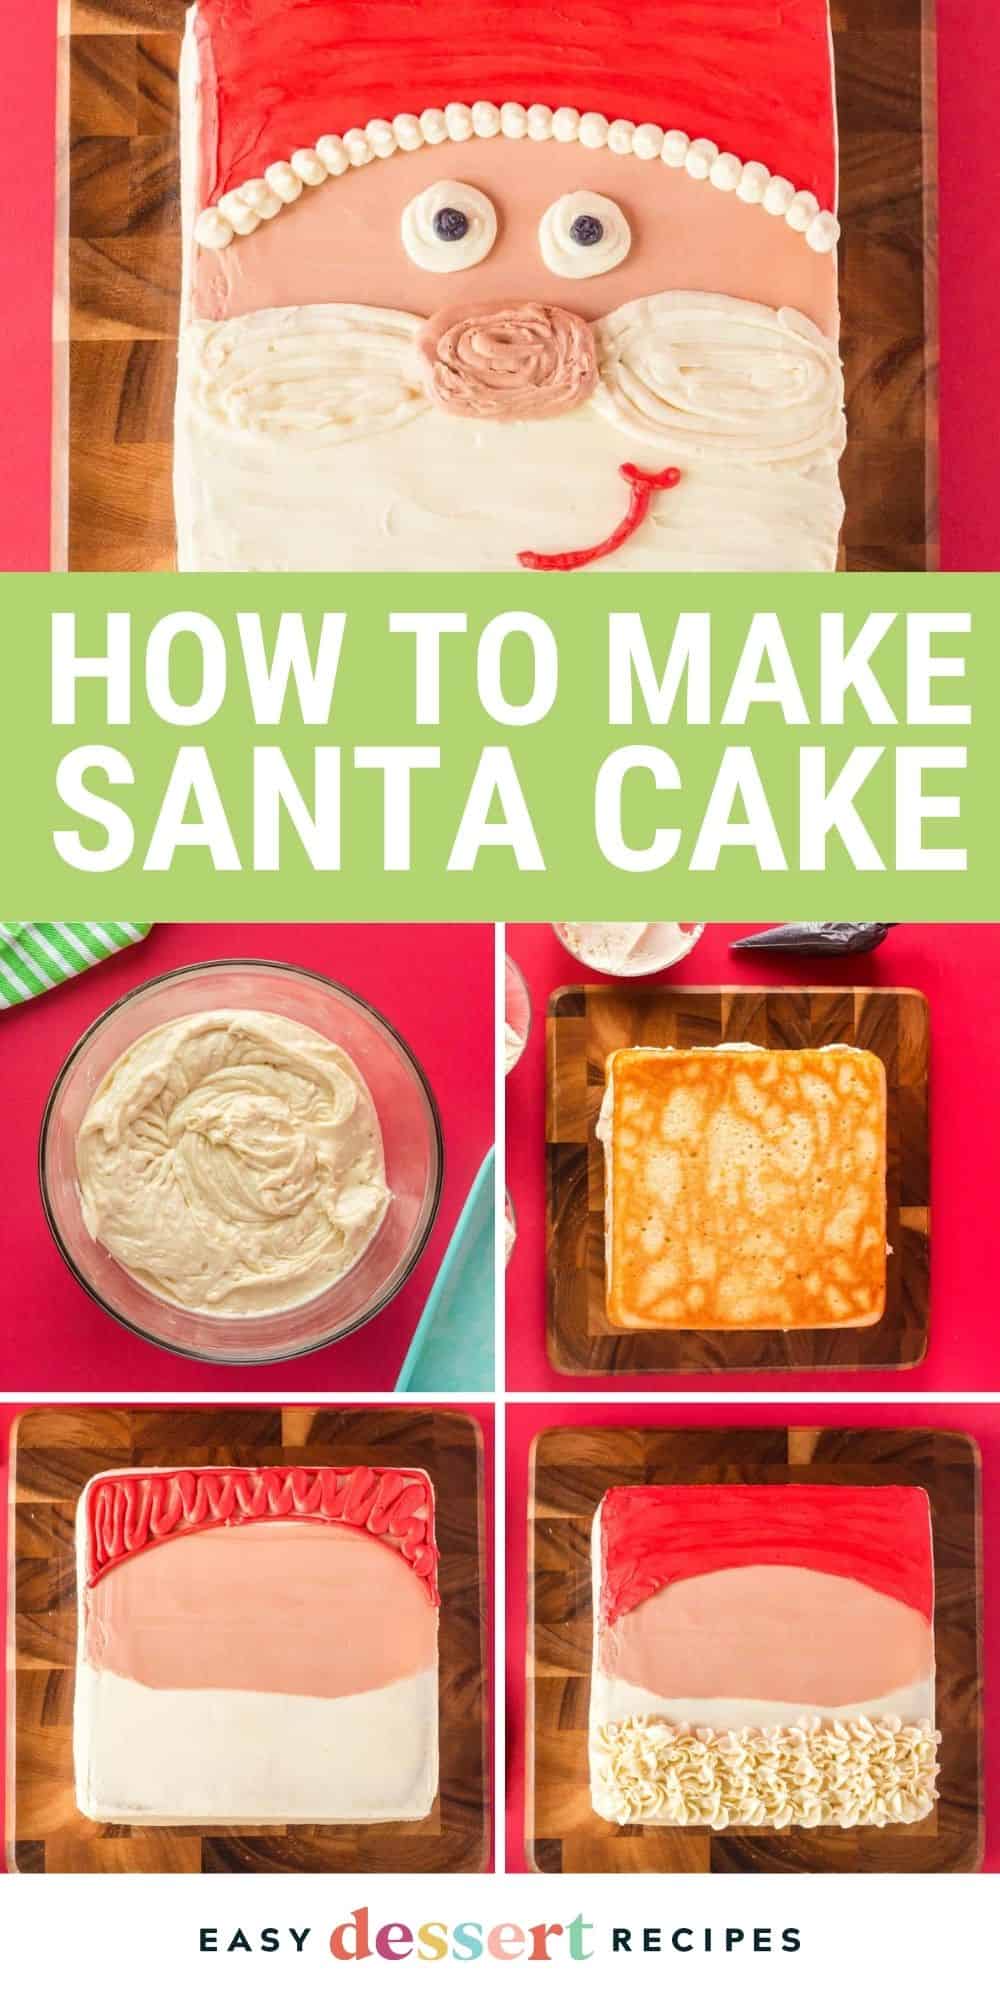
Prep: Gather the list of ingredients for this peppermint-flavored Santa cake recipe. Preheat your oven to 350°F, line two 9×9-inch square baking pans with parchment paper on the inside bottom, and spray the entire inside (bottom and sides) with nonstick spray. Set it aside. Bring the butter, eggs, and buttermilk to room temperature for 30-60 minutes before beginning.
Mix the Wet and Dry: In the bowl of a stand mixer fitted with the paddle attachment, beat ¾ cup of room-temperature unsalted butter, 1½ cups of granulated sugar, 3 large, room-temperature eggs, 2 teaspoons of vanilla extract, and ½ teaspoon of peppermint extract until creamy, about 3-4 minutes. In a separate bowl, whisk 2¼ cups of all-purpose flour, 2¼ teaspoons of baking powder, and ¾ teaspoon of kosher salt together. Measure the flour using the spoon-and-level method to avoid a dense, dry cake.
Combine the Cake Batter: Pour half of the dry mixture into the wet mixture and beat just until mixed. Pour all 1 cup of buttermilk into the wet mixture and beat just until combined. Then add the remaining dry mixture to the wet mixture and beat until combined. Be careful not to overmix, or your cakes will turn out dry.
Bake the Cakes: Divide the mixture evenly between the two prepared baking pans (about 591 grams per pan). Bake in the preheated oven for 30 minutes, or until a toothpick inserted in the middle comes out clean. Let cool completely before decorating. I recommend chilling the cakes in the refrigerator for 30 minutes (or up to overnight) before frosting so they don’t crumble apart.
Make the Frosting: In the bowl of a stand mixer fitted with the whisk attachment, beat together 2 cups of room-temperature unsalted butter, 5 cups of powdered sugar, and 1 tablespoon of vanilla extract until light and fluffy, about 4-5 minutes. Adjust the consistency of the frosting as needed by adding a little bit of milk or more powdered sugar.
Stack the Cakes: Start by setting one layer of cake on a flat square dish (or cardboard cake plate) and covering the top with a layer of white icing. Fill the cake with about ⅓ of the frosting, and save the rest for decorating. Put the second cake layer (bottom side facing up) on top of the first layer. You should now have a two-layer cake.
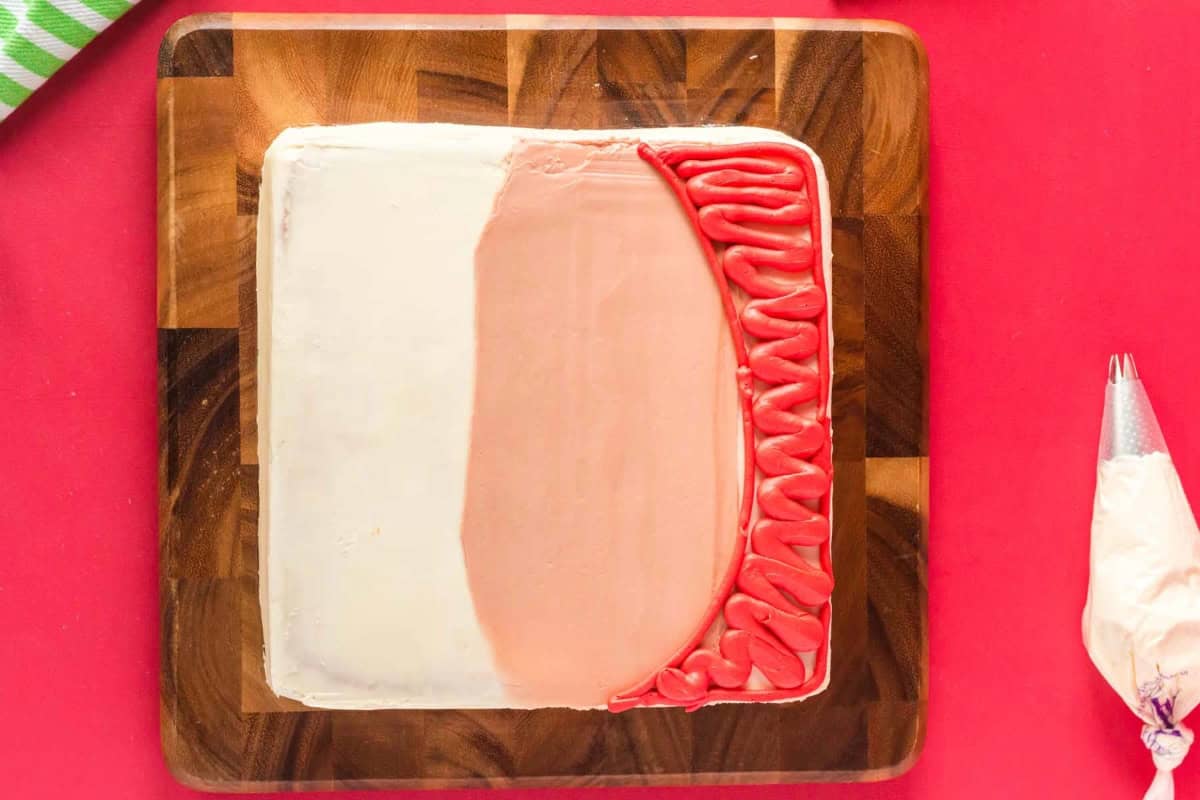
Crumb-Coat the Cake: Cover the cake in a thin “crumb” coating of white icing. Place the cake in the freezer for about 10 minutes to let it harden a bit. Remove the cake from the freezer and smooth out the “crumb” coating using a cake smoother. I like to run my smoother under hot water for the best finish. With the remaining white icing, take about 1 tablespoon out to color with black food coloring, take about ½ cup out to color with skin tone food coloring, take about ½ cup out to color with red food coloring, and leave the rest of the icing white. Place all the icings into icing piping bags or Ziplock bags with the corners cut off.
Outline the Face: Start with the skin tone icing, and pipe the outline of where you’ll want Santa’s face to be. Then lightly fill this in with icing, and use an icing spatula to smooth. I like to chill the cake for 10-15 minutes between each different colored layer of frosting so the colors don’t bleed together.
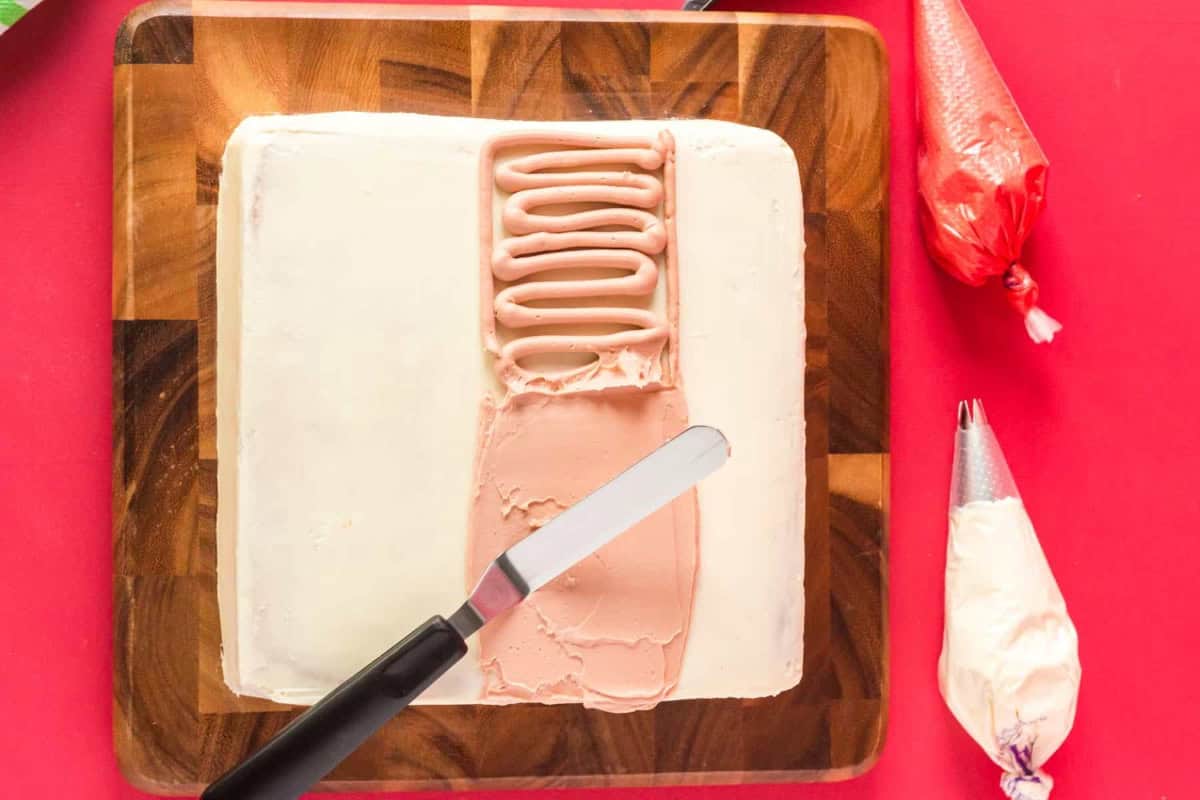
Pipe the Hat: Next, use the red to outline where you’ll want his hat to be. Then fill in with red icing, and use the icing spatula to smooth.
Make the Beard: Move on to the beard. You can do this with a Wilton 1M icing tip for a curly look, or flatten the icing like in the previous steps.
Finish the Details: Do the white mustache and the trim around his hat. Then, draw in a skin color nose overlapping with the moustache. Finish off with the white and black to make the eyes. Optionally, add a little red grin over his beard.
How to Store and Freeze
Store leftover Santa cake in an airtight container at room temperature for up to 2 days, in the refrigerator for up to 4 days, or in the freezer (tightly wrapped in 2 layers of plastic wrap and 1 layer of aluminum foil) for up to 3 months. Let thaw overnight in the refrigerator before enjoying cold or at room temperature.


Leave a Reply