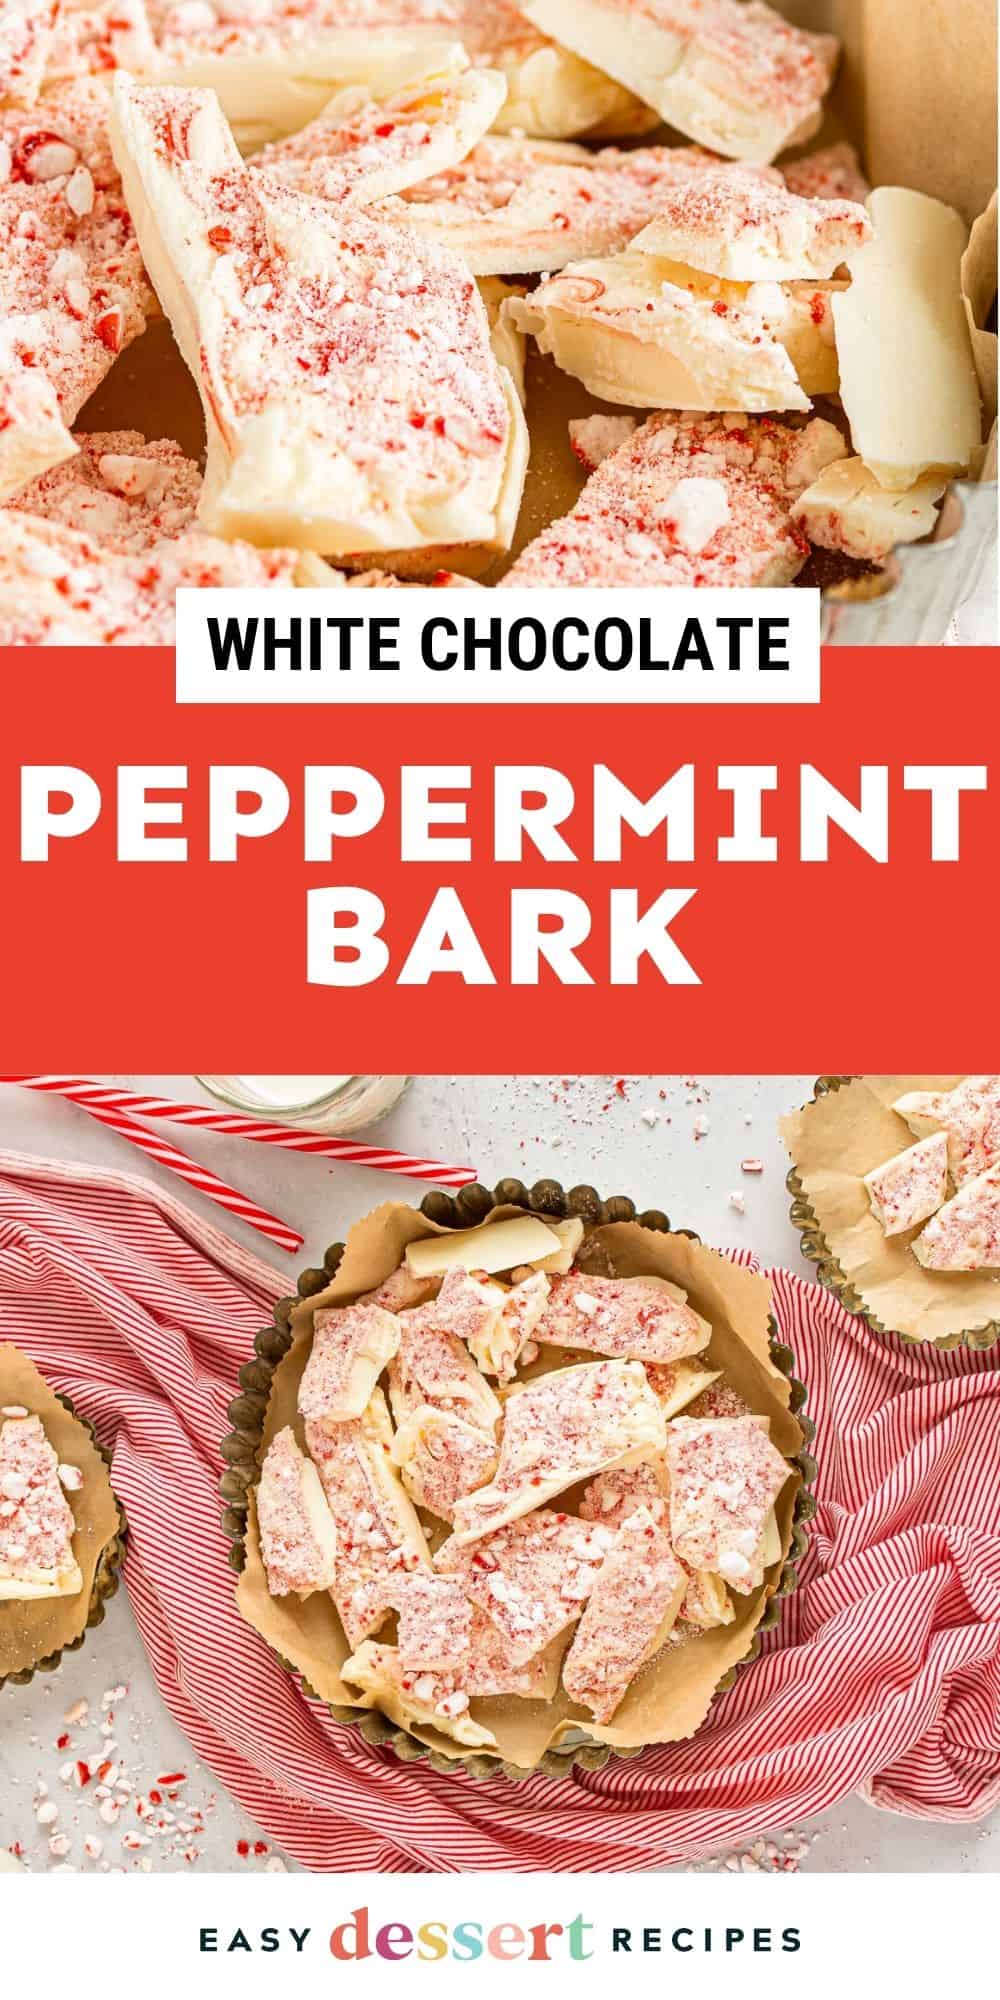
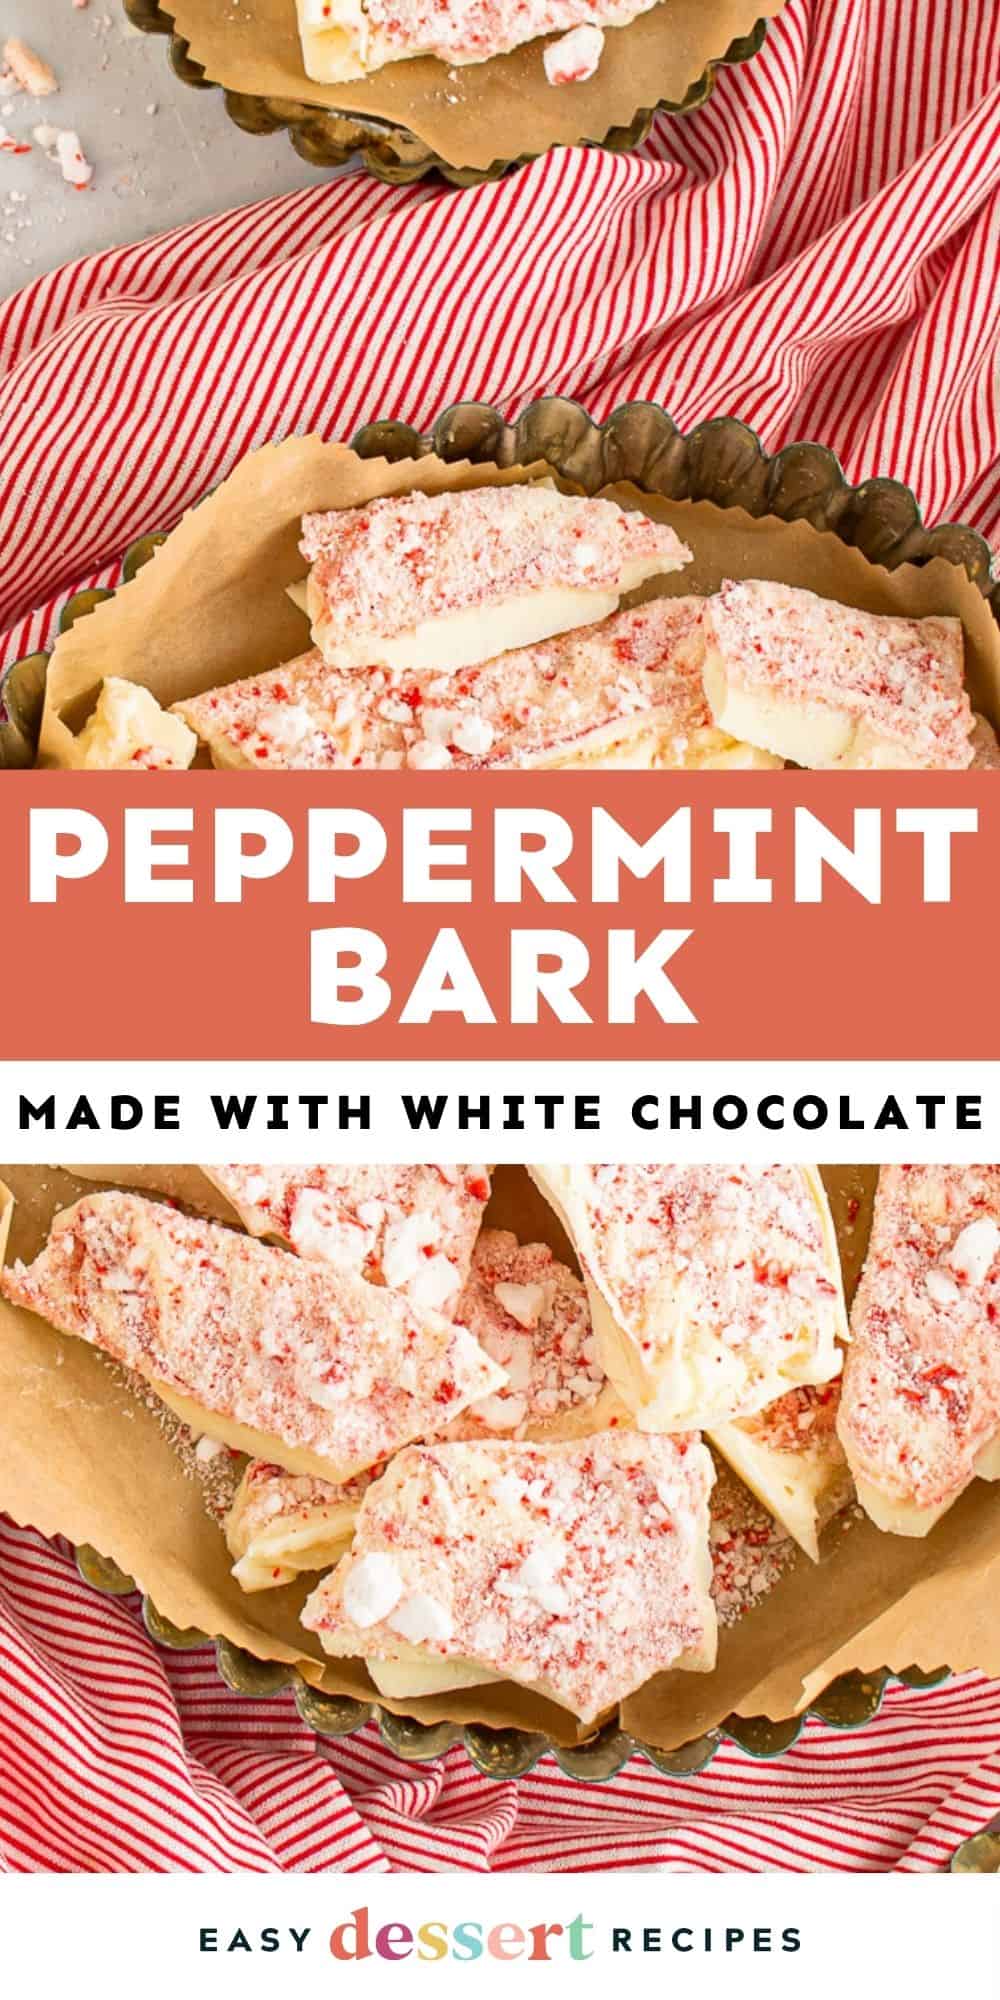
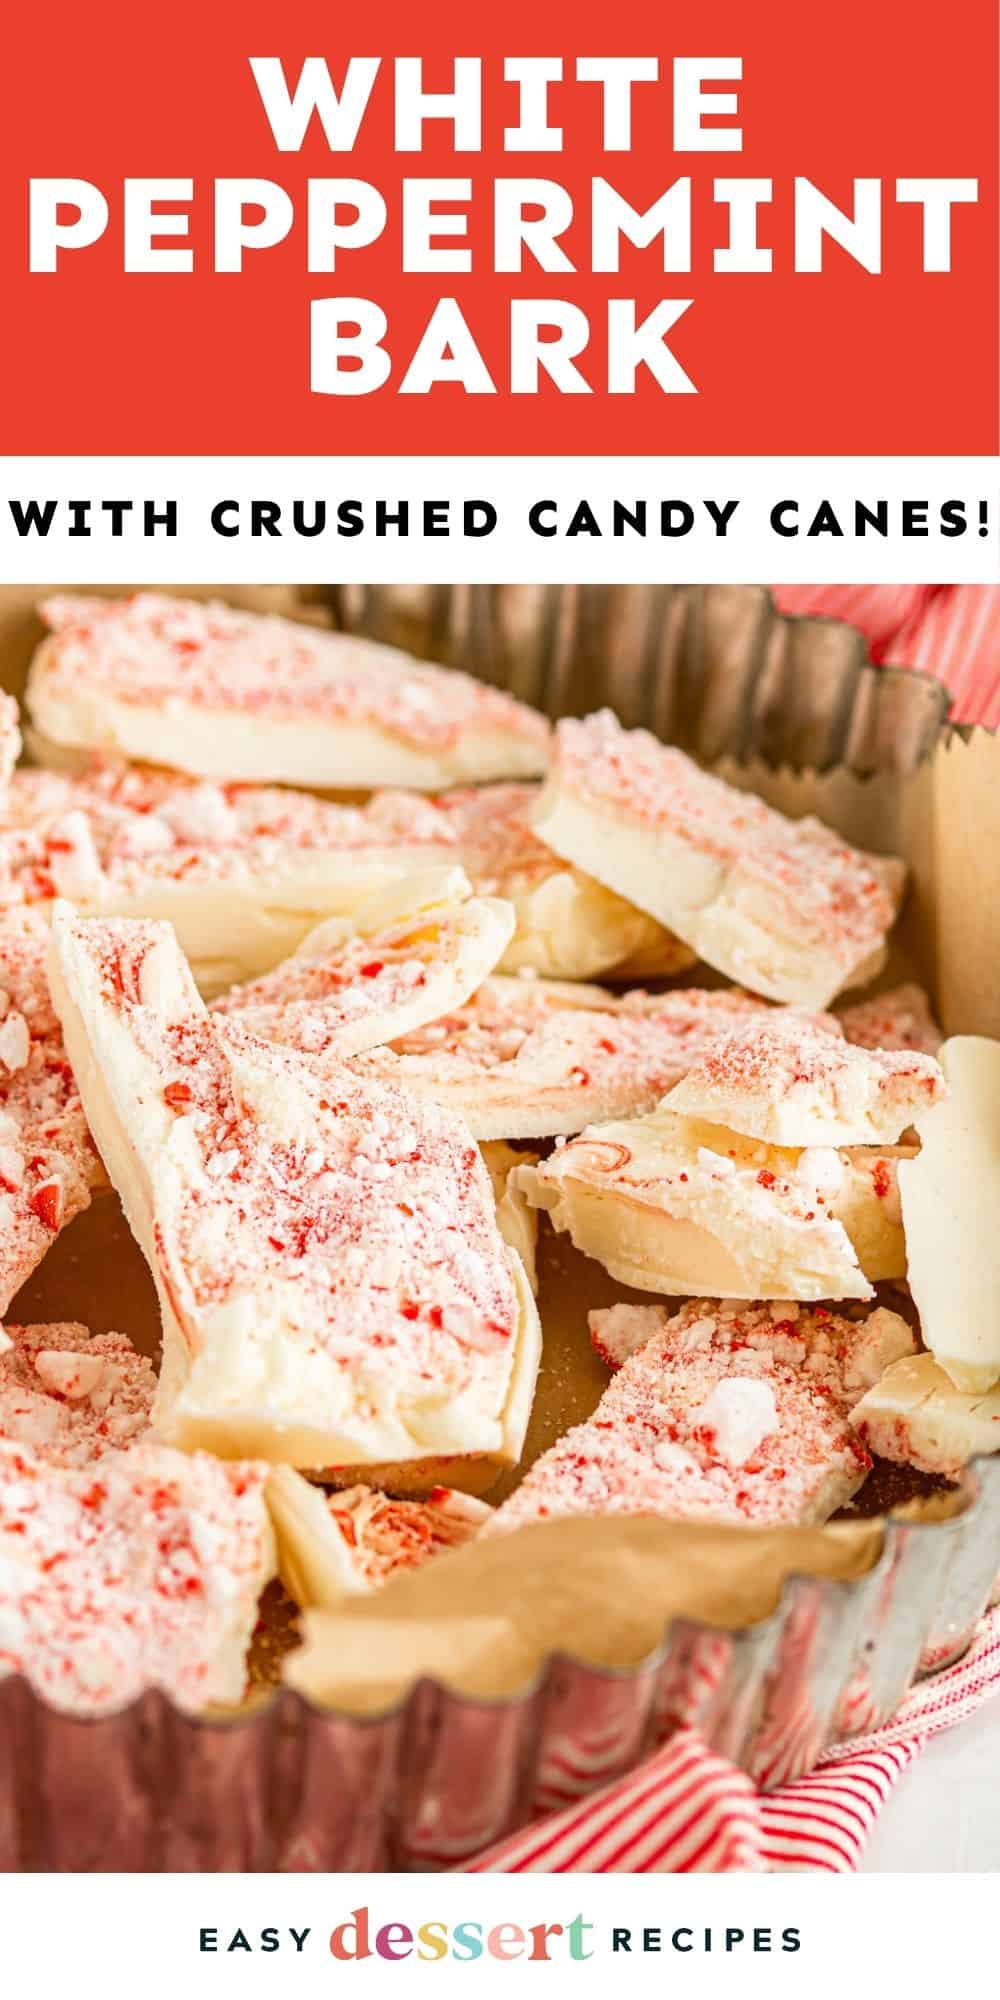
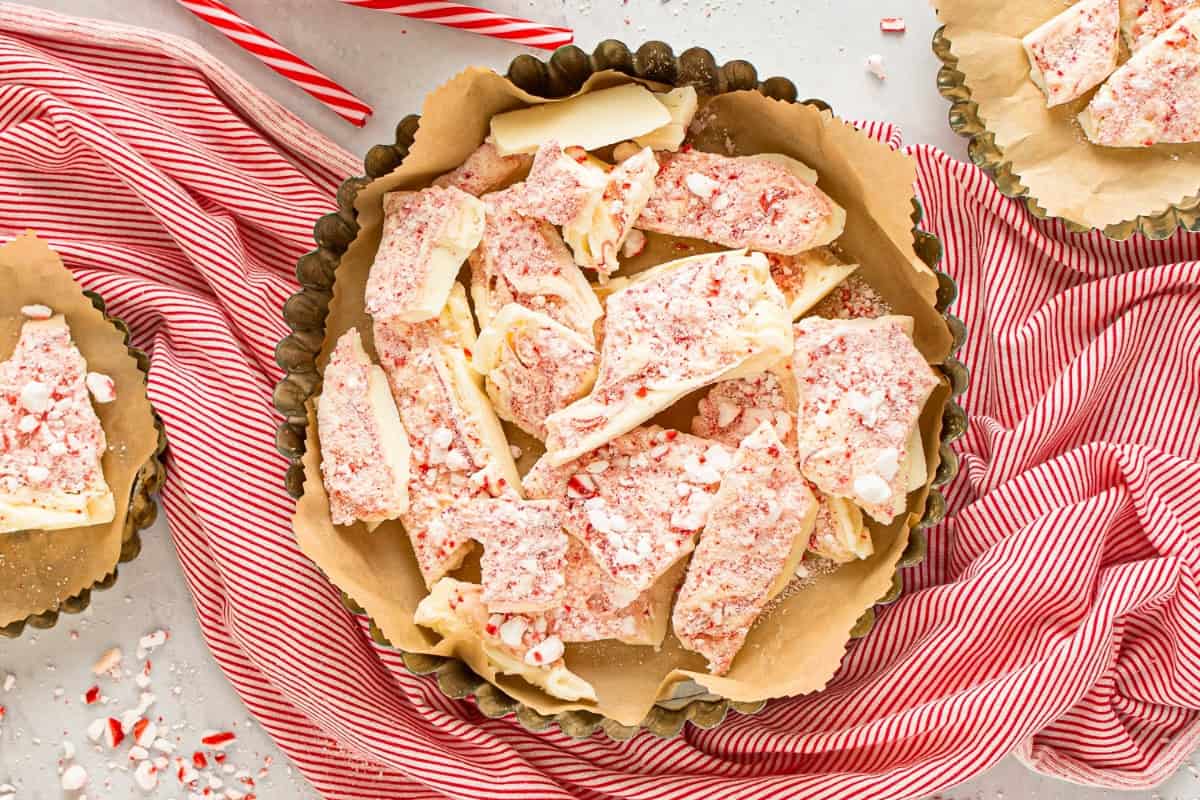
This white chocolate peppermint bark recipe is incredibly easy to make in 20 minutes using the microwave and 4 simple ingredients! I pair rich, creamy white chocolate with crushed candy canes to create a festive treat with the perfect balance of sweet and minty crunch. This candy cane bark is perfect for gifting, adding to dessert trays, or enjoying as a holiday snack.

White Chocolate Candy Cane Bark
With just white chocolate, peppermint extract, and crushed candy canes, this Christmas bark recipe comes together in minutes. No tempering required, just melt, mix, and set! The result is a crisp, glossy candy that’s easy to break into irregular pieces, making it ideal for holiday platters or homemade gifts.
I make my peppermint bark with white chocolate for a more traditional candy cane look. I love the pure, sweet flavor and contrast of colors. However, if you prefer a more classic peppermint bark look, add a layer of milk, dark, or semisweet chocolate to the pan first, then pour the white chocolate on top once it sets slightly.

Email this Recipe
Enter your email and we’ll send the recipe directly to you!
By submitting this form, you consent to receive emails from Easy Dessert Recipes.
Warm Your Pan for a Smooth Result
I like to warm my pan slightly before pouring the melted chocolate in. A room-temp or slightly warmed pan helps prevent the chocolate from setting too quickly at the edges, which can create uneven thickness. This ensures a smoother, more even peppermint bark with perfect snap.

White Chocolate Peppermint Bark Recipe
Equipment
- Kitchen Scale (optional)
- 8×8 Baking Pan
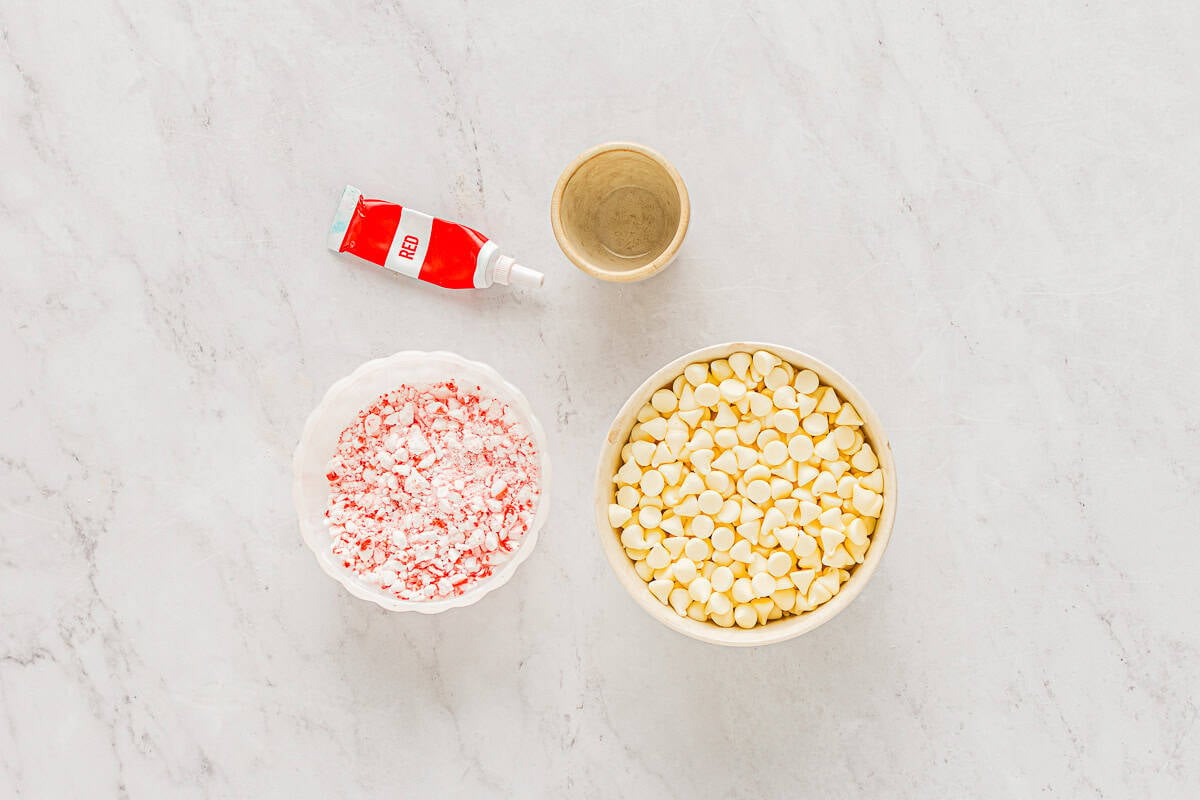
Ingredients
- 12 ounces white melting chocolate *
- ¾ teaspoon peppermint extract **
- Red food coloring optional
- ½ cup crushed candy canes ***
Instructions
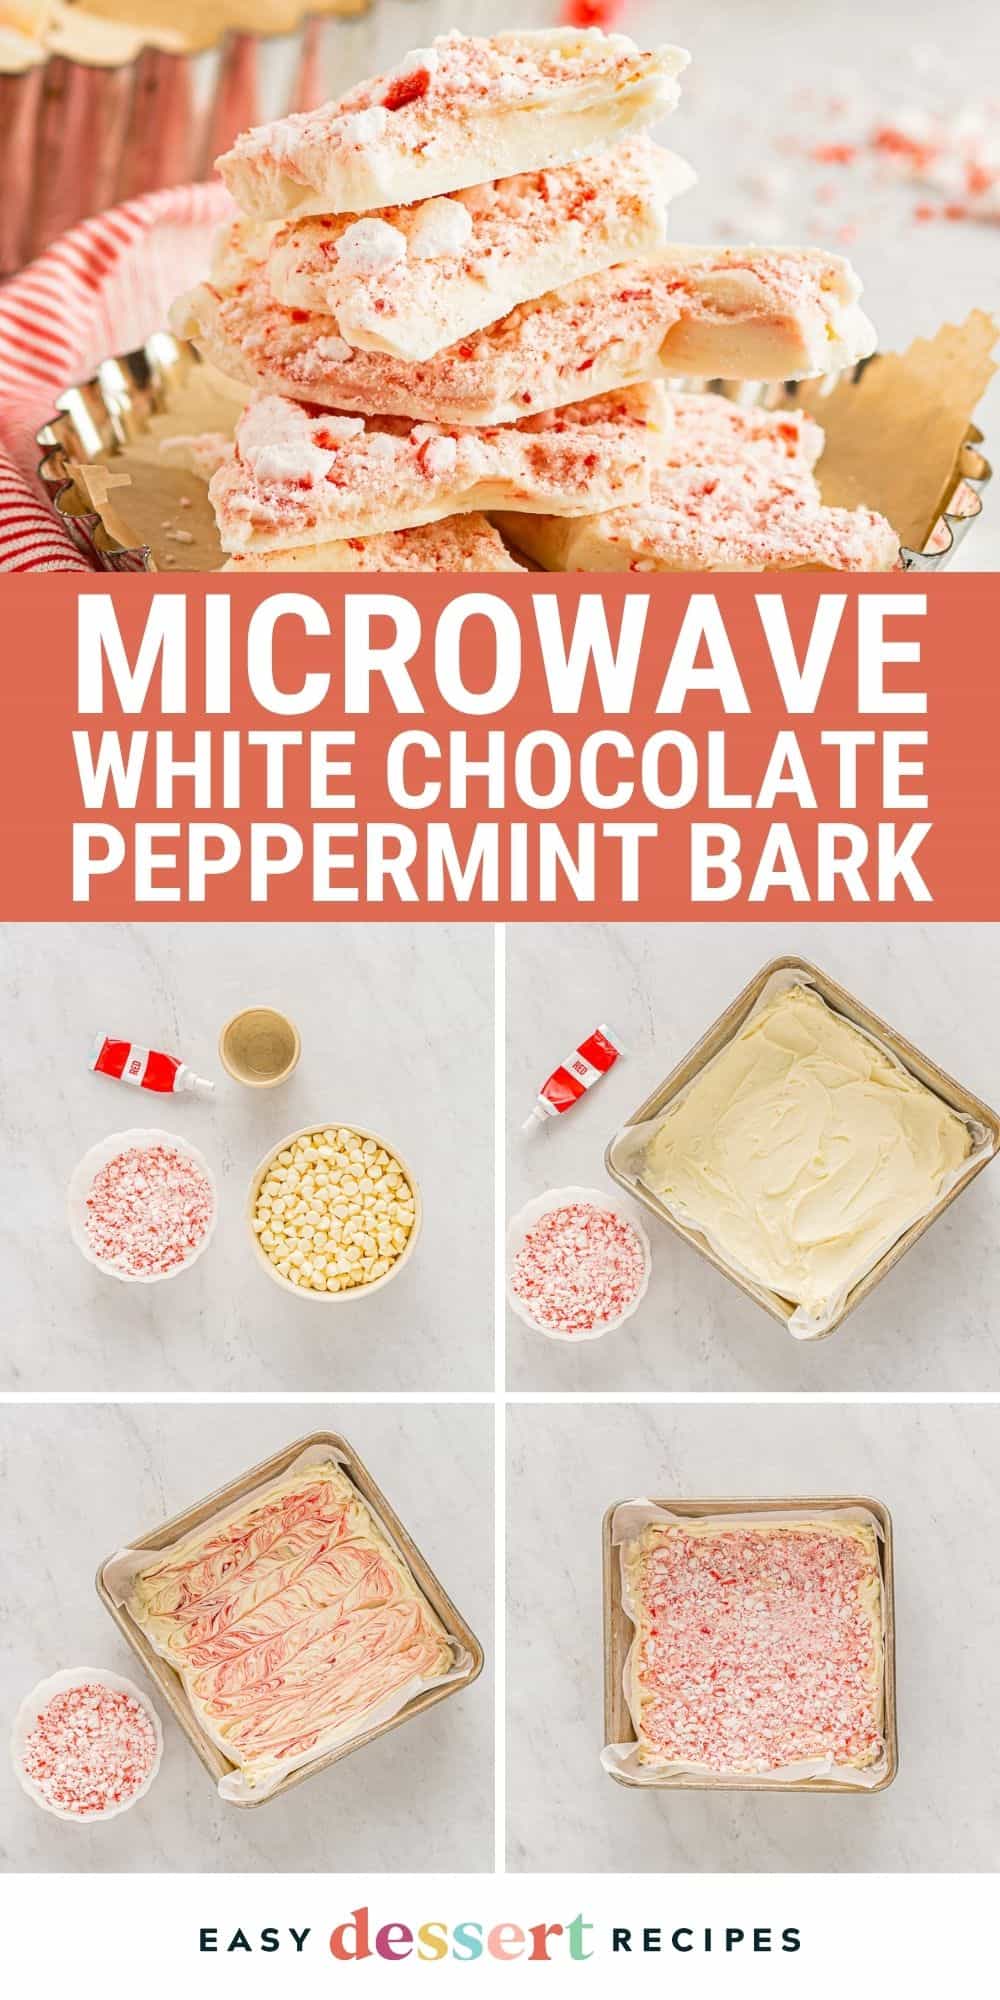
- Line an 8×8-inch baking pan with parchment paper. Set aside.

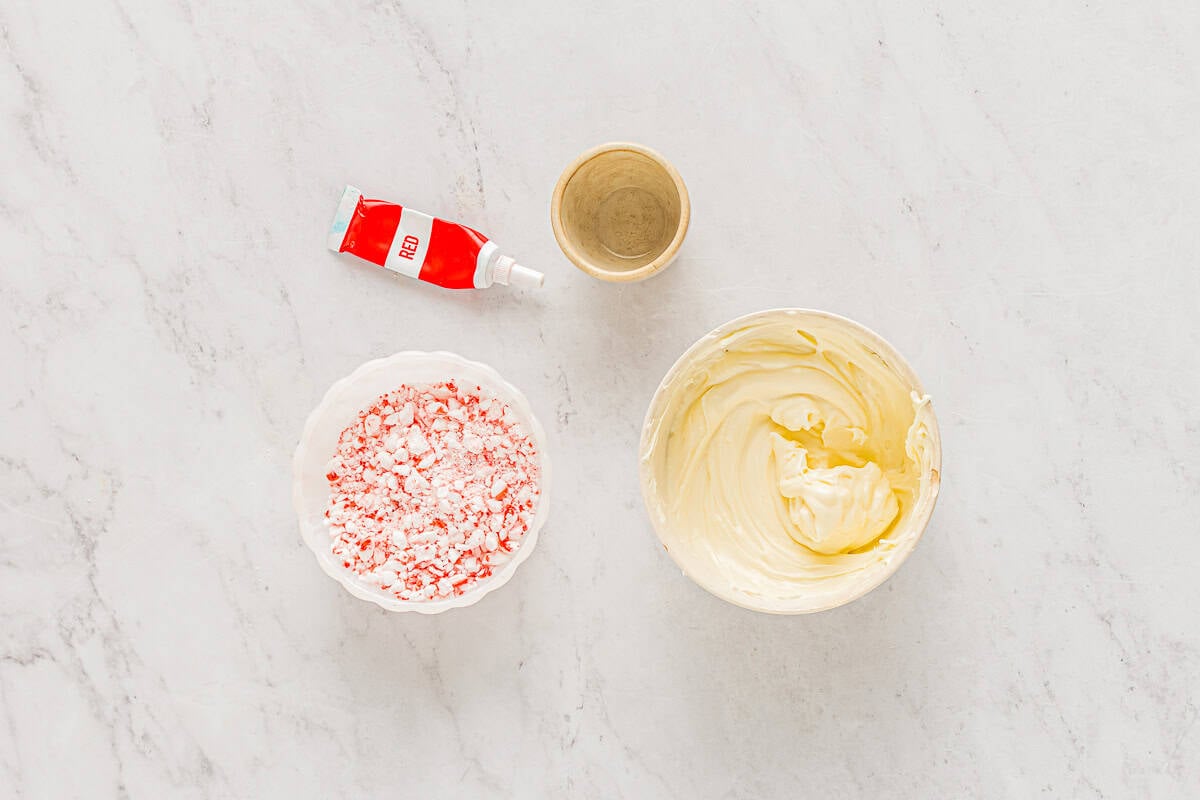
- In a medium, microwave-safe bowl, microwave the white chocolate in 20-second intervals, mixing well each time, until fully melted.12 ounces white melting chocolate
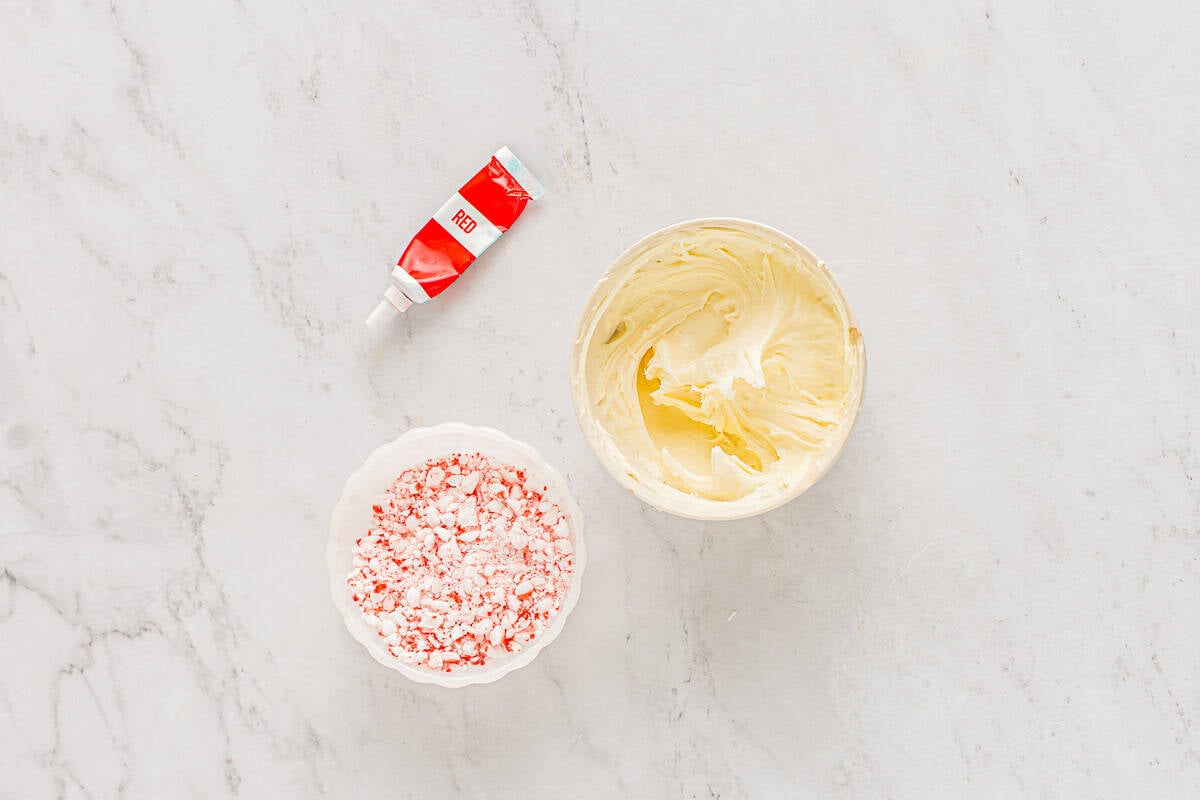
- Once melted, add the peppermint extract and stir.¾ teaspoon peppermint extract
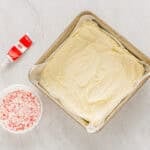
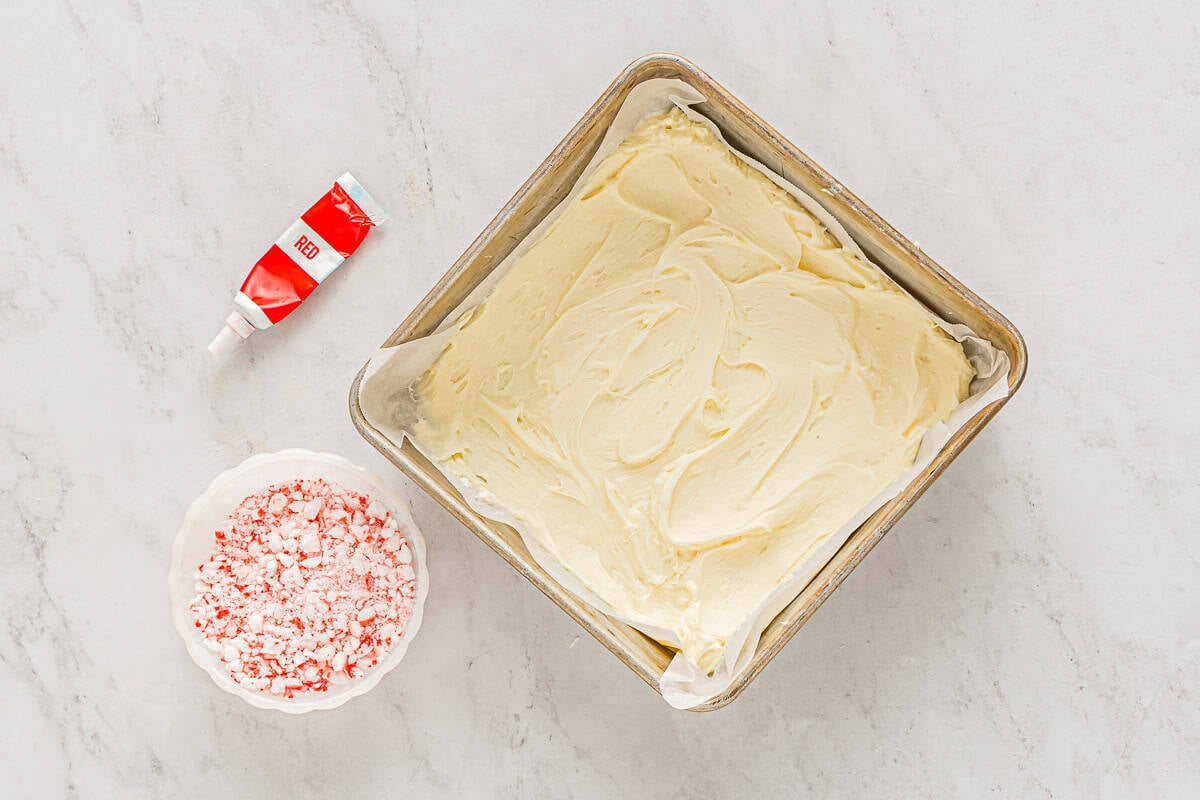
- Pour the melted chocolate into the prepared pan and smooth out to all of the corners.
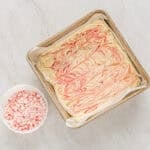
- Drop a few scattered drops of red food coloring onto the melted white chocolate. Use a knife or toothpick to swirl the red throughout the white chocolate.Red food coloring
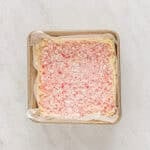
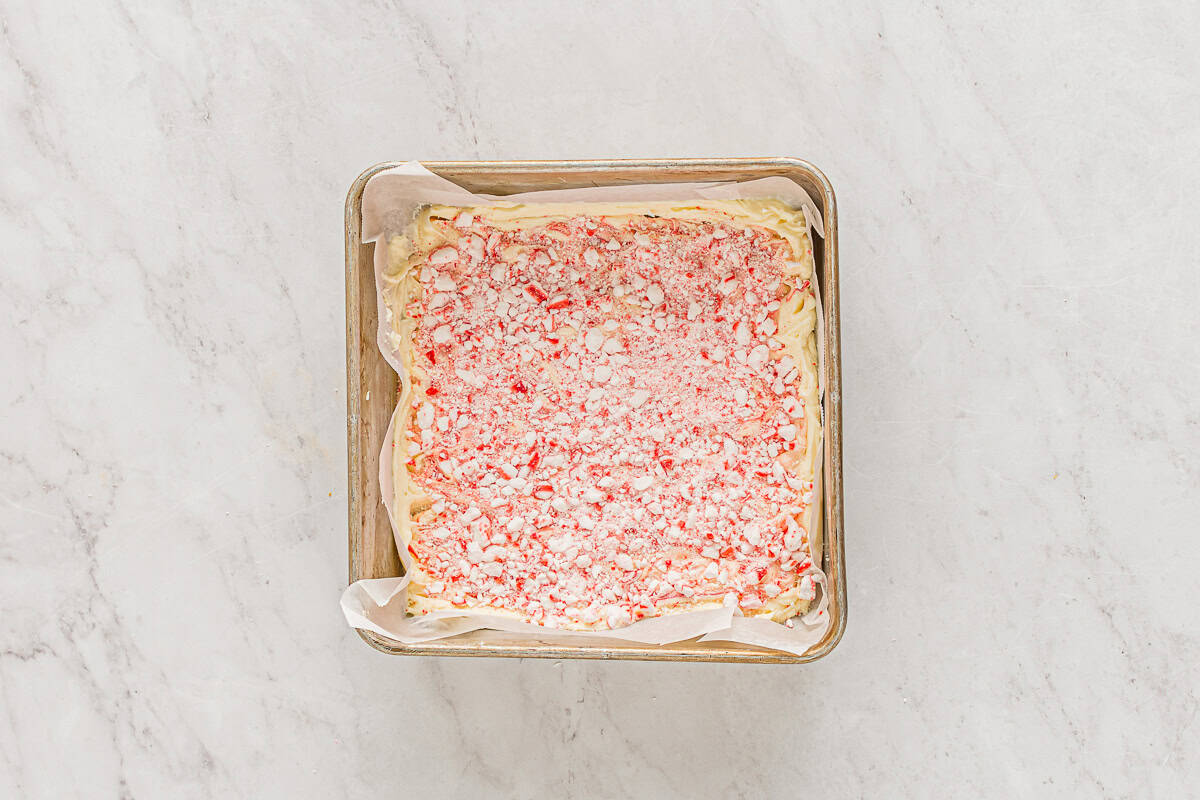
- Sprinkle crushed candy canes over the surface.½ cup crushed candy canes
- Let the peppermint bark set for 10 minutes or until completely hardened.
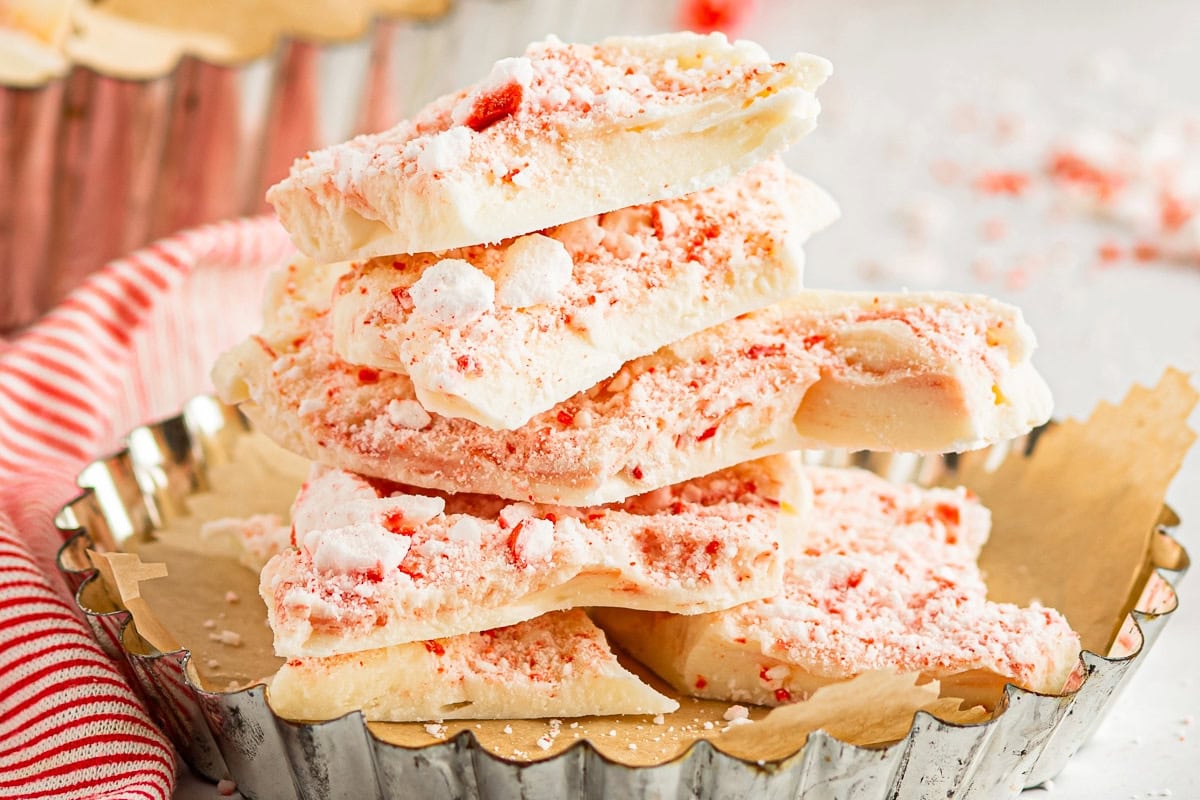
- Once hardened, remove the peppermint bark from the pan and break into pieces.


Notes
- Line your baking pan with parchment paper with a slight overhang. This makes lifting the bark out of the pan effortless and avoids breakage.
- When melting white chocolate, be sure to stir it often. This will help prevent it from seizing up.
- If your chocolate starts to seize (become grainy or clumpy), you can add 1 teaspoon of coconut oil or vegetable shortening per 3-4 ounces of chocolate and stir gently. This helps restore a smooth, pourable consistency.
- If you want professional-looking bark, gently tap the pan on the counter after pouring the chocolate to remove air bubbles and create a smooth surface.
- For a more sophisticated peppermint bark, consider adding a thin layer of dark or milk chocolate first, letting it set slightly, then pouring the white chocolate on top. This adds visual contrast and flavor depth. I recommend using 12 ounces for evenly-sized layers or 6-8 ounces for a thinner bottom layer.
- The food coloring is optional and just for looks. For the best results, I recommend using gel food coloring. I like the pepperminty look of just red, but you can also swirl in green–just don’t swirl too much, or it will turn muddy.
- To easily crush candy canes, use a food processor or place them into a Ziplock bag and crush them with a rolling pin.
- The bark will set and harden much quicker in the refrigerator.
How to Make Peppermint Bark with White Chocolate Step-by-Step
Prep: Gather the list of ingredients for this peppermint bark recipe. Line an 8×8-inch baking pan with parchment paper and set it aside. I like to leave a bit of overhang so I can more easily remove the set bark from the pan later on. Crush the candy canes into pieces in a food processor; or place the whole candy canes in a sealed Ziplock bag and crush with a rolling pin.
Melt the Chocolate: In a medium, microwave-safe bowl, microwave 12 ounces of white melting chocolate in 20-second intervals, stirring well each time, until fully melted. If your chocolate starts to seize, add 1 teaspoon of coconut oil or vegetable shortening per 3-4 ounces of chocolate and stir gently to restore its smooth consistency.
Flavor the Chocolate: Once melted, add ¾ teaspoon of peppermint extract and stir. Note that if you’re using peppermint oil, you’ll want to use much less since it’s stronger. I recommend ⅛-¼ teaspoon maximum.
Spread the Chocolate: Pour the melted chocolate into the prepared pan and smooth out to all of the corners. For a professional look, gently tap the pan on the counter after to remove air bubbles and create a smooth surface.
(Optional) Swirl the Food Coloring: If desired, drop a few scattered drops of red food coloring onto the melted white chocolate. Use a knife or toothpick to swirl the red throughout the white chocolate. You can do a mixture of red and green; just make sure not to swirl too much or the colors will turn muddy.
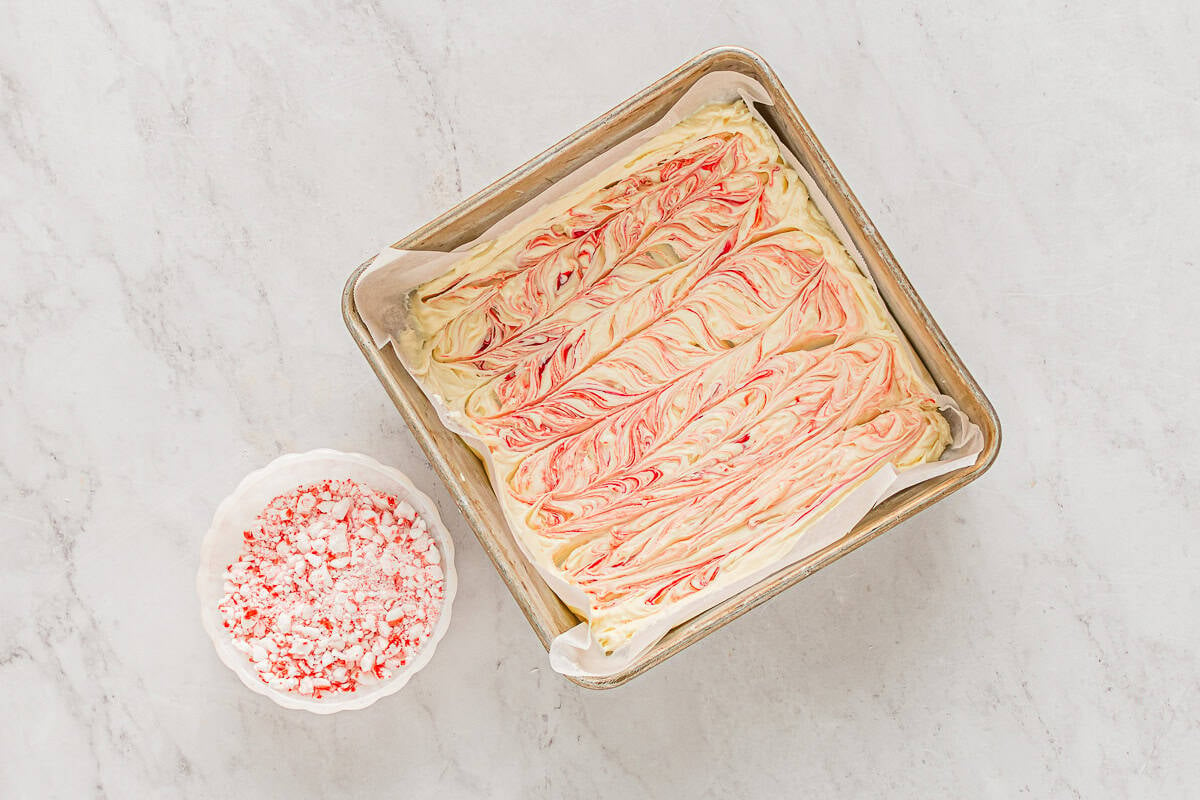
Top and Set: Sprinkle ½ cup of crushed candy canes over the surface of the bark and let set for at least 10 minutes, or until completely hardened. You can pop it in the fridge or freezer to speed this along.
Break into Pieces: Once hardened, remove the peppermint candy cane bark from the pan and break into pieces. I like to do this with my hands, but you can also press the point of a knife straight down into the bark to cause it to break irregularly.
How to Store and Freeze
Store leftover white chocolate peppermint bark in an airtight container or Ziplock bag with all the air pressed out at room temperature or in the refrigerator for up to 2 weeks. Alternatively, tightly wrap individual pieces in plastic wrap and place them in an airtight container or Ziplock bag to freezer for up to 6 months. Let thaw overnight in the refrigerator to avoid condensation before enjoying.


Leave a Reply