


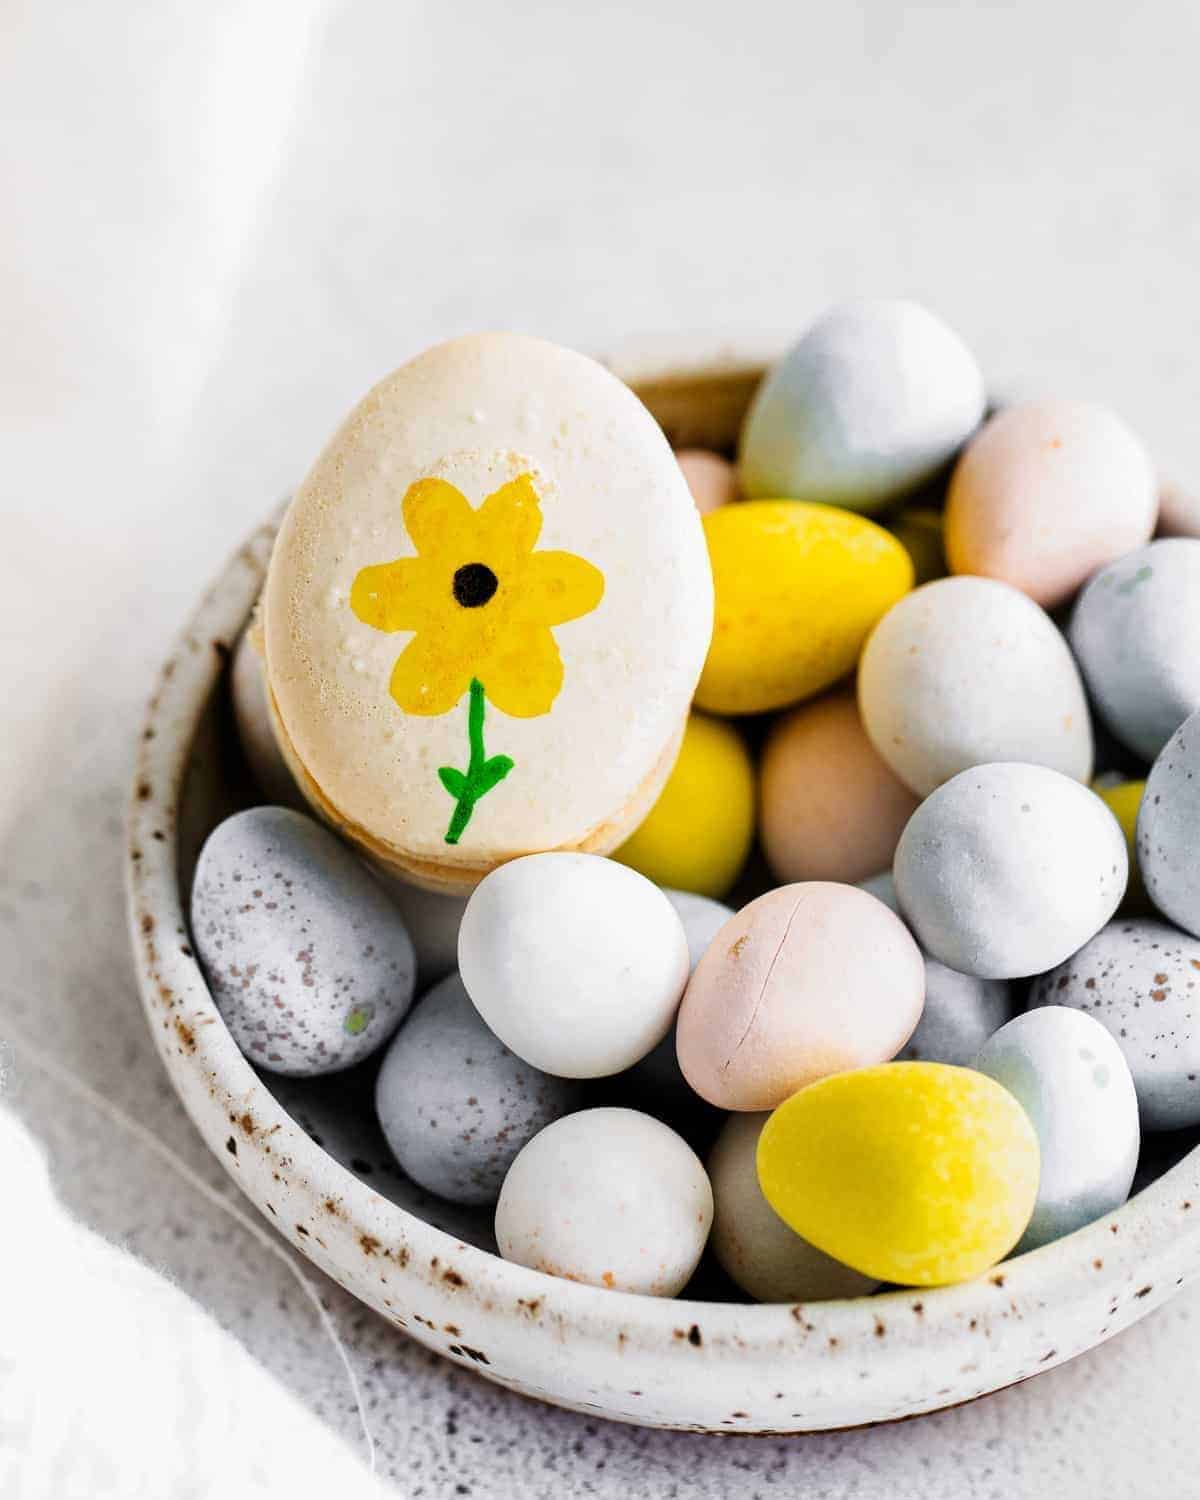
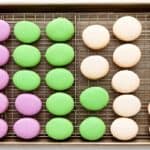
Forget the chocolate eggs! These egg-shaped Easter macarons are the true showstoppers of the season. Featuring a delicate vanilla buttercream and that signature crisp-yet-chewy shell, these colorful springtime macarons will bring a touch of elegance to your Easter dessert table. While macarons are famously finicky, I’ve refined this recipe to be approachable, stable, and–most importantly–totally delicious. Let’s take your dessert game to the next level with a treat that looks as beautiful as it tastes!

Decorated Easter Egg Shaped Macarons
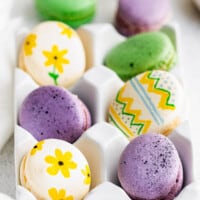
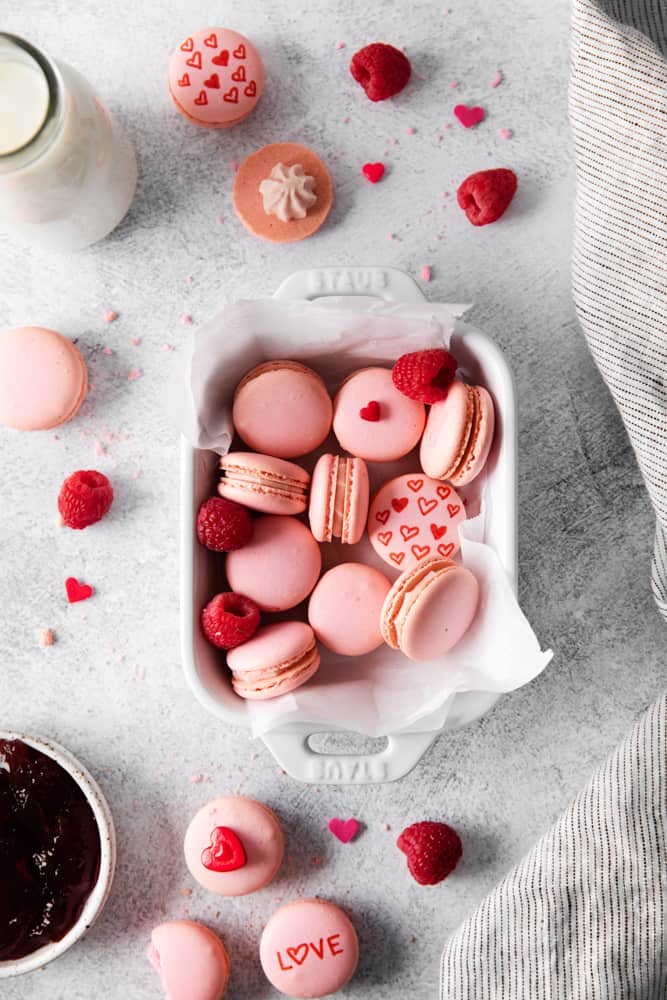
I know macarons sound difficult, but I’m here to tell you that they’re actually not. These Easter egg macarons may be a bit tedious, but with a little know-how, they turn out wonderful every time! I decorated mine with food-safe markers to make them look just like real Easter eggs, and they were the talk of my Easter dessert table!
I make my egg macarons using the Swiss meringue method. By gently heating the egg whites and sugar over a double boiler before whipping, I create a stable, marshmallow-like base that’s less prone to collapsing. This is key for creating great macarons every time. Coupled with a 25-minute rest (don’t skip it!) to set the tops and help develop those crunchy feet, this is a no-fail recipe that’s sure to impress.

Email this Recipe
Enter your email and we’ll send the recipe directly to you!
By submitting this form, you consent to receive emails from Easy Dessert Recipes.
How to Pipe Egg-Shaped Macarons
To create a perfect egg shape, pipe your macaron batter at a 45-degree angle rather than straight up and down. Start at the fat base of the egg, applying steady pressure to create a rounded mound, then slowly drag the tip upward about half an inch while gradually tapering off your squeeze. Finish with a quick, clean flick of the wrist to create the top point; any sharp peaks will naturally settle into a smooth, organic egg shape once you tap the tray on the counter to release air bubbles.
Easter Macaron Recipe
Equipment
- Kitchen Scale (optional, but recommended!)
- Baking Sheet
- Silpat Mat (optional)
- Stand Mixer
- Piping Tip Set
- Oven Thermometer (optional, but recommended!)
Ingredients
For the Shells
- 3 large egg whites
- ½ cup granulated sugar
- ⅘ cup powdered sugar
- 1 cup almond flour *
- Gel food coloring optional**
For the Vanilla Buttercream
- ½ cup unsalted butter room temperature (1 stick)
- 2¼ cups powdered sugar
- 1 teaspoon pure vanilla extract
Instructions
For the Shells:
- Line two large baking pans with parchment paper or Silpat mats.
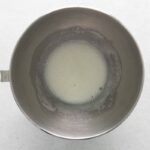
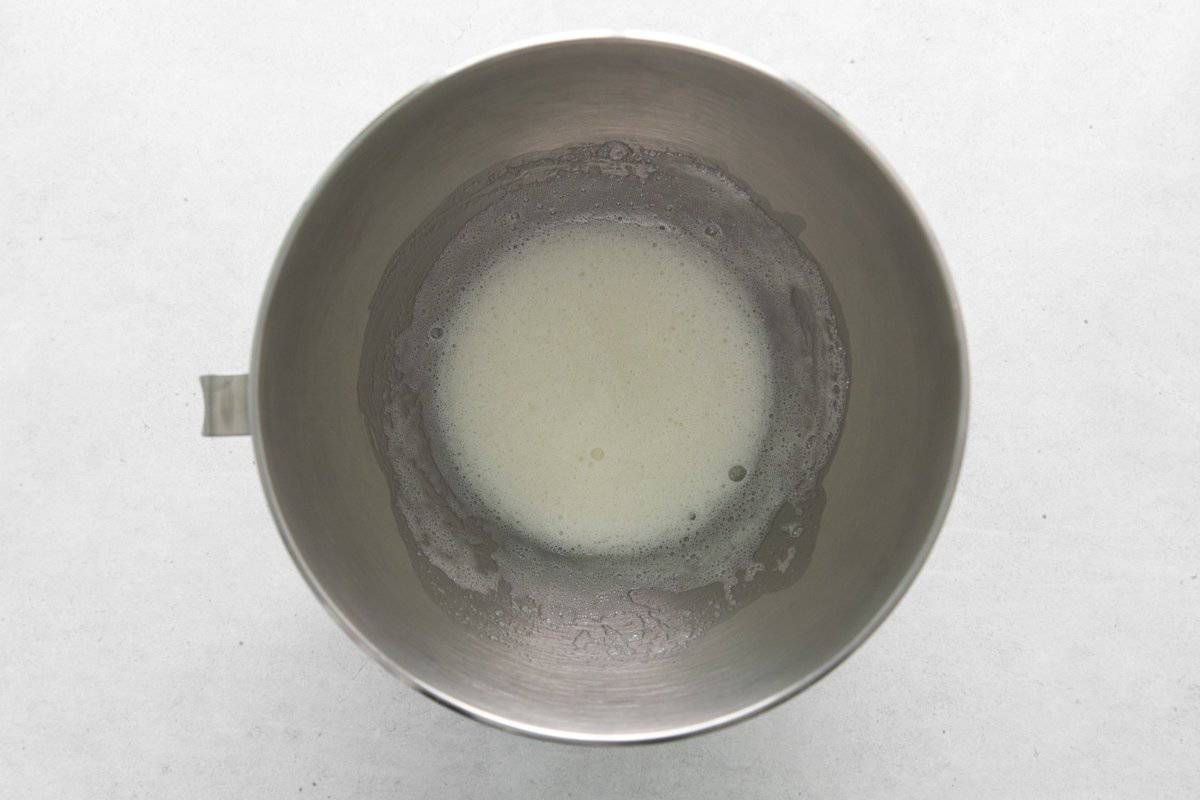
- Create a simple double-boiler by setting a heatproof bowl over a small saucepan of simmering water. Add the egg whites and granulated sugar to the bowl. Whisk constantly until the sugar has fully dissolved, about 2 minutes.3 large egg whites, ½ cup granulated sugar

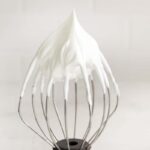
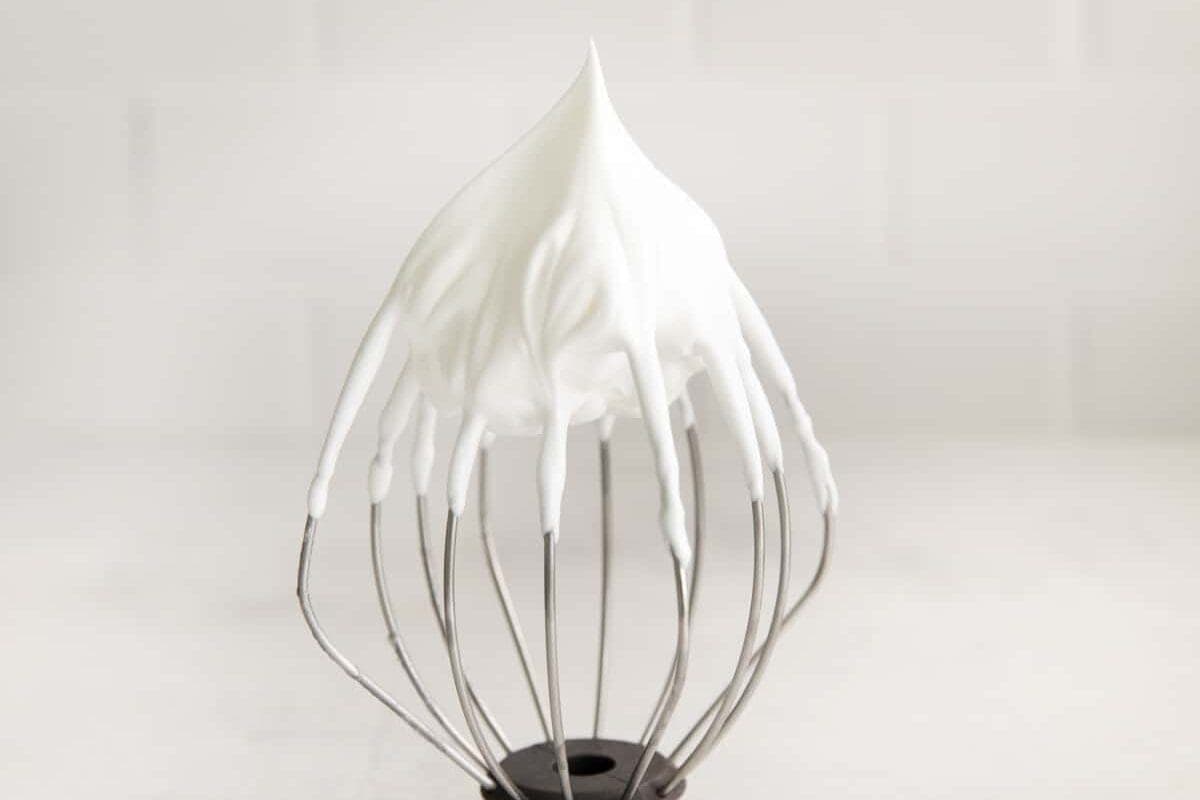
- Transfer the egg white mixture to the bowl of a stand mixer fitted with the whisk attachment. Beat on medium-high speed (Kitchenaid #8) until they form stiff peaks, about 5 minutes.
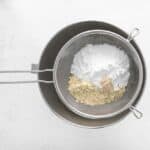
- Using a fine-mesh sieve, sift the powdered sugar and almond flour into the egg white mixture, making sure to discard any large lumps.⅘ cup powdered sugar, 1 cup almond flour
- Gently fold the dry ingredients into the egg whites, making sure not to deflate the egg whites at this point.
- Once all of the dry ingredients have been incorporated, add the gel food coloring, if using.Gel food coloring
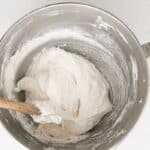
- Gently deflate the meringue by smushing it against the sides of the bowl and folding it back together. Repeat the smushing process 3-4 times and then test the meringue to see if it’s at the “figure 8 stage”. If you can draw an 8 with the batter while it flows smoothly, it’s ready. If the meringue falls off in clumps or breaks during the “8”, smush it 1-2 more times and fold it back together. Then repeat the figure 8 test.
- When the batter flows smoothly, transfer the mixture to the piping bag fitted with a round tip (I like a Wilton #10). Pipe 1½-inch circles or ovals about 2 inches apart on the prepared baking sheet. Immediately after you’ve finished piping the tray, hold it 6 inches off the counter and drop it straight down to release any air bubbles. Repeat the dropping process 5-6 times, or until it looks like any large air bubbles have popped.
- Set the tray aside to rest for 20-25 minutes, or until the macarons have developed a skin. The macarons are ready to bake when they can be gently touched without sticking to your finger.
- While the macarons rest, preheat your oven to 325°F.
- Bake the macarons, one tray at a time, for 13 minutes, rotating once halfway through.
- Allow the macarons to cool to room temperature before trying to remove them from the pan. Once they are fully cooled, they can be filled and aged.

For the Vanilla Buttercream:
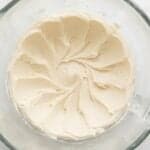
- Add the butter to the bowl of a stand mixer and beat on medium-high speed until it has lightened, about 2 minutes. Turn the mixer to low speed and add the powdered sugar slowly followed by the vanilla extract. If the mixture seems too dry, add a tablespoon of heavy cream or milk.½ cup unsalted butter, 2¼ cups powdered sugar, 1 teaspoon pure vanilla extract
- Turn the mixer to high speed and beat until the buttercream becomes light and fluffy, about 2 minutes.
- Transfer the mixture to a piping bag fitted with your choice of tip. Set aside until ready to use.
Assemble and Age:
- Place the macarons in similar-sized pairs. Pipe a small dollop of vanilla buttercream onto one of the macaron shells, and top with the other. Press down gently, just until the filling reaches the edges.
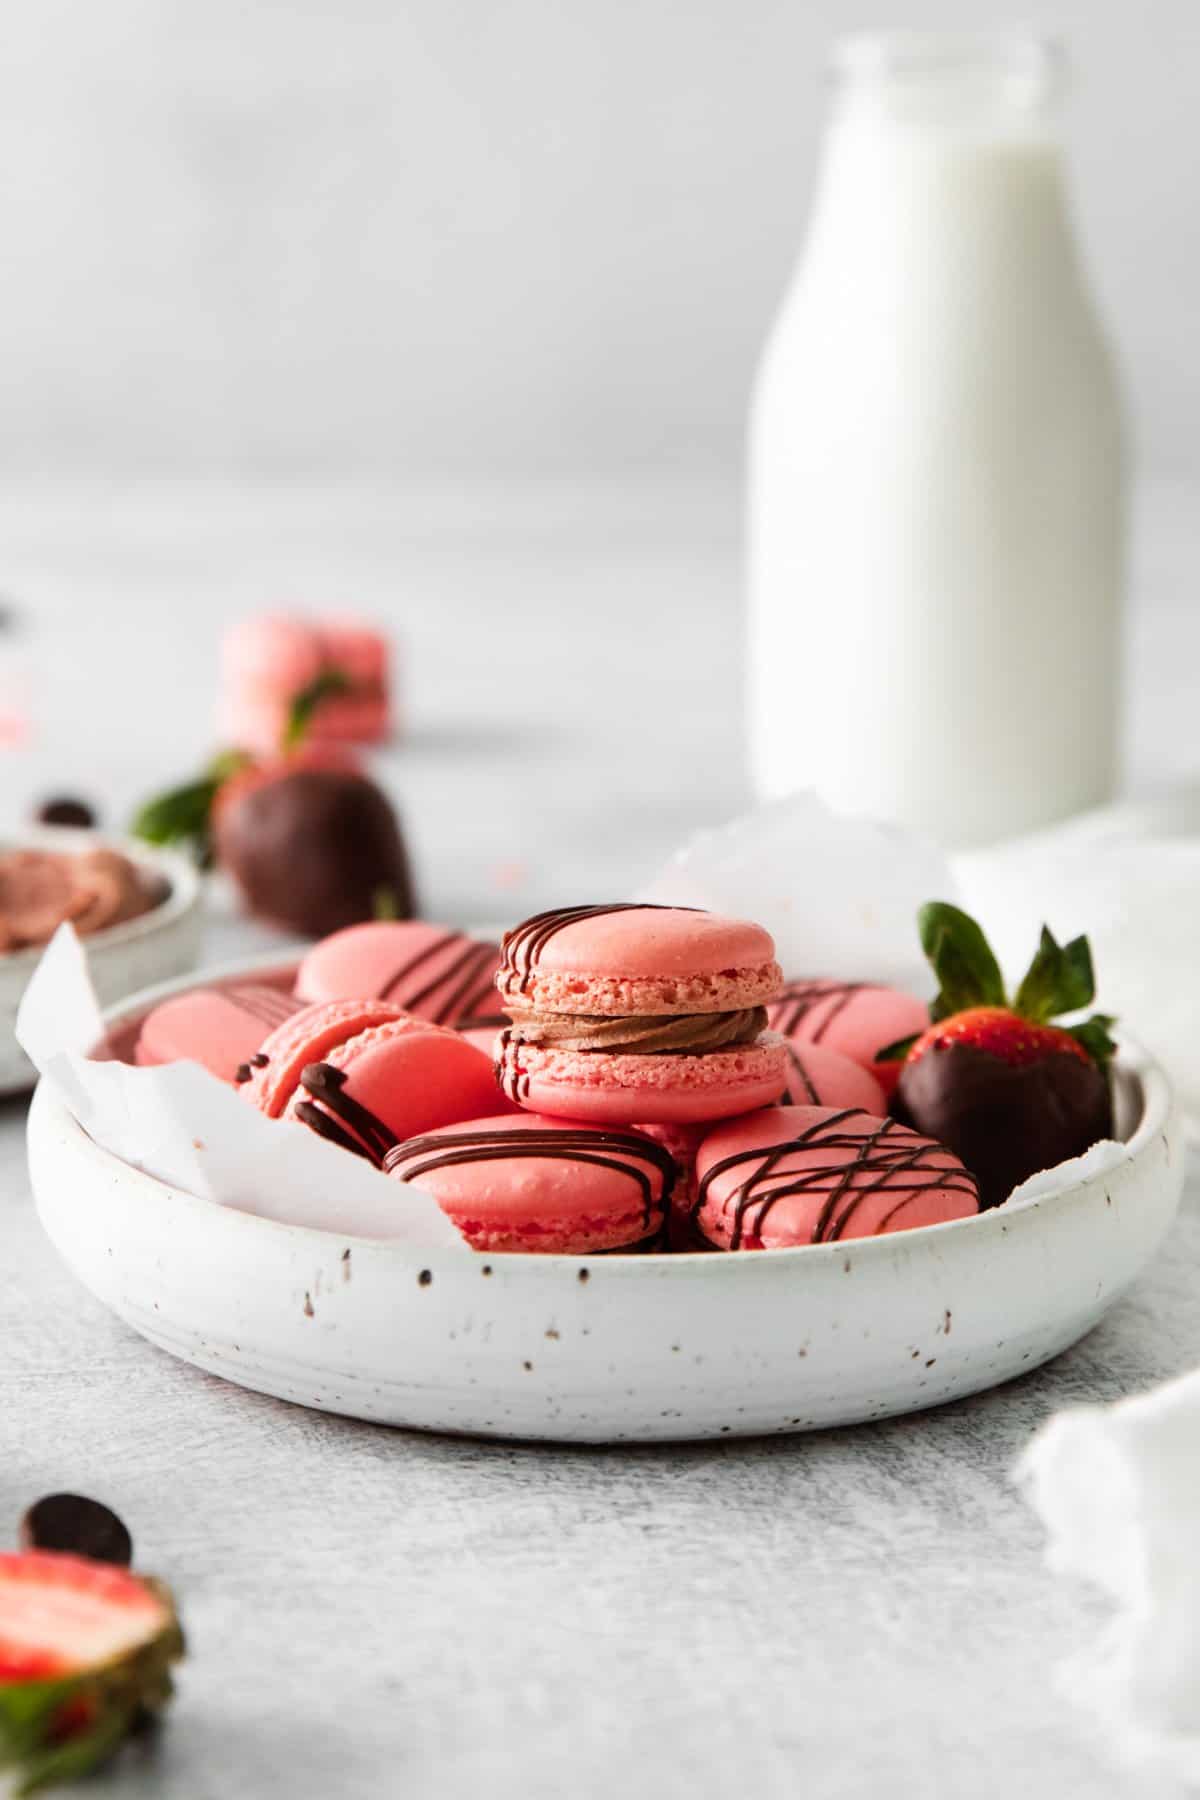
- To decorate the macarons, you can use white chocolate or food markers. Or to make the macarons speckled, combine 1 teaspoon of water with a few drops of black food coloring and use a pastry brush to splatter the food dye on the macarons (be careful not to get it on your clothes; it stains).
- Transfer the filled macarons to an airtight container and place them in the fridge to age overnight. Bring to room temperature before enjoying.

Notes
- For best results, use a kitchen scale and gram measurements. Macarons are precise–click the “Metric” button below the ingredients to convert.
- Avoid humid or rainy days. If the shells don’t form a skin after 30-40 minutes, humidity is likely the issue.
- Before you start, wipe your mixing bowl and whisk with a paper towel dampened with lemon juice or white vinegar. Even a drop of fat will prevent your egg whites from reaching stiff peaks.
- Sift the almond flour and powdered sugar at least once (twice if coarse).
- Discard large almond pieces instead of forcing them through the sieve.
- Your oven must be 325°F. An oven thermometer is strongly recommended.
- Make macarons at least 12 hours in advance and refrigerate to allow time for proper aging.
- Folding the dry ingredients into the meringue is one of the most important steps. The batter should flow smoothly and pass the figure-8 test without breaking.
- Hold the piping at a 45-degree angle when piping, and let the batter flow out naturally.
- Resting allows the shells to form a skin, helping them bake evenly without spreading.
- To avoid hollow shells, don’t over-mix, and make sure to bake fully.
- Tops should not wiggle when gently nudged
- Feet should be set and dry, not sticky
- Shells should lift cleanly from the mat without leaving centers behind
How to Make Easter Macarons Step-by-Step
Heat the Egg Whites: Line two large baking pans with parchment paper or Silpat mats and set aside. Heat a small saucepan of water over medium heat. Once the water is simmering, add 90 grams (about 3 large) of egg whites and 90 grams (about ½ cup) of granulated sugar to a heatproof bowl and set it over the water. Whisk the egg whites and sugar together until the sugar has fully dissolved, about 3 minutes. This helps set you up for a smoother, more stable meringue.
Whip the Egg Whites: Transfer the egg mixture to the bowl of a stand mixer fitted with the whisk attachment and beat on medium-high speed (Kitchenaid #8) until stiff, glossy peaks form, about 5 minutes. The meringue should hold its shape without drooping.
Fold the Batter: Using a fine-mesh sieve, sift 95 grams (about ⅘ cup) of powdered sugar and 95 grams (about 1 cup) of almond flour into the egg white mixture, making sure to discard any large lumps. Gently fold the dry ingredients into the egg whites, making sure not to deflate the egg whites at this point.
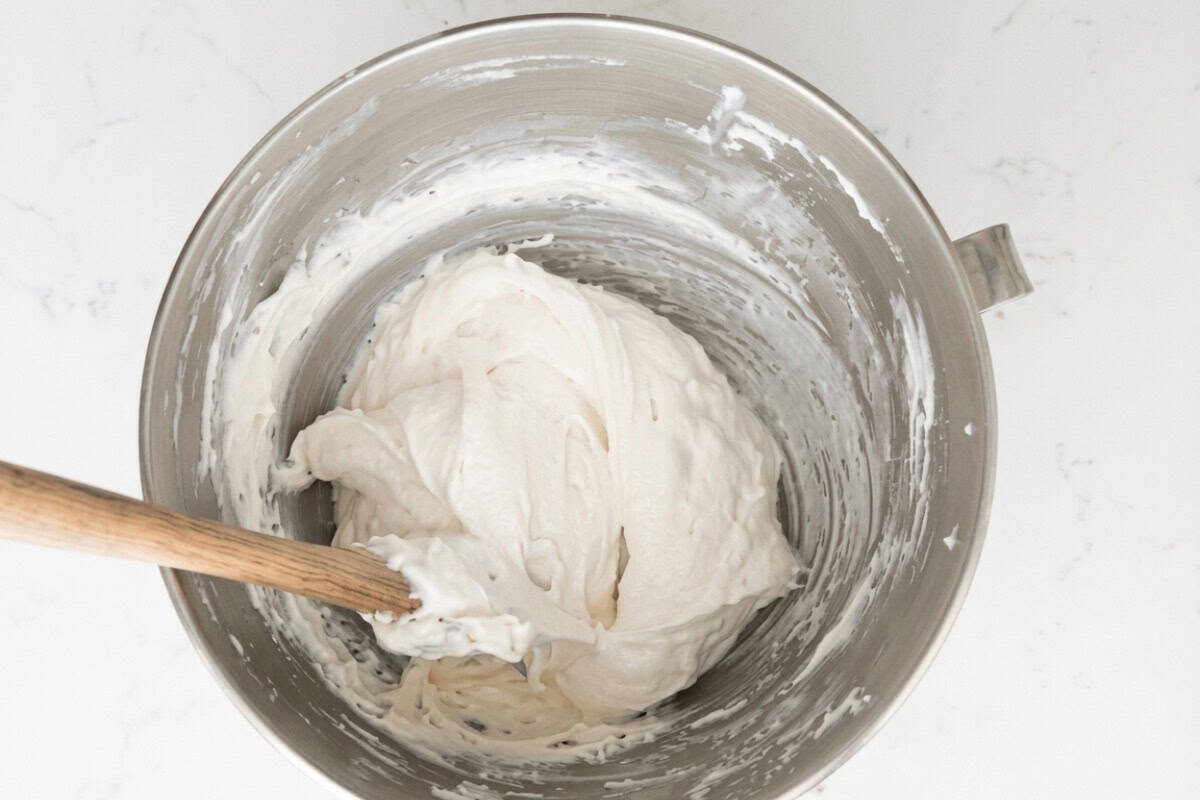
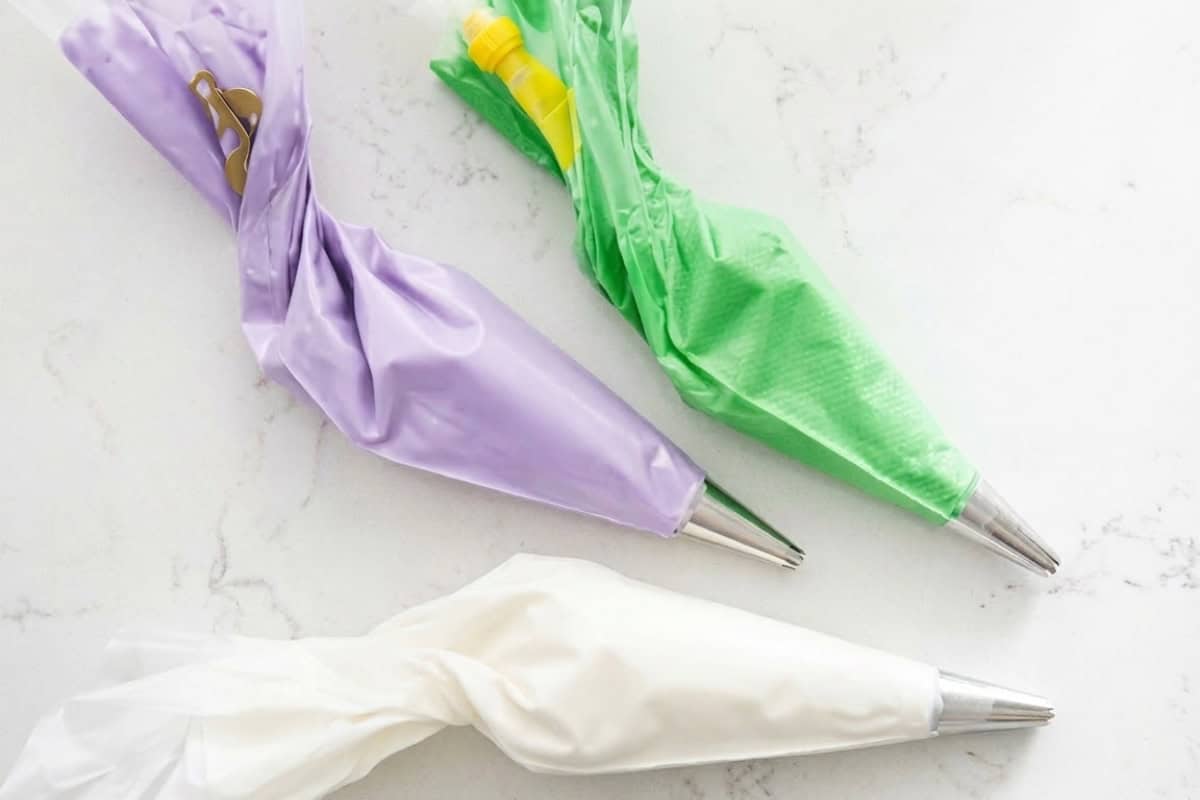
Color and Fold the Batter (Macaronage): Once all of the dry ingredients have been incorporated, add the gel food coloring, if using. This is the best time to add color, so you don’t have to over-mix later. Continue to fold the meringue, but this time gently smush the batter against the sides of the bowl before folding it back together. Continue to smush and fold the meringue a few times before testing to see if it has reached the Figure 8 stage. The batter should flow smoothly off the spatula and allow you to draw an “8” without breaking. If it falls in clumps or snaps, give it one or two more folds and test again. It’s better to go slowly here–over-mixing can lead to flat or hollow shells.Transfer the meringue to a piping bag fitted with a small round tip (I like a Wilton #10).
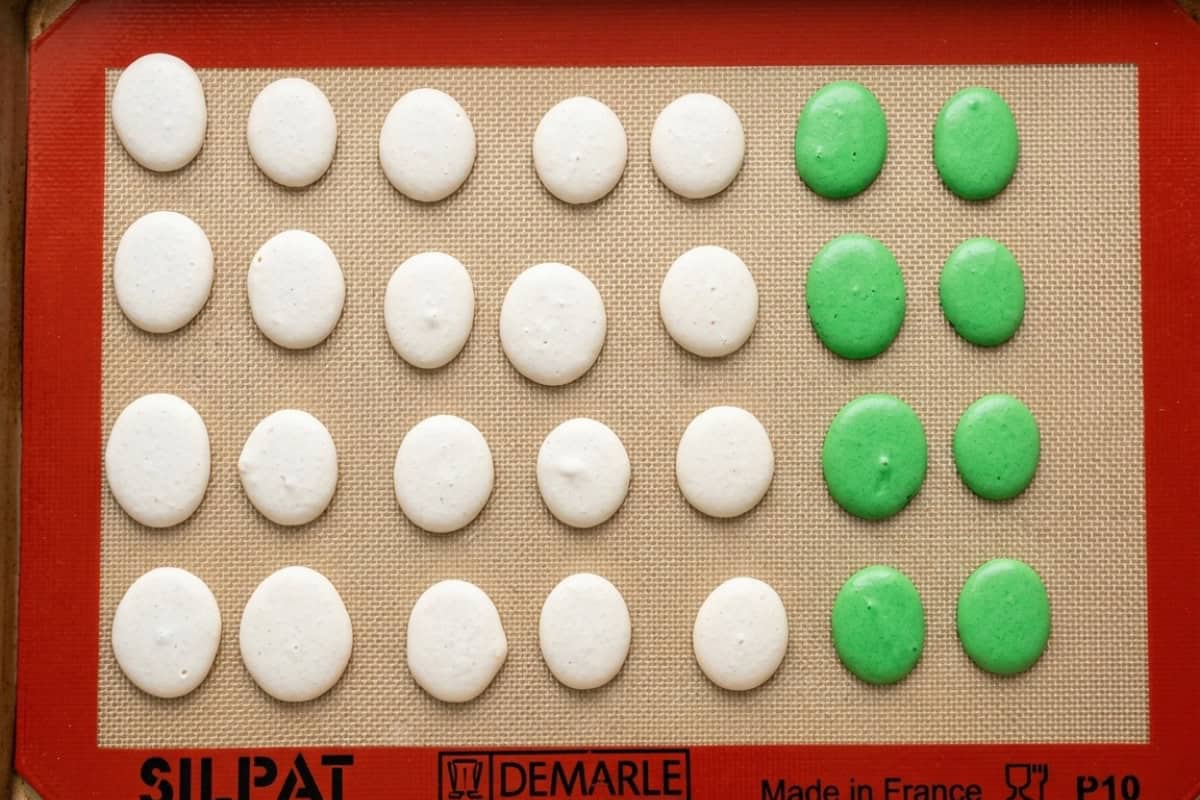
Pipe and Bake the Macarons: Pipe 1½-inch macaron shells onto the tray, making sure to pipe them at least 2 inches apart. For classic rounds, hold the bag straight up and down; for Easter egg shapes, refer to my tip above! Once you’ve finished piping the first tray, hold it a few inches off the counter and drop it straight down. Drop the tray another 5-6 times, or until it looks like any large air bubbles have popped. Repeat with the second tray. Set the trays aside to rest for at least 25 minutes. They’re ready to bake when you can touch them gently without the meringue sticking to your finger. If they’re still tacky after 30-40 minutes, humidity is usually the culprit. While the macarons rest, preheat your oven to 325°F (an oven thermometer is strongly recommended for accuracy). Bake the macarons, one tray at a time, for 13 minutes, rotating halfway through. The macarons are done when the tops no longer wiggle, the feet are set and dry, and the shells lift cleanly from the mat without leaving centers behind. Allow the macarons to cool to room temperature before trying to remove them from the pan. This will help prevent sticking.
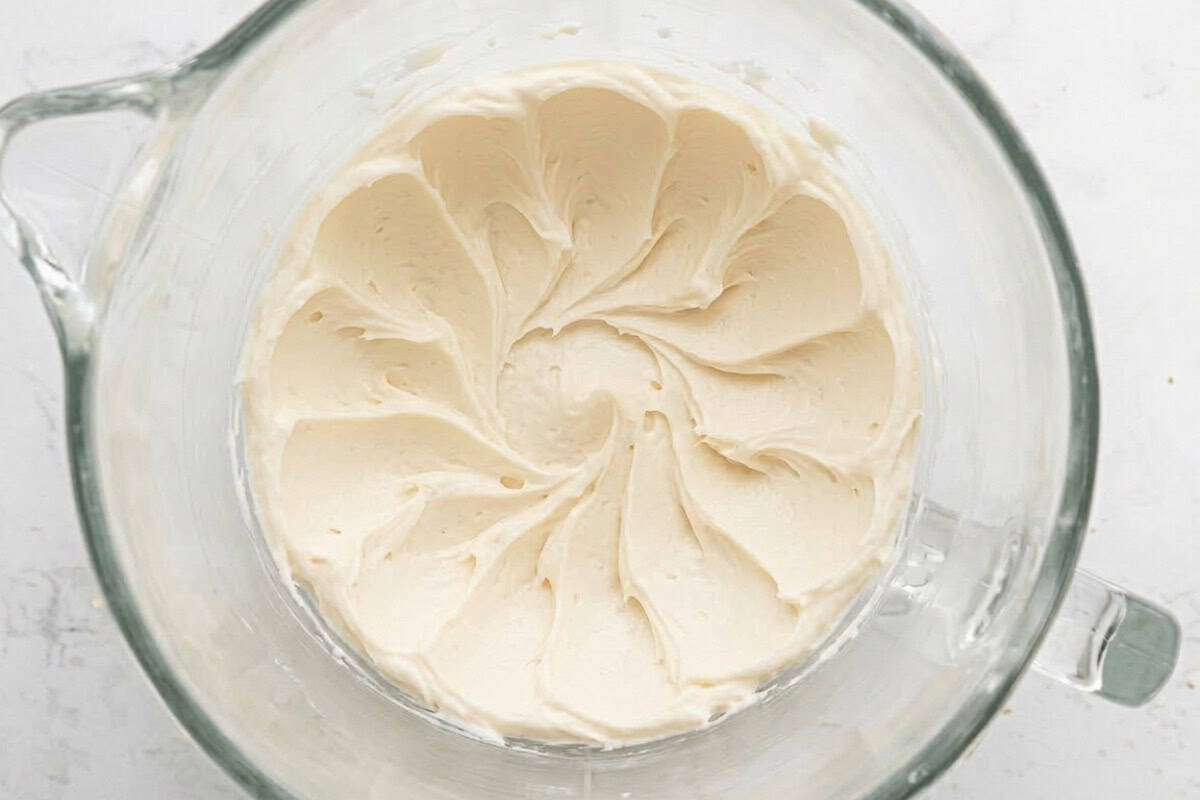
Make the Filling: Add ½ cup of unsalted butter to the bowl of a stand mixer and beat on medium-high speed until it has lightened, about 2 minutes. Turn the mixer to low speed and add 2¼ cups of powdered sugar slowly followed by 1 teaspoon of vanilla extract. If the mixture seems too dry, add a tablespoon of heavy cream or milk. Turn the mixer to high speed and beat until the buttercream becomes light and fluffy, about 2 minutes. Transfer the mixture to a piping bag fitted with your choice of tip. Set aside until ready to use.
Fill the Macarons: Place the macarons in similar-sized pairs. Pipe a small dollop of vanilla buttercream onto one of the macaron shells, then top with the paired shell. Press down gently, just until the filling reaches the edges.
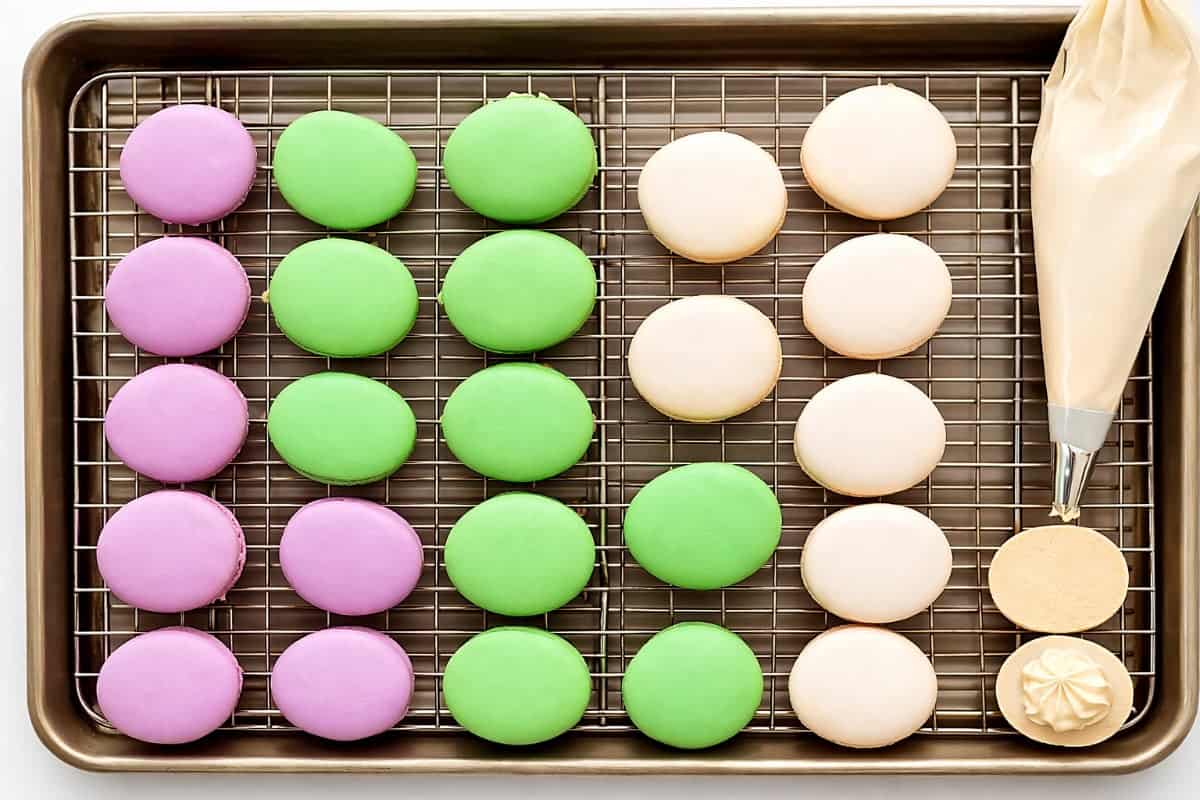
Decorate and Age: To decorate the macarons, you can use white chocolate or food markers. Or to make the macarons speckled, combine 1 teaspoon of water with a few drops of black food coloring and use a pastry brush to splatter the food dye on the macarons (be careful not to get it on your clothes; it stains). Transfer the filled macarons to an airtight container and place them in the fridge to age overnight. This resting time allows the filling to soften the shells just enough for that classic chewy texture. Bring to room temperature before enjoying.

How to Store and Freeze
For the best texture, store finished Easter macarons in an airtight container in the refrigerator for up to 3 days or in the freezer for up to 3 months. Before serving, let them come to room temperature for about 30 minutes so the shells soften slightly and the filling becomes creamy again.
If you’re making these for a special occasion, I recommend filling and refrigerating them at least 12 hours in advance. That resting time lets the filling soften the shells just enough for the classic chewy macaron texture.


Leave a Reply