


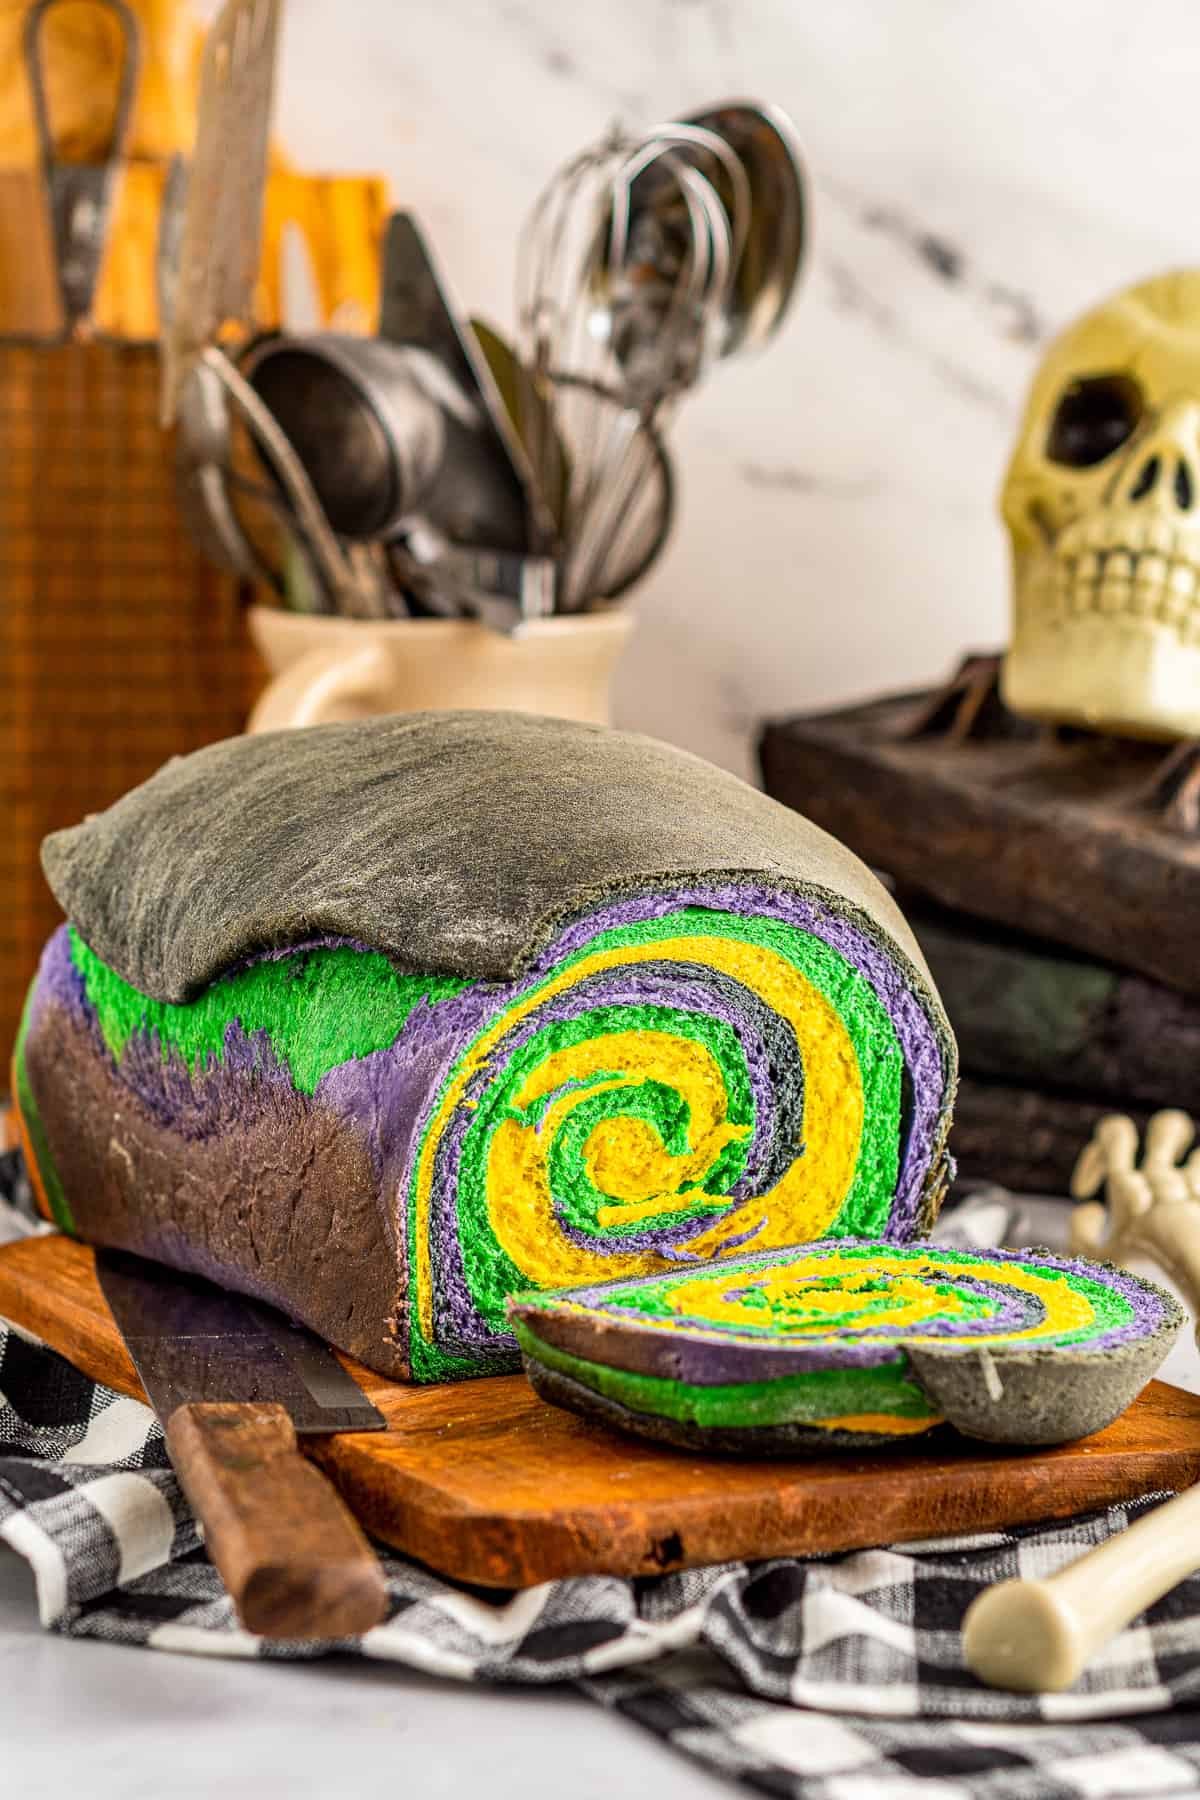
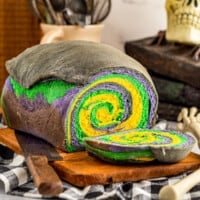
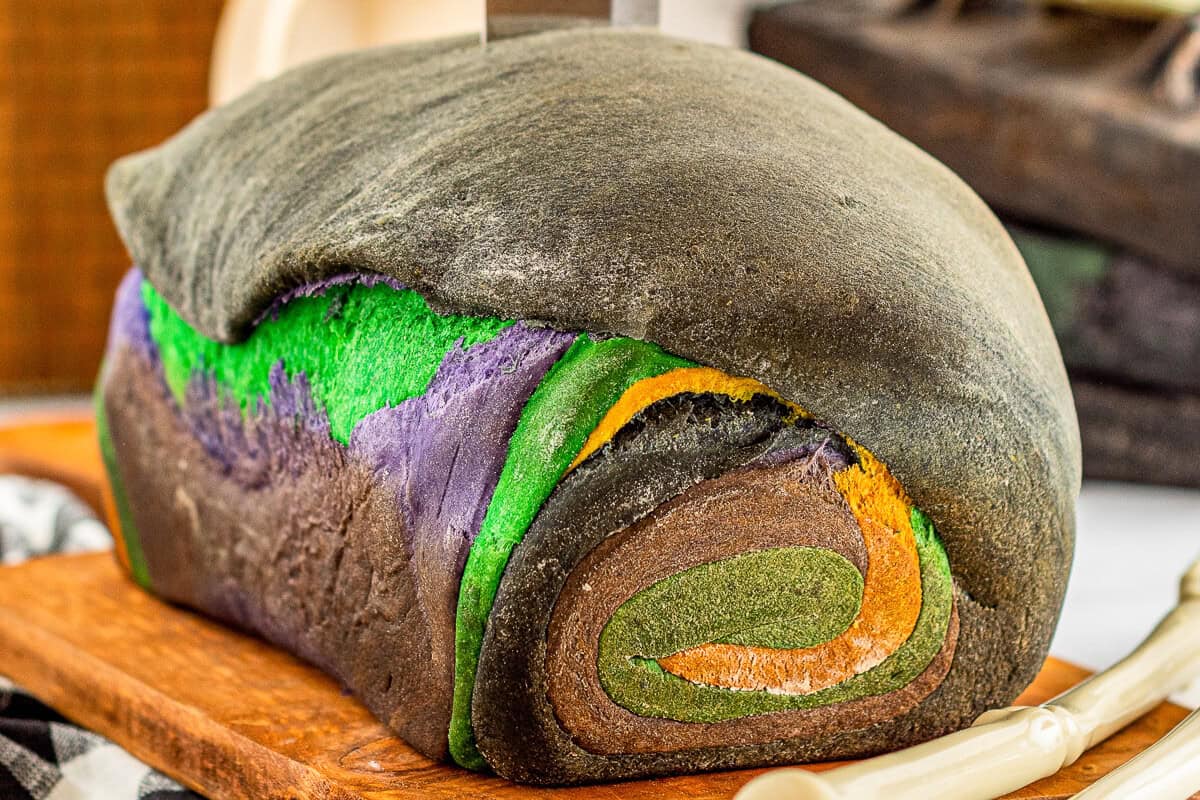
If you want a Halloween treat that’s fun, colorful, and not candy, my swirled Halloween bread is a must-try! With just 8 simple ingredients, I turn ordinary sandwich bread into a spooky, eye-catching loaf that makes lunchboxes and breakfast feel festive. The swirl of vibrant colors makes it unique, and the subtle molasses sweetness pairs perfectly with peanut butter, jelly, or any sandwich filling. My kids love seeing the surprise swirl inside, and it’s such an easy way to bring spooky season excitement to the table.
Spooky Sandwich Bread
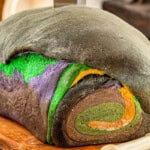
To make this spooky bread, I use a simple layering technique that creates a bold, colorful swirl without any complicated steps. It’s the same technique I use for my Christmas bread. By dividing the dough into four portions, coloring each with gel food coloring, and layering them before rolling, you get a vibrant Halloween swirl bread that stands out at parties or in school lunches. This loaf comes together quickly and is just as fun for little helpers in the kitchen. Plus, texture stays soft for days, making it the perfect Halloween sandwich bread.


Email this Recipe
Enter your email and we’ll send the recipe directly to you!
By submitting this form, you consent to receive emails from Easy Dessert Recipes.
Be Patient with the Coloring
When adding gel food coloring to your spooky Halloween bread layers, I recommend introducing it gradually and kneading each portion thoroughly before adding more. This ensures bright, distinct shades without over-hydrating the dough or making it sticky. By the time you layer and roll, each color stays bold and defined through baking.
Halloween Bread Recipe
Equipment
- Kitchen Scale (optional)
- Baking Sheet
- 9×5-inch Loaf Pan
- Rolling Pin
- Instant Read Thermometer (optional)
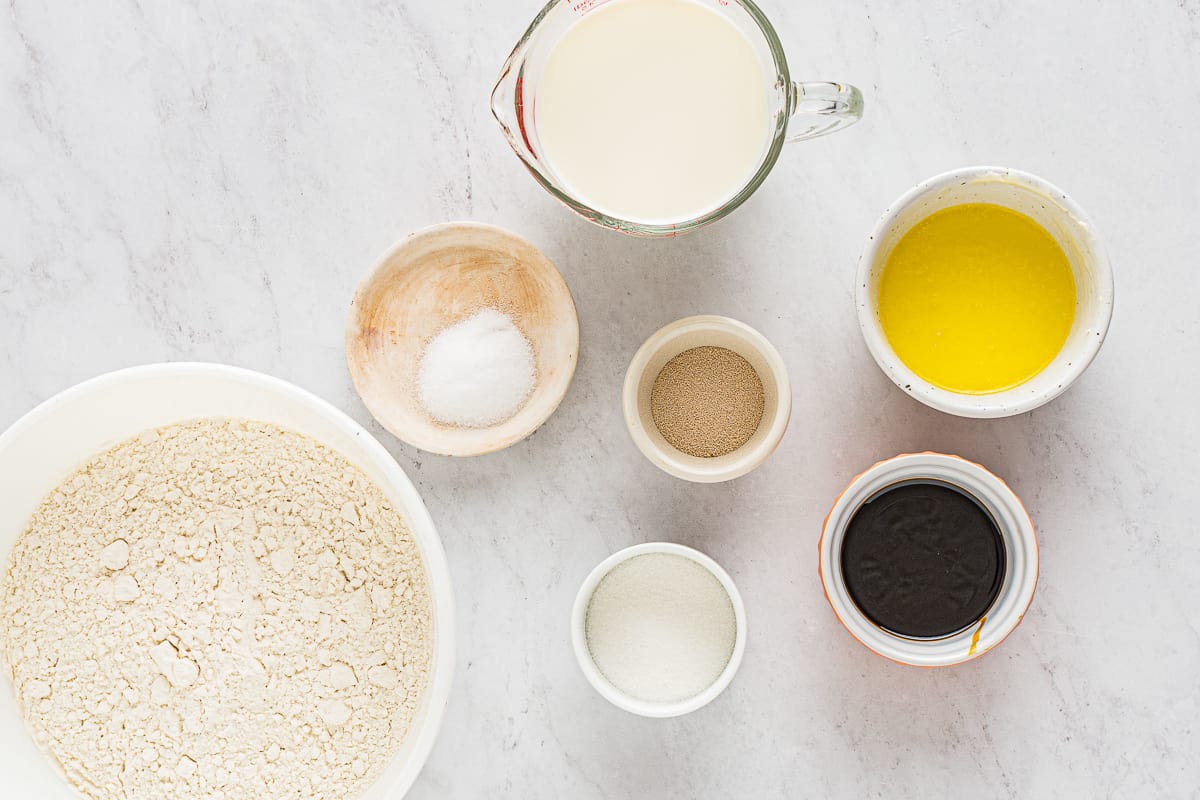
Ingredients
- 1⅔ cups milk lukewarm (110°F)*
- 3 tablespoons granulated sugar
- 2½ teaspoons instant yeast (1 envelope)**
- 4 cups all-purpose flour
- 1½ teaspoons kosher salt
- 3 tablespoons unsalted butter melted
- 2 tablespoons unsulphured molasses
- Food coloring yellow, green, purple, and black***
Instructions
- Bloom the yeast by whisking together the warm milk, sugar, and yeast. Let stand for 5 moments to bloom.1⅔ cups milk, 3 tablespoons granulated sugar, 2½ teaspoons instant yeast

- In a large bowl, whisk together the flour and salt.4 cups all-purpose flour, 1½ teaspoons kosher salt
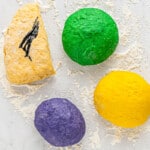
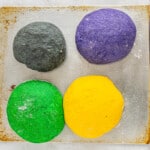
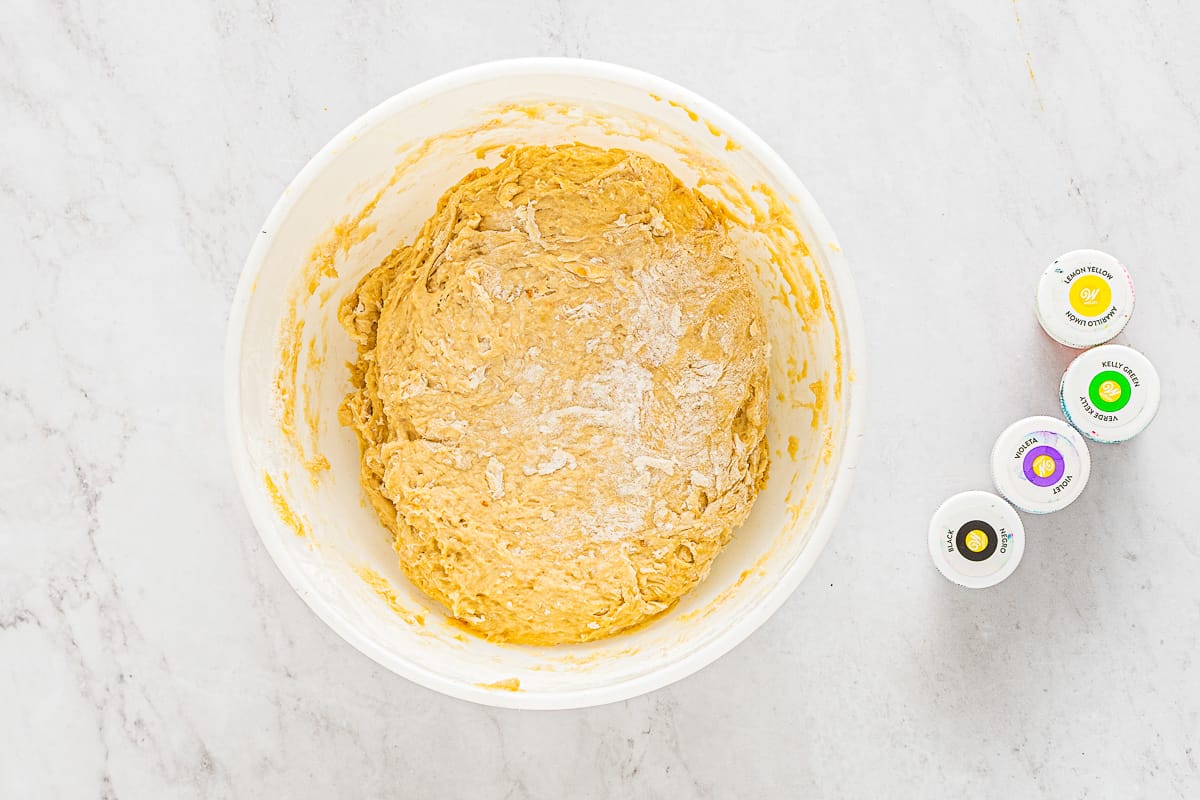
- Once the yeast has bloomed, add it to the flour mixture along with the butter and molasses. Whisk briefly to bring together slightly before kneading to bring it together completely. Once the dough is smooth, divide into 4 equal balls.3 tablespoons unsalted butter, 2 tablespoons unsulphured molasses
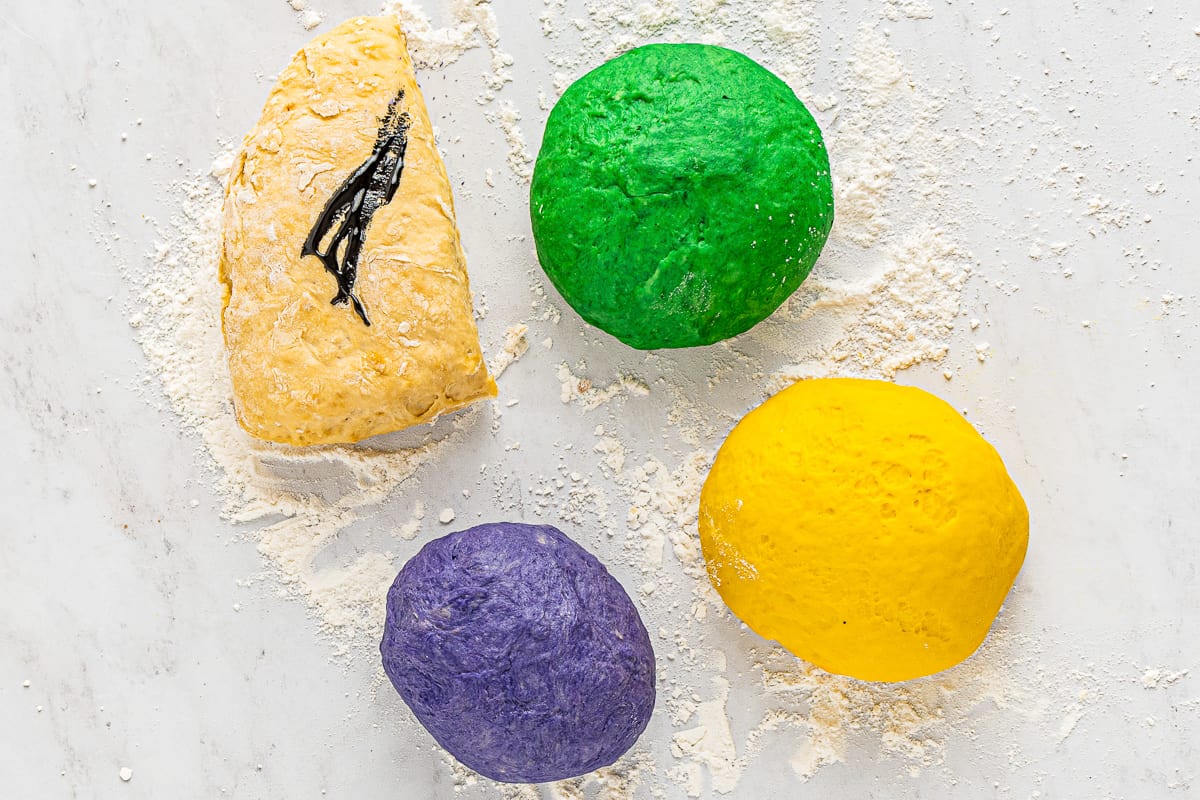
- One by one, add food coloring into each ball of dough, kneading well to fully incorporate.Food coloring
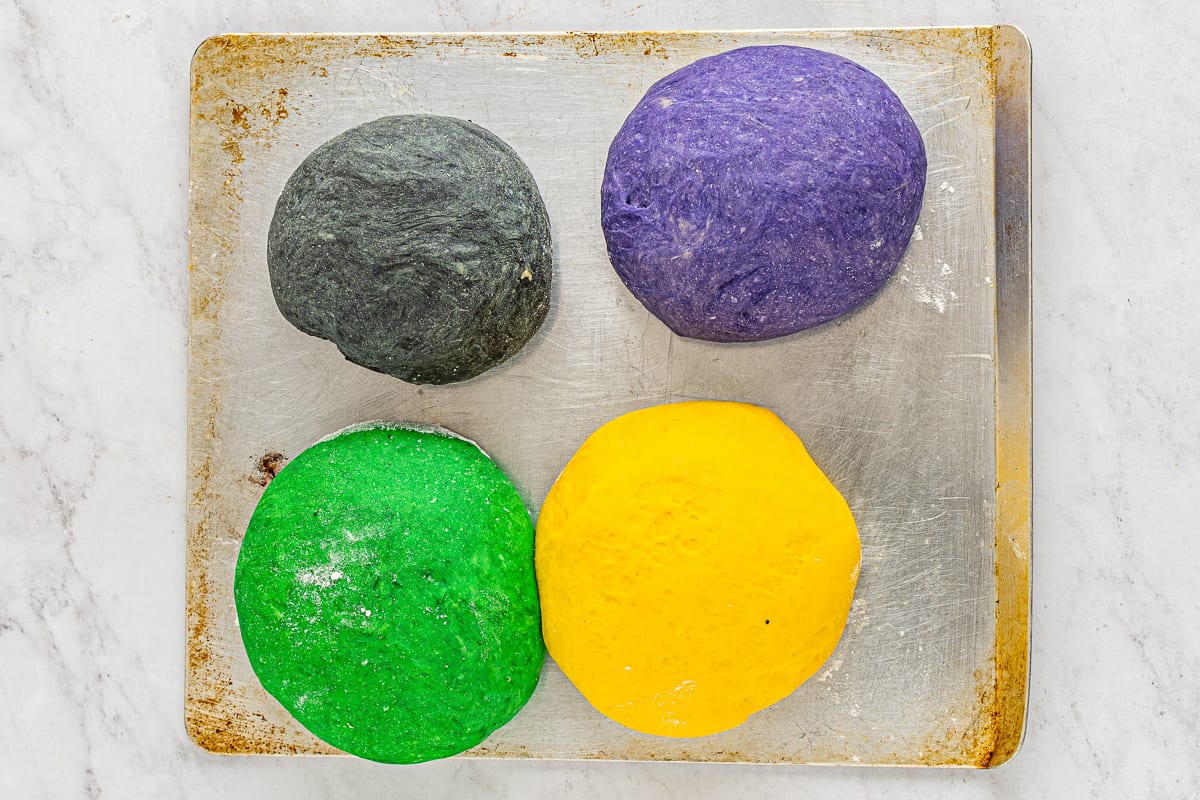
- Once all of the balls are sufficiently colored, place them onto a baking sheet to rise. Leave at least 6 inches of space between them to allow them to rise. Cover with a damp towel and let them rise for about 30-45 minutes, or until doubled in size.
- While the dough rises, spray a 9×5-inch loaf pan with nonstick spray and set aside.
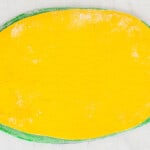
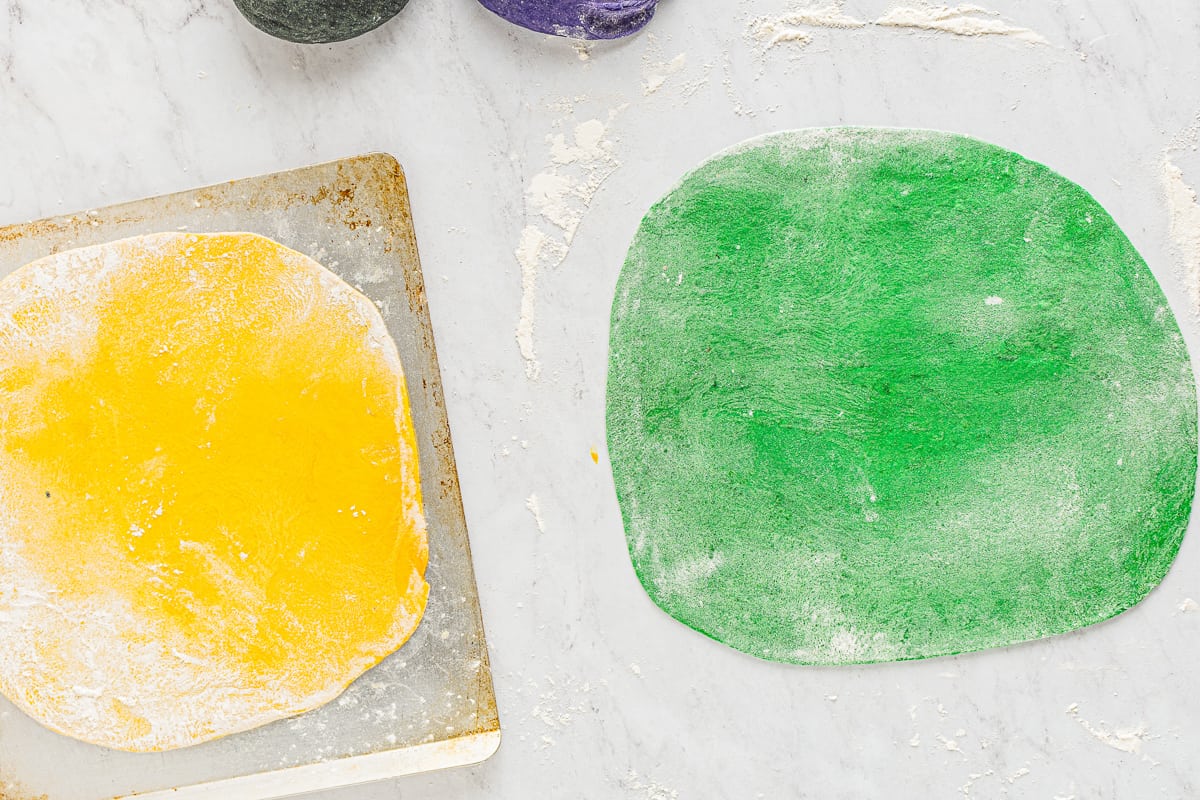
- Once the dough balls have risen, roll them out. Begin by placing the yellow ball onto a well-floured surface. Roll out into a rough 9×9-inch square.
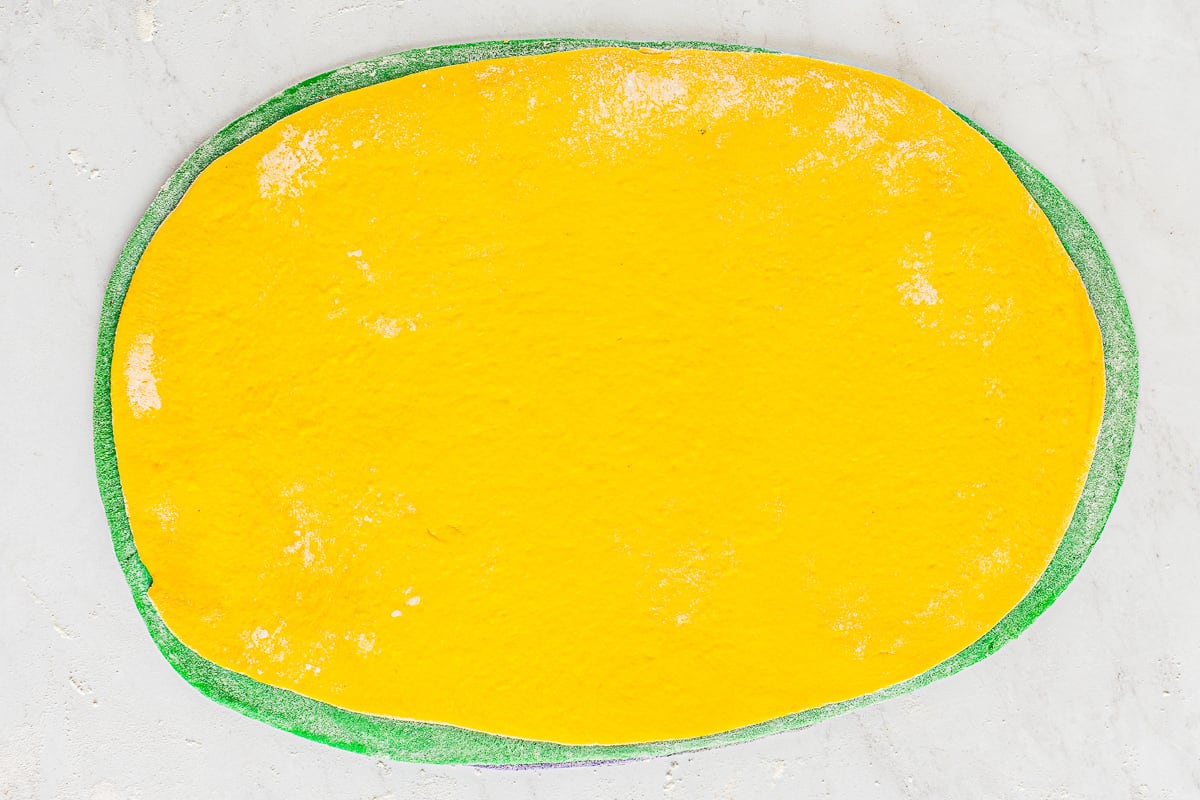
- Next, roll out the green in the same manner. Place on top of the yellow sheet of dough. Follow with the purple dough and then the black. Flip the layered dough squares over so that the yellow is on top and the black is on the bottom. Use a rolling pin to roll the squares out together into a rectangle about 9 inches wide and 13 inches long.
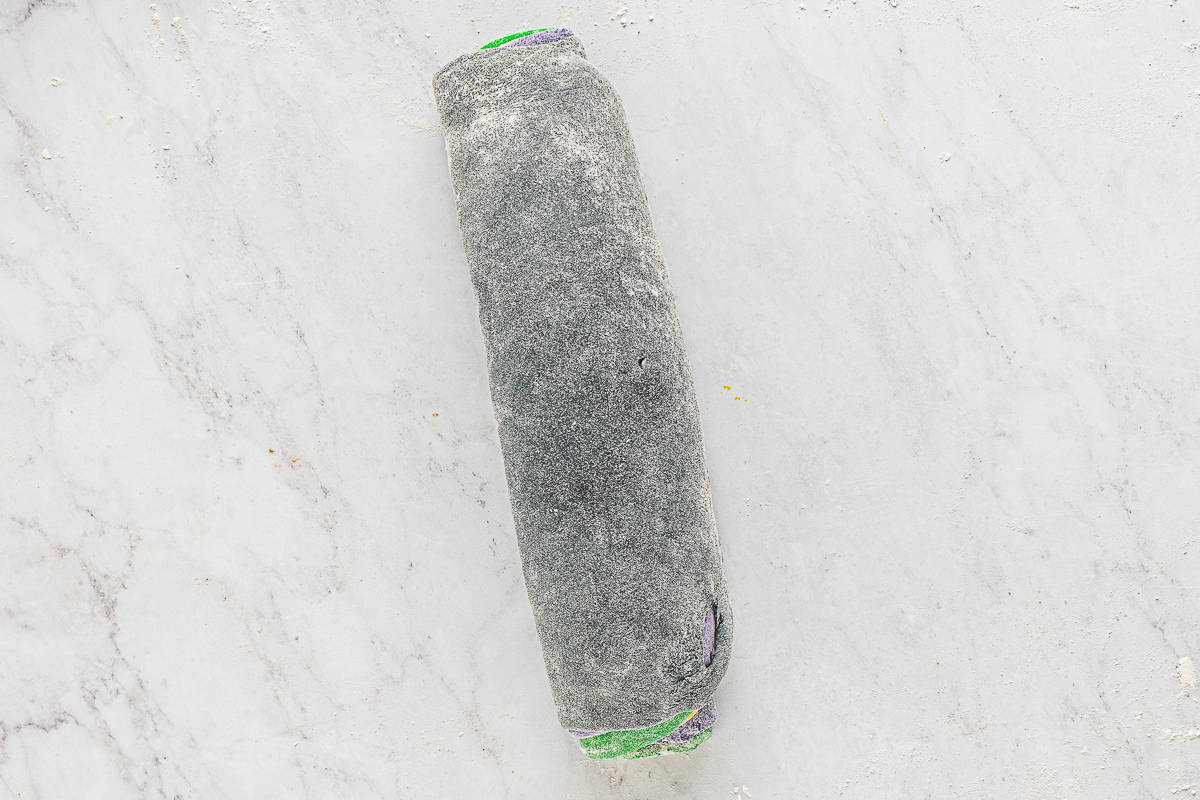
- Starting from the short side, roll the dough into a log like cinnamon rolls.
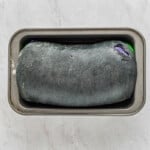
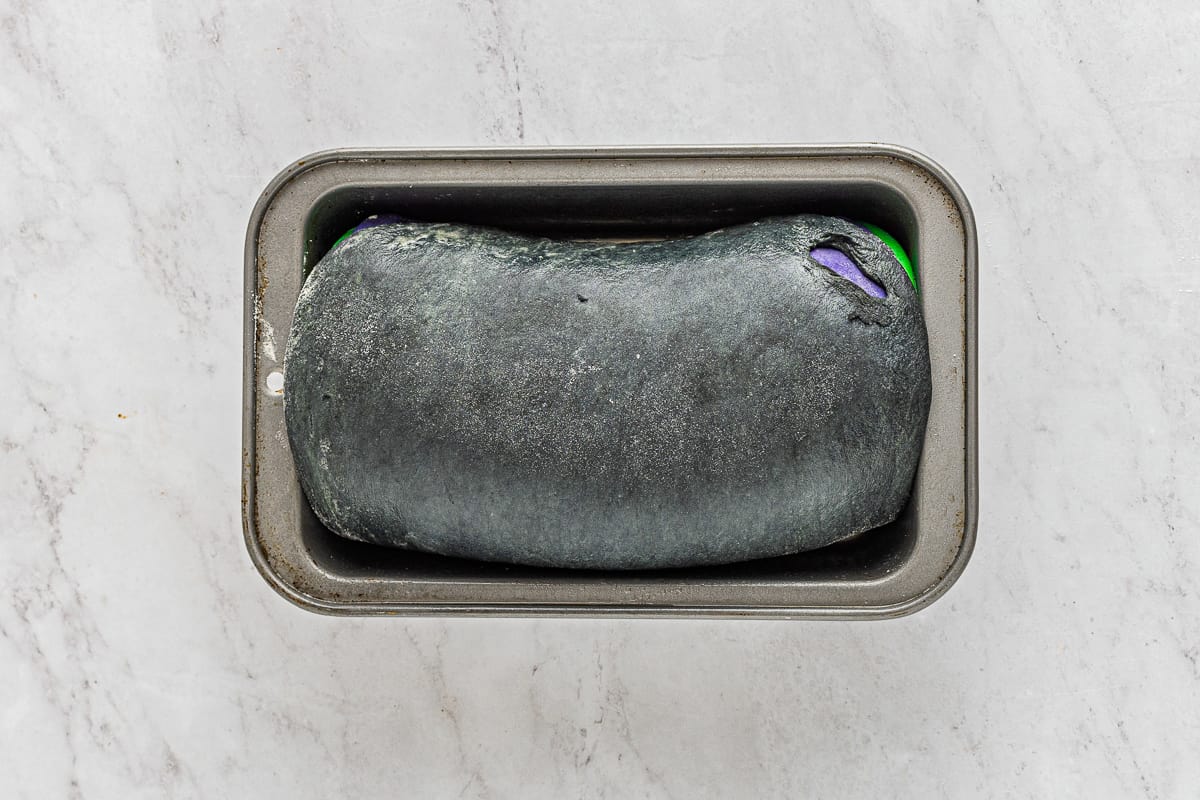
- Place the dough into the prepared loaf pan. Cover with a damp towel and let rise for 30-45 minutes, or until doubled in size. Preheat the oven to 350°F while dough rises.
- Place the risen dough into the oven to bake for 35 minutes, or until a toothpick inserted comes out clean. Remove from the oven and place onto a cooling rack to cool. Slice and serve.


Notes
- If the yeast mixture does not become frothy after 5 minutes, your yeast may be dead, in which case you need to start over. Blooming your yeast in too hot of milk will kill the yeast.
- Adding food coloring to each ball of dough may take several minutes to fully incorporate. If you use a stand mixer, it will go faster. I added color in increments and kneaded well for a few minutes before adding more.
- Do not get impatient with adding color, it takes quite a bit of kneading before all of the dough is fully saturated evenly. The dough may become stiff after kneading for a while. This is normal and totally fine. It will soften up during the second rise.
- You can tell the dough is properly proofed by performing the poke test: lightly flour your finger and poke to create an indent in the dough. If the indent slowly springs back, it’s ready to bake. If it pops back out quickly, it needs more time.
- To keep the layers together, you need to roll tightly, but not too tight. It can take a few tries to get right, so for extra insurance, you can also egg wash between the layers to help them stick together.
- To tell when the bread is properly baked, you can probe it with an instant-read thermometer. The internal temperature should be 190°F.
How to Make Halloween Bread Step-by-Step
Prep: Gather up everything you need to make your spooky bread. Bring the milk to 110°F in a pot set over low heat or by microwaving it for 20-30 seconds. Heat the butter in a microwave-safe dish in 30-second increments until melted. Let it cool while you bloom the yeast.
Bloom the Yeast: Whisk together 1⅔ cups of lukewarm milk, 3 tablespoons of granulated sugar, and 2½ teaspoons of instant yeast. Let stand for 5 moments to bloom. If the yeast mixture does not become frothy after 5 minutes, your yeast may be dead, in which case you need to start over. It’s important that the milk not be hotter than 110°F, as too high of heat can kill the yeast.
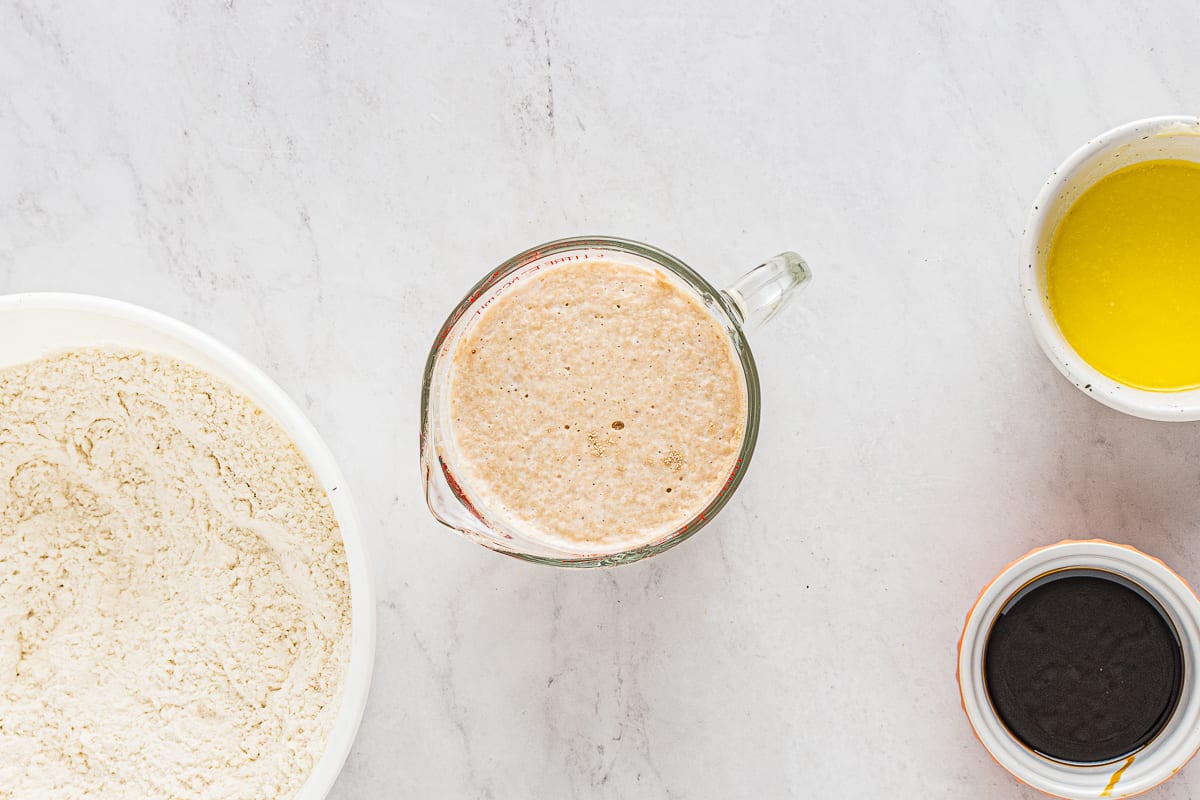
Mix the Dough: In a large bowl, whisk together 4 cups of all-purpose flour and 1½ teaspoons of kosher salt. Once the yeast has bloomed, add it to the flour mixture along with 3 tablespoons of melted and cooled unsalted butter and 2 tablespoons of unsulphured molasses. Whisk briefly to bring together slightly before kneading to bring it together completely. Once the dough is smooth, divide into 4 equal balls.
Color the Dough: One by one, add food coloring into each ball of dough, kneading well to fully incorporate. This may take several minutes, and I recommend taking it slow. If you add too much food coloring all at once, it will make the dough too sticky. It took me about 5 minutes of kneading to incorporate the amount of color necessary.
Proof the Dough: Once all of the balls are sufficiently colored, place them onto a baking sheet to rise. Leave at least 6 inches of space between them to allow them to rise. Cover with a damp towel and let them rise for about 30-45 minutes, or until doubled in size. While the dough rises, spray a 9×5-inch loaf pan with nonstick spray and set aside. You can tell the dough is properly proofed by performing the poke test: lightly flour your finger and poke to create an indent in the dough. If the indent slowly springs back, it’s ready to bake. If it pops back out quickly, it needs more time.
Roll the Dough: Once the dough balls have risen, roll them out. Begin by placing the yellow ball onto a well-floured surface. Roll out into a rough 9×9-inch square.
Layer the Dough: Next, roll out the green in the same manner. Place on top of the yellow sheet of dough. Follow with the purple dough and then the black. Flip the layered dough squares over so that the yellow is on top and the black is on the bottom. Use a rolling pin to roll the squares out together into a rectangle about 9 inches wide and 13 inches long. If you’re worried about the layers breaking apart during baking, you can egg wash them together for extra insurance. I just rolled the dough nice and tight, though.
Create a Log: Starting from the short side, roll the dough into a log like you would for cinnamon rolls.
Proof the Loaf: Place the dough into the prepared loaf pan. Cover with a damp towel and let rise for 30-45 minutes, or until doubled in size. Preheat your oven to 350°F while dough rises.
Bake the Loaf: Place the risen dough into the preheated oven to bake for 35 minutes, or until a toothpick inserted comes out clean (internal temperature should be 190°F). Remove from the oven and place onto a cooling rack to cool completely before slicing and serving.
How to Store and Freeze
Store leftover Halloween bread in an airtight container at room temperature for up to 3 days, or in the freezer for up to 3 months. Let thaw at room temperature before enjoying.


Leave a Reply