


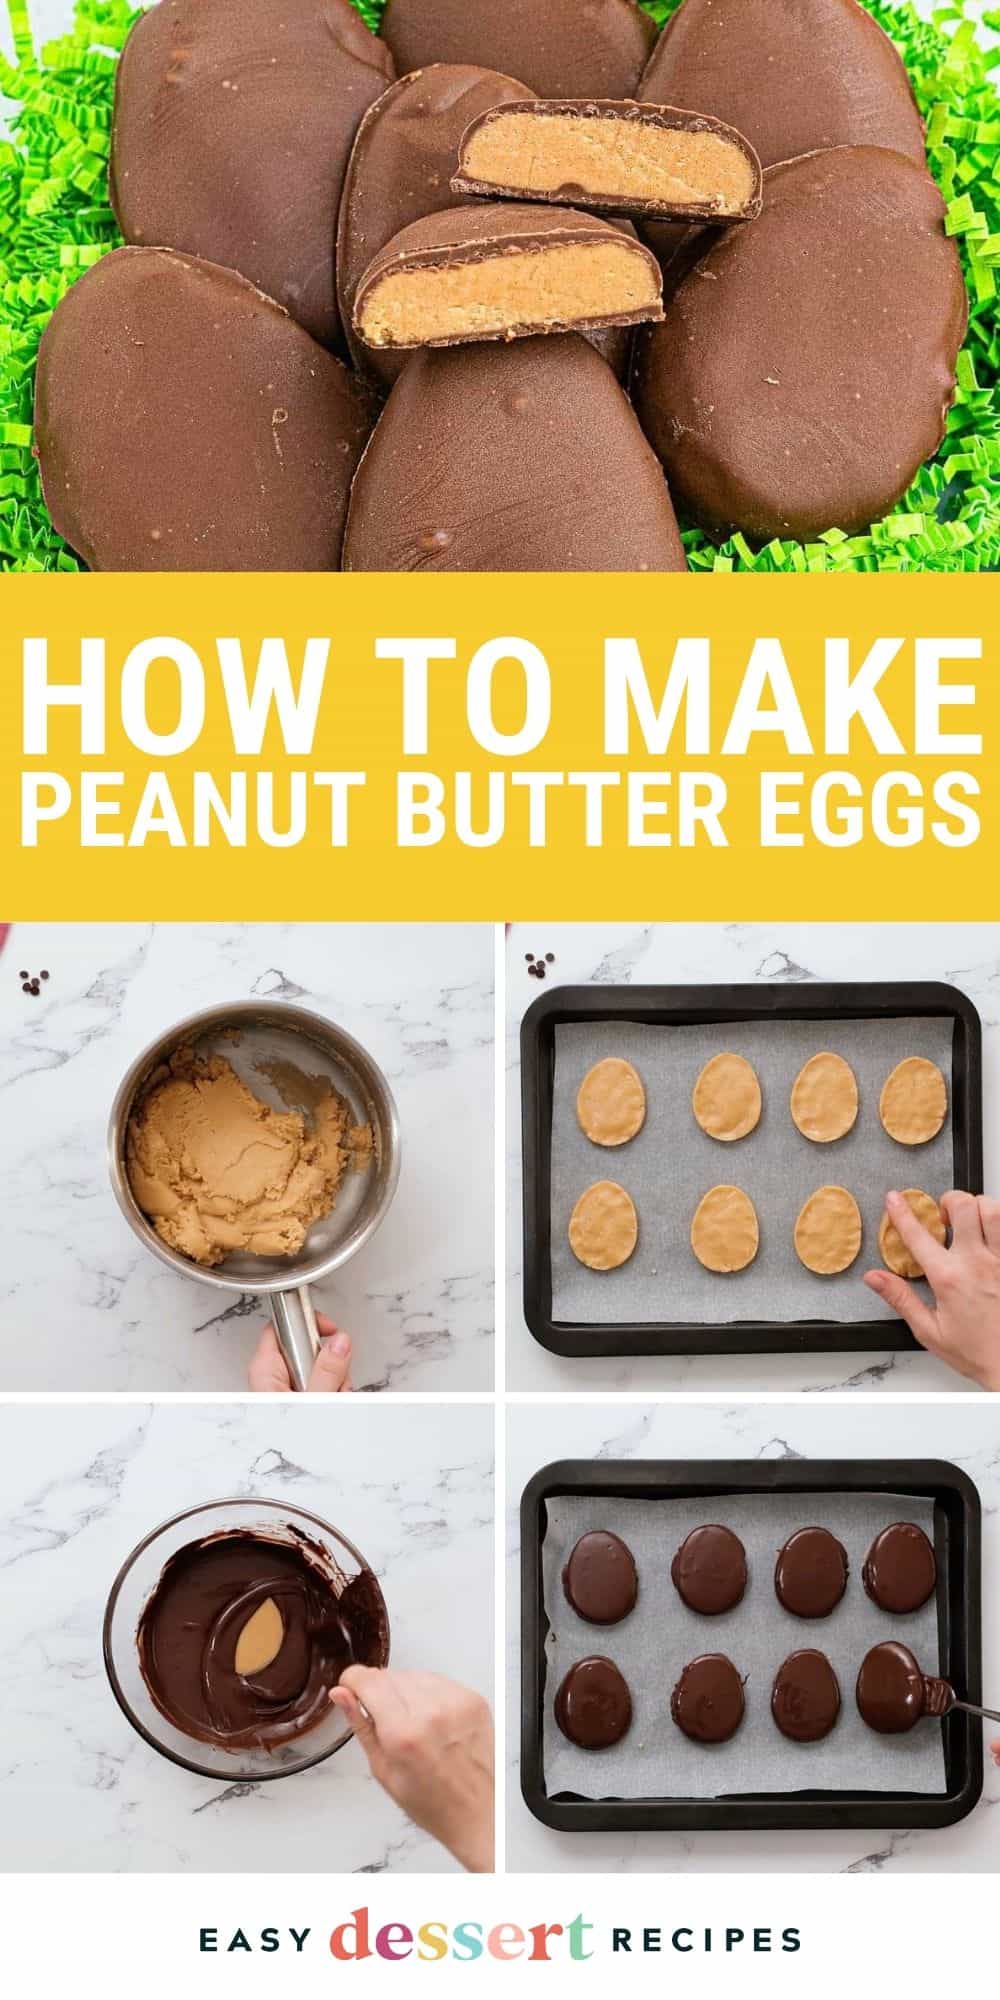

Spring hasn’t officially arrived until I’ve whipped up a batch of these homemade Reese’s eggs. After years of testing different peanut butter-to-sugar ratios, I’ve finally perfected this quick 5-ingredient, no-bake recipe to get that iconic, salty-sweet center in under an hour without the waxy aftertaste of store-bought candy. They are consistently the most requested treat at my family’s Easter celebration because they taste (and look) so much better than the real deal.

Homemade Reese’s Eggs for Easter
I’ll say it–my homemade Reese’s peanut butter eggs are even better than store-bought! Just like my homemade peanut butter cups, the filling is rich, smooth, and velvety thanks to gentle melting and the perfect balance of powdered sugar and creamy peanut butter. The dough is soft, pliable, and easy to work with. My kids love helping shape these yummy eggs!
But what truly sets my pb eggs apart is the professional finish. While store-bought eggs often have a waxy coating, I use high-quality melting wafers for a snappy chocolate shell that doesn’t require the hassle of tempering.


Email this Recipe
Enter your email and we’ll send the recipe directly to you!
By submitting this form, you consent to receive emails from Easy Dessert Recipes.
Chill Your Baking Sheet for Clean Edges
For a clean, professional finish without those messy chocolate pools at the base of your candies, make sure your baking sheet is ice-cold! If you’re chilling your eggs in the fridge, move the tray to the freezer for the final 10 minutes before dipping. Placing the warm, chocolate-dipped eggs onto a pre-chilled tray flash-sets the bottom instantly, giving you a perfect factory-style edge.

Homemade Reese’s Peanut Butter Eggs Recipe
Equipment
- Kitchen Scale (optional)
- Baking Sheet
- 2-Tablespoon (#40) Cookie Portion Scoop (optional)
Ingredients
- 1 cup creamy peanut butter *
- ¼ cup unsalted butter (½ stick)
- 1½ cups powdered sugar sifted
- 1 teaspoon pure vanilla extract
- 12 ounces melting wafers (1 bag)**
Instructions
- Line a baking sheet with wax or parchment paper. Set aside.

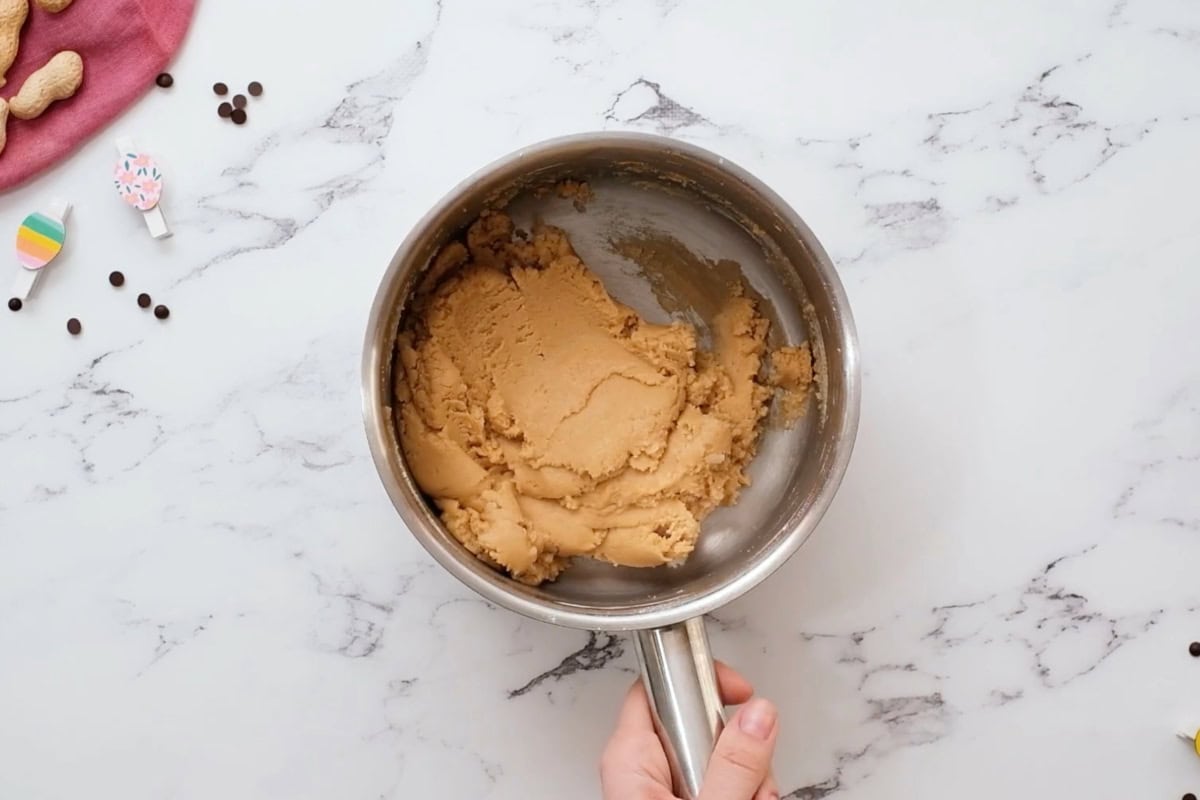
- In a medium saucepan set over medium-low heat, melt the peanut butter and butter together until smooth, about 2-3 minutes.1 cup creamy peanut butter, ¼ cup unsalted butter
- Stir in the powdered sugar and vanilla until the mixture thickens.1½ cups powdered sugar, 1 teaspoon pure vanilla extract
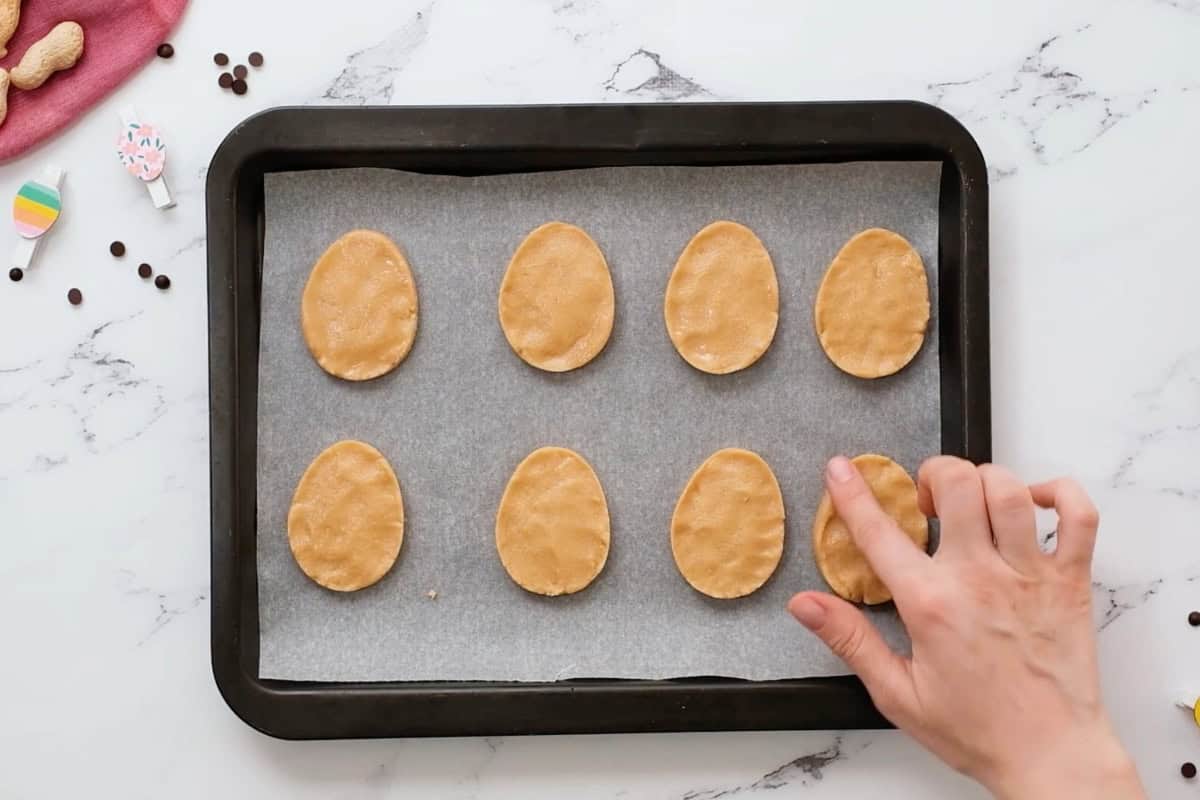
- Drop spoonfuls of the peanut butter mixture onto the prepared baking sheet.
- Shape each spoonful into an oval egg shape. Place the eggs in the refrigerator to chill for about 30 minutes.
- In a microwave-safe bowl, heat the chocolate, stirring every 30 seconds, until completely melted and smooth.12 ounces melting wafers
- Use a fork to fully submerge each egg into the chocolate.
- Tap off the excess chocolate, then set each egg back on the baking sheet to set.


Notes
- If the filling seems too soft, add a bit more powdered sugar until it becomes a stiff, yet pliable dough.
- Optionally, add a pinch of salt to the dough for less sweet eggs.
- I used a 2-tablespoon scoop and ended up with 18 eggs, so if you are using spoons to scoop the filling, the number of eggs may vary.
- If you have an egg-shaped cookie cutter, you can use that as a guide for shaping the dough.
- Lightly oil your hands if the peanut butter dough is sticking to them while shaping.
- If you don’t have a microwave, you can melt the chocolate in a double-boiler instead.
- If the chocolate is too thick/stiff, add 1 tsp of coconut oil or shortening to thin it out. This also gives the chocolate a nice shine!
- Make sure the eggs are firm but not frozen when you dip. If they are too cold, the chocolate will seize and crack as it shrinks while cooling. If they are too warm, they’ll disintegrate in the chocolate.
- Fully coat each egg, and tap off any excess chocolate so you don’t end up with a pool underneath.
- If some of the chocolate dries around the base of the eggs, you can trim them with a warm, sharp knife once they are set.
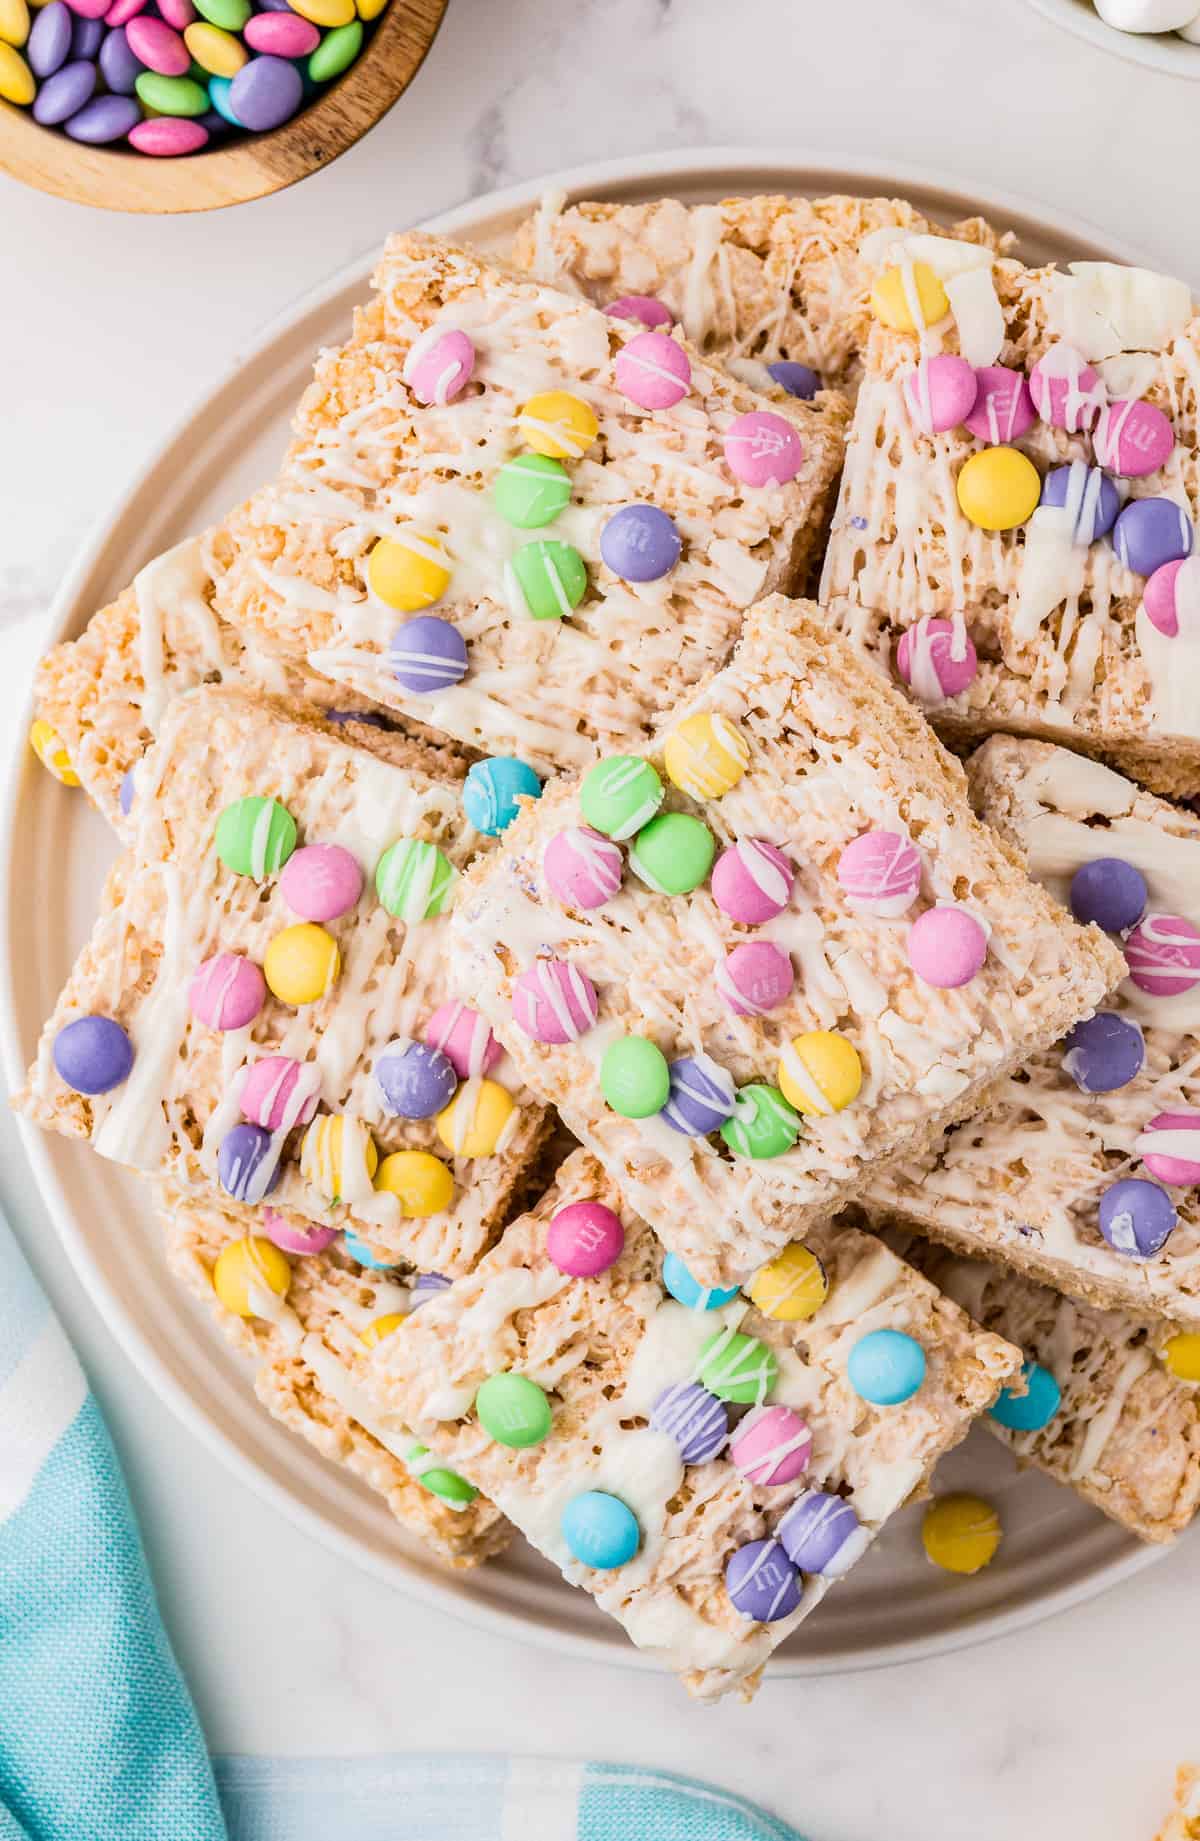
- Have fun decorating them with sprinkles (add while the chocolate is still wet) or a white chocolate drizzle!
How to Make Reese’s Eggs Step-by-Step
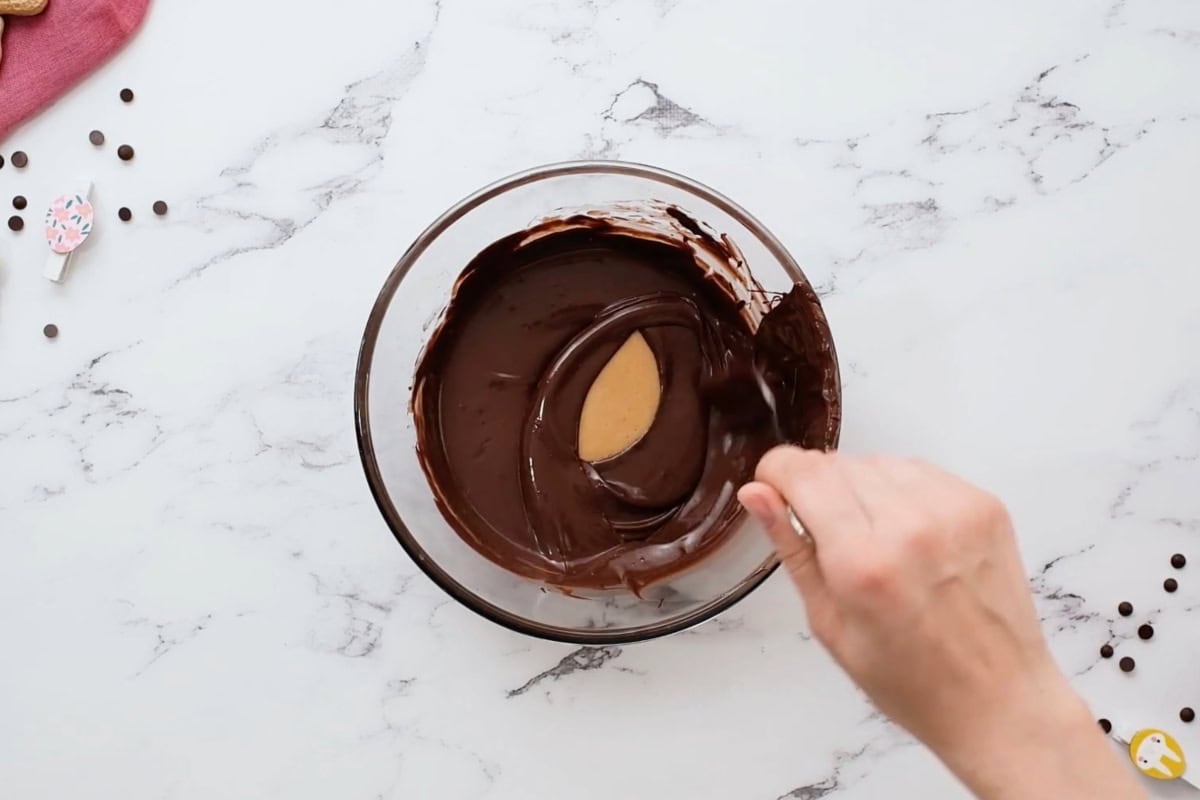
Cook the Filling: Line a baking sheet with parchment or wax paper, and set aside. In a medium saucepan, heat 1 cup of creamy peanut butter and ¼ cup of unsalted butter together until they are melted and smooth. Stir in 1½ cups of sifted powdered sugar and 1 teaspoon of vanilla extract until the mixture thickens up to a paste-like consistency. If the mixture still seems too loose, add a bit more powdered sugar until it looks like my photo.
Shape the Filling: Using a 2-tablespoon cookie portion scoop (or a regular spoon), scoop and drop spoonfuls of the peanut butter mixture onto the prepared baking sheet–I was able to get 18 portions out of my dough. Each one was about 28 grams. Using your fingers (oil them if the peanut butter is sticky), gently coax each mound into an oval egg shape. Chill in the refrigerator for about 30 minutes. During the last 10 minutes of chilling, move the baking sheet from the fridge to the freezer to help the chocolate set more easily.
Dip the Truffles: When the eggs are nearly done chilling, place 12 ounces of melting chocolate in a microwave-safe bowl, and microwave, stirring every 30 seconds, until the chocolate is completely melted and smooth. Once smooth, remove the eggs from the fridge/freezer and use a fork to dip each egg into the chocolate. Turn to fully coat, then remove, shaking off the excess chocolate. If you find this is taking you a while, pop the rest of the undipped eggs back into the freezer while you work so they don’t get too soft.
Set the Eggs: Place the dipped Reese’s eggs back on the lined baking sheet, and allow them to set at room temperature (or in the refrigerator or freezer) until the surface is hard and no longer wet.

How to Store and Freeze
Store leftover peanut butter eggs in an airtight container in the refrigerator (with parchment or wax paper between any stacked layers) for up to 2 weeks or in the freezer for up to 3 months. Let thaw at room temperature for 10-15 minutes before enjoying.


Leave a Reply